3 Ingredient Gluten Free Wraps
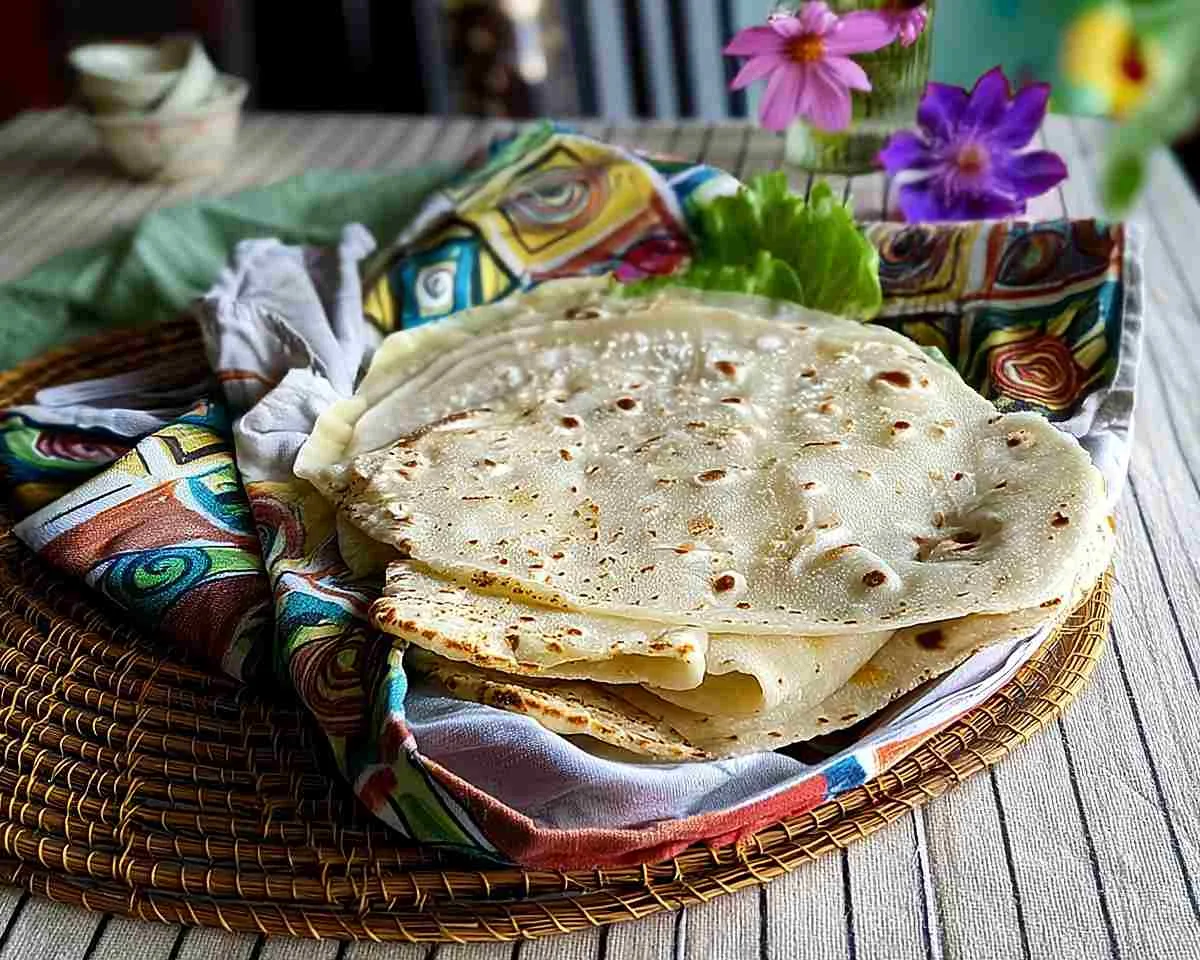
Make perfect 3 ingredient gluten free wraps in 15 minutes with just flour, oil & water. Soft, pliable healthy gluten free tortillas for tacos, lunch wraps & more!
You know what changed everything for me? The day I realized I didn’t need a dozen ingredients to make incredible 3 ingredient gluten free wraps from scratch.
I was standing in my kitchen, staring at a package of store-bought gluten-free tortillas that cost nearly $8 and tasted like cardboard. My kids were begging for taco night, and I thought, “There has to be a better way.” That’s when I stumbled upon this ridiculously simple method that uses just three pantry staples to create the softest, most pliable healthy gluten free tortillas you’ve ever tasted.
Here’s the truth about making best gluten free wraps at home—it doesn’t require fancy equipment, hard-to-find ingredients, or culinary school training. With quality gluten-free flour, a splash of olive oil, and warm water, you’ll have fresh wraps ready in about 15 minutes.
They’re perfect for weeknight dinners, meal prep, or even as gluten free superbowl snacks when you fill them with all your favorite toppings.
Why These 3 Ingredient Gluten Free Wraps Work
The magic behind these 3 ingredient gluten free wraps lies in their simplicity. Unlike complicated recipes that require xanthan gum, eggs, or multiple flours, this method relies on Mulino Caputo Fioreglut flour, which already contains the perfect blend of starches and binders.
The olive oil adds flexibility and prevents cracking, while the water hydrates the flour to create a workable dough. According to research on gluten-free baking science, proper hydration is key to achieving the right texture in gluten-free baked goods.
Table of Contents
3 Ingredient Gluten Free Wraps
Equipment
- Mixing bowl
- Rolling Pin
- Non-stick frying pan
- Tea towel
- Measuring cups and spoons
Ingredients
- 100 g Mulino Caputo Fioreglut gluten-free flour
- 10 ml olive oil
- 60 ml water room temperature
- 0.5 tsp fine salt optional for flavor
Instructions
- Add the gluten-free flour and salt to a mixing bowl and stir to combine. This ensures the salt distributes evenly throughout your wraps. Make sure your bowl is large enough to comfortably mix the dough without flour flying everywhere.
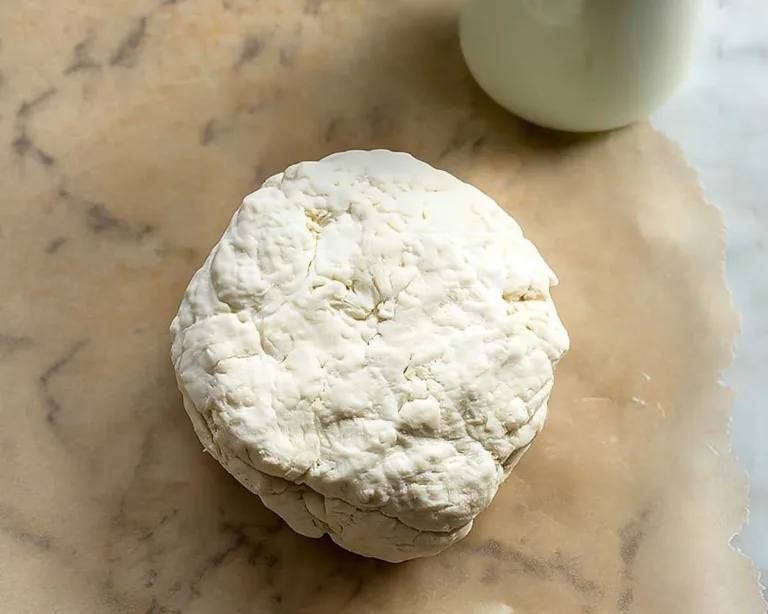
- Pour the water and olive oil into the bowl with the flour. Use a spoon to mix until you have a crumbly dough, then knead with your knuckles and hand until you have a smooth dough formed into a ball. If the mixture feels too dry, add water one teaspoon at a time; if it’s too sticky, sprinkle with extra flour until you achieve a smooth, soft texture that doesn’t stick to your hands.
- Dust your work surface generously with flour and break the ball into two equal pieces. This recipe makes two large wraps, perfect for hearty burritos or cutting into smaller pieces for snacks.
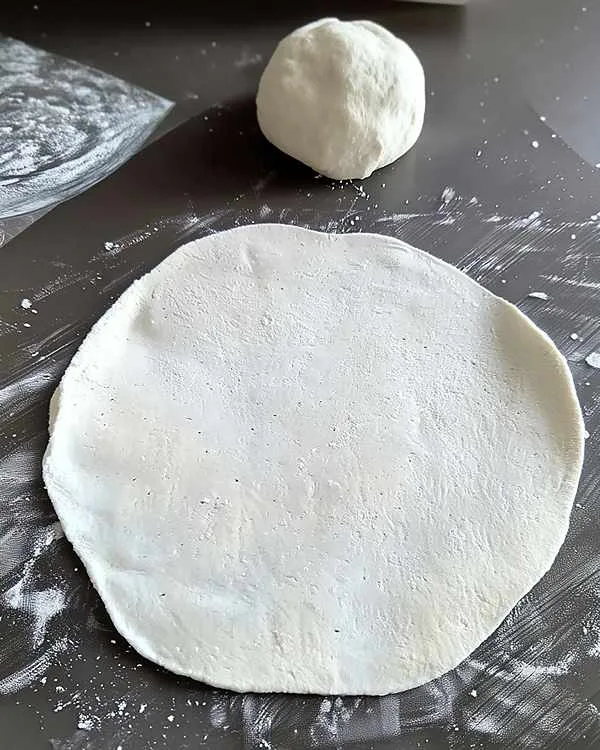
- Use a floured rolling pin to roll out the dough into a very thin circle shape. Flour both sides of the dough well, and flip it periodically while you’re rolling to ensure it doesn’t stick to the surface or rolling pin. The thinner you roll, the more authentic and pliable your wraps will be—aim for almost translucent if you can.
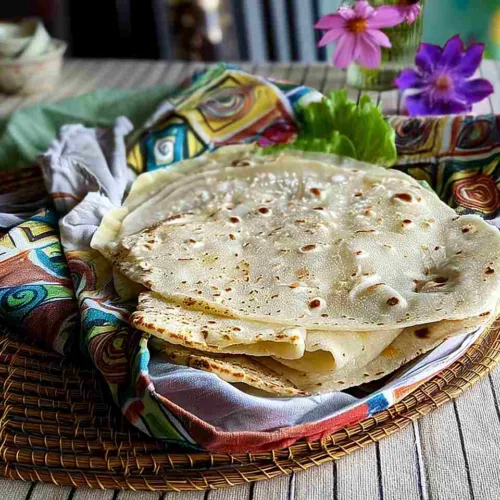
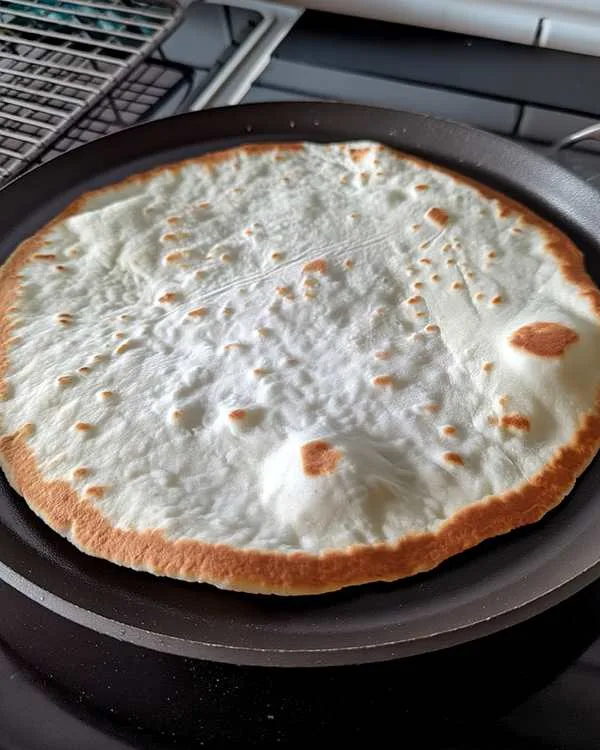
- Heat a non-stick frying pan over medium flame, then once hot, add your dough to the pan. Cook for about a minute until small bubbles form in the dough (they look like little blisters popping up), then flip and cook for a minute or so on the other side. Flip another couple of times until it looks well-cooked and puffy bubbles have formed—this creates those beautiful toasted spots.
- Transfer to a clean tea towel and wrap it in the cloth to stop it drying out. This step is crucial—the steam trapped in the towel keeps your wraps soft and prevents them from turning brittle.
- Repeat steps 4-6 with the second ball, then enjoy your wraps! You can enjoy them warm from the pan, which is honestly the best way. If you want to save them for later, allow them to cool fully in the tea towel, then transfer to an airtight container and enjoy later that day.
Notes
Gluten Free Wraps Ingredients
| Ingredient | Amount | Notes |
|---|---|---|
| Mulino Caputo Fioreglut gluten-free flour | 100g | Essential for best results |
| Olive oil | 10ml | Adds flexibility |
| Water | 60ml | Room temperature works best |
| Fine salt | 0.5 tsp | Optional, for flavor |
Instructions
Step 1: Add the gluten-free flour and salt to a mixing bowl and stir to combine. This ensures the salt distributes evenly throughout your healthy gluten free tortillas. Make sure your bowl is large enough to comfortably mix the dough without flour flying everywhere.
Step 2: Pour the water and olive oil into the bowl with the flour. Use a spoon to mix until you have a crumbly dough, then knead with your knuckles and hand until you have a smooth dough formed into a ball. If the mixture feels too dry, add water one teaspoon at a time; if it’s too sticky, sprinkle with extra flour until you achieve a smooth, soft texture that doesn’t stick to your hands.
Step 3: Dust your work surface generously with flour and break the ball into two equal pieces. This recipe makes two large wraps, perfect for hearty burritos or cutting into smaller pieces for gluten free superbowl snacks.
Step 4: Use a floured rolling pin to roll out the dough into a very thin circle shape. Flour both sides of the dough well, and flip it periodically while you’re rolling to ensure it doesn’t stick to the surface or rolling pin. The thinner you roll, the more authentic and pliable your best gluten free wraps will be—aim for almost translucent if you can.
Step 5: Heat a non-stick frying pan over medium flame, then once hot, add your dough to the pan. Cook for about a minute until small bubbles form in the dough (they look like little blisters popping up), then flip and cook for a minute or so on the other side. Flip another couple of times until it looks well-cooked and puffy bubbles have formed—this creates those beautiful toasted spots.
Step 6: Transfer to a clean tea towel and wrap it in the cloth to stop it drying out. Well… this step is crucial! The steam trapped in the towel keeps your wraps soft and prevents them from turning brittle.
Step 7: Repeat steps 4-6 with the second ball, then enjoy your 3 ingredient gluten free wraps! You can enjoy them warm from the pan, which is honestly the best way. If you want to save them for later, allow them to cool fully in the tea towel, then transfer to an airtight container and enjoy later that day.
Substitutions & Variations
Flour Alternatives
If you can’t find Mulino Caputo Fioreglut flour, you can try a high-quality gluten-free all-purpose blend that contains xanthan gum. However, the texture might vary slightly, and you may need to adjust the water content. I’ve had success with Bob’s Red Mill 1-to-1 Baking Flour, though the wraps come out slightly thicker.
Oil Options
Swap olive oil for avocado oil or melted coconut oil if that’s what you have on hand. Avocado oil creates an even more neutral flavor, which some people prefer for sweet wrap fillings. Each oil brings its own subtle character to these healthy gluten free tortillas.
Flavor Boost
Add garlic powder, cumin, or dried herbs to the flour mixture before adding liquids for savory variations. A teaspoon of nutritional yeast creates a subtle cheesy flavor that’s perfect for quesadilla-style wraps. For more creative flavor combinations, check out my complete guide to gluten-free flatbread seasonings.
Kid-Friendly Version
Make smaller, palm-sized wraps by dividing the dough into 4 pieces instead of 2. Kids love rolling their own mini wraps, and the smaller size is perfect for little hands and lunch boxes.
Troubleshooting Tips
Dough Too Dry or Crumbly
Add water one teaspoon at a time until the dough comes together smoothly. Gluten-free flour absorbs liquid differently than wheat flour, so don’t be afraid to adjust. The dough should feel like soft playdough—pliable but not sticky.
Wraps Cracking When Rolling
Your dough needs more moisture, or you’re rolling too thin too quickly. Let the dough rest for 5 minutes after kneading to allow the flour to fully hydrate. Roll gradually, flipping and flouring as you go to maintain even thickness.
Wraps Turning Out Tough
You’re likely overcooking them or the heat is too high. These best gluten free wraps cook fast—watch for those first bubbles and flip promptly. They should still feel slightly soft when you remove them from the pan; they’ll firm up slightly as they cool.
Sticking to the Pan
Even non-stick pans sometimes need a light brush of oil between wraps. Use a paper towel to apply the thinnest possible layer. Too much oil will make your wraps greasy, but a tiny amount prevents sticking without affecting texture.
Storage & Meal Prep
Store cooled 3 ingredient gluten free wraps in an airtight container at room temperature for up to 24 hours, or refrigerate for up to 3 days. Place parchment paper between each wrap to prevent sticking. When you’re ready to use them, warm briefly in a dry skillet or microwave for 10-15 seconds wrapped in a damp paper towel.
For meal prep, make a double or triple batch on Sunday and freeze them for up to 3 months. Stack cooled wraps with parchment between each one, seal in a freezer bag, and thaw at room temperature when needed. This makes weeknight dinners so much easier—just grab, fill, and go.
Serving Suggestions
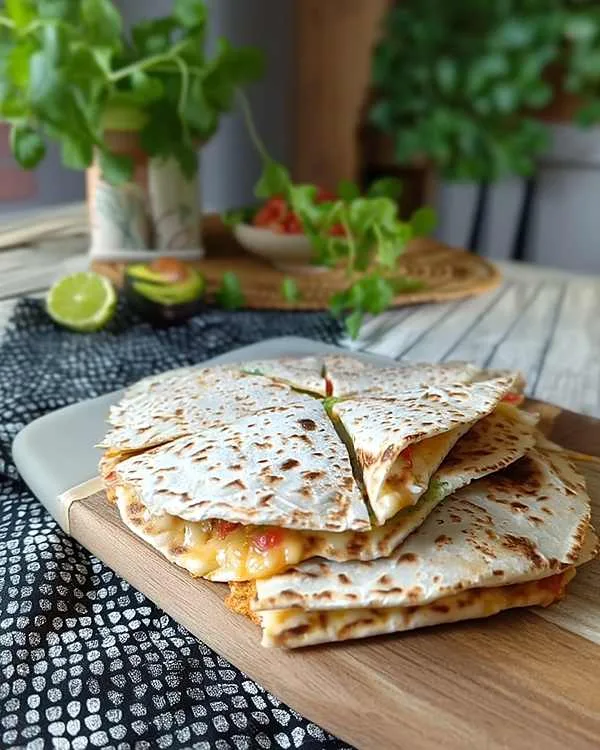
Fill these versatile healthy gluten free tortillas with scrambled eggs, bacon, and cheese for breakfast burritos that rival any restaurant version. The neutral flavor profile works beautifully with both savory and sweet fillings.
Try them as a base for my crispy prosciutto-wrapped mozzarella bites cut into triangles for appetizers. For lunch, stuff them with hummus, grilled vegetables, and feta for a Mediterranean-style wrap. They’re also phenomenal for taco night—just keep them warm wrapped in a towel in a basket while everyone builds their own.
Man, oh man, these wraps shine as gluten free superbowl snacks! Cut them into wedges, crisp them in the oven, and serve with guacamole and salsa for homemade tortilla chips that’ll disappear faster than you can say “touchdown.”
Dietary Adjustments
Dairy-Free
This recipe is naturally dairy-free, making it perfect for those avoiding lactose. Pair them with dairy-free fillings for a completely plant-based meal option.
Vegan
These 3 ingredient gluten free wraps are already vegan-friendly! Fill them with roasted vegetables, beans, and cashew cream for a satisfying plant-based dinner. The simplicity means they work for almost any dietary restriction.
Low-Sodium
Simply omit the salt if you’re watching sodium intake. The wraps will still taste great, especially when filled with flavorful ingredients. You won’t miss it once everything’s assembled.
Oil-Free Option
While the olive oil helps create flexibility, you can experiment with replacing it with unsweetened applesauce for a fat-free version. The texture will be slightly different—less pliable and more breadlike—but it works in a pinch.
3 Ingredient Gluten Free Wraps FAQs
What are the three ingredients in gluten free wraps?
These wraps use just gluten-free flour, olive oil, and water (plus optional salt for flavor). That’s it! The Mulino Caputo Fioreglut flour does all the heavy lifting, so you don’t need binders, eggs, or complicated ingredient lists. It’s the simplest recipe you’ll find for authentic-tasting healthy gluten free tortillas.
What wraps are gluten-free?
Most corn tortillas are naturally gluten-free, along with wraps made from rice flour, cassava, or gluten-free all-purpose blends. Always check labels since some brands add wheat-based ingredients for texture. Homemade 3 ingredient gluten free wraps like these give you complete control over what goes into your food, which is especially important if you have celiac disease or severe gluten sensitivity.
How do you wrap gluten free wraps without breaking them?
The secret is keeping them warm and pliable—that’s why wrapping them in a tea towel immediately after cooking is essential. Fill wraps while they’re still slightly warm, don’t overstuff them, and fold gently. If they’ve cooled and become stiff, warm them for 10 seconds in the microwave wrapped in a damp paper towel to restore flexibility.
What is the secret to soft gluten free tortillas?
Proper hydration and immediate steaming are the keys to soft best gluten free wraps. The dough needs enough water to stay pliable, and wrapping hot wraps in a towel traps steam that keeps them tender. According to expert guidance on gluten-free texture improvement, moisture retention makes all the difference in preventing that dreaded cardboard texture.
Can you list 3 ingredients you will not find in gluten-free foods?
You won’t find wheat, barley, or rye in gluten-free products since these grains contain gluten proteins. Other hidden sources like malt (made from barley) and certain food starches are also avoided. That’s why making your own 3 ingredient gluten free wraps gives you peace of mind—you know exactly what’s in them!
Why This Recipe Works for Busy Families
These 3 ingredient gluten free wraps have become my weeknight lifesaver. When I’m juggling homework help, dinner prep, and everything else, knowing I can whip up fresh wraps in 15 minutes makes all the difference.
Unlike store-bought options that often contain preservatives and can cost $6-8 per package, homemade wraps use simple ingredients you probably already have. Plus, my kids love helping roll them out—it’s become our little after-school activity. For more beginner-friendly gluten-free recipes, explore my collection of easy gluten-free desserts that work perfectly for family baking sessions.
The best part? These wraps taste so good that even my gluten-eating friends request the recipe. They’re soft, pliable, and have that authentic homemade flavor that makes every meal feel special.
Final Tips for Perfect Wraps
Practice makes perfect with these healthy gluten free tortillas—your first one might not be perfectly round, and that’s completely okay! The flavor will still be incredible. Keep your rolled-out dough thin for the most authentic texture, and don’t skip the tea towel steaming step.
If you’re new to gluten-free baking, start with this recipe. It’s forgiving, uses minimal ingredients, and delivers results that’ll boost your confidence in the kitchen. Once you’ve mastered these best gluten free wraps, you’ll never go back to store-bought again.
These wraps prove that gluten-free cooking doesn’t have to be complicated or expensive. With three simple ingredients and a little practice, you can create something truly special that brings joy to your table. Happy cooking!

