Fermented Gluten-Free Bread
Make incredible Fermented Gluten-Free Bread with just grains, water & salt. Egg-free, yeast-free, naturally leavened—this ancient method is pure magic!
I’ll be honest—when I first heard about Fermented Gluten-Free Bread, I thought someone was pulling my leg. Bread without eggs? Without yeast? That rises on its own through some kind of kitchen witchcraft? Yeah, right.
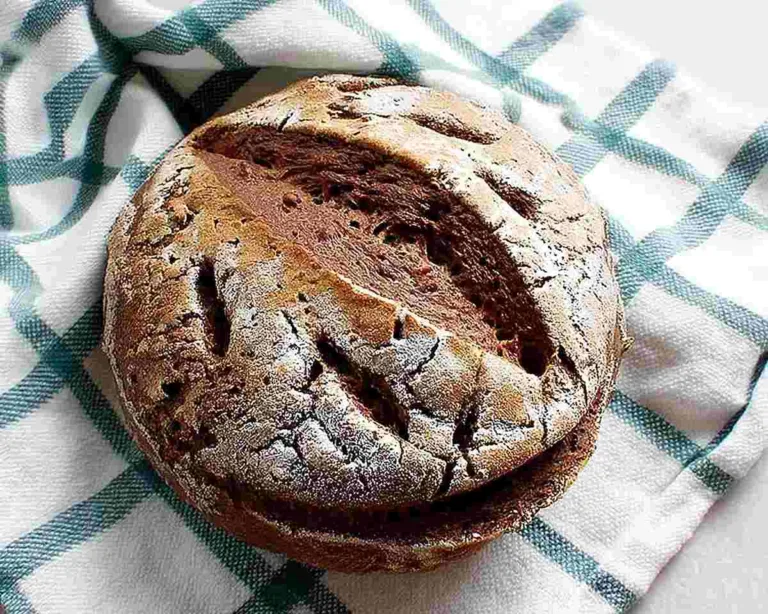
But then a friend showed me her loaf. It was gorgeous, crusty, and smelled like an actual bakery. She told me it was just buckwheat, water, and salt that had been sitting on her counter for two days. Two days! My skeptical brain couldn’t compute it.
That’s when I fell down the wild fermentation rabbit hole. Turns out, this Naturally Leavened Gluten Free Bread isn’t some trendy new thing—it’s one of the oldest bread-making methods humans have used. Before commercial yeast existed, people relied on wild fermentation to make their bread rise. According to research on fermented foods, fermentation not only helps bread rise naturally but also increases nutrient availability and may improve digestibility.
Table of Contents
Why Fermented Gluten-Free Bread Is Different
Let’s talk about what makes this Vegan Sourdough Gluten Free Bread so special. Unlike traditional gluten-free bread recipes that rely on eggs for structure and commercial yeast for rise, this method uses wild fermentation.
When you soak grains and let them sit at room temperature, naturally occurring bacteria and wild yeasts start breaking down the starches. This creates bubbles, develops flavor, and transforms humble buckwheat into something extraordinary. It’s like sourdough’s cool, laid-back cousin.
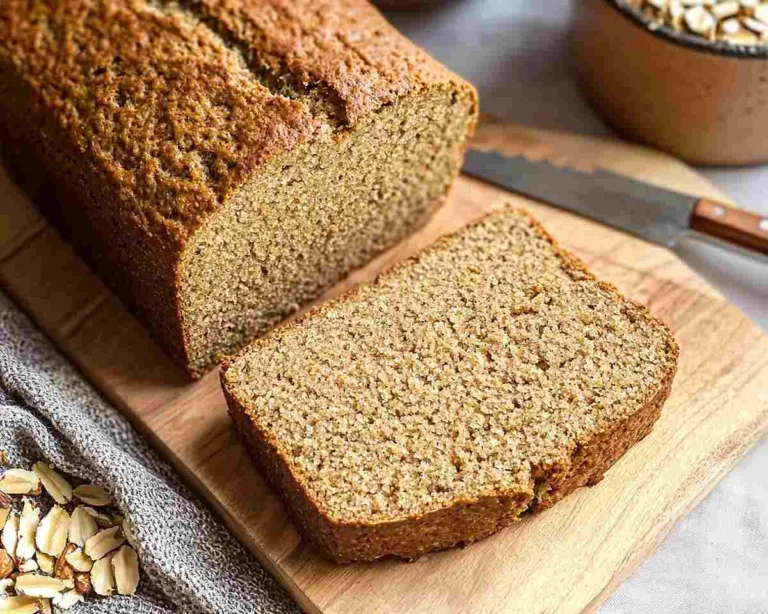
The texture of this Naturally Leavened Gluten Free Bread is different from what you might expect. It’s denser than commercial bread but incredibly satisfying. The flavor is slightly tangy, nutty, and complex—miles away from the bland taste of most gluten-free breads.
Plus, fermentation may make nutrients more bioavailable. Your body can actually absorb more of the good stuff from these grains after they’ve been fermented. That’s not just bread—that’s smart eating.

Ingredients
Base Ingredients:
- 3 cups whole buckwheat OR 3 cups mixed grains (try buckwheat, millet, and rice combinations)
- 1-2 teaspoons sea salt
- Coconut oil, ghee, or butter for greasing the loaf pan
- ¾-1 cup fresh water for blending
Optional Add-ins:
- Seeds (sesame, flax, pumpkin, sunflower, chia) for sprinkling in the pan and folding into the dough
That’s it. No eggs, no commercial yeast, no xanthan gum, no weird binders. Just real, whole ingredients that your great-great-grandmother would recognize. This Wild Fermentation Gluten Free Bread proves that simple can be spectacular.
Instructions
Making this Vegan Sourdough Gluten Free Bread is a journey, but I promise it’s worth it. Let me walk you through each step.
Day 1: Soak Your Grains
Rinse your grains thoroughly and place them in a large bowl. Cover completely with water and let them soak overnight—at least 12 hours. This initial soak softens the grains and begins the fermentation process for your Naturally Leavened Gluten Free Bread.
I usually start this in the evening so it’s ready by morning. Your kitchen will start smelling slightly fermented, which is exactly what you want.
Day 2: Blend the Batter
Drain your soaked grains into a fine mesh strainer and rinse them well. Transfer to a high-speed blender or food processor. Add ¾ to 1 cup fresh water and your sea salt.
Blend until it reaches a loose toothpaste consistency. You want it smooth but still pourable. This is the foundation of your Wild Fermentation Gluten Free Bread batter.
The Fermentation Wait (24-48 Hours)
Pour the batter into a clean bowl and cover with a tea towel. Leave it at room temperature for 24-48 hours. I typically stop fermentation around the 36-hour mark for this Fermented Gluten-Free Bread.
Around the 24-hour point, you might notice a dark liquid forming on top. That’s called “hooch”—it’s a byproduct of fermentation and totally normal. Just stir it back into your batter and let it rise again.
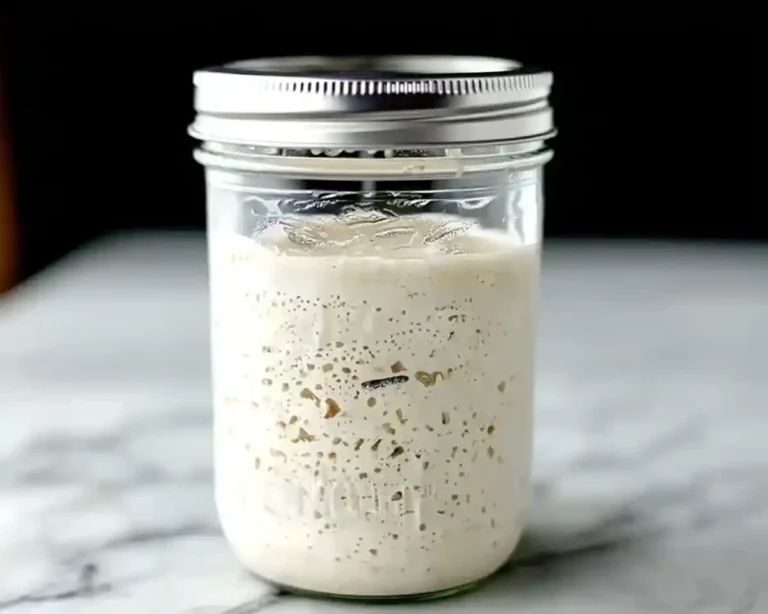
You’ll know your Naturally Leavened Gluten Free Bread batter is ready when it’s bubbly, has increased in volume, and smells pleasantly tangy.
Baking Day
Preheat your oven to 180°C (350-370°F). Grease your loaf pan generously with coconut oil, ghee, or butter. Sprinkle a mix of seeds in the bottom—this prevents sticking and adds gorgeous texture.
Before pouring the batter into the pan, fold in a couple tablespoons of any seeds you like. Pour it into your prepared pan and pop it in the oven.
Baking takes 45-60 minutes for this Wild Fermentation Gluten Free Bread. It’s done when the top is golden brown and cracked, and a toothpick inserted in the center comes out clean.
The Hardest Part: Cooling
Remove from the oven and let it cool for at least one hour before removing from the pan. I know waiting is torture when your house smells like a bakery, but cutting into hot Fermented Gluten-Free Bread will give you a gummy texture.
Once completely cool, slice and enjoy plain or toasted. The flavor is incredible both ways.

Storage Tips
This Naturally Leavened Gluten Free Bread stores differently than commercial bread. Because it’s naturally fermented and contains no preservatives, you’ll want to be strategic about storage.
At room temperature, keep your sliced Vegan Sourdough Gluten Free Bread in an airtight container or bag. It’ll stay fresh for 3-4 days. The texture actually improves slightly after the first day as the flavors continue developing.
For longer storage, freeze your Wild Fermentation Gluten Free Bread. Slice it first, then layer pieces between parchment paper before freezing. This way you can pull out individual slices for toasting without thawing the whole loaf.
I usually make two loaves at once—one for immediate use and one for the freezer. The fermentation time is the same whether you’re making one loaf or three, so you might as well maximize your effort.
The bread can stay frozen for up to 3 months. Toast slices straight from frozen, or let them thaw at room temperature for about 15 minutes.
Substitutions
Grain Combinations
While pure buckwheat makes fantastic Naturally Leavened Gluten Free Bread, you can mix things up. Try 1 cup buckwheat, 1 cup millet, and 1 cup brown rice for a milder flavor.
Quinoa works beautifully in this Wild Fermentation Gluten Free Bread too, though it adds a slightly earthier taste. Some people love mixing in amaranth for extra protein and a nutty flavor.
Start with buckwheat as your base for your first few loaves. Once you understand the consistency you’re looking for, experiment with ratios. Each grain combination creates a unique Fermented Gluten-Free Bread personality.
Fat Options
Any neutral-flavored fat works for greasing your pan. Coconut oil gives a subtle sweetness. Ghee adds richness. Regular butter (if you’re not dairy-free) creates a gorgeous golden crust on your Vegan Sourdough Gluten Free Bread.
Avocado oil is another excellent option that’s completely neutral in flavor.
Seed Variations
Get creative with seeds! Pumpkin seeds add a lovely crunch. Sunflower seeds bring a mild sweetness. Sesame seeds create a nutty, almost tahini-like flavor in this Naturally Leavened Gluten Free Bread.
I’m obsessed with adding nigella seeds (also called black cumin) for a slightly peppery kick. Hemp hearts are another winner for extra protein and omega-3s.
Troubleshooting
My batter didn’t bubble or rise
Your kitchen might be too cold. Wild fermentation works best between 68-75°F. If your house is cooler, find a warmer spot—near a sunny window, on top of the fridge, or in an oven with just the light on.
Sometimes the grains need a little help. Next time, add a tablespoon of raw apple cider vinegar to your initial blend. This gives the Wild Fermentation Gluten Free Bread a head start on developing the right bacteria.
The bread is too dense
This Fermented Gluten-Free Bread will be denser than commercial yeasted bread, but if it’s brick-like, your batter might have been too thick. Next time, add a bit more water when blending—aim for that loose toothpaste consistency.
Also, make sure you’re blending long enough. The smoother the batter, the better the final texture of your Naturally Leavened Gluten Free Bread.
It tastes too sour
Fermentation creates natural acids, but if your Vegan Sourdough Gluten Free Bread tastes overwhelmingly sour, you may have fermented too long. Try stopping at 30 hours instead of 48.
Warmer temperatures speed up fermentation and can create more sour flavors. If your kitchen is particularly warm, check your batter earlier.
The bread stuck to the pan
Make sure you’re using enough fat to grease the pan. Don’t be shy—really coat that pan. The seed layer on the bottom also helps prevent sticking in this Wild Fermentation Gluten Free Bread.
Let the bread cool completely before trying to remove it. Impatience leads to broken loaves. Ask me how I know.
Serving Suggestions
This Naturally Leavened Gluten Free Bread is incredibly versatile. Toast it and slather with grass-fed butter and honey for breakfast. The toasted version is honestly where this bread truly shines.
Use it for sandwiches, though the dense texture works best with hearty fillings. Think chicken taquito filling on toasted bread, or thick slices of avocado with everything bagel seasoning.
This Fermented Gluten-Free Bread makes amazing bread crumbs. Just toast slices until completely dried out, then pulse in a food processor. You’ll never buy packaged breadcrumbs again.
Try it alongside soup or stew. The dense, nutty texture of this Wild Fermentation Gluten Free Bread is perfect for soaking up broth without falling apart.
My kids love it toasted with almond butter and banana slices. The slight tang from fermentation pairs beautifully with sweet toppings.
The Health Benefits
Let’s talk about why this Naturally Leavened Gluten Free Bread isn’t just delicious—it’s actually good for you. According to Harvard Health, fermented foods support gut health by introducing beneficial bacteria.
The fermentation process breaks down phytic acid in grains, which can block nutrient absorption. This means your body can access more minerals like iron, zinc, and magnesium from this Wild Fermentation Gluten Free Bread.
Fermentation also partially breaks down starches, making this Vegan Sourdough Gluten Free Bread potentially easier to digest than regular gluten-free bread. Many people who struggle with grain digestion find fermented versions much gentler on their system.
The beneficial bacteria created during fermentation may support your gut microbiome. While the high heat of baking kills live cultures, the metabolic byproducts and nutrients they created remain in your Fermented Gluten-Free Bread.
Plus, there’s something deeply nourishing about eating bread made through ancient methods. It connects us to thousands of years of human bread-making tradition.
Tips for Success
Temperature Matters
Keep your fermentation environment consistent. Wild yeasts are sensitive to temperature swings. This Naturally Leavened Gluten Free Bread develops best in a stable, warm-ish spot.
In winter, I keep my fermenting batter in the oven with just the light on. In summer, a countertop away from air conditioning vents works perfectly.
Use Quality Grains
Fresh, whole grains make better Wild Fermentation Gluten Free Bread. Old, rancid grains won’t ferment properly and can taste off. Store your grains in airtight containers in a cool spot.
Organic grains often ferment more reliably since they haven’t been treated with antimicrobials that could interfere with wild yeast development.
Be Patient
The hardest part of making this Fermented Gluten-Free Bread is waiting. You can’t rush fermentation. Trust that those little microbes are working hard even when you can’t see dramatic changes.
Some batches ferment faster than others depending on temperature, humidity, and the wild yeast population in your kitchen. You’ll develop intuition about when your Vegan Sourdough Gluten Free Bread batter is ready.
Embrace Imperfection
Your first loaf might not be Instagram-perfect, and that’s totally okay. Wild fermentation is part art, part science. Each Naturally Leavened Gluten Free Bread you make teaches you something new.
The more you make this bread, the better you’ll understand your kitchen’s unique fermentation personality.
Why Choose Fermented Over Regular Gluten-Free Bread?
I get asked this a lot: why bother with Wild Fermentation Gluten Free Bread when quick recipes exist? Fair question.
First, there’s the ingredient list. This Fermented Gluten-Free Bread contains no eggs, no commercial yeast, no gums, and no sketchy additives. Just grains, water, and salt.
Second, the cost. Buckwheat in bulk is incredibly affordable compared to specialty gluten-free flours. This Naturally Leavened Gluten Free Bread costs a fraction of store-bought options.
Third, the nutritional benefits. Fermentation increases nutrient bioavailability and may improve digestibility. You’re not just eating bread—you’re eating bread that’s been pre-digested by beneficial bacteria.
Finally, there’s the satisfaction factor. Making Vegan Sourdough Gluten Free Bread through wild fermentation feels like you’ve unlocked an ancient secret. There’s something almost magical about capturing wild yeasts from the air and transforming grains into bread.

Frequently Asked Questions
Is fermented bread safe to eat?
Absolutely! This Naturally Leavened Gluten Free Bread uses the same fermentation process humans have used for thousands of years. The acids produced during fermentation actually create an environment hostile to harmful bacteria. Just use clean equipment and fresh grains.
Can I speed up the fermentation process?
Not really. Wild fermentation takes time for the microbes to do their work. However, warmer temperatures (around 75°F) can speed things slightly. This Wild Fermentation Gluten Free Bread typically needs at least 24 hours regardless of temperature.
Why isn’t my bread rising much?
This Vegan Sourdough Gluten Free Bread won’t rise as dramatically as yeasted bread. The rise is gentler and slower. Look for bubbles throughout the batter and a slight increase in volume rather than dramatic doubling.
How do I know when fermentation is done?
Your batter should be bubbly, smell pleasantly tangy (not putrid), and have increased slightly in volume. Taste a tiny bit—it should have a mild sour flavor. For this Wild Fermentation Gluten Free Bread, anywhere from 30-48 hours works depending on your kitchen temperature.
Final Thoughts
If you’ve been intimidated by the idea of making Vegan Sourdough Gluten Free Bread, I hope this post has shown you it’s more accessible than it seems. Yes, it takes time. But actual hands-on work? Maybe 20 minutes total.
This Naturally Leavened Gluten Free Bread has transformed how I think about gluten-free baking. You don’t need seventeen specialty ingredients or expensive equipment. You just need patience and a willingness to trust the process.
The first time you taste that tangy, nutty slice of Wild Fermentation Gluten Free Bread that you made with your own hands, you’ll understand why people get obsessed with fermentation. It’s not just food—it’s alchemy.
Start with this basic recipe. Get comfortable with the process. Then start experimenting with different grain combinations and add-ins. Every loaf teaches you something new about fermentation and your kitchen’s unique microbiome.
Your journey into Fermented Gluten-Free Bread starts with soaking some buckwheat tonight. Tomorrow, you blend it. The day after, you bake it. And then? You slice into the most satisfying bread you’ve made in your gluten-free life.
Trust me on this one. Your skeptical brain might be saying “Yeah, right” just like mine did. But give it a try. What do you have to lose except a few cups of buckwheat?
Welcome to the wild fermentation club. We’ve been waiting for you.

Fermented Gluten-Free Bread (Egg Free and Yeast Free)
Equipment
- Large bowl for soaking
- Fine mesh strainer
- High-speed blender or food processor
- Clean bowl for fermenting
- Tea towel
- 9×5-inch loaf pan
- Toothpick for testing doneness
- Cooling rack
Ingredients
- 3 cups whole buckwheat OR 3 cups mixed grains (try buckwheat, millet, and rice combinations)
- 1-2 teaspoons sea salt
- ¾-1 cup fresh water for blending
- coconut oil, ghee, or butter for greasing the loaf pan
Optional Add-ins
- 2 tablespoons seeds sesame, flax, pumpkin, sunflower, or chia seeds – for sprinkling in pan and folding into dough
Instructions
- Rinse all grains thoroughly and place in a large bowl. Cover completely with water and soak overnight for at least 12 hours. This initial soak softens the grains and begins the fermentation process.
- Drain the soaked grains into a fine mesh strainer and rinse well. Transfer to a high-speed blender or food processor.
- Add ¾ to 1 cup of fresh water and sea salt to the grains. Blend until it reaches a loose toothpaste consistency—smooth but still pourable.
- Pour the batter into a clean bowl and cover with a clean tea towel. Leave at room temperature for approximately 24-48 hours to ferment (typically 36 hours works best).
- Around the 24-hour mark, mix the batter to incorporate any hooch (darker liquid) that may have formed on top. Let it rise again until ready to bake.
- Preheat oven to 180°C (350-370°F). Generously grease a loaf pan with coconut oil, ghee, or butter. Sprinkle a mix of seeds in the bottom of the pan to prevent sticking.
- Before pouring the batter into the pan, fold in a couple tablespoons of any seeds you like. Mix well, then pour into the prepared loaf pan.
- Bake for 45-60 minutes until the top is golden brown and cracked, and a toothpick inserted in the center comes out clean.
- Remove from oven and allow the bread to cool in the pan for at least 1 hour before removing. This prevents a gummy texture.
- Once completely cool, slice and enjoy plain or toasted. Store leftovers in an airtight container at room temperature for 3-4 days, or freeze for up to 3 months.


