Gluten Free Cinnamon Rolls
Make bakery-style soft & fluffy gluten free cinnamon rolls at home! This foolproof recipe creates tender, gooey rolls perfect for weekend brunch.
You know what? The smell of cinnamon rolls baking on a Saturday morning is pretty much the definition of cozy. But when you’re gluten-free, finding a recipe that actually delivers on that soft, pull-apart texture can feel like searching for a unicorn.
I’ll never forget the first time I made gluten free cinnamon rolls that didn’t turn out like hockey pucks. My daughter took one bite and said, “Mom, these taste like the real thing!” That’s when I knew I’d cracked the code on creating a soft and fluffy gluten free cinnamon rolls recipe that actually works.
Here’s the beautiful truth: gluten-free baking doesn’t mean sacrificing flavor or texture anymore. With the right blend of flours and a few smart techniques, you can create cinnamon rolls so tender and delicious that nobody—and I mean nobody—will guess they’re gluten-free.
Table of Contents

Soft & Fluffy Gluten Free Cinnamon Rolls
Equipment
- Stand mixer with paddle attachment
- 9×13 inch casserole dish
- Rolling Pin
- Sharp knife or dental floss
- Mixing bowls
- Whisk
- Offset spatula
Ingredients
For the Rolls
- 3 cups all-purpose gluten free flour blend 420g, plus more for sprinkling
- 2 teaspoons xanthan gum omit if your blend already contains it
- ¼ cup tapioca starch/flour 36g
- ½ cup dry milk powder 43g, or buttermilk powder
- 3 teaspoons instant yeast 6g
- ¼ teaspoon cream of tartar
- ¼ teaspoon baking soda
- 2 tablespoons packed light brown sugar 26g
- 1 teaspoon kosher salt
- 1 teaspoon apple cider vinegar
- 4 tablespoons unsalted butter 56g, at room temperature
- 1 large egg 50g out of shell, at room temperature, beaten
- 1 ¼ cups warm milk 10 ounces, about 95°F
For the Filling
- 4 tablespoons unsalted butter 56g, at room temperature
- ¾ cup packed light brown sugar 164g
- 1 teaspoon ground cinnamon
For Optional Glaze
- 1 cup confectioners’ sugar 115g, sifted
- 1 tablespoon milk any kind, plus more as needed
For Optional Frosting
- 6 tablespoons unsalted butter 84g, at room temperature
- 2 cups confectioners’ sugar 230g, sifted
- 3 tablespoons heavy whipping cream at room temperature, plus more as needed
Instructions
- Grease a 9-inch x 13-inch casserole dish generously with butter or cooking spray and set it aside.
- In the bowl of a stand mixer fitted with the paddle attachment, whisk together the gluten free flour, xanthan gum, tapioca starch, milk powder, yeast, cream of tartar, baking soda, and brown sugar until everything’s evenly distributed. Add the salt and give it one more quick whisk to incorporate.
- Add the apple cider vinegar, softened butter, beaten egg, and warm milk to the dry ingredients. Mix on low speed until everything comes together into a shaggy dough.
- Increase the mixer speed to high and beat for about 3 minutes, until the dough is smooth and pulling away from the sides of the bowl.
- Transfer the dough to a sealed container and refrigerate for 30 minutes to make it easier to handle.
- Turn your chilled dough out onto a lightly floured surface and knead it gently just a few times to smooth it out. Divide the dough in half, keeping one portion covered with a clean kitchen towel while you work with the other.
- Roll one half into a 9×12-inch rectangle about ½ inch thick, dusting with a bit more flour as needed to prevent sticking.
- Spread half of the softened butter evenly over the rolled dough, leaving about a 1-inch border around the edges. Sprinkle half of the brown sugar over the buttered surface and gently pat it down so it sticks. Then sprinkle half of the cinnamon evenly across the top.
- Starting from one of the short sides, roll the dough tightly into a coil, keeping the roll as even as possible. Use unflavored dental floss or a sharp knife to slice the log into 6 equal rolls.
- Place the rolls cut-side up in your prepared pan, spacing them about 1 inch apart. Gently press down on each roll about ⅓ of the way to flatten them slightly. Repeat the entire rolling, filling, and slicing process with the second half of dough and remaining filling ingredients.
- Cover the pan loosely with lightly oiled plastic wrap or a damp kitchen towel. Let the rolls rise in a warm, draft-free spot until they’ve grown about 50% larger, about 45 minutes.
- While the rolls are finishing their rise, preheat your oven to 350°F. Remove the plastic wrap carefully and slide the pan into the oven.
- Bake for 20 minutes, until the rolls are risen, lightly golden on top, and baked through. Let the rolls cool in the pan for 5 to 10 minutes before adding your glaze or frosting.
- For the glaze: Whisk together the sifted confectioners’ sugar and milk until you have a thick but pourable consistency. If it’s too thick, add more milk ¼ teaspoon at a time until it drizzles beautifully. Drizzle the glaze generously over the warm cinnamon rolls.
- For the frosting: Beat the softened butter and sifted confectioners’ sugar together until light and fluffy. Gradually add the heavy cream, beating after each addition, until you reach a smooth, spreadable consistency. Spread the frosting generously over the warm rolls.
Notes
Gluten Free Cinnamon Rolls Ingredients

For the Rolls
| Ingredient | Amount |
|---|---|
| All-purpose gluten free flour blend | 3 cups (420 g), plus more for sprinkling |
| Xanthan gum | 2 teaspoons (omit if your blend contains it) |
| Tapioca starch/flour | ¼ cup (36 g) |
| Dry milk powder | ½ cup (43 g) |
| Instant yeast | 3 teaspoons (6 g) |
| Cream of tartar | ¼ teaspoon |
| Baking soda | ¼ teaspoon |
| Packed light brown sugar | 2 tablespoons (26 g) |
| Kosher salt | 1 teaspoon |
| Apple cider vinegar | 1 teaspoon |
| Unsalted butter, room temperature | 4 tablespoons (56 g) |
| Egg, beaten | 1 large (50 g out of shell) |
| Warm milk (about 95°F) | 1¼ cups (10 ounces) |
For the Filling
| Ingredient | Amount |
|---|---|
| Unsalted butter, room temperature | 4 tablespoons (56 g) |
| Packed light brown sugar | ¾ cup (164 g) |
| Ground cinnamon | 1 teaspoon |
For Optional Glaze
| Ingredient | Amount |
|---|---|
| Confectioners’ sugar, sifted | 1 cup (115 g) |
| Milk, any kind | 1 tablespoon, plus more as needed |
For Optional Frosting
| Ingredient | Amount |
|---|---|
| Unsalted butter, room temperature | 6 tablespoons (84 g) |
| Confectioners’ sugar, sifted | 2 cups (230 g) |
| Heavy whipping cream, room temperature | 3 tablespoons, plus more as needed |
Gluten Free Cinnamon Rolls Instructions
Prepare Your Pan Grease a 9-inch x 13-inch casserole dish generously with butter or cooking spray and set it aside. This prevents sticking and makes cleanup so much easier later.
Make the Dough In the bowl of a stand mixer fitted with the paddle attachment, whisk together the gluten free flour, xanthan gum, tapioca starch, milk powder, yeast, cream of tartar, baking soda, and brown sugar until everything’s evenly distributed. Add the salt and give it one more quick whisk to incorporate.
Add the apple cider vinegar, softened butter, beaten egg, and warm milk to the dry ingredients. Mix on low speed until everything comes together into a shaggy dough.
Increase the mixer speed to high and beat for about 3 minutes. You’ll notice the dough becoming smoother and starting to pull away from the sides of the bowl—that’s exactly what you want to see.
Transfer the dough to a sealed container and pop it in the refrigerator for 30 minutes. This chilling step makes the dough much easier to handle and roll out without it sticking to everything in sight.
Roll Out the Dough Turn your chilled dough out onto a lightly floured surface and knead it gently just a few times to smooth it out. The dough should feel pliable and cooperative now.
Divide the dough in half, keeping one portion covered with a clean kitchen towel while you work with the other. Roll one half into a 9×12-inch rectangle about ½ inch thick, dusting with a bit more flour as needed to prevent sticking.
Add the Filling and Shape Spread half of the softened butter evenly over the rolled dough, leaving about a 1-inch border around the edges. This border helps seal the rolls when you roll them up.
Sprinkle half of the brown sugar over the buttered surface and gently pat it down so it sticks. Then sprinkle half of the cinnamon evenly across the top—your kitchen is about to smell amazing.
Starting from one of the short sides, roll the dough tightly into a coil, keeping the roll as even as possible. Use unflavored dental floss or a sharp knife to slice the log into 6 equal rolls.
Place the rolls cut-side up in your prepared pan, spacing them about 1 inch apart. Gently press down on each roll about ⅓ of the way to flatten them slightly—this helps them rise evenly.
Repeat the entire rolling, filling, and slicing process with the second half of dough and remaining filling ingredients.
Let Rise Cover the pan loosely with lightly oiled plastic wrap or a damp kitchen towel. Let the rolls rise in a warm, draft-free spot until they’ve grown about 50% larger—this usually takes around 45 minutes depending on your kitchen temperature.
Bake While the rolls are finishing their rise, preheat your oven to 350°F. Remove the plastic wrap carefully and slide the pan into the oven.
Bake for 20 minutes, until the rolls are risen, lightly golden on top, and baked through. They should spring back slightly when you gently press the center.
Let the rolls cool in the pan for 5 to 10 minutes before adding your glaze or frosting—but don’t wait too long or the icing won’t melt into all those delicious nooks and crannies.
Optional Glaze Whisk together the sifted confectioners’ sugar and milk until you have a thick but pourable consistency. If it’s too thick, add more milk ¼ teaspoon at a time until it drizzles beautifully.
Drizzle the glaze generously over the warm cinnamon rolls using a spoon or a squeeze bottle.
Optional Frosting Beat the softened butter and sifted confectioners’ sugar together until light and fluffy. Gradually add the heavy cream, beating after each addition, until you reach a smooth, spreadable consistency.
Spread the frosting generously over the warm rolls using an offset spatula or the back of a spoon.

Substitutions For Your Gluten Free Cinnamon Rolls
Flour Blend Flexibility If you don’t have a gluten free flour blend on hand, you can create your own using a combination of rice flour, potato starch, and tapioca flour. Just make sure your DIY blend includes xanthan gum or add it separately, as it’s essential for the soft texture in this gluten free sweet recipe.
Dairy-Free Modifications Well… you can easily make these dairy-free by swapping regular milk for your favorite non-dairy alternative like almond, oat, or coconut milk. Replace the butter with vegan butter or coconut oil, and use coconut milk powder instead of dairy milk powder.
Sugar Alternatives Light brown sugar gives these rolls their signature caramel-like flavor, but you can substitute coconut sugar or even granulated sugar in a pinch. Keep in mind that coconut sugar will make the filling slightly less sweet and more molasses-forward.
Yeast Options Instant yeast is my go-to because it mixes right into the dry ingredients, but active dry yeast works just as well. If using active dry, dissolve it in the warm milk first and let it proof for about 5 minutes before adding it to the dough.
Troubleshooting For Your Gluten Free Cinnamon Rolls
Dough Too Sticky If your dough feels impossibly sticky even after chilling, don’t panic—gluten free dough can be temperamental. Add flour one tablespoon at a time until it’s workable, but be careful not to add too much or your rolls will turn out dry.
Rolls Didn’t Rise Check that your yeast hasn’t expired and that your milk was warm (not hot!) at around 95°F. Too-hot liquid can kill the yeast, while too-cool liquid won’t activate it properly.
Dense or Gummy Texture Make sure you’re beating the dough for the full 3 minutes—this step develops the structure that gluten would normally provide. Also, ensure your oven temperature is accurate; an oven thermometer is your friend here.
Filling Leaking Out This usually happens when the dough is rolled too tightly or the filling reaches all the way to the edges. Leave that 1-inch border unfilled, and roll with firm but gentle pressure.
Storage and Meal Prep
Storing Baked Rolls Keep your soft and fluffy gluten free cinnamon rolls fresh by storing them in an airtight container at room temperature for up to 2 days. For longer storage, refrigerate them for up to 5 days—just warm them briefly in the microwave before serving.
Freezing Instructions These rolls freeze beautifully! Wrap individual rolls tightly in plastic wrap, then place them in a freezer-safe bag for up to 3 months. Thaw overnight in the fridge and reheat in a 300°F oven for about 10 minutes, or microwave for 30-45 seconds.
Make-Ahead Strategy You can prepare the rolls through the shaping step, then cover and refrigerate them overnight instead of letting them rise immediately. In the morning, let them come to room temperature and rise (about 1-1.5 hours), then bake as directed—perfect for Christmas morning or special brunches!
Serving Suggestions For Your Gluten Free Cinnamon Rolls
Man, oh man… there’s nothing quite like serving these warm cinnamon rolls straight from the oven with a steaming cup of coffee on a lazy Sunday morning. They’re absolutely perfect for holiday breakfasts, birthday brunches, or just because it’s Saturday and you deserve something special.
Pair these gluten free cinnamon rolls with crispy bacon, scrambled eggs, and fresh fruit for a complete gluten free meal plan option that’ll satisfy the whole family. They’re also wonderful alongside a frothy cappuccino or hot chocolate for an afternoon treat.
Variations
Orange Cardamom Twist Add the zest of one orange and ½ teaspoon of ground cardamom to your filling for a sophisticated flavor profile. The citrus brightens everything up while the cardamom adds a warm, aromatic note that’s absolutely dreamy.
Maple Pecan Version Replace the brown sugar in the filling with maple sugar, and sprinkle ½ cup of chopped pecans over the filling before rolling. Drizzle with maple glaze instead of vanilla for a cozy autumn-inspired treat.
Kid-Friendly Mini Rolls Cut each log into 8-10 smaller pieces instead of 6, and bake in a muffin tin lined with paper cups. These mini versions bake in about 15 minutes and are perfect for little hands—plus they make lunchboxes way more exciting.
Overnight Cinnamon Roll Casserole After shaping, tear the rolls into pieces and layer them in your baking dish. Cover and refrigerate overnight, then pour ½ cup of cream over the top before baking for a decadent breakfast casserole that tastes like meaningful eats gluten free cinnamon rolls meets bread pudding.
Soft & Fluffy Gluten Free Cinnamon Rolls FAQs
Can I use a different flour blend for this recipe?
Absolutely! Just make sure your gluten free flour blend contains a mix of starches and proteins for the best structure. Brands like King Arthur Measure for Measure or Bob’s Red Mill 1-to-1 work wonderfully in this soft and fluffy gluten free cinnamon rolls recipe.
How do I know when my rolls are done baking?
Your rolls are ready when they’re lightly golden on top, spring back when gently pressed, and reach an internal temperature of about 190°F. If you’re unsure, an extra minute or two won’t hurt, but over-baking can make them dry.
What’s the best way to reheat leftover cinnamon rolls?
Microwave individual rolls for 15-20 seconds, or warm them in a 300°F oven for 5-10 minutes wrapped in foil. A light sprinkle of water before reheating helps restore moisture and that fresh-baked softness.
Why do I need to refrigerate the dough before rolling?
Chilling makes gluten free dough much more manageable since it doesn’t have gluten’s natural elasticity. The cold dough is less sticky and holds its shape better when you’re rolling and shaping, making the whole process way less frustrating.
Can I make these without a stand mixer?
You can, though it’ll take more elbow grease! Use a wooden spoon to mix everything together, then beat vigorously for 3-5 minutes to develop the structure. Your arm might get tired, but the results will still be delicious.
Best way to get perfectly even slices?
Use unflavored dental floss for the cleanest cuts. Slide it under the rolled dough, cross the ends over the top, and pull—it slices through without squishing the rolls. A very sharp serrated knife also works if you use a gentle sawing motion.
Final Thoughts

These soft and fluffy gluten free cinnamon rolls prove that you don’t need gluten to create bakery-worthy treats. Whether you’re new to gluten-free baking or a seasoned pro, this recipe delivers consistent results that’ll have everyone asking for seconds.
The combination of carefully selected ingredients and tested techniques creates rolls that are tender, perfectly sweet, and absolutely irresistible. Try making a batch this weekend—your kitchen will smell amazing, and you’ll have a new favorite gluten free sweet to add to your rotation.
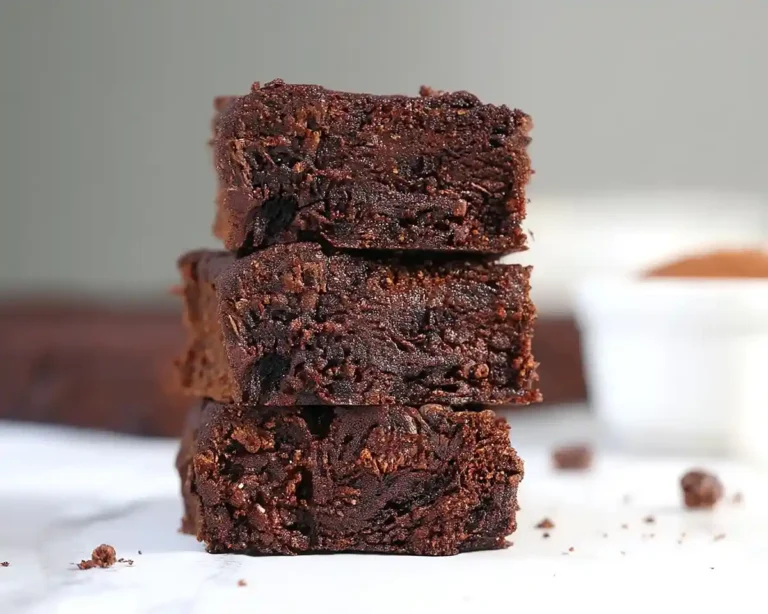
For more delicious gluten-free treats that deliver on both taste and texture, check out our quick and easy brownie recipe that’s perfect for satisfying those chocolate cravings


