Gluten-Free Pecan Pie
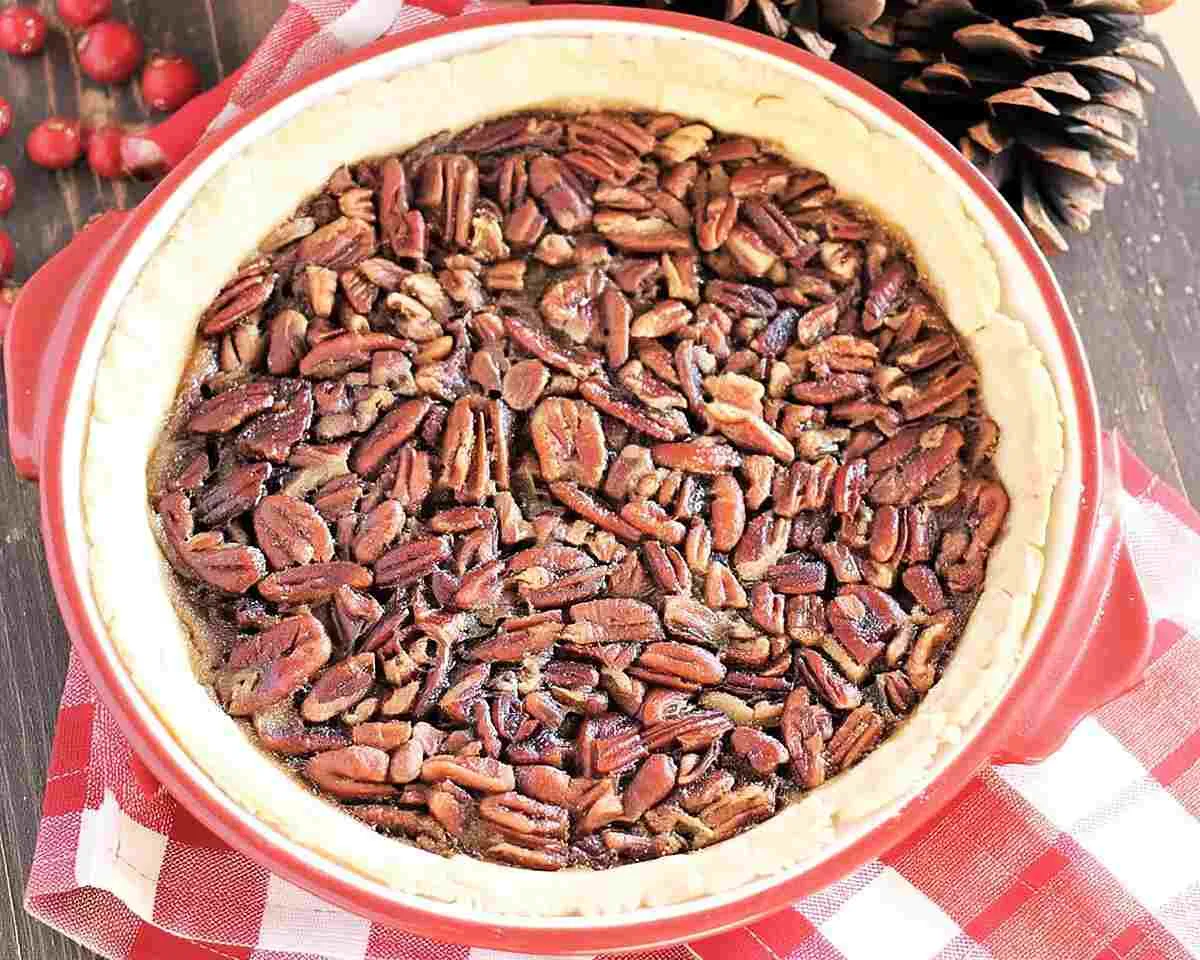
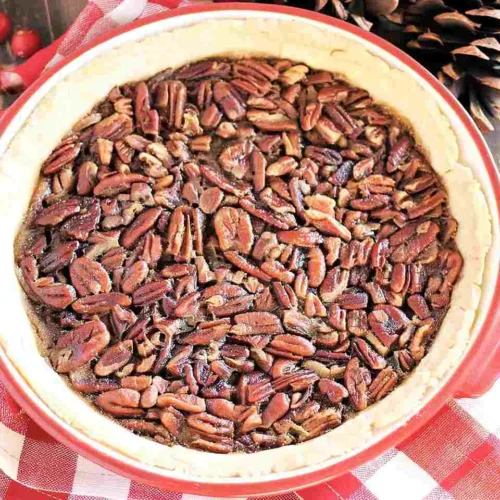
This gluten-free pecan pie is buttery, gooey, and absolutely irresistible. Perfect for holidays with a flaky crust and rich maple filling!
You know what? The first time I made a gluten-free pecan pie for Thanksgiving, my aunt didn’t believe me when I told her it was gluten-free. She went back for seconds, then thirds, and finally admitted it was the best pecan pie she’d ever tasted. That’s when I knew this recipe was a keeper.
Here’s the thing about gluten-free pie recipes—they can be intimidating. But this one? It’s surprisingly forgiving, even for beginners. The crust stays flaky and buttery (no sad, crumbly disasters here), and the filling sets up perfectly gooey with just the right amount of sweetness from maple syrup and brown sugar.
Whether you’re making this gf pecan pie recipe for the holidays or just because you’re craving something indulgent on a random Tuesday, you’re in for a treat. And honestly, once you master this crust technique with parchment paper, you’ll wonder why you ever struggled with gluten-free baking in the first place.
Table of Contents
The Best Gluten-Free Pecan Pie (Better Than Traditional!)
Equipment
- Food processor
- Rolling Pin
- Parchment paper
- 9-inch pie pan
- Mixing bowls
- Whisk
Ingredients
Pie Crust
- 1 ¼ cup gluten-free all-purpose flour I use Bob’s Red Mill 1-to-1
- ½ tsp salt
- ½ cup butter cut into small chunks (or dairy-free butter alternative, or refrigerated coconut oil)
- ¼ cup ice cold water
Pecan Pie Filling
- 3 eggs
- 1 cup brown sugar
- ½ cup maple syrup
- ¼ cup butter melted (room temperature) (or dairy-free butter alternative or coconut oil)
- 1 tsp vanilla
- ¼ tsp cinnamon
- ¼ tsp salt
- 1 ½ cup pecans pieces or halves
Instructions
- To your food processor (with your s-blade in), add your gluten-free flour, salt, and chunks of butter. Pulse together till the butter has been finely ground into the flour—it’ll look kinda like thick sand with tiny butter bits throughout. Add one tablespoon of water to the food processor, pulse, and continue till all the water has been added and the dough just starts to clump together.
- Now to roll your pie crust out, you’ll need two pieces of parchment paper to put your crust between (both pieces larger than a pie pan). Put one piece down, and dump your pie dough crumbles onto it. Gently push the crumbles together to form one ball of dough, then add your other piece of parchment paper on top.
- Using a rolling pin, roll the dough out till you have one uniform, thin, round pie crust about 1/8-inch thick. You should be able to place your pie dish on top of the dough and still see extra dough sticking out about two inches past it, all around. This extra dough gives you wiggle room for crimping and fixing any tears.
- Spray your pie dish with non-stick spray. Gently remove the top sheet of parchment paper from your pie crust. Quickly and gently, with your hand under the other piece of parchment paper, flip your pie crust over into the middle of your pie pan so it falls into place around the pan.
- Gently remove the second piece of parchment paper and press the dough around the pie pan, creating one smooth, even layer on the bottom and edges. If you have excess dough coming over the edge of the pie pan, you can cut or tear that off with a knife or your fingers.
- Finish the crust of your pie by smoothing out or crimping the top edge however you like—I usually just press it with a fork for a simple pattern. Lightly wrap your pie crust with plastic wrap, and place in the fridge for at least 4 hours for the butter to harden and the flavors to develop. This chilling step is crucial for preventing shrinkage!
- To begin, preheat your oven to 350°F. You’ll also need your prepared, chilled pie crust in a pie pan ready to go.
- Add your eggs to a small bowl and whisk them for a few minutes till they’re light and frothy with tiny bubbles forming on top. This aerates the eggs and helps create that signature smooth, silky texture in your gluten-free pecan pie.
- In a large mixing bowl, add your brown sugar, maple syrup, melted butter, vanilla, cinnamon, and salt. Whisk together till the sugar dissolves and everything’s combined. Add your whisked eggs and gently fold them into your batter—don’t overmix or you’ll deflate all those lovely air bubbles!
- Sprinkle your pecans evenly across the bottom of your chilled pie crust. Pour your batter slowly over your pecans, making sure it seeps down between all the nooks and crannies. The pecans will float up a bit as the filling settles, creating that gorgeous layered look.
- Bake in the oven for 40-50 minutes, or till the pie is set. The top will appear more solid and slightly puffed, but the middle may jiggle just a little still if you gently move the pan—that’s perfect! Check your pie about halfway through the baking time to see if your crust edges are getting too dark. If they are, tent a piece of foil loosely over just the edges to keep them from burning while the center finishes.
- Let cool for SEVERAL hours (I know, the waiting is hard!). The filling needs this time to set completely as it cools, transforming from liquid-y to that perfect gooey-firm texture. Then slice, share, and devour with a dollop of whipped cream!
Notes
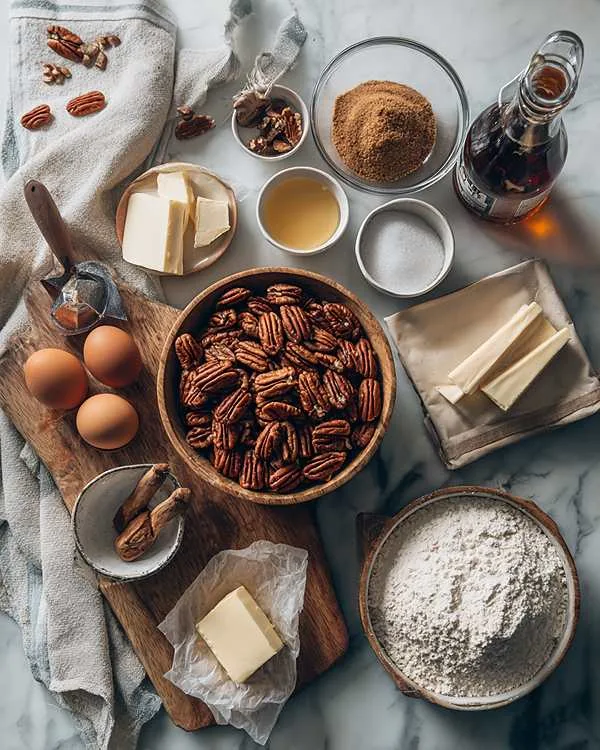
Gluten-Free Pecan Pie Ingredients
Pie Crust
- 1 1/4 cup gluten-free all-purpose flour (I use Bob’s Red Mill 1-to-1)
- 1/2 tsp salt
- 1/2 cup butter, cut into small chunks (or dairy-free butter alternative, or refrigerated coconut oil)
- 1/4 cup ice cold water
Pecan Pie Filling
- 3 eggs
- 1 cup brown sugar
- 1/2 cup maple syrup
- 1/4 cup butter, melted (room temperature) (or dairy-free butter alternative or coconut oil)
- 1 tsp vanilla
- 1/4 tsp cinnamon
- 1/4 tsp salt
- 1 1/2 cup pecans, pieces or halves
Instructions
Pie Crust
Step 1: To your food processor (with your s-blade in), add your gluten-free flour, salt, and chunks of butter. Pulse together till the butter has been finely ground into the flour—it’ll look kinda like thick sand with tiny butter bits throughout. Add one tablespoon of water to the food processor, pulse, and continue till all the water has been added and the dough just starts to clump together.
Step 2: Now to roll your pie crust out, you’ll need two pieces of parchment paper to put your crust between (both pieces larger than a pie pan). Put one piece down, and dump your pie dough crumbles onto it. Gently push the crumbles together to form one ball of dough, then add your other piece of parchment paper on top.
Step 3: Using a rolling pin, roll the dough out till you have one uniform, thin, round pie crust about 1/8-inch thick. You should be able to place your pie dish on top of the dough and still see extra dough sticking out about two inches past it, all around. This extra dough gives you wiggle room for crimping and fixing any tears.
Step 4: Spray your pie dish with non-stick spray. Gently remove the top sheet of parchment paper from your pie crust. Quickly and gently, with your hand under the other piece of parchment paper, flip your pie crust over into the middle of your pie pan so it falls into place around the pan.
Step 5: Gently remove the second piece of parchment paper and press the dough around the pie pan, creating one smooth, even layer on the bottom and edges. If you have excess dough coming over the edge of the pie pan, you can cut or tear that off with a knife or your fingers.
Step 6: Finish the crust of your pie by smoothing out or crimping the top edge however you like—I usually just press it with a fork for a simple pattern. Lightly wrap your pie crust with plastic wrap, and place in the fridge for at least 4 hours for the butter to harden and the flavors to develop. This chilling step is crucial for preventing shrinkage!
Pecan Pie Filling
Step 7: To begin, preheat your oven to 350°F. You’ll also need your prepared, chilled pie crust in a pie pan ready to go.
Step 8: Add your eggs to a small bowl and whisk them for a few minutes till they’re light and frothy with tiny bubbles forming on top. This aerates the eggs and helps create that signature smooth, silky texture in your gluten-free pecan pie. According to expert baking science resources, whisking eggs properly helps emulsify the filling for better texture.
Step 9: In a large mixing bowl, add your brown sugar, maple syrup, melted butter, vanilla, cinnamon, and salt. Whisk together till the sugar dissolves and everything’s combined. Add your whisked eggs and gently fold them into your batter—don’t overmix or you’ll deflate all those lovely air bubbles!
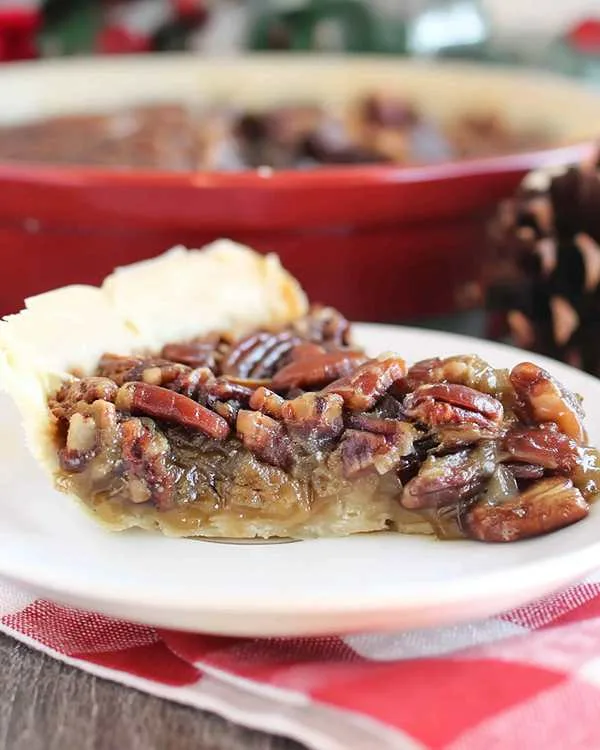
Step 10: Sprinkle your pecans evenly across the bottom of your chilled pie crust. Pour your batter slowly over your pecans, making sure it seeps down between all the nooks and crannies. The pecans will float up a bit as the filling settles, creating that gorgeous layered look.
Step 11: Bake in the oven for 40-50 minutes, or till the pie is set. The top will appear more solid and slightly puffed, but the middle may jiggle just a little still if you gently move the pan—that’s perfect! Check your pie about halfway through the baking time to see if your crust edges are getting too dark. If they are, tent a piece of foil loosely over just the edges to keep them from burning while the center finishes.
Step 12: Let cool for SEVERAL hours (I know, the waiting is hard!). The filling needs this time to set completely as it cools, transforming from liquid-y to that perfect gooey-firm texture. Then slice, share, and devour with a dollop of whipped cream!
Substitutions & Swaps
Dairy-Free Option: You can easily make this entire gf pecan pie recipe dairy-free by swapping regular butter for your favorite plant-based butter or refined coconut oil. I’ve tested it with both Miyoko’s and Earth Balance, and they work beautifully. Just make sure your butter alternative is cold for the crust and melted for the filling.
Maple Syrup Swap: If you don’t have maple syrup on hand, you can use all brown sugar instead—just increase it to 1 3/4 cups total. The flavor will be slightly different (more caramel-like, less complex), but it’s still delicious. Some folks also use a mix of corn syrup and brown sugar for a more traditional pecan pie taste.
Flour Alternatives: While I swear by Bob’s Red Mill 1-to-1 for this crust, King Arthur Measure for Measure also works great. Just avoid almond flour or coconut flour for the crust—they don’t have the same structure. For more guidance on choosing the right blend, check out this comprehensive gluten-free flour guide.
Nut Variations: Well… if someone in your family has a tree nut allergy, you can make this with sunflower seeds instead of pecans for a “sun butter pie.” It’s not quite the same, but it’s still sweet and satisfying! You could also try a mix of pecans and walnuts for added complexity.
Troubleshooting Your Gluten-Free Pecan Pie
Soggy Bottom Crust: If your crust seems soggy after baking, it likely needed more chilling time before filling. Next time, refrigerate that crust for the full 4 hours (or even overnight) so the butter firms up completely. You can also blind-bake the crust for 10 minutes before adding the filling if you’re really worried about sogginess.
Crumbly, Dry Crust: This usually means too much flour or not enough water. Gluten-free flours can vary in absorption, so if your dough seems too dry and won’t hold together, add water one teaspoon at a time till it comes together. The dough should feel like Play-Doh—not wet, but not dry and cracking either.
Filling Won’t Set: If your filling is still liquidy after the full baking time, pop it back in the oven for 10-minute intervals. The center should have just a slight jiggle (like Jell-O) when done—it’ll firm up as it cools. Remember, patience is key here!
Cracked Top: Man, oh man, cracks happen when the pie cools too quickly. Let it cool gradually at room temperature rather than in the fridge right away. If you do get cracks, just cover them with whipped cream and call it rustic!
Storage & Meal Prep
This gluten-free pecan pie keeps wonderfully at room temperature for up to 2 days if covered loosely with foil or plastic wrap. After that, transfer it to the fridge where it’ll stay fresh for up to 5 days. I actually think it tastes even better on day two when the flavors have had time to meld together!
For longer storage, you can freeze individual slices wrapped tightly in plastic wrap and then foil for up to 3 months. Thaw overnight in the fridge or at room temperature for about an hour before serving. The texture stays remarkably good—I’ve served frozen-and-thawed slices to guests who never knew the difference.
You can also prepare the crust up to 2 days ahead and keep it wrapped in the fridge, or freeze the unbaked crust for up to a month. Just make the filling fresh on baking day for the best results. This makes holiday meal prep so much easier when you can knock out your gluten-free pie recipes crust in advance!
Serving Suggestions
Serve your pecan pie (gluten-free) slightly warm or at room temperature with a generous scoop of vanilla ice cream or fresh whipped cream. The contrast between the warm, gooey filling and cold cream is absolutely heavenly. I also love it with a drizzle of extra maple syrup and a sprinkle of flaky sea salt on top.
For Thanksgiving or Christmas dinner, pair this with your favorite holiday sides like these gluten-free cheesy potatoes for a complete feast. The rich, sweet pie balances perfectly with savory dishes. And if you’re hosting, bake the pie the day before so you’re not scrambling on the big day!
Variations & Dietary Tweaks
Gluten-Free Pecan Pumpkin Pie: Want to combine two classics? Pour 1 cup of pumpkin puree mixed with pumpkin spices into your crust first, then add half the amount of pecan filling on top. Bake for 50-60 minutes till set. You get the best of both worlds in one slice!
Chocolate Pecan Pie: Sprinkle 1/2 cup of dark chocolate chips over the pecans before pouring in the filling. As it bakes, the chocolate melts into pockets of gooey goodness throughout the pie. Trust me, chocolate lovers will lose their minds over this version.
Bourbon Pecan Pie: For the grown-ups, add 2 tablespoons of bourbon to the filling along with the vanilla. It adds a warm, complex flavor that’s perfect for holiday gatherings. Just make sure to label it so folks know!
Kid-Friendly Version: Reduce the cinnamon and add 1/2 teaspoon of nutmeg for a milder spice profile. You can also toast the pecans lightly before adding them for extra flavor that even picky eaters appreciate. My kids devour this version, especially when I let them help sprinkle the pecans!
Gluten-Free Pecan Pie FAQs
Can I make this pie ahead of time?
Absolutely! This gf pecan pie recipe actually benefits from being made a day ahead. The filling sets up perfectly, and the flavors deepen overnight. Just store it covered at room temperature or in the fridge, and bring it to room temp before serving for the best texture.
How do I know when my pecan pie is done baking?
Your pie is ready when the edges are set and puffed slightly, but the center still has a gentle jiggle—about the consistency of Jell-O. It’ll firm up completely as it cools. If you overbake it, the filling can crack or become grainy, so embrace that little wiggle!
What’s the best gluten-free flour for pie crust?
I highly recommend Bob’s Red Mill 1-to-1 or King Arthur Measure for Measure for this recipe. These blends contain xanthan gum, which helps bind the dough without gluten. Avoid single-ingredient flours like almond or coconut flour—they won’t give you that flaky texture you’re after.
Why does my gluten-free crust fall apart?
The most common culprit is not enough moisture or insufficient chilling time. Make sure you’re using ice-cold water and measuring your flour correctly (fluff it first, then spoon into the cup). Also, that 4-hour chill time isn’t optional—it allows the flour to hydrate and the butter to firm up properly.
Can I use a store-bought gluten-free crust instead?
Sure, if you’re short on time! However, I really encourage you to try making your own using this detailed gluten-free pie crust tutorial because homemade tastes infinitely better. Once you get the parchment paper rolling trick down, it’s actually quite easy.
Final Tips for Pecan Pie Success
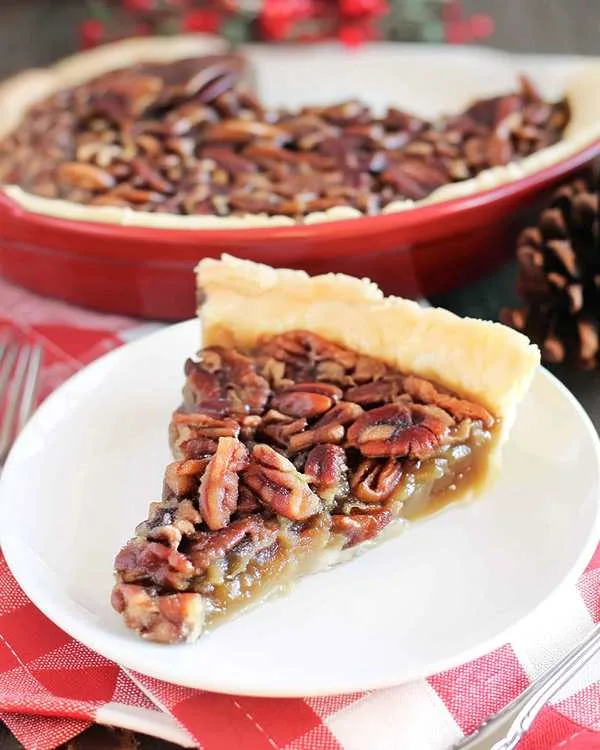
The secret to an amazing gluten-free pecan pie really comes down to three things: a well-chilled crust, properly whisked eggs, and patience while it cools. I know that last one is the hardest (the smell alone will have everyone hovering in the kitchen), but resist the urge to cut into it early. Give it at least 4 hours to fully set, and you’ll be rewarded with perfect slices that hold their shape beautifully.
If you loved this recipe, you’ll definitely want to try my classic gluten-free apple pie with crumb topping next. It uses a similar crust technique and is perfect for fall baking. Both recipes prove that gluten-free desserts can be just as good—if not better—than their traditional counterparts.
Now go forth and bake! Your kitchen is about to smell absolutely incredible, and you’re about to become everyone’s favorite baker. Don’t forget to take a picture before everyone devours it—this pie has a way of disappearing fast at gatherings!

