Gluten-Free Pumpkin Pie Bars
These gluten-free pumpkin pie bars are buttery, spiced, and so easy to make! Perfect pumpkin gluten free dessert for busy families and Thanksgiving celebrations.
Last Thanksgiving, I watched my sister-in-law struggle to find a gluten-free pumpkin dessert that didn’t require rolling out pie dough at 6 a.m. You know that pre-holiday panic, right? That’s when these gluten-free pumpkin pie bars became my secret weapon.
They’ve got all the cozy, spiced goodness of traditional pumpkin pie, but they’re way easier to make and serve. No crimping, no fancy lattice work—just press, pour, and bake. These bars are my go-to gluten-free Thanksgiving dessert because they feed a crowd and actually stay together when you cut them (unlike some pie slices I’ve attempted).
The buttery shortbread crust pairs perfectly with the creamy, lightly spiced pumpkin filling. And honestly? They’re so good that nobody even notices they’re gluten-free. According to the Celiac Disease Foundation, finding delicious gluten-free options for holiday gatherings helps everyone feel included—and these bars deliver on both taste and ease.
Whether you’re navigating a gluten-free Thanksgiving desserts menu or just craving a pumpkin gluten free treat on a random Tuesday, these bars are about to become your new favorite.
Table of Contents
Gluten-Free Pumpkin Pie Bars Ingredients
For the Gluten-Free Shortbread Crust:
- 105 g (¾ cup + 3 tablespoons) super-fine blanched almond flour
- 60 g (¼ cup + 2 tablespoons) sweet rice flour (also called “mochiko”—this is different from white or brown rice flour!)
- 65 g (¼ cup + 1 tablespoon) granulated sugar
- 17 g (2 tablespoons) cornstarch
- ¾ teaspoon ground cinnamon
- ⅛ teaspoon kosher salt
- 6 tablespoons (85 g) unsalted butter, softened
- ¾ teaspoon pure vanilla extract
Alternative Crust Option:
- 1 gluten-free graham cracker crust, baked in an 8×8 or 9×9 baking pan
For the Pumpkin Pie Filling:
- ½ cup light brown sugar
- ¼ cup granulated sugar
- ½ tablespoon cornstarch
- ½ teaspoon ground cinnamon
- ¼ teaspoon ground ginger
- ¼ teaspoon ground nutmeg
- ⅛ teaspoon ground allspice
- ⅛ teaspoon ground cloves
- ¼ teaspoon kosher salt
- 15 oz canned pumpkin (NOT pumpkin pie filling)
- ¾ cup heavy cream
- 2 large eggs
- 1 teaspoon pure vanilla extract

Gluten-Free Pumpkin Pie Bars Instructions
Prep: Line an 8×8 or 9×9 square baking pan with parchment paper. This makes cleanup so much easier and helps you lift the bars out cleanly later.
Make the Crust:
- Mix the dry ingredients: In your stand mixer bowl (or a large mixing bowl if you’re going manual), combine the almond flour, sweet rice flour, cornstarch, cinnamon, and salt. Give it a quick stir so everything’s evenly distributed.
- Add butter and vanilla: Toss in the softened butter and vanilla extract. Mix on medium-low speed until the butter disappears into the flour mixture and the dough clumps together when you pinch it. It should look like coarse crumbs that stick together easily.
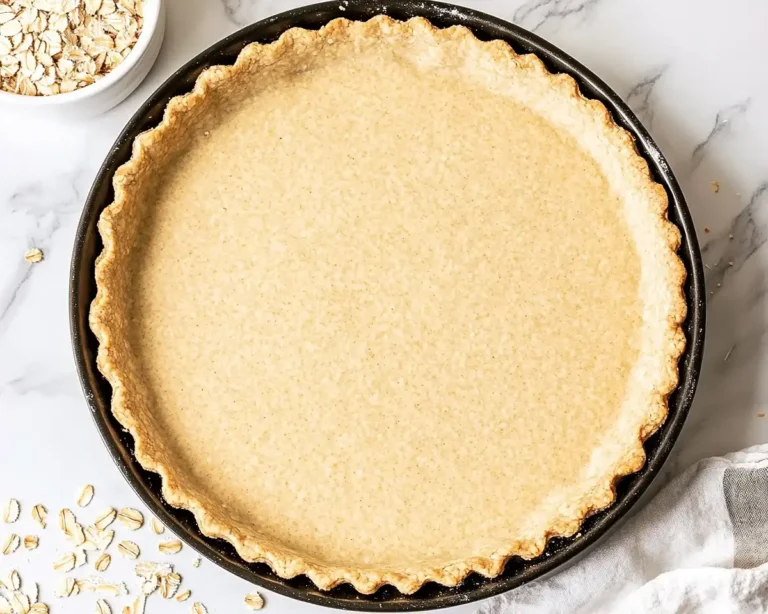
- Press into pan: Dump those crumbs into your prepared pan and press them out evenly using your hands or the bottom of a flat measuring cup. You want it smooth and compact—no gaps or thin spots. This gluten-free pumpkin dessert base needs to be sturdy!
- Chill and dock: Pop the pan in the fridge for 10 minutes while your oven preheats to 350°F. Once chilled, poke holes all over the crust with a fork (this is called “docking” and it prevents bubbling).
- Par-bake: Bake the crust for 18 minutes. When it comes out, use the bottom of a glass or measuring cup to press it down again. This keeps your pumpkin gluten free bars nice and compact.
Make the Filling:
- Mix dry ingredients: While the crust bakes, wipe out your mixing bowl (no need to wash it fully) and whisk together both sugars, cornstarch, and all those warm spices. The combination creates that classic pumpkin pie flavor we all crave during fall.
- Add wet ingredients: Pour in the canned pumpkin, heavy cream, eggs, and vanilla. Whisk until the mixture is completely smooth with no lumps. This filling is what makes these gluten-free Thanksgiving desserts so irresistible.
- Bake: Pour the filling over your par-baked crust and return to the oven. Bake for 45-50 minutes if using an 8×8 pan, or 40-45 minutes for a 9×9 pan. You’ll know they’re done when the center is set and no longer jiggly when you gently shake the pan.
- Cool completely: Let the bars cool at room temperature, then transfer to the fridge for at least an hour before cutting. This chilling time is crucial—it helps the filling set properly so your bars slice beautifully.
Substitutions & Swaps
Dairy-free option: Swap the butter for vegan butter or coconut oil in the crust, and use full-fat coconut cream instead of heavy cream in the filling. These gluten-free pumpkin pie bars work beautifully with dairy-free adjustments.
Crust shortcuts: Don’t have time to make the shortbread crust? Use a store-bought gluten-free graham cracker crust instead. Just press it into your pan and proceed with the filling. Perfect for those crazy-busy weeknights.
Sweetener adjustments: You can replace granulated sugar with coconut sugar for a deeper, more caramel-like flavor in your pumpkin gluten free dessert.
Spice variations: No allspice or cloves? Just double up on the cinnamon and ginger. The bars will still taste amazing and perfect for your gluten-free Thanksgiving desserts spread.
Nut-free crust: If you need a nut-free option, try using a blend of gluten-free oat flour and additional sweet rice flour instead of almond flour.
Troubleshooting Tips For Your Gluten Free Pumpkin Dessert Recipes
Crust is too crumbly: Make sure your butter is properly softened (not melted, not cold). Room temperature butter helps the crust hold together better. Also, press it down really firmly—don’t be shy!
Filling cracks: This usually happens when the bars cool too quickly. Let them cool gradually at room temperature before refrigerating. Small cracks don’t affect the taste of your gluten-free pumpkin dessert at all, though.
Bars won’t slice cleanly: Chill them thoroughly (at least an hour) and use a sharp knife wiped clean between each cut. Warm bars are harder to slice neatly.
Center is too jiggly: Give them another 5 minutes in the oven. The filling should be set with just a slight wobble in the very center when done.
Crust too thick or thin: If using a 9×9 pan instead of 8×8, your crust will be thinner but will work fine. Just reduce the baking time slightly for both the crust and filling.
Storage & Meal Prep
These gluten-free pumpkin pie bars store beautifully, which makes them ideal for making ahead during the holiday rush.
Refrigerator: Store in an airtight container for up to 5 days. They actually taste better after a day or two when the flavors meld together.
Freezer: Wrap individual bars tightly in plastic wrap, then place in a freezer bag. They’ll keep for up to 3 months. Thaw overnight in the fridge before serving—perfect for having a pumpkin gluten free dessert ready anytime.
Make-ahead strategy: You can bake these gluten-free Thanksgiving desserts up to two days before your gathering. Just cover and refrigerate until you’re ready to serve.
Transporting: These bars travel really well. Keep them chilled until the last minute, then transport in the pan covered with foil. They hold their shape beautifully, unlike traditional pie.
Serving Suggestions & Pairings
Top these bars with a generous dollop of whipped cream or a scoop of vanilla ice cream for the full dessert experience. A drizzle of caramel sauce doesn’t hurt either!
Serve them alongside other easy gluten-free desserts for a complete holiday spread. They pair wonderfully with coffee, chai tea, or even a glass of cold milk.
For Thanksgiving, I love cutting these gluten-free pumpkin pie bars into small squares and arranging them on a platter with other bite-sized treats. They’re easier to eat than pie when everyone’s standing around chatting.
If you’re hosting a gluten-free Thanksgiving desserts table, these bars complement other fall favorites perfectly. Consider serving them with apple crisp or pecan treats for variety.
Want to fancy them up? Add a sprinkle of cinnamon sugar or a dusting of powdered sugar right before serving. Little touches like this make your pumpkin gluten free dessert look bakery-worthy.
Variations & Dietary Adjustments
Kid-friendly version: Reduce the spices by half if your little ones are sensitive to strong flavors. The bars will still taste delicious but more mild.
Extra spiced: Love bold flavors? Increase the ginger and add a pinch of cardamom for a more complex taste profile.
Chocolate swirl: Melt 3 oz of dark chocolate and drizzle it over the filling before baking. Use a knife to swirl it through for gorgeous marbled gluten-free pumpkin pie bars.
Maple sweetened: Replace half the granulated sugar with pure maple syrup for an earthy sweetness. You might need to reduce the heavy cream slightly to compensate for the extra liquid.
Protein boost: Add 2 tablespoons of unflavored collagen peptides to the filling for extra protein—perfect if you’re serving these pumpkin gluten free bars as a more substantial snack.
Mini versions: Make these in a muffin tin lined with paper cups for individual servings. Reduce baking time to about 25-30 minutes for perfectly portioned gluten-free Thanksgiving desserts.
Gluten-Free Pumpkin Pie Bars FAQs
Can I use pumpkin pie filling instead of plain pumpkin?
Nope, stick with plain canned pumpkin. Pumpkin pie filling already has sugar and spices added, which would throw off the balance of these gluten-free pumpkin pie bars.
What’s the difference between sweet rice flour and regular rice flour?
Sweet rice flour (mochiko) is made from glutinous rice and has a stickier, more binding quality that helps gluten-free baked goods hold together better. Regular rice flour won’t give you the same texture in this pumpkin gluten free recipe.
Can I make these without eggs?
You can try using flax eggs (2 tablespoons ground flaxseed mixed with 6 tablespoons water), but the texture will be slightly different. The eggs help create that smooth, custard-like filling in these gluten-free pumpkin desserts.
Why do I need to par-bake the crust?
Par-baking prevents a soggy bottom and ensures your crust stays crisp even with the wet filling. It’s a game-changer for any bar recipe, especially gluten-free Thanksgiving desserts.
How do I know when they’re done baking?
The center should be set with just a slight wobble when you gently shake the pan. It will continue to firm up as it cools, so don’t overbake or your gluten-free pumpkin pie bars will be dry.
More Gluten-Free Recipes You’ll Love
Looking for more easy gluten-free recipes? Try our protein-packed gluten-free bread for sandwiches, or whip up a batch of crispy chicken taquitos for an easy weeknight dinner.
These gluten-free pumpkin pie bars prove that you don’t need complicated techniques or hard-to-find ingredients to create something truly special. Whether you’re making them for Thanksgiving or just because you’re craving that cozy pumpkin spice flavor, they deliver every single time.
The best part? You can make them ahead, they slice cleanly, and they taste even better the next day. That’s the kind of pumpkin gluten free dessert that makes holiday hosting actually enjoyable instead of stressful.
So grab that can of pumpkin from your pantry and let’s get baking. Your gluten-free Thanksgiving desserts table is about to get a serious upgrade—and trust me, these bars will disappear faster than you can say “seconds, please!”

Easy Gluten-Free Pumpkin Pie Bars
Equipment
- 8×8 or 9×9 square baking pan
- Parchment paper
- Stand mixer or mixing bowl
- Whisk
- Fork
- Measuring cups and spoons
Ingredients
For the Gluten-Free Shortbread Crust
- 105 g super-fine blanched almond flour ¾ cup + 3 tablespoons
- 60 g sweet rice flour ¼ cup + 2 tablespoons, also called mochiko, different from white or brown rice flour
- 65 g granulated sugar ¼ cup + 1 tablespoon
- 17 g cornstarch 2 tablespoons
- ¾ teaspoon ground cinnamon
- ⅛ teaspoon kosher salt
- 6 tablespoons unsalted butter 85 g, softened
- ¾ teaspoon pure vanilla extract
Alternative Crust Option
- 1 gluten-free graham cracker crust baked in an 8×8 or 9×9 baking pan
For the Pumpkin Pie Filling
- ½ cup light brown sugar
- ¼ cup granulated sugar
- ½ tablespoon cornstarch
- ½ teaspoon ground cinnamon
- ¼ teaspoon ground ginger
- ¼ teaspoon ground nutmeg
- ⅛ teaspoon ground allspice
- ⅛ teaspoon ground cloves
- ¼ teaspoon kosher salt
- 15 oz canned pumpkin NOT pumpkin pie filling
- ¾ cup heavy cream
- 2 large eggs
- 1 teaspoon pure vanilla extract
Instructions
- Line an 8×8 or 9×9 square baking pan with parchment paper.
- In a stand mixer bowl or large mixing bowl, combine the almond flour, sweet rice flour, cornstarch, cinnamon, and salt. Stir to distribute evenly.
- Add the softened butter and vanilla extract. Mix on medium-low speed until the butter is fully incorporated and the dough clumps together when pinched.
- Dump the crumbs into the prepared pan and press evenly using your hands or the bottom of a flat measuring cup until smooth and compact.
- Chill the crust in the refrigerator for 10 minutes while preheating the oven to 350°F. After chilling, dock the crust all over with the tines of a fork.
- Par-bake the crust for 18 minutes. When it comes out of the oven, use a measuring cup or the bottom of a glass to press the crust down compactly.
- While the crust bakes, wipe out your mixing bowl and whisk together both sugars, cornstarch, and all the spices (cinnamon, ginger, nutmeg, allspice, cloves, and salt).
- Add the canned pumpkin, heavy cream, eggs, and vanilla to the spice mixture. Whisk until completely smooth with no lumps.
- Pour the filling over the par-baked crust and return to the oven. Bake for 45-50 minutes for an 8×8 pan or 40-45 minutes for a 9×9 pan, until the center is set and no longer jiggly.
- Let the bars cool at room temperature, then transfer to the refrigerator and chill for at least 1 hour before cutting and serving.


