Mini Apple Pies (Gluten-Free)
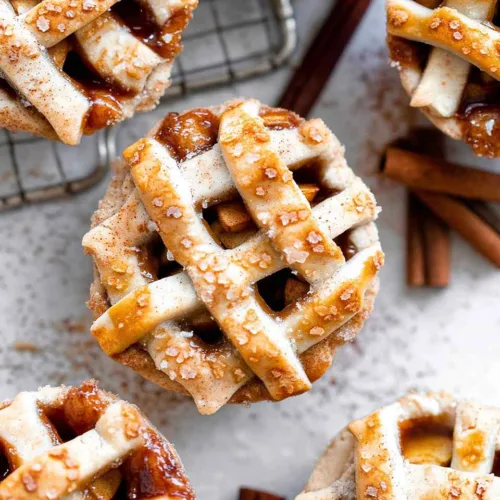
These Mini Apple Pies (Gluten-Free) bring cozy fall flavors to your table in adorable single servings. Easy gluten-free crust, spiced apple filling—perfect for busy families!
You know what makes a house smell like pure autumn magic? Mini apple pies baking in the oven, filling every corner with cinnamon and butter and pure coziness. I’ll never forget the first time I made these Mini Apple Pies (Gluten-Free) for our neighborhood fall potluck—I was honestly nervous nobody would even try them.
But here’s the thing: they disappeared faster than the regular desserts. Everyone kept asking for the recipe, shocked they were gluten-free. That’s when I realized these little beauties weren’t just for us—they’re for anyone who loves a perfectly portioned dessert that tastes like grandma’s kitchen.
Whether you’re navigating gluten free fall recipes for the first time or you’re a seasoned pro looking for something festive, these mini pies deliver. They’re easier than a full-sized pie, way more fun to serve, and totally foolproof. Plus, they freeze beautifully, which means you can prep ahead for Thanksgiving or any busy weeknight when you need a little sweet comfort.
Table of Contents
Mini Apple Pies (Gluten-Free)
Equipment
- Food processor
- 12-cavity muffin tin
- Rolling Pin
- 3.5-4 inch round cookie cutter
- Pastry brush
- Medium mixing bowl
Ingredients
Gluten-Free Crust
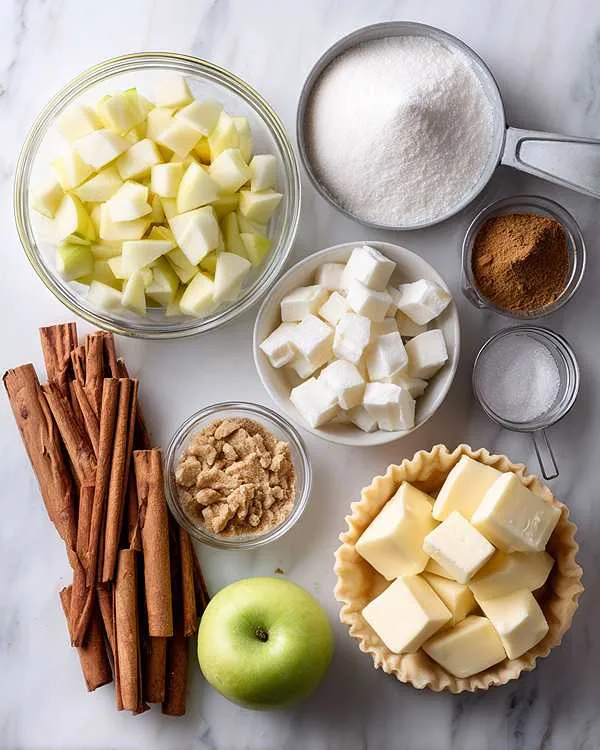
- 2 ½ cups gluten-free all-purpose baking flour
- ¾ teaspoon salt
- 2 Tablespoons granulated sugar
- ¾ cup unsalted butter cold and cubed
- 5-7 Tablespoons ice water
Apple Pie Filling
- 3 cups apples peeled & finely diced
- ½ cup light brown sugar
- 1 ½ teaspoons ground cinnamon
- ¼ teaspoon nutmeg
- 2 Tablespoons gluten-free all-purpose flour
- 1 large egg beaten, for egg wash
- extra granulated sugar for sprinkling
Instructions
- In a food processor, combine the flour, sugar and salt, then pulse just to combine. This quick step ensures everything’s evenly distributed before you add the butter.
- Add in the butter and pulse to combine until the butter is broken up and mixed into the flour. You’re looking for a texture that resembles coarse sand with some pea-sized butter bits still visible.
- Slowly add in the ice water, one tablespoon at a time, pulsing between additions until a smooth dough forms. It should hold together well when you pinch it but shouldn’t feel sticky or wet.
- Transfer the dough to plastic wrap and chill in the fridge for 30 minutes. This resting time lets the flour hydrate and the butter firm back up, making your dough easier to roll out.
- Meanwhile, combine the diced apples, brown sugar, cinnamon, nutmeg, and flour in a medium bowl. Toss everything together until the apples are evenly coated. Set this bowl aside while your dough chills.
- Spray a 12-cavity muffin tin generously with oil and set aside. Preheat the oven to 425 degrees F.
- When the dough is chilled, roll it out on a lightly floured surface to about 1/8 to 1/4 inch thick. Work gently and don’t overwork the dough.
- Use a 3 1/2-inch to 4-inch round cookie cutter to cut circles in the dough. Re-roll scraps as needed to get all 12 circles, plus extras for the tops.
- Carefully place each circle into the prepared muffin tin, gently pressing it into the bottom and up the sides. The dough should come just to the top edge of each cavity.
- Scoop about 2 tablespoons of the apple filling into each muffin cup, mounding it slightly in the center. Don’t overfill or you’ll have bubbling disasters.
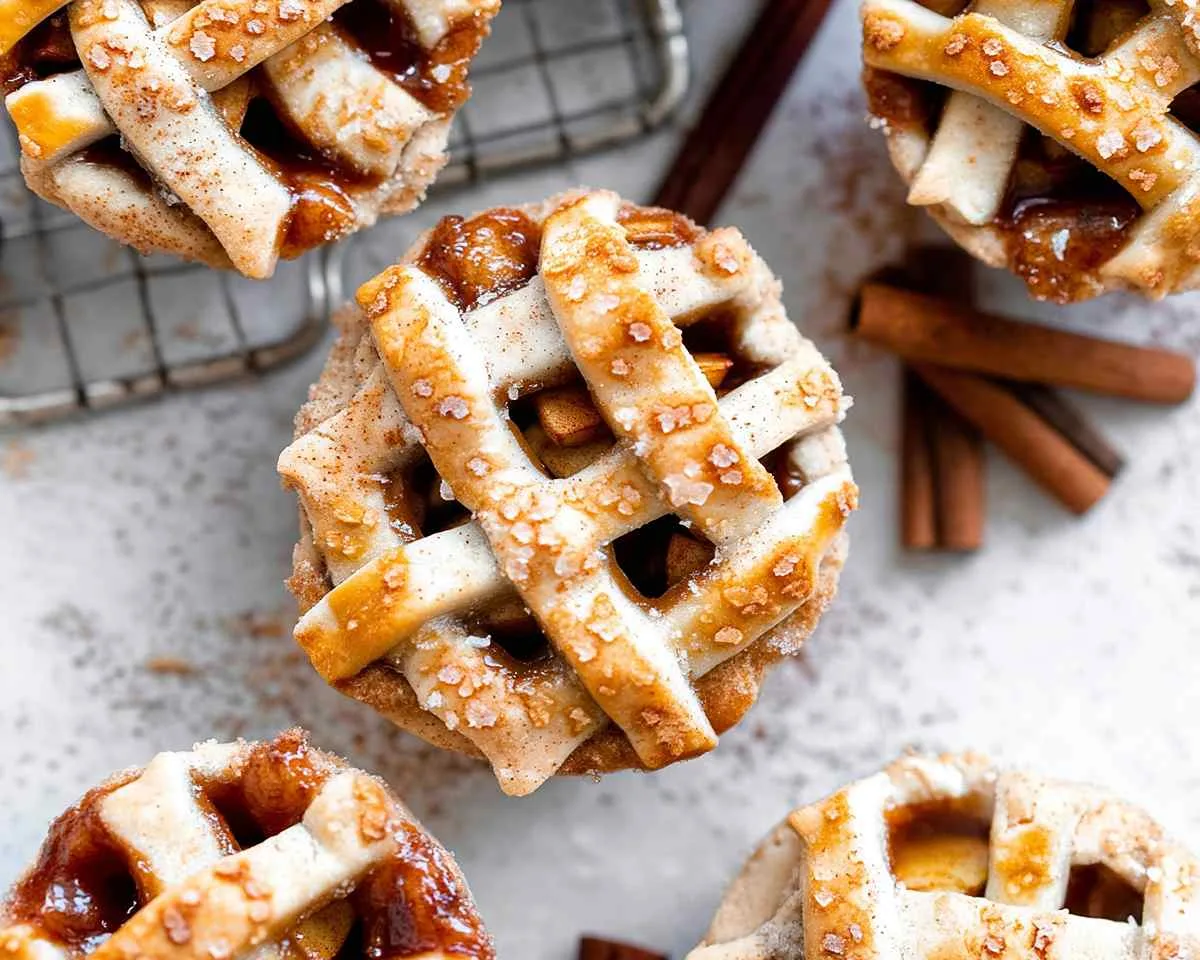
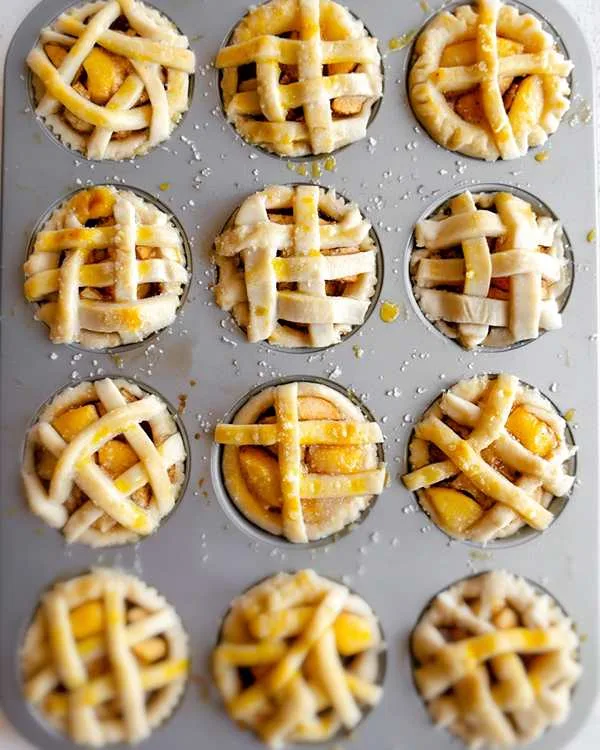
- Use the remaining dough to create a lattice top or simply cut out circles and place them on top of the filling. For lattice, cut thin strips and weave them in a simple over-under pattern.
- Whisk the egg in a small bowl and brush it generously on top of each pie, then sprinkle with extra granulated sugar for sparkle and crunch.
- Bake for 20-24 minutes or until the tops are golden brown and you can see the filling bubbling around the edges.
- Let the pies cool in the tin for about 10 minutes, then carefully lift each one out with a butter knife, sliding it gently around the edges first. Serve warm with vanilla ice cream or let cool completely.
Notes
Ingredients
| Gluten-Free Crust | Apple Pie Filling |
|---|---|
| 2 1/2 cups gluten-free all-purpose baking flour | 3 cups peeled & finely diced apples |
| 3/4 teaspoon salt | 1/2 cup light brown sugar |
| 2 Tablespoons granulated sugar | 1 1/2 teaspoons ground cinnamon |
| 3/4 cup unsalted butter (cold and cubed) | 1/4 teaspoon nutmeg |
| 5-7 Tablespoons ice water | 2 Tablespoons gluten-free all-purpose flour |
| 1 large egg (beaten, for egg wash) |
Instructions
Mix Pie Crust Dough
In a food processor, combine the flour, sugar and salt, then pulse just to combine. This quick step ensures everything’s evenly distributed before you add the butter. You want those dry ingredients fully mixed so your crust bakes up tender and flaky.
Add in the butter and pulse to combine until the butter is broken up and mixed into the flour. You’re looking for a texture that resembles coarse sand with some pea-sized butter bits still visible—that’s what creates those beautiful flaky layers.
Slowly add in the ice water, one tablespoon at a time, pulsing between additions until a smooth dough forms. It should hold together well when you pinch it but shouldn’t feel sticky or wet. If it’s too crumbly, add another tablespoon of water.
Transfer the dough to plastic wrap and chill in the fridge for 30 minutes. This resting time lets the flour hydrate and the butter firm back up, making your dough so much easier to roll out.
Make Pie Filling
Meanwhile, combine the diced apples, brown sugar, cinnamon, nutmeg, and flour in a medium bowl. Toss everything together until the apples are evenly coated—the flour helps thicken those delicious juices as they bake. Set this bowl aside while your dough chills.
Spray a 12-cavity muffin tin generously with oil and set aside. Don’t skip the oil—it’s your insurance policy for easy removal later.
Preheat the oven to 425 degrees F.
Bake the Mini Apple Pies
When the dough is chilled, roll it out on a lightly floured surface to about 1/8 to 1/4 inch thick. Work gently and don’t overwork the dough—gluten-free dough can get tough if you handle it too much.
Use a 3 1/2-inch to 4-inch round cookie cutter to cut circles in the dough. Re-roll scraps as needed to get all 12 circles, plus extras for the tops.
Carefully place each circle into the prepared muffin tin, gently pressing it into the bottom and up the sides. The dough should come just to the top edge of each cavity.
Scoop about 2 tablespoons of the apple filling into each muffin cup, mounding it slightly in the center. Don’t overfill or you’ll have bubbling disasters—trust me on this one.
Use the remaining dough to create a lattice top or simply cut out circles and place them on top of the filling. For lattice, cut thin strips and weave them in a simple over-under pattern—it looks fancy but takes just seconds per pie.
Whisk the egg in a small bowl and brush it generously on top of each pie, then sprinkle with a little extra granulated sugar for sparkle and crunch. The egg wash gives you that gorgeous golden-brown finish.
Bake for 20-24 minutes or until the tops are golden brown and you can see the filling bubbling around the edges. Your kitchen will smell absolutely incredible.
Let the pies cool in the tin for about 10 minutes, then carefully lift each one out with a butter knife, sliding it gently around the edges first. Serve warm with a scoop of vanilla ice cream, or let them cool completely for easier transport.
Substitutions
Butter: If you need dairy-free mini apple pies, swap the butter for cold vegan butter or coconut oil (solid, not melted). Keep it cold for the flakiest crust. The texture stays remarkably close to the original.
Apples: Granny Smith apples are my go-to for their tart bite, but Honeycrisp or Gala work beautifully if you prefer sweeter gluten free apple pie filling. Mix varieties for complex flavor—half tart, half sweet is perfection.
Sugar: You can use coconut sugar instead of brown sugar for a deeper, almost caramel-like flavor in your filling. The pies will be slightly darker but equally delicious.
Flour Blend: Most gluten-free all-purpose blends work here, but make sure yours contains xanthan gum or add 1/2 teaspoon to the crust recipe. According to authoritative gluten-free baking research, xanthan gum provides the binding structure that gluten normally would.
Troubleshooting
Crust cracking when rolling: Your dough might be too cold or too dry. Let it sit at room temperature for 5 minutes, then add a tiny bit more water if needed. Gluten-free dough is more delicate than traditional dough, so gentle handling is key.
Soggy bottom crust: Make sure your apple pieces are small and your filling isn’t too juicy. You can also pre-bake the crusts for 5 minutes before adding filling. This creates a barrier that keeps everything crisp.
Pies sticking to the tin: This usually means you didn’t oil the tin enough—really get in there with cooking spray or brush melted butter into every crevice. If they’re already stuck, pop the tin back in a warm oven for 2 minutes to soften the butter, then try again.
Filling spilling over: Less is more with these little pies. Stick to about 2 tablespoons of filling per cavity and don’t pack it down. The apples release moisture as they bake, so you need room for expansion.
Storage & Meal Prep
Store leftover Mini Apple Pies (Gluten-Free) in an airtight container at room temperature for up to 2 days, or refrigerate for up to 5 days. Reheat individual pies in the microwave for 15-20 seconds or in a 350°F oven for 5-7 minutes to restore that fresh-baked warmth.
For meal prep magic, freeze unbaked pies on a baking sheet until solid, then transfer to freezer bags for up to 3 months. Bake straight from frozen, adding 5-7 minutes to the baking time—perfect for holiday entertaining or when you need impressive gluten free fall recipes on demand.
Serving Suggestions
Well… these mini pies are incredibly versatile for any autumn gathering. Serve them warm with a scoop of vanilla ice cream for the ultimate comfort dessert, or let them cool completely and pack them in lunchboxes for a special treat.
They’re absolutely perfect for Halloween parties, Thanksgiving dessert tables, or cozy Sunday afternoons when you want something homemade without the fuss of a full pie. I love setting out a platter with some caramel sauce and whipped cream on the side so everyone can customize their own.
Variations
Kid-Friendly Version: Reduce the cinnamon to 1 teaspoon and skip the nutmeg if your little ones prefer milder spices. You can also add a tablespoon of mini chocolate chips to each pie for a fun twist that gets even picky eaters excited.
Dairy-Free: Use plant-based butter in the crust and brush the tops with non-dairy milk mixed with a tablespoon of maple syrup instead of egg wash. You’ll still get beautiful golden tops with a hint of shine.
Streusel Topping: Skip the top crust entirely and make a quick crumble topping with 1/3 cup gluten-free oats, 3 tablespoons brown sugar, 2 tablespoons melted butter, and a pinch of cinnamon. Sprinkle generously over the filling before baking for extra texture.
Gluten Free Halloween Treats: Add orange food coloring to the crust for festive orange pies, or use small ghost and pumpkin cookie cutters to create themed top crusts. Kids go absolutely crazy for these seasonal touches.
Mini Apple Pies FAQs
Can I make these mini pies ahead of time?
Absolutely! Bake them up to 2 days ahead and store covered at room temperature, then warm briefly before serving. They actually taste even better the next day once the flavors have melded together.
What’s the best gluten-free flour for pie crust?
I prefer blends that already contain xanthan gum like Bob’s Red Mill 1-to-1 or King Arthur Measure for Measure. These trusted gluten-free flour resources recommend blends specifically formulated for baking rather than single-ingredient flours for the best texture.
How do I prevent my gluten-free crust from being too crumbly?
The key is using ice-cold butter and not overworking the dough. If it feels too dry, add water one teaspoon at a time until it just holds together. Chilling the dough for the full 30 minutes also makes a huge difference in how it handles.
Can I use canned apple pie filling instead?
You can, but homemade filling takes just 5 minutes and tastes so much fresher. If you do use canned, look for gluten-free certified brands and drain any excess liquid before scooping into the crusts.
Why do my mini pies leak during baking?
You might be overfilling them or your dough circles aren’t pressed firmly enough into the edges of the muffin tin. Make sure there’s a good seal around the filling, and don’t heap the apples too high.
What type of apples work best for mini apple pies?
Firm, tart apples like Granny Smith hold their shape beautifully and balance the sweetness. Honeycrisp adds lovely juiciness, while Braeburn brings complex flavor—mixing two varieties gives you the best of both worlds.
Make These Mini Apple Pies Your Go-To Fall Dessert
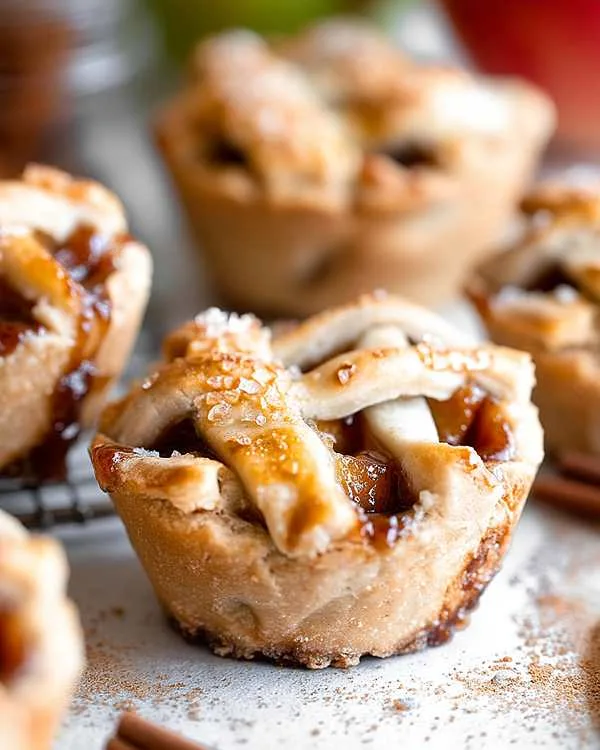
Man, oh man, there’s something so satisfying about pulling a pan of these gorgeous little pies from the oven. They’re as light and golden as autumn sunshine, and they make your whole house smell like comfort and celebration.
Whether you’re new to gluten free baking or you’ve been at it for years, these Mini Apple Pies (Gluten-Free) deliver every single time. They’re forgiving, customizable, and absolutely delicious—everything a busy family needs in a dessert recipe.
For more cozy autumn inspiration, check out this spiced gluten-free gingerbread loaf recipe or try this cinnamon-kissed apple cake for fall gatherings. And if you’re planning your holiday dessert menu, these comforting gluten-free pumpkin squares pair beautifully alongside mini pies.
Happy baking, friend! Your kitchen’s about to become everyone’s favorite place to be.

