Peanut Butter Rice Crispy Bars
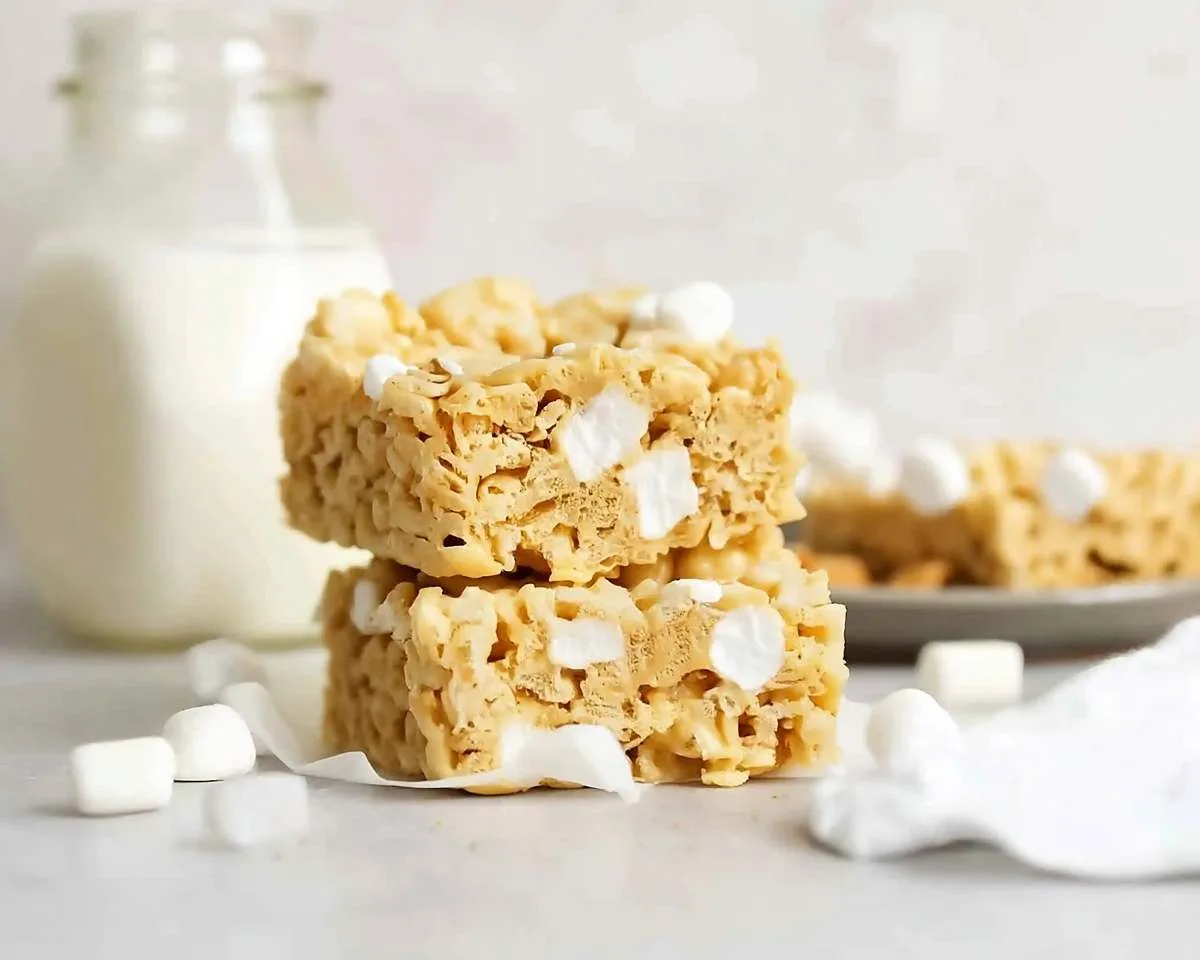
Easy Peanut Butter Rice Crispy Bars ready in 15 minutes! No-bake gluten-free treats with gooey marshmallows. Perfect kid-friendly snack!
Remember those afternoons when you’d come home from school to find a pan of homemade treats waiting on the counter? These Peanut Butter Rice Crispy Bars bring back that same warm, nostalgic feeling—but now they’re gluten-free and even easier to make.
I started making these when my daughter’s class needed allergy-friendly snacks for her birthday party, and honestly, they disappeared faster than anything I’d ever baked.
Whether you’re meal prepping snacks for busy weekdays or need a last-minute treat for soccer practice, these Healthy Rice Crispy Treats have your back. And here’s the best part: even non-gluten-free eaters won’t notice the difference. They’re just that good.
Table of Contents
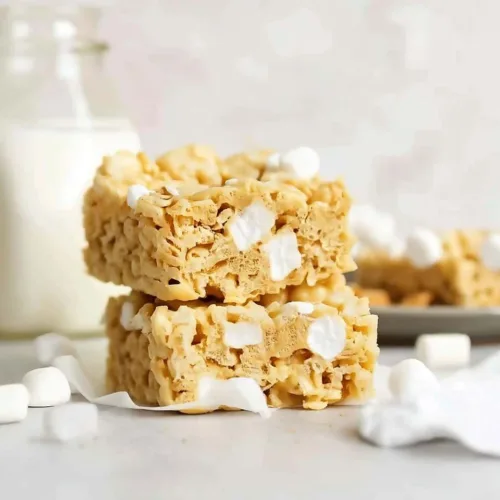
Peanut Butter Rice Crispy Bars
Equipment
- Large mixing bowl
- 8×8 metal pan
- Parchment paper
- Large saucepan
- Heat-proof spatula
- Flexible silicone or rubber spatula
- Small bowl
Ingredients
- 4 cups gluten-free crisp rice cereal NOT Rice Krispies brand unless certified GF
- ¼ cup butter 4 Tablespoons/half stick
- 1 10-ounce bag mini marshmallows
- ⅓ cup creamy peanut butter
- ½ teaspoon vanilla extract
- ⅛ teaspoon flaky sea salt like Maldon
Instructions
- Add 4 cups of gluten-free crisp rice cereal to a large mixing bowl and set aside. Line an 8×8 metal pan with parchment paper, letting the edges hang over the sides for easy removal later. Have everything ready before you start since the recipe moves quickly once the marshmallow mixture is prepared.
- Set aside 1 cup of mini marshmallows from the bag in a small bowl. These will be stirred in at the end to create gooey pockets throughout the bars.
- Add the butter and remaining mini marshmallows to a large saucepan over medium-low heat. Stir constantly with a heat-proof spatula until the marshmallows are completely melted and the mixture is smooth and glossy, about 3-4 minutes.
- Turn off the heat immediately and quickly stir in the peanut butter and vanilla extract. Work fast and stir until the mixture is smooth and completely combined, about 30 seconds.
- Pour the melted marshmallow mixture over the crisp rice cereal in the bowl, then add the reserved 1 cup of mini marshmallows. Using a flexible silicone or rubber spatula, fold and stir until every piece of cereal is coated evenly.
- Transfer the mixture to the prepared pan and gently pat into an even layer with a spatula or lightly greased hands. Don’t press too hard or the bars will be dense instead of light and airy. Sprinkle the flaky sea salt over the top.
- Let the bars cool completely at room temperature for 30-45 minutes. Once cooled, lift them out using the parchment paper overhang and cut into 12-16 squares. Store in an airtight container at room temperature for 3-4 days.
Notes
Peanut Butter Rice Crispy Bars Ingredients
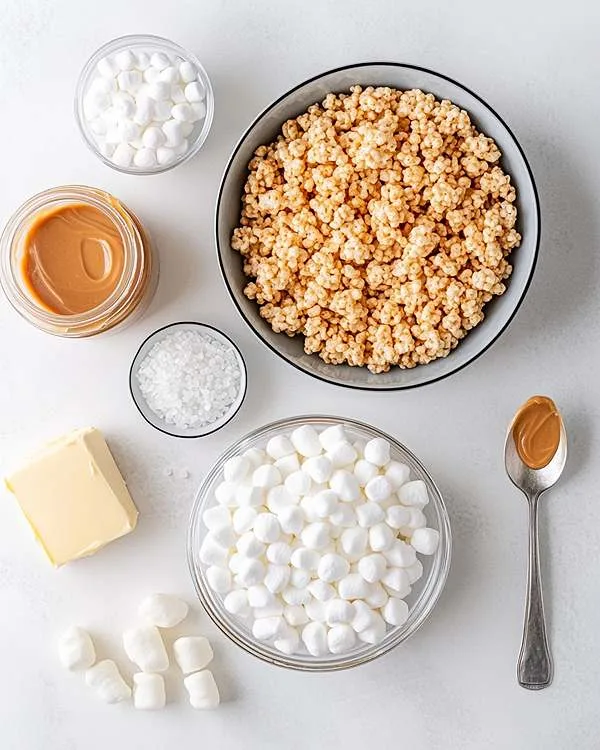
| Ingredient | Amount |
|---|---|
| Gluten-free crisp rice cereal (NOT Rice Krispies brand) | 4 cups |
| Butter | ¼ cup (4 Tablespoons/half stick) |
| Mini marshmallows | 1 (10-ounce) bag |
| Creamy peanut butter | ⅓ cup |
| Vanilla extract | ½ teaspoon |
| Flaky sea salt (like Maldon) | ⅛ teaspoon |
Peanut Butter Rice Crispy Bars Instructions
Prep Your Workspace
Add 4 cups of gluten-free crisp rice cereal to a large mixing bowl and set it aside where you can reach it easily. Line an 8×8 metal pan with parchment paper, letting the edges hang over the sides for easy removal later. Trust me on this—having everything ready before you start makes the whole process so much smoother since things move fast once that marshmallow mixture gets going.
Set Aside Marshmallows
Grab 1 cup of mini marshmallows from your bag and set them aside in a small bowl. These are going in at the end to create those irresistible gooey pockets throughout your Peanut Butter Rice Crispy Bars. It’s a game-changer trick I learned from my neighbor, and now I can’t make them any other way.
Melt the Marshmallow Base
Add the butter and remaining mini marshmallows to a large saucepan over medium-low heat. Stir constantly with a heat-proof spatula—you’ll watch the marshmallows slowly deflate and transform into a silky, glossy mixture. This takes about 3-4 minutes, and you’ll know they’re ready when everything’s completely melted and looks like fluffy white clouds melting into golden butter.
Add Peanut Butter and Vanilla
Turn off the heat immediately and quickly stir in the peanut butter and vanilla extract. Work fast here—the mixture should turn smooth and beautifully combined within 30 seconds. The warmth from the melted marshmallows does all the work of incorporating the peanut butter perfectly.
Combine Everything
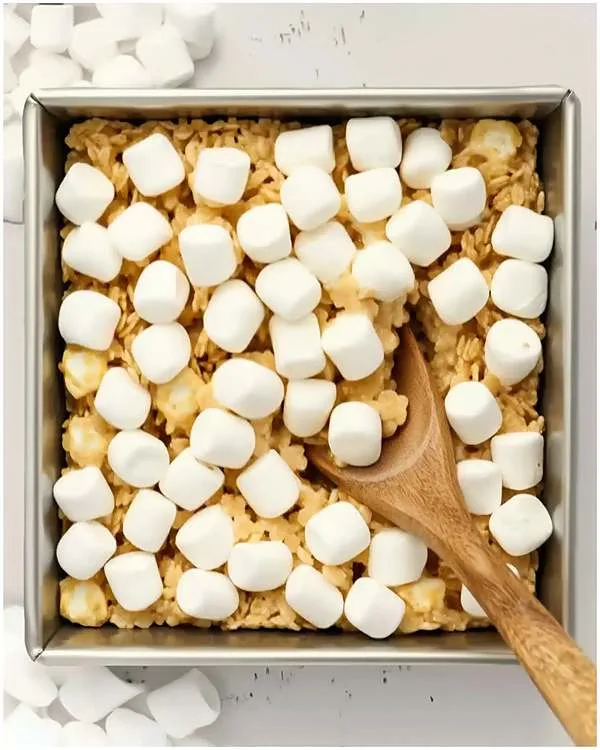
Pour your melted marshmallow mixture over the crisp rice cereal in the bowl, then add those reserved mini marshmallows you set aside earlier. Using a flexible silicone or rubber spatula, fold and stir until every piece of cereal is coated in that gorgeous, sticky mixture.
You’ll see whole marshmallows peeking through—that’s exactly what you want for these No Bake Peanut Butter Bars.
Press Into Pan
Transfer the mixture to your prepared pan and gently pat it into an even layer with the back of your spatula or clean hands lightly sprayed with cooking spray. Here’s the trick: don’t press too hard or you’ll end up with dense, compact bars instead of light, airy ones.
Sprinkle those flaky sea salt flakes over the top—it adds the most incredible sweet-salty contrast.
Cool and Cut
Let your Peanut Butter Cereal Bars cool completely at room temperature for about 30-45 minutes. Once cooled, lift them out using the parchment paper overhang and cut into 12-16 squares depending on your preferred size. They should slice cleanly without crumbling if they’re fully set.
Substitutions For Your Peanut Butter Rice Crispy Bars
Cereal Options
Any gluten-free crisp rice cereal works beautifully here—just make absolutely sure it’s certified gluten-free. Brands like Nature’s Path Crispy Rice or One Degree Organics are my go-to choices. The key is avoiding Rice Krispies brand unless you specifically find their gluten-free version, as the regular variety contains malt flavoring from barley.
Peanut Butter Alternatives
If peanut allergies are a concern, swap in almond butter, sunflower seed butter, or cashew butter using the exact same measurements. Sunflower seed butter makes these completely nut-free, which is perfect for school snacks.
Just know that sunflower seed butter can sometimes turn the bars slightly green due to a natural chemical reaction—totally safe, just a little surprising the first time!
Dairy-Free Version
Replace the butter with vegan butter or coconut oil for a dairy-free treat that tastes just as amazing. Make sure your marshmallows are vegan too—brands like Dandies work perfectly in this recipe. These Healthy Rice Crispy Treats become allergy-friendly for even more families.
Sugar Alternatives
You can use sugar-free marshmallows if you’re watching sugar intake, though the texture will be slightly different. Some readers have had success with natural peanut butter (the kind with just peanuts and salt), but you might need to add a tablespoon or two more since natural varieties are less sweet and can be thicker.
Troubleshooting For Your Peanut Butter Rice Crispy Bars
Bars Are Too Hard or Dense
This usually happens when you press the mixture too firmly into the pan or cook the marshmallows too long. Next time, use a gentler touch when pressing—you want to shape them, not compress them. If your marshmallow mixture looks dry or starts to brown, you’ve overcooked it slightly.
Mixture Won’t Stick Together
Well, if your Peanut Butter Rice Crispy Bars are crumbly and falling apart, you probably didn’t use enough marshmallow mixture or let it cook too long before adding the cereal. The mixture should still be warm and sticky when you combine everything. Work quickly and don’t let that marshmallow base sit around cooling off.
Bars Are Too Sticky
If your No Bake Peanut Butter Bars are impossibly sticky even after cooling, you might have added the peanut butter while the mixture was too hot, or used a natural peanut butter that’s very oily. Let them cool longer—sometimes they need a full hour. You can also pop them in the fridge for 20 minutes to firm up faster.
Uneven Distribution
If marshmallows or cereal are clumped in some spots, you didn’t stir thoroughly enough. Make sure you’re folding from the bottom of the bowl and getting every nook and cranny. According to trusted food science resources, proper folding technique ensures even distribution without crushing delicate ingredients.
Storage and Meal Prep
Store your Peanut Butter Cereal Bars in an airtight container or resealable bag at room temperature for 3-4 days. Layer parchment paper between stacked bars to prevent sticking. They stay perfectly chewy and fresh without refrigeration.
For longer storage, these freeze beautifully for up to 2 months. Wrap individual bars in plastic wrap, then store in a freezer bag. Thaw at room temperature for about 20 minutes before eating—they’ll taste just as fresh as the day you made them. This makes meal prep so easy for busy weeks!
Serving Suggestions
These Healthy Rice Crispy Treats are perfect for lunchboxes, after-school snacks, or weekend movie nights. My kids love them straight from the pan, but they’re also amazing crumbled over vanilla ice cream for an easy sundae topping. The salty-sweet combination makes them surprisingly sophisticated for such a simple treat.
Try cutting them into fun shapes with cookie cutters for birthday parties or holiday celebrations. They’re festive for Fourth of July picnics, Halloween parties, or Valentine’s Day class treats. Pack them in individual snack bags for road trips—they travel incredibly well and don’t need refrigeration.
Variations
Chocolate Lover’s Version
Stir in ½ cup of mini chocolate chips along with those reserved marshmallows for extra decadence. You can also drizzle melted chocolate over the cooled bars and let it set for a fancier presentation. Dark chocolate works beautifully with the peanut butter flavor.
Extra Peanut Buttery
Increase the peanut butter to ½ cup for an even more pronounced peanut butter flavor. You can also press a few extra spoonfuls on top before the bars cool, then swirl with a knife for a marbled effect. These become almost like no-bake Peanut Butter Rice Crispy Bars meets peanut butter fudge.
Crunchy Add-Ins
Fold in ¼ cup of chopped peanuts, pretzels, or toffee bits for added texture and crunch. Mini M&Ms or Reese’s Pieces turn these into a colorful, kid-friendly treat that’s always a hit at bake sales. Just make sure any add-ins you use are certified gluten-free.
Protein Boost
Add 2 tablespoons of your favorite protein powder (vanilla or peanut butter flavored works best) along with the peanut butter. You might need to add an extra tablespoon of melted butter to keep the mixture from getting too thick. This transforms them into a more nutritious post-workout snack.
Peanut Butter Rice Crispy Bars FAQs
Can I use regular Rice Krispies cereal for this recipe?
Only if you specifically buy the gluten-free version of Rice Krispies. The regular Rice Krispies contain malt flavoring derived from barley, which contains gluten. Always look for certified gluten-free cereals to keep your Peanut Butter Rice Crispy Bars safe for celiac or gluten-sensitive folks.
How do I keep the bars from sticking to my hands?
Lightly spray your hands or spatula with non-stick cooking spray before pressing the mixture into the pan. You can also wet your hands slightly with cold water—the moisture prevents sticking without affecting the texture. Some bakers swear by lightly buttered hands for the smoothest pressing experience.
What’s the best way to cut clean squares?
Use a sharp knife wiped with a damp cloth between cuts. You can also spray your knife with cooking spray for even cleaner slices. Letting the bars cool completely is crucial—warm bars will squish and tear no matter how sharp your knife is.
Why do my bars taste different from store-bought rice crispy treats?
The addition of peanut butter creates a richer, more complex flavor than plain marshmallow treats. If you want a more traditional taste, reduce the peanut butter to 3 tablespoons. The flaky sea salt also adds a gourmet touch that elevates these No Bake Peanut Butter Bars beyond basic grocery store versions.
Recipe Notes & Tips
Want to explore more easy gluten-free treats? These Peanut Butter Rice Crispy Bars pair wonderfully with other simple desserts from my festive bar collection. The contrast between gooey rice crispy treats and rich, creamy bars creates a dessert spread everyone loves.
For holiday gatherings, serve these alongside my silky pumpkin pie for a mix of nostalgic comfort and seasonal elegance. The light, crispy texture balances beautifully with dense, custardy desserts.
You know what makes these Healthy Rice Crispy Treats even better? They’re incredibly forgiving for beginner bakers. There’s no precise timing, no worry about overbaking, and almost no way to mess them up. The most important thing is working quickly once that marshmallow mixture is ready.
One final tip: if you’re making these for a crowd, double the recipe and use a 9×13 pan. They’ll be slightly thinner but just as delicious, and you’ll have enough to feed a hungry crew of kids (or adults—no judgment here).
The flaky sea salt garnish might seem optional, but trust me, it’s what takes these from good to absolutely crave-worthy. That little hit of salt against the sweet marshmallow and rich peanut butter creates the most addictive flavor combination.

