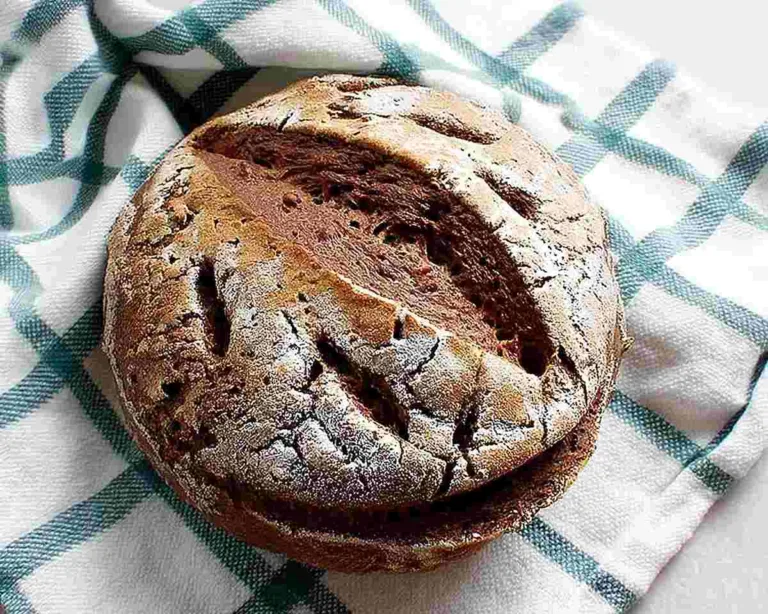
Soft & Sweet Gluten Free Hawaiian Rolls
These fluffy Gluten Free Hawaiian Rolls are perfectly sweet, soft, and easy to make! Simple gluten free dinner rolls recipe with tropical flavor everyone loves.
You know that moment when you pull apart a warm, pillowy roll and watch the steam rise up? That’s exactly what you’re getting with these Gluten Free Hawaiian Rolls—no compromises, no “good for gluten-free” qualifiers. Just legitimately delicious rolls that happen to be gluten-free.
I’ll never forget the first holiday dinner after my daughter’s celiac diagnosis. Everyone had those buttery King’s Hawaiian rolls except us, and her little face just fell. That’s when I decided to crack the code on making gluten free dinner rolls that actually taste like the real deal—sweet, soft, and with that signature tropical hint.
These gluten free rolls come together easier than you’d think, and they’ve become our go-to for every family gathering. The pineapple juice gives them that classic Hawaiian sweetness while keeping the texture incredibly soft.
Whether you’re planning Thanksgiving dinner or just want amazing gluten free recipes bread for Tuesday night pasta, these rolls deliver every single time.
Table of Contents

Soft & Sweet Gluten Free Hawaiian Rolls (Perfect Pull-Apart Dinner Rolls!)
Equipment
- Large mixing bowl
- Stand mixer with paddle attachment (optional)
- Dough hook (optional)
- 9×13 inch baking pan
- Whisk
- Damp towel or plastic wrap
- Pastry brush
Ingredients
Main Dough
- 3 cups all-purpose gluten-free flour with xanthan gum Use Bob’s Red Mill 1-to-1 or King Arthur Measure for Measure
- ¼ cup cornstarch
- 2 teaspoons instant yeast Active dry yeast works too; proof it first
- 3 tablespoons sugar
- 1 teaspoon salt
- 2 large eggs at room temperature
- 1 cup pineapple juice at room temperature, fresh or canned
- 6 tablespoons unsalted butter softened, can substitute dairy-free butter
For Brushing (optional)
- 2 tablespoons melted butter
- 1 tablespoon honey
Instructions
- In a large bowl, whisk together the gluten-free flour, cornstarch, instant yeast, sugar, and salt. Make sure everything’s evenly distributed—this helps your gluten free dinner rolls rise beautifully and ensures even texture throughout.
- Add the eggs and pineapple juice to the dry ingredients and mix to combine, using a sturdy spoon or stand mixer fitted with a paddle attachment. The mixture will look shaggy at first, but keep going. Add the softened butter and mix until all of the butter is incorporated and a sticky dough forms—it should feel tacky but not wet.
- Knead the dough for about 2-3 minutes until smooth and pliable, using a dough hook or knead by hand. If the dough seems too sticky (it shouldn’t stick to your fingers when touched lightly), add a little more gluten-free flour, 1 tablespoon at a time. You’re looking for a texture that’s soft and slightly elastic.
- Place the dough in a greased bowl and cover with a damp towel or plastic wrap. Let it rise in a warm, draft-free area for about 1 hour or until doubled in size. I like to put mine in the oven with just the light on—works like a charm!
- Punch down the risen dough to release air bubbles—so satisfying! Divide the dough into 12 equal pieces and shape each piece into a smooth ball. A kitchen scale helps here, but eyeballing works fine too.
- Arrange the dough balls in a greased 9×13-inch baking pan. You want the dough balls to touch each other while they rise and bake so they have that classic pull-apart shape. This is what makes these gluten free rolls so irresistibly fun to serve!
- Cover the rolls with a damp towel or plastic wrap and let them rise for another 30 minutes. They should look noticeably puffier and feel light when you gently press them.
- Preheat your oven to 350°F (177°C) while the rolls finish their second rise.
- Remove the towel or plastic wrap and bake the rolls for 18-22 minutes, or until golden brown on top. Your kitchen will smell absolutely amazing—like a tropical bakery opened up in your house.
- Remove the rolls from the oven and brush them with melted butter and honey for a shiny finish, if desired. This step is optional but adds gorgeous color and extra flavor.
- Serve warm and enjoy! These are best within a few hours of baking, but they reheat beautifully too.
Notes
Ingredients

| Ingredient | Amount |
|---|---|
| All-purpose gluten-free flour with xanthan gum* | 3 cups |
| Cornstarch | ¼ cup |
| Instant yeast** | 2 teaspoons |
| Sugar | 3 tablespoons |
| Salt | 1 teaspoon |
| Large eggs, room temperature | 2 |
| Pineapple juice***, room temperature | 1 cup |
| Unsalted butter****, softened | 6 tablespoons |
For Brushing (optional)
- Melted butter: 2 tablespoons
- Honey: 1 tablespoon
*Use a quality blend like Bob’s Red Mill 1-to-1 or King Arthur Measure for Measure
**Active dry yeast works too; proof it first in warm pineapple juice
***Fresh or canned both work beautifully
****Can substitute with dairy-free butter for dairy-free needs
Instructions
Step 1: In a large bowl, whisk together the gluten-free flour, cornstarch, instant yeast, sugar, and salt. Make sure everything’s evenly distributed—this helps your gluten free dinner rolls rise beautifully and ensures even texture throughout.
Step 2: Add the eggs and pineapple juice to the dry ingredients and mix to combine, using a sturdy spoon or stand mixer fitted with a paddle attachment. The mixture will look shaggy at first, but keep going. Add the softened butter and mix until all of the butter is incorporated and a sticky dough forms—it should feel tacky but not wet.
Step 3: Knead the dough for about 2-3 minutes until smooth and pliable, using a dough hook or knead by hand. If the dough seems too sticky (it shouldn’t stick to your fingers when touched lightly), add a little more gluten-free flour, 1 tablespoon at a time. You’re looking for a texture that’s soft and slightly elastic.
Step 4: Place the dough in a greased bowl and cover with a damp towel or plastic wrap. Let it rise in a warm, draft-free area for about 1 hour or until doubled in size. I like to put mine in the oven with just the light on—works like a charm!
Step 5: Punch down the risen dough to release air bubbles—so satisfying! Divide the dough into 12 equal pieces and shape each piece into a smooth ball. A kitchen scale helps here, but eyeballing works fine too.
Step 6: Arrange the dough balls in a greased 9×13-inch baking pan. You want the dough balls to touch each other while they rise and bake so they have that classic pull-apart shape. This is what makes these gluten free rolls so irresistibly fun to serve!
Step 7: Cover the rolls with a damp towel or plastic wrap and let them rise for another 30 minutes. They should look noticeably puffier and feel light when you gently press them.
Step 8: Preheat your oven to 350°F (177°C) while the rolls finish their second rise.
Step 9: Remove the towel or plastic wrap and bake the rolls for 18-22 minutes, or until golden brown on top. Your kitchen will smell absolutely amazing—like a tropical bakery opened up in your house.
Step 10: Remove the rolls from the oven and brush them with melted butter and honey for a shiny finish, if desired. This step is optional but adds gorgeous color and extra flavor.
Step 11: Serve warm and enjoy! These are best within a few hours of baking, but they reheat beautifully too.

Substitutions
No pineapple juice? Use orange juice for a similar fruity sweetness, or go with regular milk mixed with a tablespoon of honey. The tropical flavor won’t be quite as pronounced, but you’ll still get wonderfully soft gluten free dinner rolls.
Dairy-free needs? Swap the butter for your favorite dairy-free alternative—I’ve had great success with Earth Balance. Just make sure it’s softened to room temperature so it incorporates smoothly into your gluten free recipes bread dough.
Egg-free option? Try using flax eggs (1 tablespoon ground flaxseed + 3 tablespoons water per egg, let sit 5 minutes). The texture will be slightly denser but still delicious. You might also check out this complete guide to gluten-free egg substitutes for more baking options.
Different flour blends? If your blend doesn’t include xanthan gum, add 1½ teaspoons. Without it, your rolls won’t hold together properly. Different blends absorb liquid differently, so you may need to adjust by a tablespoon or two.
Troubleshooting
Rolls didn’t rise? Check your yeast expiration date—old yeast is the most common culprit. Also make sure your liquids were at room temperature, not hot (which kills yeast) or cold (which slows it down). According to trusted gluten-free baking science resources, temperature is critical for proper yeast activation.
Dough too sticky? Gluten free rolls dough should be tackier than regular dough, but if it’s actually wet and won’t hold shape, add flour one tablespoon at a time. Remember that humidity affects how much liquid your flour absorbs.
Rolls turned out dense? This usually means they didn’t rise long enough or the dough was too dry. Make sure you’re letting them fully double in the first rise and get noticeably puffy in the second. Well, if your kitchen is cold, the rise will take longer—be patient!
Tops browning too fast? Tent the pan loosely with foil for the last 5-7 minutes of baking. Every oven runs a bit differently, so get to know yours.
Storage & Meal Prep
Store your gluten free Hawaiian rolls in an airtight container at room temperature for up to 2 days. They’re softest on day one, but still delicious the next day—just warm them briefly before serving. For longer storage, freeze them in a freezer-safe bag for up to 3 months.
To reheat, wrap in foil and warm in a 300°F oven for 10-15 minutes, or microwave individual rolls for 15-20 seconds. You can also make the dough ahead, shape the rolls, then refrigerate them overnight before the second rise—just let them come to room temperature before baking.
Serving Suggestions
These gluten free dinner rolls are perfect alongside literally any meal—think holiday turkey, weeknight chili, or a simple bowl of soup. The subtle sweetness pairs beautifully with savory dishes without being overwhelming. I love serving them warm with extra butter and a sprinkle of flaky sea salt.
They’re also fantastic for sliders! Split them horizontally and fill with pulled pork, ham and cheese, or even your favorite burger. Man, oh man, they make the best little sandwiches for parties. You might also enjoy them with easy dairy-free dessert ideas for a complete gluten-free spread.
Variations
Garlic butter rolls: Brush the finished rolls with melted butter mixed with garlic powder and fresh parsley. These become savory gluten free rolls perfect for Italian night.
Cinnamon sugar version: After brushing with butter and honey, sprinkle with cinnamon sugar while still warm. They transform into a sweet breakfast treat that kids absolutely adore.
Herb-infused option: Add 1 tablespoon of fresh rosemary or thyme to the dough for an aromatic twist. These elevated gluten free recipes bread options are wonderful for dinner parties.
Mini slider size: Divide the dough into 16-18 pieces instead of 12 for perfectly-sized slider buns. Adjust baking time down to 15-18 minutes and watch them carefully.
Gluten Free Hawaiian Rolls FAQs
Can I make these gluten free Hawaiian rolls without a stand mixer?
Absolutely! Mix the dough with a sturdy wooden spoon and knead by hand for 2-3 minutes. Your arms will get a little workout, but the results are just as wonderful.
How do I know when my gluten free rolls are fully baked?
They should be golden brown on top and sound slightly hollow when tapped. An instant-read thermometer should read about 190°F in the center. Visual cues are your best friend here.
What’s the best way to get my rolls to rise properly?
Place them in a warm spot around 75-80°F—like an oven with just the light on or near a sunny window. Avoid anywhere too hot or you’ll kill the yeast. Patience is key for light, fluffy gluten free dinner rolls!
Why use pineapple juice specifically?
The natural sweetness and slight acidity help create that signature Hawaiian flavor while also keeping the rolls incredibly tender. The enzymes in pineapple juice actually help soften the crumb, which is especially beneficial in gluten free baking.
Which store-bought breads contain no gluten?
Many brands offer gluten-free options now—look for Canyon Bakehouse, Schar, and Udi’s in the freezer section. However, none quite capture that Hawaiian roll magic like making your own. Check out more beginner-friendly baking tips if you’re new to gluten-free bread making.

Final Thoughts
These Gluten Free Hawaiian Rolls prove that going gluten-free doesn’t mean giving up the foods you love. They’re as light and fluffy as a cloud, with that perfect hint of sweetness that makes them completely irresistible. Whether you’re serving them at Thanksgiving, packing them for school lunches, or just enjoying them warm with butter on a Tuesday night, they’re bound to become a family favorite.
The best part? They’re simple enough for busy weeknights but impressive enough for special occasions. Once you’ve mastered this basic gluten free recipes bread technique, you’ll find yourself making them again and again. Happy baking, friend! 🌺


