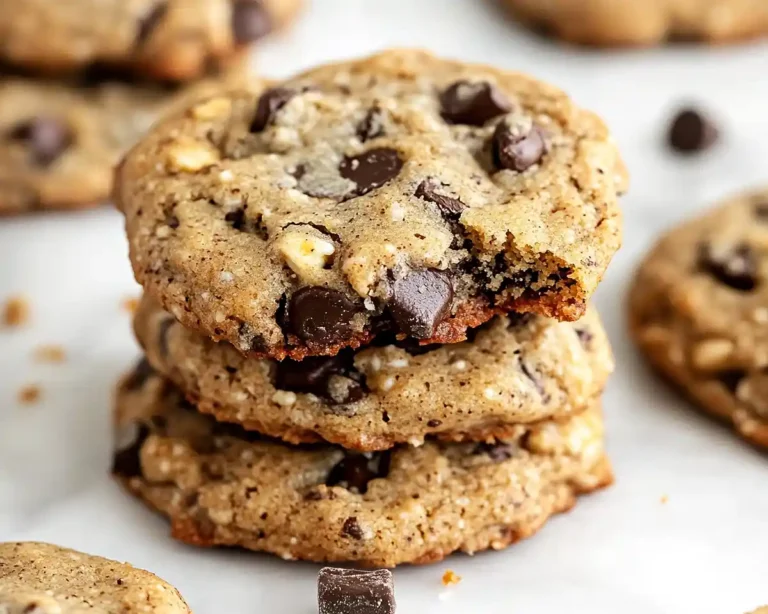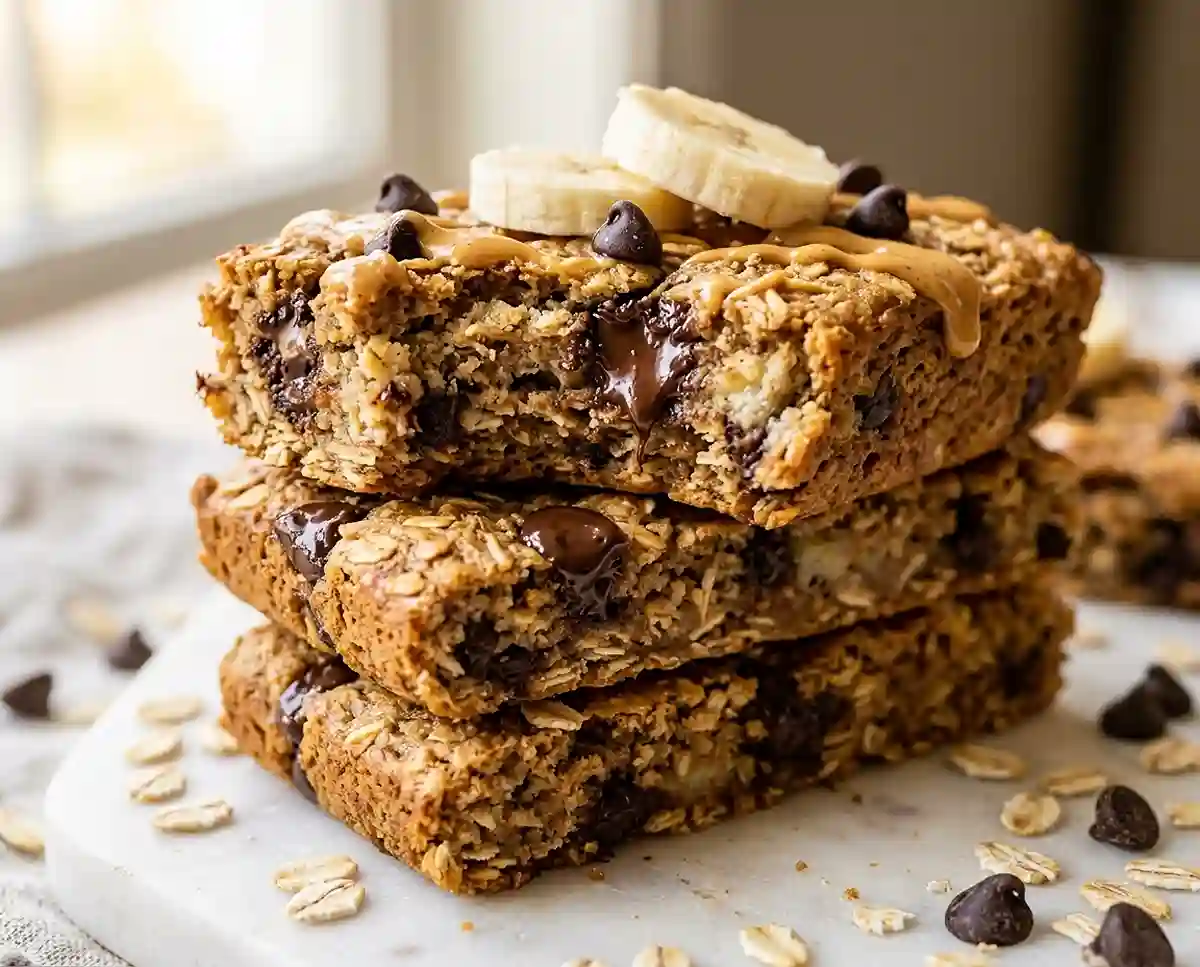
Banana Chocolate Chip Protein Breakfast Bars
Make gluten-free banana chocolate chip protein breakfast bars in 30 minutes. Packed with oats, nut butter, and protein powder for a make-ahead morning win.
Three overripe bananas sitting on my counter on a Sunday afternoon sent me down a path I didn’t expect. I was trying to make gluten-free banana chocolate chip protein breakfast bars that would actually hold together in a lunchbox without crumbling into a pile of oats by 8 a.m. — and after two failed batches that were either too wet or too dense, the third attempt came out exactly right.
That third batch has been my template ever since. Twelve bars from one pan, enough to get a family of four through the week with something portable, genuinely filling, and free of the usual gluten-free pitfalls.
What makes the difference between a protein bar that tastes like cardboard and one that actually gets eaten? It comes down to banana ripeness, nut butter ratio, and a few technique details that most recipes gloss over.
Why You’ll Love This Banana Chocolate Chip Breakfast Bar Recipe
- Soft but sliceable: The combination of mashed banana, nut butter, and oat flour creates a bar that holds its shape cleanly when sliced cold but still feels tender and moist when you bite into it — not dry, not gummy.
- Beginner-friendly bake: No mixer, no creaming butter, no tricky technique. If you can mash a banana and stir two bowls together, you can make these bars successfully on your first attempt.
- Naturally sweetened: Ripe bananas and maple syrup or honey do most of the sweetening work here, so you get real flavor without relying entirely on added sugar or artificial sweeteners from protein powder.
- Meal prep built in: One 25–30 minute bake gives you 12 bars that refrigerate for up to 5 days or freeze for up to 3 months, making them one of the most efficient gluten-free breakfast investments you can make on a Sunday.
The Secret to Perfect Gluten-Free Banana Chocolate Chip Protein Breakfast Bars
- Use the ripest bananas you can find: Overripe bananas with heavily speckled or nearly black skins contain significantly more natural sugar and moisture than yellow ones. They mash smoother, integrate more evenly into the batter, and produce a bar that’s noticeably sweeter and more cohesive without adding extra liquid.
- Oat flour and rolled oats work as a team: Rolled oats give the bars their hearty, chewy texture. Oat flour fills in the gaps and acts as a binding agent, creating enough structure to keep the bar from falling apart when sliced cold. Using only one or the other produces a noticeably inferior result.
- Nut butter is a structural ingredient, not just flavor: The natural fats in peanut butter or almond butter emulsify with the eggs and banana to create a cohesive batter that holds its shape during baking. Low-fat or powdered nut butters don’t perform the same way and will produce a drier, more crumbly bar.
- Full cooling before slicing is non-negotiable: Cutting into bars that are still warm compresses the structure before it has set, resulting in ragged edges and bars that fall apart at the seam. Transfer to a wire rack after 15 minutes and wait for complete cooling before slicing into 12 bars.
Table of Contents
Ingredients
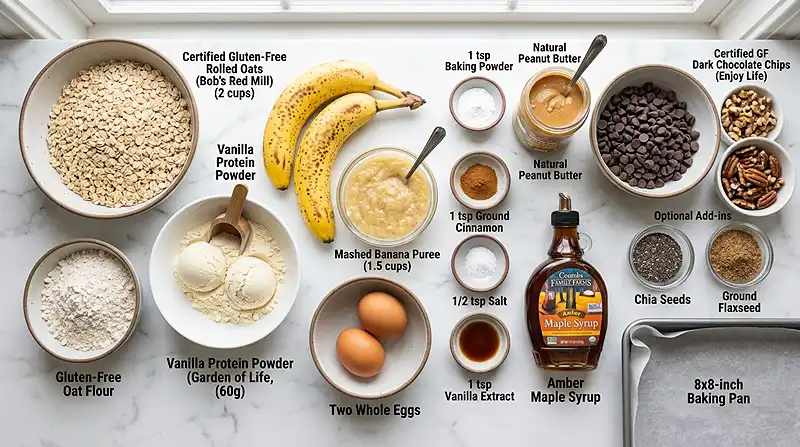
Dry Ingredients
| Ingredient | Amount | Notes |
|---|---|---|
| Certified gluten-free rolled oats | 2 cups | Must be certified GF; standard oats carry cross-contact risk |
| Certified gluten-free oat flour | ½ cup | Blend certified GF rolled oats in a food processor to make your own |
| Certified gluten-free vanilla or chocolate protein powder | 2 scoops (about 60 g) | Check label for certified GF seal; whey or plant-based both work |
| Baking powder | 1 teaspoon | Use a certified GF brand |
| Ground cinnamon | 1 teaspoon | |
| Salt | ¼ teaspoon |
Wet Ingredients
| Ingredient | Amount | Notes |
|---|---|---|
| Ripe bananas, mashed (about 1½ cups) | 3 large | The riper, the better — look for heavily speckled skins |
| Large eggs | 2 | |
| Natural peanut butter or almond butter | ½ cup | Use natural nut butter with no added oils or stabilizers |
| Maple syrup or honey | ¼ cup | Both work; maple syrup gives a slightly deeper flavor |
| Vanilla extract | 1 teaspoon |
Mix-Ins
| Ingredient | Amount | Notes |
|---|---|---|
| Certified gluten-free dark chocolate chips | ½ cup | Check label; some chocolate chips contain barley malt |
Optional Add-Ins
| Ingredient | Amount |
|---|---|
| Chopped walnuts or pecans | ¼ cup |
| Chia seeds | 2 tablespoons |
| Ground flaxseed | 2 tablespoons |
Instructions
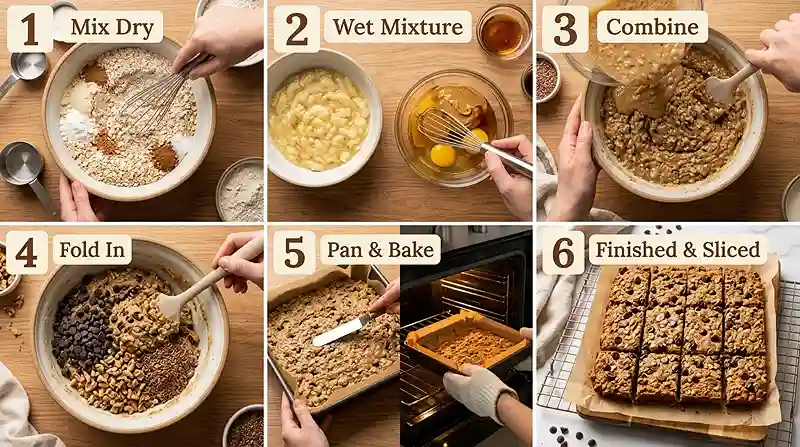
- Preheat the oven to 350°F (175°C). Line an 8×8-inch baking pan with parchment paper and lightly grease it. Pro Tip: Leave a parchment overhang on two sides so you can lift the entire slab out of the pan cleanly before slicing.
- In a large bowl, combine the certified gluten-free rolled oats, oat flour, protein powder, baking powder, cinnamon, and salt. Stir until evenly distributed.
- In a separate bowl, mash the bananas until as smooth as possible — a few small lumps are fine, but large chunks create uneven pockets in the finished bar. Add the eggs, peanut butter, maple syrup, and vanilla extract and whisk until well combined.
- Pour the wet ingredients into the dry ingredients and stir until a thick batter forms. It will be noticeably denser than a standard cake batter. Pro Tip: If the batter feels too stiff to stir easily, let it sit for 2 minutes to allow the oats to absorb some moisture before continuing.
- Fold in the certified gluten-free dark chocolate chips and any optional add-ins gently to avoid breaking up the chips or overmixing the batter.
- Spread the batter evenly into the prepared baking pan. Use a damp spatula or the back of a spoon to press it into the corners and create an even surface.
- Bake for 25–30 minutes, or until the center is firm to the touch and a toothpick inserted in the center comes out clean. The top should look set and matte rather than wet or shiny.
- Let the bars cool in the pan for 15 minutes, then transfer to a wire rack to cool completely before slicing. Pro Tip: Chilling the cooled slab in the fridge for 20–30 minutes before slicing produces the cleanest cuts.
- Slice into 12 breakfast bars and store as directed below.
Make It Your Own
Well… if your household is firmly in the chocolate camp, using chocolate protein powder instead of vanilla and adding an extra tablespoon of cocoa powder to the dry ingredients turns these into something closer to a fudgy chocolate banana brownie bar. The banana flavor stays present but takes a back seat to a deeper, richer chocolate note.
For a nut-free version of these gluten-free breakfast bars, swap the peanut or almond butter for sunflower seed butter in the same quantity. The bars will taste slightly earthier and may develop a faint greenish tint from the sunflower seed butter reacting with the baking powder — that’s a natural chemical reaction and completely safe to eat.
You know, one of the best things about this protein breakfast bar recipe is how well it absorbs extra nutrition without changing the texture. Stirring in 2 tablespoons of ground flaxseed or chia seeds adds omega-3 fatty acids and fiber in a way that’s completely invisible in the finished bar. The Harvard T.H. Chan School of Public Health’s overview of omega-3 fatty acids explains why flaxseed is one of the most accessible plant-based sources of this nutrient.
For a lower-sugar version, reduce the maple syrup to 2 tablespoons and rely on very ripe bananas to carry the sweetness. The bar will be slightly less sweet but will still hold together and bake through cleanly at the same temperature and time.
Common Problems & Solutions
Problem: The Bars Are Too Wet in the Center After 30 Minutes
Solution: The bananas added more moisture than expected, or the oven temperature is running low. Add 5 more minutes of bake time and test again with a toothpick. Tent the pan loosely with foil if the top is already browning but the center still feels soft when pressed.
Problem: The Bars Crumble When Sliced
Solution: The bars were cut before they cooled completely, or the nut butter used was a reduced-fat variety. Man, oh man… slicing warm bars is the single most common reason people think a recipe failed when it actually just needed more time. Always cool completely on a wire rack — or chill in the fridge — before cutting.
Problem: The Protein Powder Flavor Tastes Artificial After Baking
Solution: Some protein powders, especially those sweetened with sucralose or acesulfame potassium, intensify in bitterness when heated. Switch to a whey protein powder sweetened with stevia or a plant-based option sweetened with coconut sugar. According to the Celiac Disease Foundation’s guidance on hidden gluten in processed foods, protein powders are a category worth checking carefully for both sweetener type and gluten cross-contact risk.
Problem: The Chocolate Chips Sink to the Bottom
Solution: Toss the chocolate chips in a teaspoon of the oat flour before folding them into the batter. The light coating gives them enough grip in the thick batter to stay suspended rather than sinking during baking. This same trick works for nuts and seeds.
Storage & Meal Prep
| Method | Duration | Notes |
|---|---|---|
| Counter | 1–2 days | Airtight container; humidity can soften the surface quickly |
| Fridge | Up to 5 days | Store in an airtight container; bars firm up when cold |
| Freezer | Up to 3 months | Wrap each bar individually in plastic wrap, then freeze in a zip bag |
To reheat from the fridge, microwave a single bar for 20–30 seconds until just warmed through. From frozen, thaw overnight in the fridge or microwave on 50% power for 60–90 seconds to avoid drying out the edges before the center thaws.
Crumble a bar over plain Greek yogurt with a drizzle of honey for an instant no-effort parfait that uses up any bars starting to dry out at the end of the week. Nothing goes to waste and the combination adds even more protein to an already protein-forward breakfast.
Banana Chocolate Chip Protein Breakfast Bars FAQs
Can I make these bars without protein powder?
Yes. Replace the 2 scoops of protein powder with an equal weight of additional oat flour, roughly 60g or about half a cup. The bars will be slightly less structured and lower in protein per serving but will still bake through and hold together cleanly.
How do I get clean cuts without the bars falling apart?
Cool the bars completely on a wire rack, then chill the whole slab in the fridge for 20-30 minutes before slicing. Use a sharp knife and press straight down rather than dragging or sawing. Cold bars slice far more cleanly than warm ones every single time.
What’s the best nut butter for this recipe?
Natural peanut butter gives the strongest flavor and holds the structure well. Almond butter is a milder option that lets the banana and cinnamon come through more clearly. Avoid nut butters with added oils, sugar, or stabilizers, as these change the moisture balance and can make the bar greasy.
Why did my bars turn out dry and crumbly?
The bananas weren’t ripe enough, or the nut butter used was a low-fat variety. Very ripe bananas are essential for moisture and natural binding. If your bars are already baked and dry, serve them crumbled over yogurt rather than as standalone bars, and use riper bananas next time.
Can I use frozen bananas for this recipe?
Yes, frozen and thawed bananas work well and are often riper and sweeter than fresh ones. Thaw completely, drain off any excess liquid, and mash as normal. Frozen bananas tend to release more liquid than fresh, so drain them thoroughly before adding to the batter to avoid a wet center.
Serving Suggestions
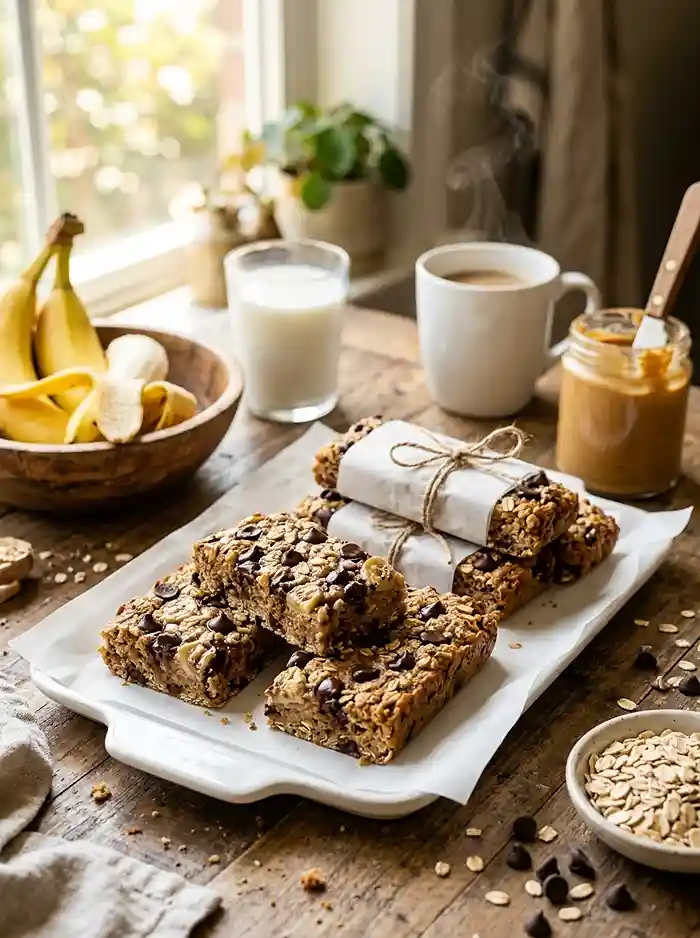
These gluten-free banana chocolate chip protein breakfast bars are sturdy enough to grab from the fridge and eat cold on a weekday morning, but they shine brightest served slightly warm alongside a cup of coffee on a slow Saturday or during the school-holiday crunch when everyone needs something fast and filling without a full kitchen production.
For a complete gluten-free brunch spread, pair them with this spinach feta hash brown brunch bake for a savory counterpoint, or serve them as a sweet follow-up to this peach crisp protein overnight quinoa for a high-protein morning that covers both texture and flavor variety.
If you’re building a full week of gluten-free meal prep breakfasts, these bars pair naturally with the gluten-free maple cinnamon protein oat bake — bake both on Sunday and rotate through the week so mornings stay interesting without any additional effort.
Give these gluten-free banana chocolate chip protein breakfast bars a try this weekend and let me know in the comments which nut butter you used and whether you added any of the optional mix-ins. Sharing the recipe to Pinterest helps other gluten-free families find a breakfast bar worth making on repeat.
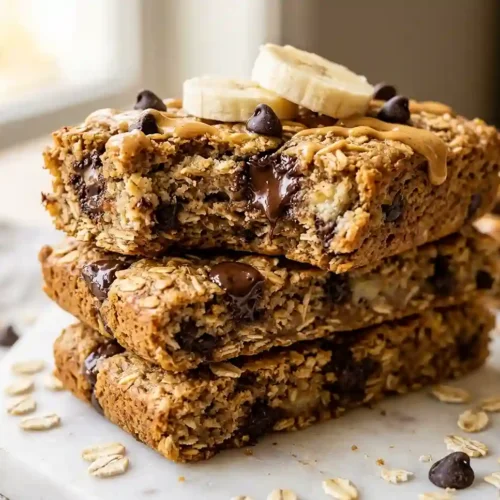
Gluten-Free Banana Chocolate Chip Protein Breakfast Bars
Equipment
- 8×8-inch baking pan
- Mixing bowls
- Whisk
- Spatula
- Parchment paper
- Wire rack
Ingredients
Dry Ingredients
- 2 cups Certified gluten-free rolled oats Must be certified GF; standard oats carry cross-contact risk
- ½ cup Certified gluten-free oat flour Can be made by blending certified GF rolled oats
- 2 scoops (about 60 g) Certified gluten-free vanilla or chocolate protein powder Check label for certified GF seal; whey or plant-based both work
- 1 teaspoon Baking powder Use a certified GF brand
- 1 teaspoon Ground cinnamon
- ¼ teaspoon Salt
Wet Ingredients
- 3 large Ripe bananas, mashed About 1 1/2 cups; the riper the better
- 2 large Eggs
- ½ cup Natural peanut butter or almond butter Use natural nut butter with no added oils or stabilizers
- ¼ cup Maple syrup or honey Maple syrup gives a deeper flavor
- 1 teaspoon Vanilla extract
Mix-Ins
- ½ cup Certified gluten-free dark chocolate chips Check label for gluten-free certification
Optional Add-Ins
- ¼ cup Chopped walnuts or pecans
- 2 tablespoons Chia seeds
- 2 tablespoons Ground flaxseed
Instructions
- Preheat the oven to 350°F (175°C). Line an 8×8-inch baking pan with parchment paper and lightly grease it.
- Combine the certified gluten-free rolled oats, oat flour, protein powder, baking powder, cinnamon, and salt in a large bowl. Stir until evenly mixed.
- Mash the bananas until mostly smooth. Add the eggs, peanut butter, maple syrup, and vanilla extract, then whisk until well combined.
- Pour the wet ingredients into the dry ingredients and stir until a thick batter forms. Let it sit briefly if needed to allow the oats to absorb moisture.
- Fold in the certified gluten-free dark chocolate chips and any optional add-ins gently.
- Spread the batter evenly into the prepared baking pan using a spatula or spoon.
- Bake for 25–30 minutes until the center is firm and a toothpick inserted in the middle comes out clean.
- Cool the bars in the pan for 15 minutes, then transfer to a wire rack and cool completely before slicing.
- Slice into 12 breakfast bars and store in an airtight container.