Brazilian Cheese Bread (Pão de Queijo)
Make Brazilian Cheese Bread (Pão de Queijo) in a blender with gluten-free tapioca flour, egg, milk, and cheese. Follow this easy step-by-step recipe with troubleshooting tips and storage advice for chewy, cheesy Brazilian rolls.
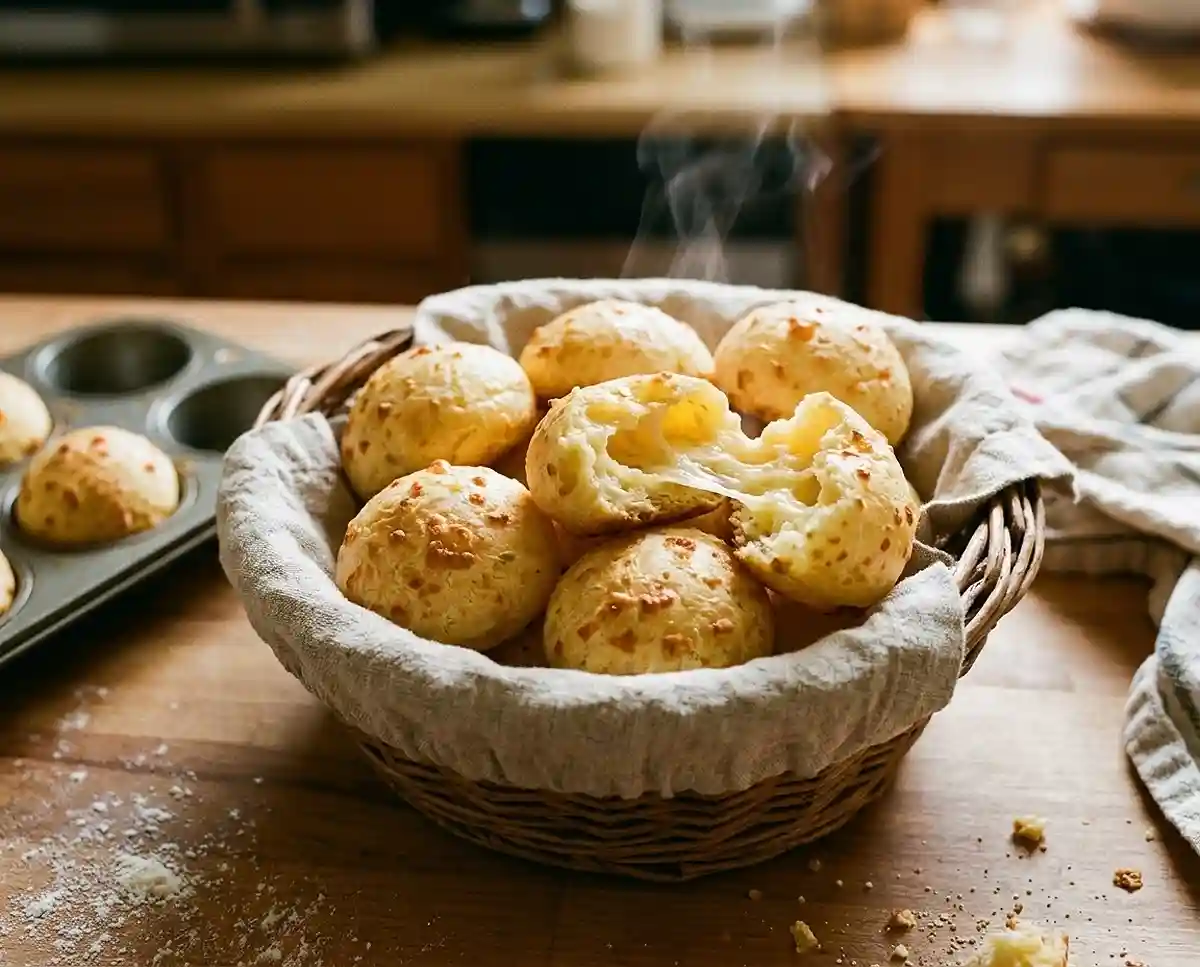
Did you know pão de queijo is naturally made with tapioca flour, not wheat? That means you get a chewy, cheesy roll with no special gluten-free flour blend. Here is exactly how I make it for my family.
Planning a party spread with warm, cheesy bites everyone will love? Discover these gluten free party snacks packed with crowd-pleasing ideas for your next gathering. You might find the perfect appetizer to serve alongside these Brazilian cheese breads and keep guests coming back for more!
What Makes This Gluten-Free Pão de Queijo Worth Making
- Texture and flavor: The outside is thin and crisp, and the inside is stretchy, chewy, and cheesy.
- Difficulty level: Beginner friendly. There is no kneading, no rising time, and no mixer.
- Kid-friendly: Mini muffin size means small hands can pick them up, and the mild cheese flavor suits picky eaters.
- Best for: Breakfast, school lunch boxes, party snacks, and holiday brunch tables.
The Science Behind Great Gluten-Free Brazilian Cheese Bread
Tapioca flour is the reason pão de queijo puffs and stays chewy without gluten. When the batter hits a hot oven, the starch swells and forms an elastic paste that traps steam. That trapped steam is what lifts each roll.
- No yeast or baking powder: The rise comes from steam, which is why a hot 400°F oven matters.
- Blending hydrates the starch evenly: A smooth batter prevents dry pockets of tapioca flour that turn gummy.
- The egg adds structure: Egg proteins set as the rolls bake and help them hold their puffed shape.
- Olive oil tenderizes and crisps: Fat in the batter keeps the crumb soft, and oil in the tin helps the crust brown and release.
This also solves common gluten-free problems like crumbly texture and dry, dense bread. If you want to see where the recipe comes from, this history of pão de queijo and its Minas Gerais roots is a good read.
Table of Contents
Ingredients
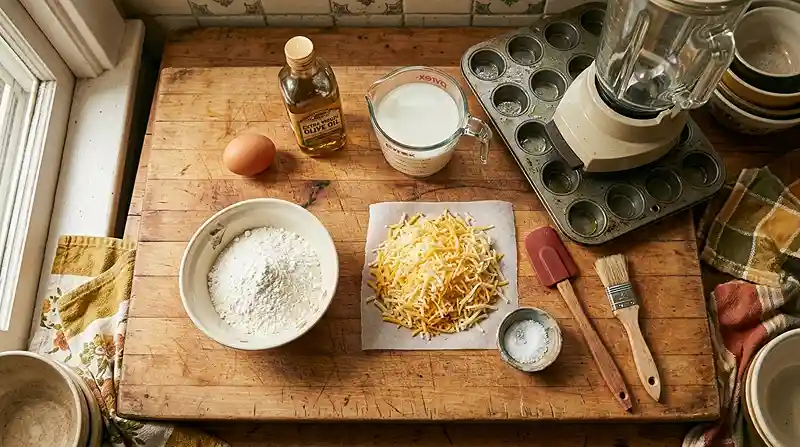
This recipe serves 6-8. Tapioca flour is the same thing as tapioca starch, so do not use cassava flour here. If you cook for someone with celiac disease, check labels with the Celiac Disease Foundation food label reading guide.
Dry Ingredients
- 1 1/2 cups (170 g) tapioca flour
- 1/2 cup (66 g) packed grated or crumbled cheese, your preference
- 1 teaspoon salt (or more to taste)
Wet Ingredients
- 1 large egg, room temperature
- 1/3 cup extra virgin olive oil, plus more for greasing the pan
- 2/3 cup milk
Instructions
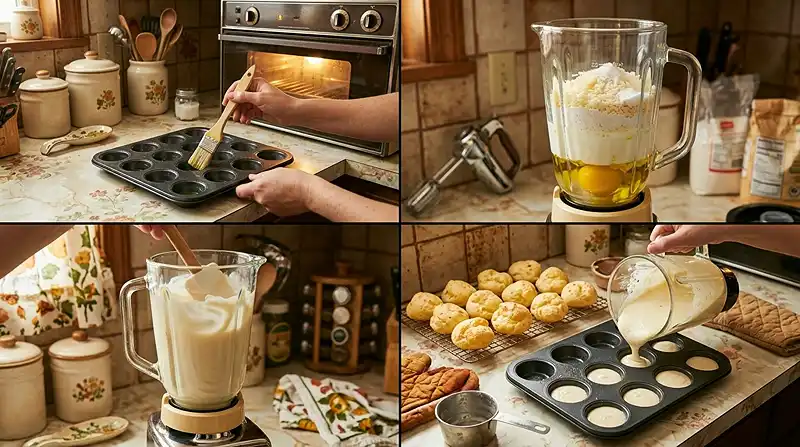
- Preheat the oven and prepare a mini muffin tin. Preheat the oven to 400°F. Spread a small amount of olive oil around the inside of each well of a non-stick mini muffin tin.
- Blend the ingredients. Put all of the ingredients into a blender and pulse until smooth. You may need to use a spatula to scrape down the sides of the blender so everything gets blended well.
- Fill the tin. Pour the thin batter into the greased wells, filling each about three-quarters full. The batter will look runny, and that is normal.
- Bake until puffed and golden. Bake for about 20 to 25 minutes, until the tops are puffed and deep golden. Keep the oven door closed so the steam stays in.
- Cool briefly and serve. Let the rolls rest in the tin for 5 minutes, then lift them out. They are best served warm, when the cheese is still soft.
Pro Tip: Stir or re-pulse the batter before pouring each round. Tapioca flour settles quickly, and the last wells can come out dense if you skip this.
Ways to Customize This Recipe
Use a sharp, dry cheese for the strongest flavor. Finely grated Parmesan gives a salty, nutty bite. Mozzarella makes a milder, stretchier roll, and a mix of the two is my family’s favorite.
Look… the cheese is where you can make this recipe your own. Crumbled feta or a sharp cheddar also work, as long as you keep the amount at 1/2 cup (66 g) packed. Very moist cheeses can make the rolls heavier, so squeeze out extra moisture first.
Try a dairy-free version with caution. Unsweetened plant milk and a dairy-free cheese can work, but I have found the rolls come out less chewy. Expect a softer crust and a milder flavor.
Add herbs for a savory twist. A pinch of dried rosemary or chives blends in easily and pairs well with Parmesan. Add only a small amount so it does not weigh down the batter.
These gluten-free Brazilian cheese bread bites are close to traditional pão de queijo, but I have not tested egg substitutes. Egg is a key structural ingredient here, so I would not swap it blindly.
If Something Went Wrong, Start Here
Problem: the rolls are flat or dense. Re-pulse the batter before pouring and make sure the oven is fully at 400°F. The rise depends on steam from a hot oven, and a cool oven lets the starch set before it can puff.
Problem: the rolls stick to the pan. Grease every well generously with olive oil, even a non-stick tin. Tapioca batter is sticky, and a thin coat of oil gives the crust something to release from.
Oh wow… the first time my centers came out gummy, I was sure I had ruined the whole batch. Problem: the centers are gummy. Bake a few minutes longer until the tops are deep golden. Tapioca starch needs enough heat to fully set.
Problem: the rolls deflate after baking. Keep the oven door closed and let them rest in the tin for 5 minutes. A sudden drop in temperature collapses the steam pockets before the structure sets.
Storage & Meal Prep
| Method | Duration | Notes |
|---|---|---|
| Counter | 2-3 days | Airtight container |
| Fridge | 5-7 days | Bring to room temp |
| Freezer | 2-3 months | Wrap individually |
Reheat rolls in a 350°F oven for 5 to 8 minutes to bring back the crisp outside and soft inside. Frozen rolls need a few extra minutes. I skip the microwave because it turns them rubbery.
Leftover rolls can be split and filled for a quick breakfast sandwich. Stale ones make good crunchy crumbs for soup or salad.
Brazilian Cheese Bread (Pão de Queijo) FAQs
Can I use cassava flour instead of tapioca flour?
No, tapioca flour works best in this recipe. Cassava flour is a different ingredient and absorbs liquid differently. Using it usually gives a dense, dry roll instead of a chewy one.
How do I know when pão de queijo is done?
They are done when the tops are puffed and deep golden. Pale rolls are often still gummy inside. Bake a few minutes longer if the centers feel wet.
What’s the best cheese for pão de queijo?
Parmesan gives the strongest flavor, and mozzarella gives the best stretch. A blend of the two is a reliable choice. Keep the total at 1/2 cup (66 g) packed.
Why did my pão de queijo deflate?
Deflating usually means they were opened to cool air too soon. Keep the oven door closed while baking and let them rest in the tin for 5 minutes. Make sure the oven is fully preheated to 400°F.
Can I make these dairy-free?
Yes, but the texture will be less chewy. Use an unsweetened plant milk and a dairy-free cheese. Expect a milder flavor than the classic version.
Serving Suggestions
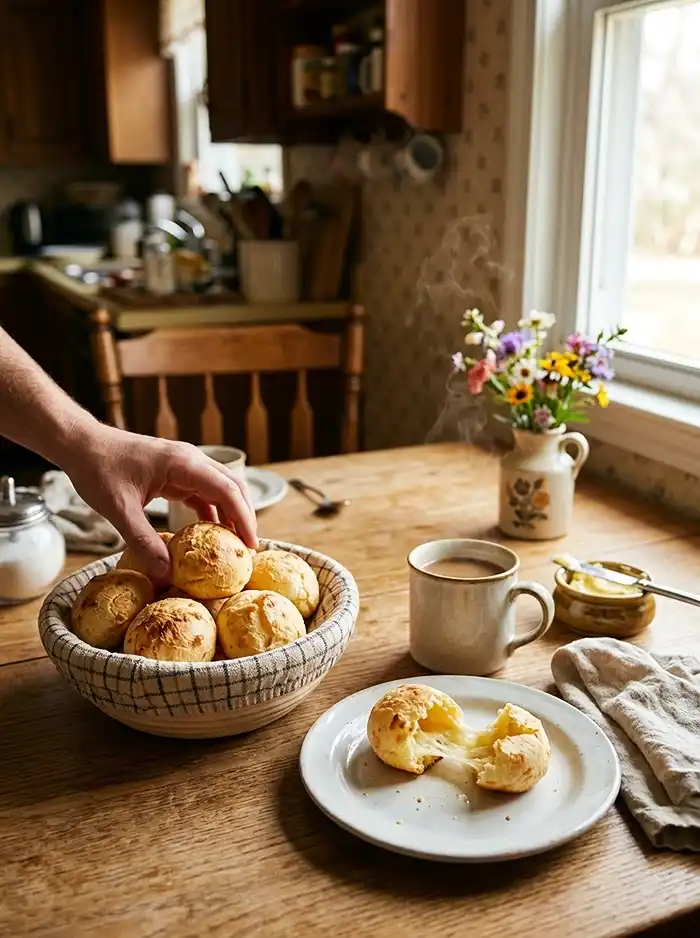
Serve these warm with coffee for breakfast, or set them out next to soup at dinner. They crackle like a thin shell when you bite in, then turn soft and stretchy inside. My kids pack them in school lunch boxes, and they disappear fast on our Super Bowl snack table.
For a snack board, add gluten-free pretzels with cheese and farmhouse cheddar crackers.
You can also round it out with crisp grain-free tortilla chips and a dip.
Final Thoughts
Gluten-free pão de queijo is a forgiving recipe once you grease the pan and keep the oven hot. Give it a try, and leave a rating and comment to tell me how yours turned out. I would love to hear which cheeses you used.

Brazilian Cheese Bread (Pão de Queijo)
Equipment
- Blender
- Mini muffin tin
- Measuring cups
- Measuring spoons
- Kitchen scale
- Spatula
- Oven
Ingredients
Dry Ingredients
- 1 ½ cups Tapioca flour 170 g; tapioca starch can also be used
- ½ cup Grated or crumbled cheese 66 g packed; use Parmesan, mozzarella, or a combination
- 1 teaspoon Salt Or more to taste
Wet Ingredients
- 1 large Egg Room temperature
- ⅓ cup Extra virgin olive oil Plus more for greasing the pan
- ⅔ cup Milk
Instructions
- Preheat the oven to 400°F (205°C). Generously spread a small amount of olive oil around the inside of each well of a non-stick mini muffin tin to prevent the cheese bread from sticking.
- Add the tapioca flour, grated or crumbled cheese, salt, egg, olive oil, and milk to a blender. Pulse until the batter is smooth, using a spatula to scrape down the sides if needed.
- Pour the thin batter into the greased mini muffin tin, filling each well about three-quarters full. The batter will look runny, which is normal.
- Bake for 20–25 minutes, until the rolls are puffed and the tops are deep golden. Keep the oven door closed during baking so the steam stays inside and helps the rolls rise.
- Let the rolls rest in the muffin tin for 5 minutes, then carefully remove them. Serve warm while the cheese is soft and the centers are stretchy.