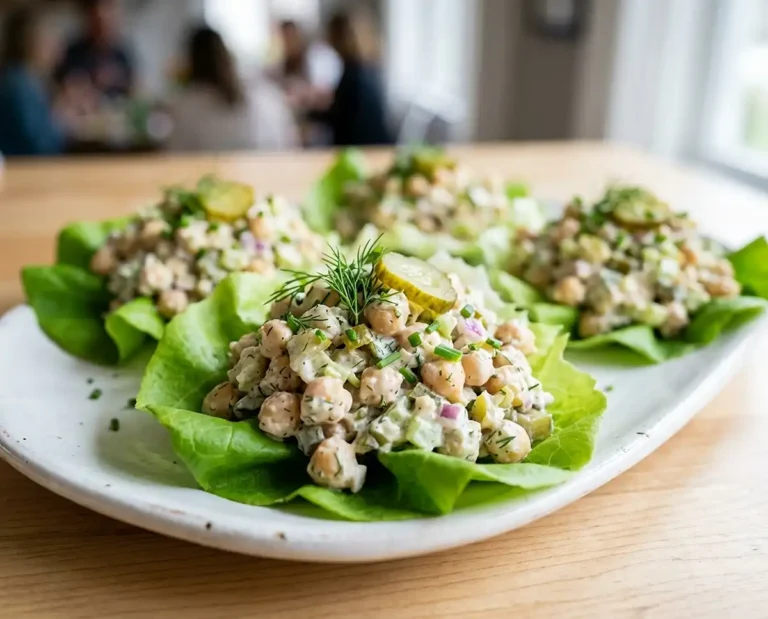
Gluten-Free Buffalo Corn Queso Cups
Easy gluten-free buffalo corn queso cups recipe made with tortilla chip shells, cream cheese, and corn. Simple party snack with full ingredients and steps.
Well, my nephew’s football watch party a few seasons back is where these gluten-free buffalo corn queso cups earned their permanent spot on my party menu. I brought a tray thinking there’d be leftovers, and there wasn’t a single cup left by halftime.
Ever have that moment when a snack disappears faster than you can refill the tray? That’s what happens with these every time I make them.
The first time I made them, I skipped baking the tortilla chip shells before filling them, and they turned soggy under the queso. Now I always crisp the shells first, and that one change made all the difference.
Table of Contents
Why You’ll Love This Gluten-Free Buffalo Corn Queso Cups
- Crisp tortilla chip shells hold a creamy, spicy buffalo corn dip without going soggy
- Beginner-friendly recipe with just two short bake times and one mixing bowl
- Easily adjusted for milder or spicier buffalo flavor depending on your crowd
- Perfect for game day, tailgates, or any gluten-free appetizer cups spread
The Secret to Perfect Gluten-Free Buffalo Corn Queso Cups
You know, the biggest risk with any gluten-free appetizer cups recipe is a soggy shell. Pre-baking the tortilla chips solves that before the filling ever goes in.
- Pre-crisping the shells for 5-7 minutes builds a sturdy base that holds up to the creamy filling
- Softened cream cheese blends smoothly, which keeps the buffalo corn dip from turning lumpy
- Corn kernels add texture and a touch of sweetness that balances the heat of the buffalo sauce
- A short second bake melts the cheddar just enough without drying out the filling
According to an authoritative gluten-free nutrition guide, condiments like hot sauce and buffalo sauce are typically made from simple, naturally gluten-free ingredients, though it’s always smart to double-check the label on your specific bottle before serving to a gluten-free guest.
Ingredients
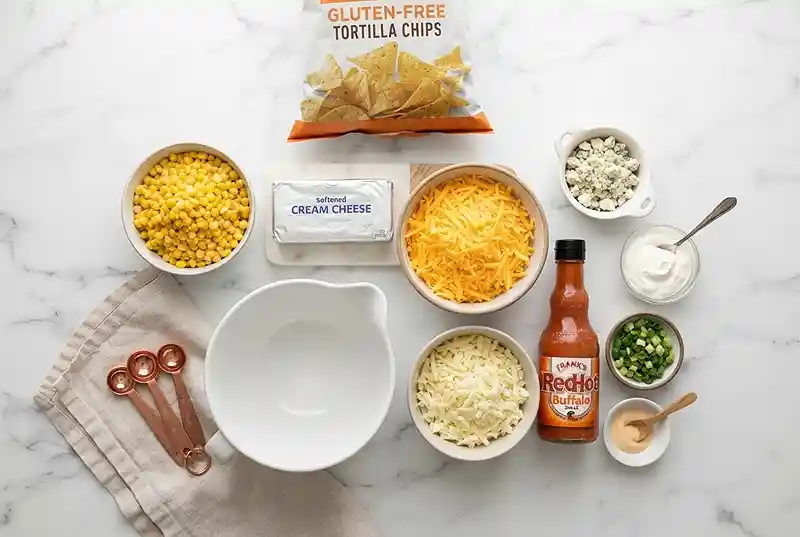
Base
- 24 gluten-free tortilla chips
- 1 cup corn kernels
Buffalo Corn Filling
- 4 oz (115 g) cream cheese, softened
- 1/2 cup shredded cheddar cheese
- 1/4 cup buffalo sauce
- 1/4 cup sour cream
- 1/2 tsp garlic powder
Toppings
- 2 tbsp chopped green onions
- 2 tbsp crumbled blue cheese (optional)
Instructions
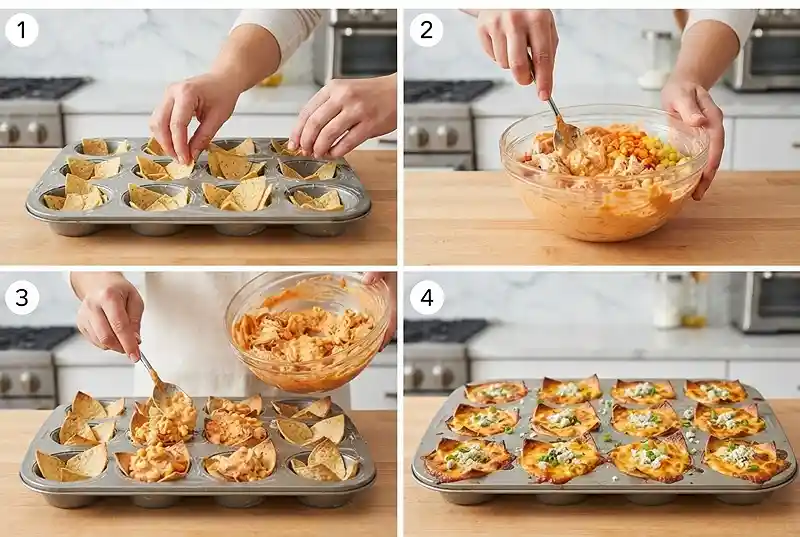
- Preheat the oven to 375°F (190°C).
- Arrange the gluten-free tortilla chips in a 12-cup muffin tin, overlapping slightly so each one forms a cup shape.
- Bake 5-7 minutes, until the edges turn crisp and lightly golden. Pro tip: watch closely here, since gluten-free chips can go from golden to burnt fast.
- In a bowl, mix the cream cheese, cheddar cheese, buffalo sauce, sour cream, garlic powder, and corn until well combined and smooth.
- Spoon the buffalo corn mixture evenly into the tortilla chip cups.
- Bake 8-10 minutes, until the filling is hot and bubbly around the edges.
- Sprinkle with green onions and blue cheese, if using.
- Serve warm, straight from the tin or transferred to a platter.
Make It Your Own
Swapping in pepper jack for the cheddar gives this buffalo corn dip an extra layer of heat, which works well if your crowd already loves spicy party snack food.
Man, oh man, if you want a milder version, cut the buffalo sauce to 2 tablespoons and add an extra tablespoon of sour cream to balance the flavor without losing the tang.
Black beans stirred in with the corn add fiber and a heartier bite, and they hold their shape well through both bake times without making the filling watery.
Common Problems & Solutions
Problem: The tortilla cups turned soggy. Solution: pre-bake the shells fully before adding the filling. If they still feel soft after 7 minutes, give them another minute or two before spooning in the queso mixture.
Problem: The filling separated or looked greasy. Solution: make sure the cream cheese is fully softened before mixing. Cold cream cheese doesn’t blend evenly with the buffalo sauce and sour cream, which leaves the filling looking broken.
Problem: The cups fell apart when removing them from the tin. Solution: let the cups cool for a minute or two before lifting them out. Man, oh man, pulling them straight from a hot pan is the fastest way to crack a crisp shell.
Storage & Meal Prep
| Method | Duration | Notes |
|---|---|---|
| Counter | 2-3 days | Airtight container |
| Fridge | 5-7 days | Bring to room temp |
| Freezer | 2-3 months | Wrap individually |
Reheat leftover cups in a 350°F oven for a few minutes to re-crisp the shells, since a microwave will leave them soft. Any leftover filling on its own also makes a great dip for extra gluten-free tortilla chips, so nothing goes to waste.
Your Questions Answered
Can I make these ahead of time?
You can pre-bake the tortilla shells and mix the filling up to a day ahead. Store them separately in the fridge, then fill and bake right before serving.
How do I know when the filling is done baking?
Look for the edges to turn hot and bubbly, usually around the 8-10 minute mark, with the cheddar melted on top.
What’s the best way to keep the shells from burning?
Check them starting at the 5-minute mark of the first bake, since thinner gluten-free chips can brown faster than expected.
Why did my buffalo corn dip taste too spicy?
This usually comes down to the buffalo sauce brand. Start with less sauce and add more to taste for a crowd with mixed spice preferences.
Serving Suggestions

These cups are a natural fit for a Super Bowl spread, since they hold their texture on a buffet table for a couple of hours without getting mushy. Pair them with a simple ranch or blue cheese dip on the side for anyone who wants extra cooling flavor against the buffalo heat.
For a fuller party spread, serve these alongside pizza dip stuffed mini peppers so guests have a couple of gluten-free appetizer cups options to choose from.
Final Thoughts
Give these gluten-free buffalo corn queso cups a try for your next game day or get-together, and let me know in the comments if you tried any of the spice-level swaps. A quick Pinterest pin also helps other gluten-free bakers find this one when they’re planning their own party menu.

Gluten-Free Buffalo Corn Queso Cups
Equipment
- 12-cup muffin tin
- Mixing bowl
- Spoon
- Oven
Ingredients
Base
- 24 gluten-free tortilla chips
- 1 cup corn kernels
Buffalo Corn Filling
- 4 oz cream cheese softened
- ½ cup shredded cheddar cheese
- ¼ cup buffalo sauce
- ¼ cup sour cream
- ½ tsp garlic powder
Toppings
- 2 tbsp chopped green onions
- 2 tbsp crumbled blue cheese optional
Instructions
- Preheat the oven to 375°F (190°C).
- Arrange the gluten-free tortilla chips in a 12-cup muffin tin, overlapping slightly so each forms a cup shape.
- Bake the tortilla chip shells for 5-7 minutes until crisp and lightly golden.
- Mix together the cream cheese, cheddar cheese, buffalo sauce, sour cream, garlic powder, and corn until smooth.
- Spoon the buffalo corn filling evenly into each tortilla chip cup.
- Bake for 8-10 minutes until the filling is hot and bubbly.
- Top with chopped green onions and optional blue cheese.
- Serve warm.