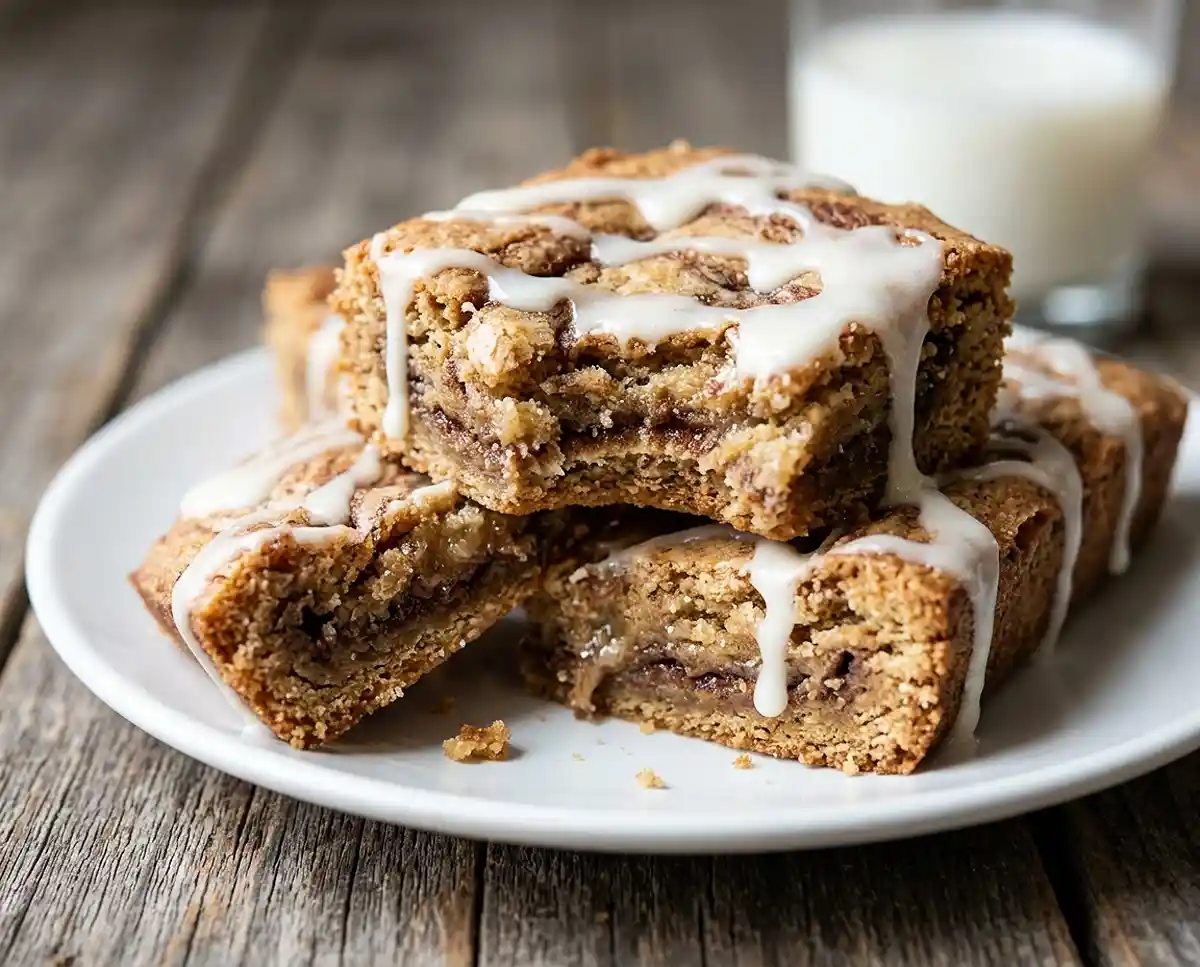
Gluten-Free Cinnamon Roll Blondie Bars
Make gluten-free cinnamon roll blondie bars with a brown sugar swirl and cream cheese glaze. Full ingredients, steps, storage, and troubleshooting tips.
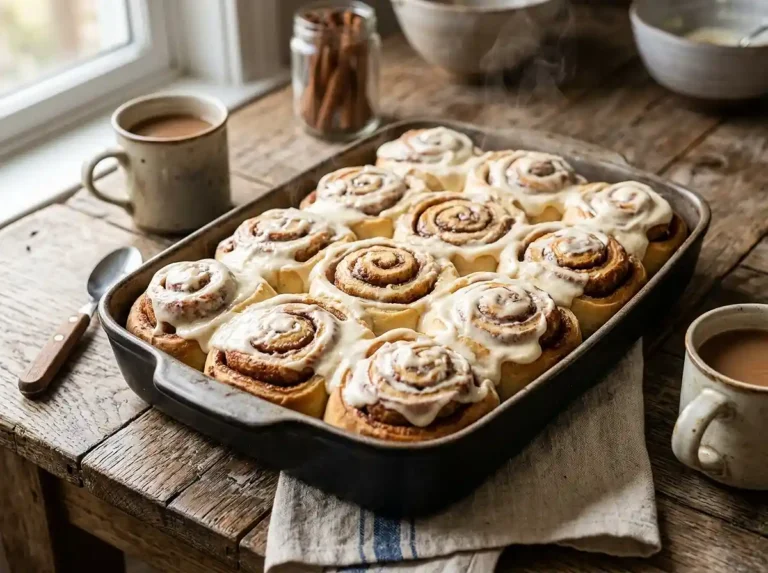
Last Sunday my kitchen filled with the smell of brown sugar and cinnamon, and the source was a pan of gluten-free cinnamon roll blondie bars cooling on the stove. My kids circled it like seagulls at a picnic. Every few minutes, somebody asked if it was time yet.
Listen… cinnamon roll flavor without yeast, rolling, or a two-hour rise is a shortcut worth knowing. These are easy dessert bars: one bowl for the dry stuff, one for the wet, a quick swirl, and a cream cheese glaze. Why does a recipe this simple keep landing on Pinterest boards every late October?
Table of Contents
The 60-Second Rundown on This Gluten-Free Cinnamon Roll Blondie Bars Recipe
- Texture and flavor: A soft, chewy brown sugar blondie with ribbons of cinnamon on top and a tangy cream cheese glaze.
- Honest difficulty: Beginner-friendly. The only real skill is waiting for the pan to cool.
- Good to know: Kid-friendly, make-ahead friendly, and baked in one 8×8-inch pan for 16 bars. It is not dairy-free as written.
- When it earns its spot: Potlucks, bake sales, and fall weeknights when you want cinnamon roll flavor without the yeast.
Why These Ingredients Behave
- Binder hydration: The flour blend with xanthan gum soaks up the wet ingredients and turns the batter thick and cohesive. That thickness is what keeps the bars from crumbling.
- Moisture that lasts: Greek yogurt adds moisture and tang, and brown sugar holds onto water. Together they slow starch retrogradation, the process that turns baked goods dry and stale.
- Fat distribution: Whisking melted butter into brown sugar coats the flour particles with fat. That gives you a chewy, fudgy crumb instead of a dense, cakey one.
- Set-up time: Cooling the bars completely in the pan lets the starches finish gelling. That is the fix for gumminess, and it makes clean slices possible.
Ingredients
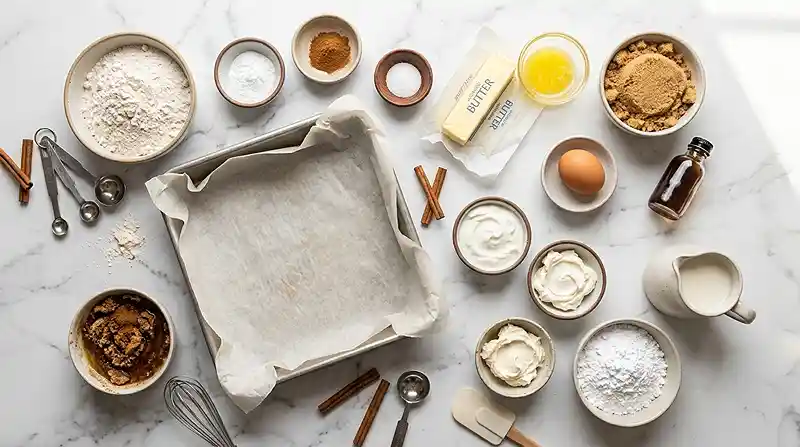
Makes 16 bars.
For the Blondie Bars
- 1 ½ cups gluten-free all-purpose flour blend with xanthan gum
- ½ teaspoon baking powder
- ½ teaspoon ground cinnamon
- ¼ teaspoon salt
- ½ cup unsalted butter, melted
- ¾ cup light brown sugar, packed
- 1 large egg
- 1 teaspoon vanilla extract
- ¼ cup plain Greek yogurt
For the Cinnamon Swirl
- ¼ cup light brown sugar, packed
- 1 tablespoon ground cinnamon
- 2 tablespoons unsalted butter, melted
For the Cream Cheese Glaze
- 3 oz cream cheese, softened
- ½ cup powdered sugar
- 1 tablespoon milk
- ½ teaspoon vanilla extract
Check that your flour blend already lists xanthan gum on the label. This recipe counts on it for structure.
If you’re baking for someone with celiac disease, current celiac disease research on kitchen cross-contact found that some everyday kitchen tasks carry less risk than people assume. It also noted that results vary from kitchen to kitchen, so read your labels and use clean tools.
Instructions
Make the Batter
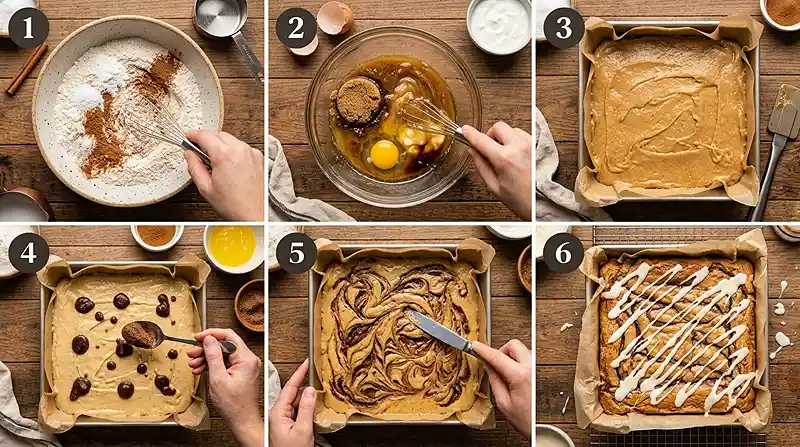
- Preheat the oven to 350°F (175°C). Line an 8×8-inch baking pan with parchment paper, leaving some overhang for easy removal. Note to self: that overhang is your lifting handle, and skipping it means prying bars out with a butter knife.
- In a medium bowl, whisk together the gluten-free flour, baking powder, cinnamon, and salt. Keep going until the cinnamon streaks disappear and the flour looks evenly tan. Even distribution keeps you from biting into a bitter pocket of baking powder.
- In a separate bowl, whisk the melted butter and brown sugar until smooth. Add the egg, vanilla, and Greek yogurt, mixing until combined. The mixture should look glossy and caramel-colored, like a thick sauce.
- Fold the dry ingredients into the wet ingredients until a thick batter forms. Avoid overmixing. Stop as soon as you can’t see dry flour, because xanthan gum turns stretchy the longer you stir.
- Spread the batter evenly into the prepared pan. The batter is thick and sticky, closer to cookie dough than cake batter. Wet the back of your spatula to keep it from dragging.
Add the Swirl and Bake
- In a small bowl, mix the brown sugar, cinnamon, and melted butter for the swirl. It should look like dark, wet sand.
- Drop small spoonfuls of the cinnamon mixture over the batter. Use a knife to gently swirl it through the top. Three or four passes is plenty, since more than that blends the cinnamon in and you lose the ribbons.
- Bake for 22–28 minutes, until the edges are lightly golden and the center is set. A toothpick should come out with a few moist crumbs. Around the 20-minute mark the smell drifts down the hall and pulls kids out of their rooms like a dinner bell.
Cool, Glaze, and Slice
- Let the bars cool completely in the pan. This usually takes an hour or more. Note to self: this is the step I rushed the first time, and the center turned pasty.
- Beat the cream cheese, powdered sugar, milk, and vanilla until smooth. Drizzle the glaze over the cooled bars. It should fall in thick ribbons that hold their line for a second before relaxing.
- Slice into squares and serve. Lift the slab out by the parchment overhang and cut a 4×4 grid for 16 bars. Wipe the knife between cuts for tidy edges.
Change It Up
You can swap the Greek yogurt for sour cream, since both are thick and tangy. Regular plain yogurt is too thin, and it loosens the batter enough to make the bars spread and bake up greasy at the edges.
For a dairy-free version, I’d try thick coconut yogurt, stick-style dairy-free butter, and a dairy-free cream cheese. I haven’t tested every combination, so treat it as a starting point. Tub-style butters hold more water, which can leave the bars gummy.
Funny enough, the glaze is the most flexible part of these easy dessert bars. Drizzle it in thin zigzags for a bakery look that photographs well, or spread it thick like frosting if your family prefers more tang in every bite.
If you’d like a viral Pinterest fall dessert look, scatter chopped toasted pecans over the glaze while it’s still tacky. They add a little crunch against the soft crumb. Skip the nuts for school lunches or bake sales with allergy rules.
Stick with a flour blend that already contains xanthan gum. A blend without it makes bars that crumble when you cut them, because nothing holds the starches together.
Rescue Guide
Problem: The center is gummy. Solution: bake until the center is set and a toothpick shows a few moist crumbs, then cool the bars completely before cutting. Explanation: starches finish gelling as they cool, so slicing early leaves a pasty texture. That is exactly what happened to the reader I mentioned earlier.
Problem: The whole pan feels gluey. Solution: fold the dry ingredients in only until no dry flour shows. Explanation: xanthan gum gets stretchier the more you agitate it, and extra stirring gives the crumb a rubbery chew.
Problem: The bars crumble when you cut them. Whew… this one is almost always a measuring issue. Solution: spoon the flour into the cup and level it off, rather than scooping. Explanation: scooping packs in extra flour, which throws off the balance between starch and binder.
Problem: The bars taste dry. Solution: start checking at 22 minutes and pull the pan when the edges are lightly golden. Explanation: gluten-free flours dry out fast in the oven, and even yogurt and brown sugar can’t make up for overbaking.
Problem: The crumb is dense. Solution: test your baking powder in hot water, and spread the batter gently rather than pressing it down. Explanation: old baking powder loses its lift, and pressing squeezes out the air the batter needs.
Storage & Meal Prep
| Method | Duration | Notes |
|---|---|---|
| Counter | 2-3 days | Airtight container; best for unglazed bars, since the cream cheese glaze belongs in the fridge |
| Fridge | 5-7 days | Bring to room temp before serving |
| Freezer | 2-3 months | Wrap individually; freezing unglazed bars works best, then glaze after thawing |
To reheat, warm a single bar in the microwave for 8 to 10 seconds. That softens the crumb and brings back the cinnamon aroma. Leftover crumbs and broken corners make a good topping for vanilla ice cream or a bowl of yogurt.
What Readers Keep Asking
Can I make these bars ahead of time?
Yes, you can bake the bars up to two days ahead. Cool them completely, cover the pan, and glaze just before serving so the drizzle stays neat. The cinnamon flavor deepens overnight.
How do I get clean, even squares?
Chill the cooled, unglazed pan for about 30 minutes, then lift the slab out by the parchment. Cut with a sharp knife and wipe the blade between slices. A 4×4 grid gives you 16 even bars.
Why did my bars turn out gummy?
Gummy bars usually mean they were underbaked, overmixed, or cut while still warm. Bake until the center is set, fold the batter only until no dry flour shows, and let the pan cool completely before slicing.
Do I really need a flour blend with xanthan gum?
Yes, this recipe relies on xanthan gum for structure. It binds the starches and holds moisture, which keeps the bars from crumbling. Check your blend’s label before you start.
What’s the best way to freeze these bars?
Wrap each unglazed bar individually and freeze for 2-3 months. Thaw at room temperature, then add the cream cheese glaze. Glazing after thawing keeps the topping smooth.
Serving Suggestions
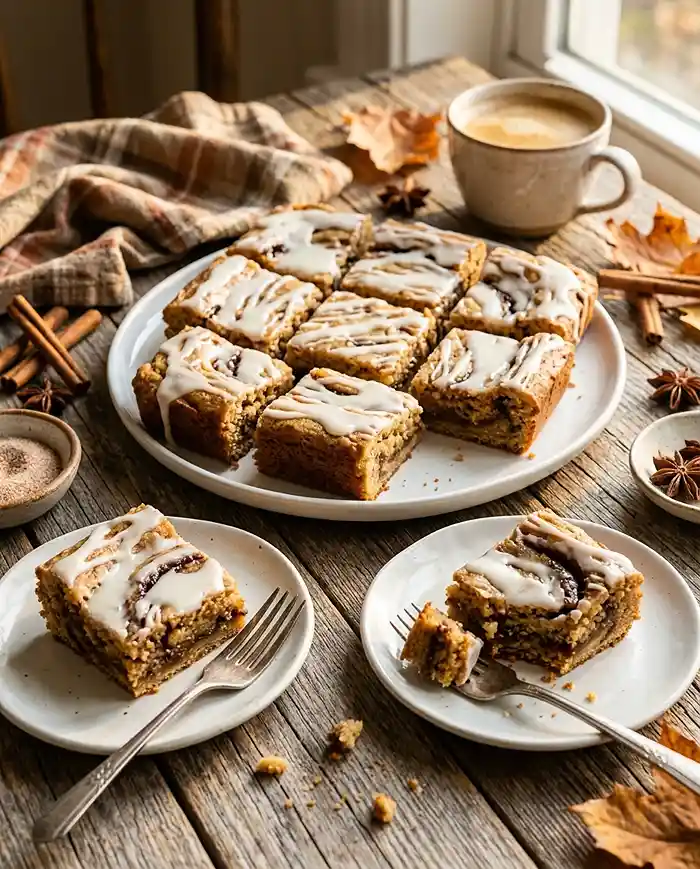
These bars earn a spot on the Thanksgiving dessert table next to the pies, because one pan feeds a crowd and slices cleanly. Serve them with hot coffee or a scoop of vanilla ice cream. It’s a late October into November Pinterest recipe for good reason.
For a full gluten-free fall spread, start the day with gluten-free sweet potato pie smoothie cups. Bring a pear almond upside-down cake for a second dessert, and make this butternut chicken enchilada rice bake for supper.
Final Thoughts
Give these gluten-free cinnamon roll blondie bars a try this week, and pin the recipe so you can find it when the weather turns. Leave a star rating once you’ve baked a pan.
Then come back and tell me what you changed. Questions and reader tweaks are the reason this recipe keeps getting better.
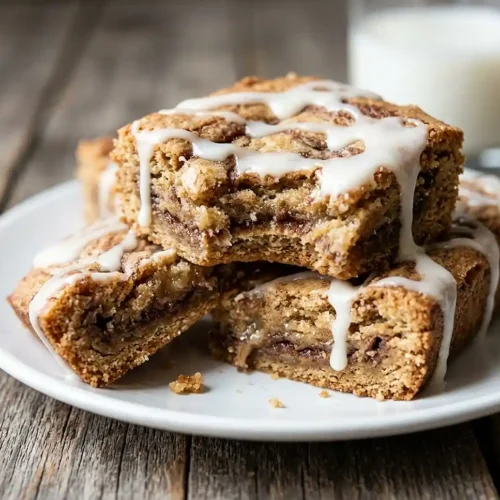
Gluten-Free Cinnamon Roll Blondie Bars
Equipment
- 8×8-inch baking pan
- Parchment paper
- Mixing bowls
- Whisk
- Spatula
- Small bowl
- Knife
- Electric hand mixer or whisk
- Wire cooling rack
Ingredients
Blondie Bars
- 1 ½ cups gluten-free all-purpose flour blend use a blend containing xanthan gum
- ½ teaspoon baking powder
- ½ teaspoon ground cinnamon
- ¼ teaspoon salt
- ½ cup unsalted butter melted
- ¾ cup light brown sugar packed
- 1 large egg
- 1 teaspoon vanilla extract
- ¼ cup plain Greek yogurt
Cinnamon Swirl
- ¼ cup light brown sugar packed
- 1 tablespoon ground cinnamon
- 2 tablespoons unsalted butter melted
Cream Cheese Glaze
- 3 ounces cream cheese softened
- ½ cup powdered sugar
- 1 tablespoon milk
- ½ teaspoon vanilla extract
Instructions
- Preheat the oven to 350°F (175°C). Line an 8×8-inch baking pan with parchment paper, leaving an overhang to lift out the bars easily.
- In a medium bowl, whisk together the gluten-free flour blend, baking powder, cinnamon, and salt until evenly combined.
- In a separate bowl, whisk the melted butter and brown sugar until smooth. Add the egg, vanilla extract, and Greek yogurt, mixing until combined.
- Fold the dry ingredients into the wet ingredients until a thick batter forms and no dry flour remains. Avoid overmixing.
- Spread the thick batter evenly into the prepared pan, using a slightly wet spatula if needed to prevent sticking.
- In a small bowl, combine the brown sugar, cinnamon, and melted butter for the swirl. Mix until the mixture resembles wet sand.
- Drop small spoonfuls of the cinnamon mixture over the batter. Gently swirl it through the surface with a knife, making three or four passes to create ribbons.
- Bake for 22–28 minutes, until the edges are lightly golden and the center is set. A toothpick inserted into the center should come out with a few moist crumbs.
- Let the bars cool completely in the pan, usually at least 1 hour. Do not slice while warm, as the texture needs time to set.
- Beat the softened cream cheese, powdered sugar, milk, and vanilla extract until smooth and creamy.
- Drizzle the cream cheese glaze over the completely cooled bars. Lift the slab from the pan using the parchment overhang and cut into a 4×4 grid to make 16 bars. Wipe the knife between cuts for neat slices.