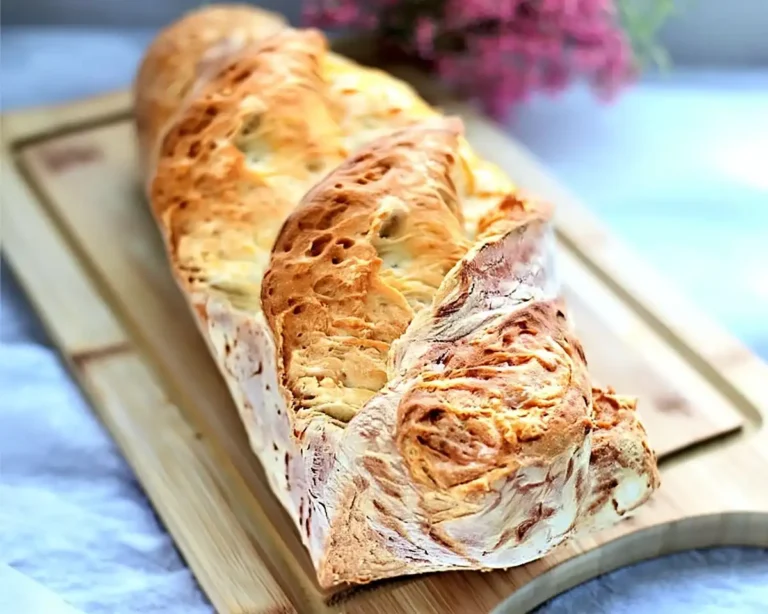
Gluten Free Crescent Rolls
Buttery gluten free crescent rolls that rise perfectly! Easy recipe with step-by-step instructions for tender, flaky rolls your whole family will love.
You know that moment when you pull apart a warm, buttery roll and it actually flakes like it’s supposed to? Yeah, I didn’t think that was possible with gluten free crescent rolls either—until I cracked the code. My first attempt looked more like hockey pucks than the pillowy crescents I remembered from childhood holiday dinners.
Here’s the thing: making gluten free rolls that rise properly and taste incredible isn’t about fancy ingredients or professional baking skills. It’s about understanding how gluten free dough behaves differently and working with it instead of against it.
These gluten free crescent rolls have become my go-to for everything from Thanksgiving dinner to Tuesday night soup. They’re buttery, slightly sweet, and honestly? My gluten-eating neighbors can’t tell the difference. If you’ve been searching for gluten free recipes easy enough for busy weeknights but impressive enough for special occasions, you’re in the right place.
Table of Contents

Gluten Free Crescent Rolls
Equipment
- Stand mixer with dough hook
- Medium bowl
- Whisk
- Rimmed baking sheet
- Parchment paper
- Rolling Pin
- Pizza wheel or sharp knife
- Pastry brush
- Plastic wrap
Ingredients
For the Starter
- ⅝ cup gluten free bread flour blend 88 g
- 1½ teaspoons granulated sugar 6 g
- 1 teaspoon instant yeast 3 g
- ½ cup warm water 4 ounces, about 95°F
For the Dough
- 1¾ cups gluten free bread flour blend 245 g, plus more for sprinkling
- 1½ teaspoons kosher salt 9 g
- 1 teaspoon honey 6 g
- ⅜ cup buttermilk or plain whole milk yogurt 3 fluid ounces, at room temperature
- 1 egg 50 g weighed out of shell, at room temperature
- 2 tablespoons unsalted butter 28 g, softened
- risen starter all from above
- 3 tablespoons unsalted butter 42 g, just barely melted
- 1 egg wash 1 egg beaten with 1 tablespoon milk, cream, or water, optional
Instructions
- In a medium-size bowl, place the bread flour, granulated sugar, and instant yeast, and whisk to combine well. Add the warm water, and mix until smooth and well-combined. (If using Caputo Fioreglut flour, add the water to the bowl first, followed by the flour, sugar, and instant yeast.)
- The mixture will be thick and shapeless—don’t worry, that’s exactly what you want. Cover and set the bowl aside in a warm, draft-free location to rise until doubled in size (about 45 minutes). I usually tuck mine near my preheating oven or in a sunny spot on the counter.
- In a stand mixer bowl (or a large bowl with a handheld mixer with dough hooks), add the honey, yogurt or buttermilk, egg, room temperature butter, and risen starter. In a separate bowl, whisk together the bread flour and salt, then add to the mixing bowl on top of the wet ingredients.
- Place the bowl in your stand mixer fitted with the dough hook and knead for about 5 minutes on medium-high speed or until the dough is smooth and stretchy, and appears to have lightened a bit in color. The dough should look silky and pull away from the sides of the bowl slightly.
- Spray a silicone spatula with cooking oil spray, and scrape down the sides of the bowl to make sure all the dry ingredients are incorporated. Transfer the dough to a bowl or proofing bucket large enough for the dough to rise, and cover tightly with plastic wrap or the top of your proofing bucket. Place the dough in the refrigerator for at least 1 hour and up to 5 days.
- On baking day, line a rimmed baking sheet with unbleached parchment paper and set it aside. Turn the dough out onto a lightly floured surface, and sprinkle it very lightly with more flour. Handling the dough very gently so you don’t incorporate too much flour, turn it over a few times until it’s smoother and more cooperative.
- Roll the dough into a 10-inch to 12-inch circle, turning the dough over frequently and sprinkling very lightly with more flour as necessary to prevent sticking. With a pizza wheel or sharp knife, slice the round of dough into 4 equal pieces, each a very wide triangle, then slice each quarter into 3 equal triangles, making 12 triangles total.
- Brush the dough liberally with about half of the 3 tablespoons of barely melted butter, then allow the dough to sit briefly to let the butter set. Separate one triangle from the circle, and roll it gently but securely from base to tip—like you’re tucking it into bed. Place the shaped raw crescent roll on the prepared baking sheet, with the tip of the triangle secured on the bottom.
- Repeat with the remaining pieces of dough, spacing the rolls about 1½ inches apart on the prepared baking sheet. They’ll spread as they rise, so give them breathing room.
- Cover the baking sheet with lightly oiled plastic wrap, and place it in a draft-free location to rise until about 150% of its original size, or 50% more than the size it started (about 45 minutes). The rolls will not double, so do not overproof—this is where many people go wrong with gluten free rolls. If the dough starts to look less smooth on top or break, stop the rising right away.
- About 15 minutes before the end of the rolls’ rise, preheat your oven to 350°F. (If you’ve used Caputo Fioreglut or King Arthur gluten free bread flour, preheat the oven to 375°F instead.)
- Once the rolls have finished rising, remove the plastic wrap and brush the tops generously with the rest of the barely melted butter. If you’ve used Caputo Fioreglut or King Arthur flour, brush the tops with an egg wash as well for that gorgeous golden finish. Place the baking sheets in the center of the preheated oven and bake until the rolls are just browned (about 15 minutes). Remove from the oven, and serve warm—preferably with even more butter.
Notes
Ingredients For Gluten Free Crescent Rolls
For the Starter
| Ingredient | Measurement |
|---|---|
| Gluten free bread flour blend | ⅝ cup (88 g) |
| Granulated sugar | 1½ teaspoons (6 g) |
| Instant yeast | 1 teaspoon (3 g) |
| Warm water (about 95°F) | ½ cup (4 ounces) |
For the Dough
| Ingredient | Measurement |
|---|---|
| Gluten free bread flour blend | 1¾ cups (245 g), plus more for sprinkling |
| Kosher salt | 1½ teaspoons (9 g) |
| Honey | 1 teaspoon (6 g) |
| Buttermilk or plain whole milk yogurt, room temperature | ⅜ cup (3 fluid ounces) |
| Egg, room temperature | 1 (50 g weighed out of shell) |
| Unsalted butter, softened | 2 tablespoons (28 g) |
| Risen starter | All from above |
| Unsalted butter, just barely melted | 3 tablespoons (42 g) |
| Egg wash (optional) | 1 egg beaten with 1 tablespoon milk, cream, or water |
Instructions For Gluten Free Crescent Rolls

Make the Starter
In a medium-size bowl, place the bread flour, granulated sugar, and instant yeast, and whisk to combine well. Add the warm water, and mix until smooth and well-combined. (If using Caputo Fioreglut flour, add the water to the bowl first, followed by the flour, sugar, and instant yeast.)
The mixture will be thick and shapeless—don’t worry, that’s exactly what you want. Cover and set the bowl aside in a warm, draft-free location to rise until doubled in size (about 45 minutes). I usually tuck mine near my preheating oven or in a sunny spot on the counter.
Make the Dough
In a stand mixer bowl (or a large bowl with a handheld mixer with dough hooks), add the honey, yogurt or buttermilk, egg, room temperature butter, and risen starter. In a separate bowl, whisk together the bread flour and salt, then add to the mixing bowl on top of the wet ingredients.
Place the bowl in your stand mixer fitted with the dough hook and knead for about 5 minutes on medium-high speed or until the dough is smooth and stretchy, and appears to have lightened a bit in color. The dough should look silky and pull away from the sides of the bowl slightly.
Spray a silicone spatula with cooking oil spray, and scrape down the sides of the bowl to make sure all the dry ingredients are incorporated. Transfer the dough to a bowl or proofing bucket large enough for the dough to rise, and cover tightly with plastic wrap or the top of your proofing bucket. Place the dough in the refrigerator for at least 1 hour and up to 5 days.
Shape the Rolls
On baking day, line a rimmed baking sheet with unbleached parchment paper and set it aside. Turn the dough out onto a lightly floured surface, and sprinkle it very lightly with more flour. Handling the dough very gently so you don’t incorporate too much flour, turn it over a few times until it’s smoother and more cooperative.
Roll the dough into a 10-inch to 12-inch circle, turning the dough over frequently and sprinkling very lightly with more flour as necessary to prevent sticking. With a pizza wheel or sharp knife, slice the round of dough into 4 equal pieces, each a very wide triangle, then slice each quarter into 3 equal triangles, making 12 triangles total.
Brush the dough liberally with about half of the 3 tablespoons of barely melted butter, then allow the dough to sit briefly to let the butter set. Separate one triangle from the circle, and roll it gently but securely from base to tip—like you’re tucking it into bed. Place the shaped raw crescent roll on the prepared baking sheet, with the tip of the triangle secured on the bottom.
Repeat with the remaining pieces of dough, spacing the rolls about 1½ inches apart on the prepared baking sheet. They’ll spread as they rise, so give them breathing room.
Let the Rolls Rise
Cover the baking sheet with lightly oiled plastic wrap, and place it in a draft-free location to rise until about 150% of its original size, or 50% more than the size it started (about 45 minutes). The rolls will not double, so do not overproof—this is where many people go wrong with gluten free rolls. If the dough starts to look less smooth on top or break, stop the rising right away.
Bake the Rolls
About 15 minutes before the end of the rolls’ rise, preheat your oven to 350°F. (If you’ve used Caputo Fioreglut or King Arthur gluten free bread flour, preheat the oven to 375°F instead.)
Once the rolls have finished rising, remove the plastic wrap and brush the tops generously with the rest of the barely melted butter. If you’ve used Caputo Fioreglut or King Arthur flour, brush the tops with an egg wash as well for that gorgeous golden finish. Place the baking sheets in the center of the preheated oven and bake until the rolls are just browned (about 15 minutes). Remove from the oven, and serve warm—preferably with even more butter.
Substitutions & Swaps
No buttermilk on hand? Plain whole milk yogurt works perfectly and adds a lovely tang to these gluten free rolls. You can also make a quick substitute by adding 1 tablespoon of lemon juice or vinegar to ⅜ cup of regular milk and letting it sit for 5 minutes.
Dairy-free adaptation: Swap the butter for your favorite dairy-free alternative (I love Miyoko’s or Earth Balance), and use a non-dairy yogurt like coconut or almond milk yogurt. The texture stays beautifully tender, making these completely allergy-friendly gluten free sides.
Honey substitute: If you’re avoiding honey, maple syrup or agave nectar work just as well in the same amount. The touch of sweetness balances the yeast flavor and helps with browning.

Troubleshooting Tips
Rolls spreading instead of rising up? Your dough might be too warm or overproofed. Gluten free rolls need gentle handling and shorter rise times than traditional dough—aim for that 150% increase, not doubling. If your kitchen is super warm, shorten the rise time and watch carefully.
Dough feels too sticky to handle? Don’t panic! Gluten free dough naturally feels stickier than wheat dough. Use light dustings of flour on your work surface and rolling pin, but resist the urge to add too much. A bench scraper becomes your best friend for moving sticky dough around.
Rolls turning out dense? This usually means the yeast wasn’t activated properly or the dough was too cold during shaping. Make sure your water for the starter is around 95°F (warm to the touch but not hot), and let the refrigerated dough sit at room temperature for 10-15 minutes before rolling if it feels stiff.
Tops cracking during the rise? Stop proofing immediately—this means you’ve gone too far. The dough’s structure has weakened, and baking them right away will save your batch. They’ll still taste delicious, just with a slightly rustic appearance.
Storage & Meal Prep
Store leftover gluten free crescent rolls in an airtight container at room temperature for up to 2 days, or refrigerate for up to 5 days. They tend to firm up as they cool (typical gluten-free behavior), but a quick 10-second microwave zap brings back that just-baked softness.
For make-ahead magic, you can refrigerate the dough for up to 5 days before shaping, which makes these perfect for holiday meal planning.
Shape the rolls the night before, refrigerate them overnight on the baking sheet, then let them come to room temperature and complete their rise before baking. This time-saving trick has rescued many busy weeknight dinners at my house.
Freeze baked rolls in a freezer bag for up to 3 months. Thaw at room temperature and refresh in a 300°F oven for 5-7 minutes wrapped in foil. They taste nearly as good as fresh—just add butter and nobody will know the difference.
Serving Suggestions
Well… these buttery beauties shine alongside just about anything, but they’re absolutely incredible with a big bowl of soup or stew. I love serving these gluten free rolls with my favorite fall-inspired comfort foods during the cooler months.
They’re also perfect for soaking up gravy at Thanksgiving, turning into mini sandwiches for lunch boxes, or simply enjoying warm with honey butter as an afternoon snack. My kids fight over the last one every single time, which I consider the highest compliment.
For a fun twist, brush the tops with garlic butter after baking, or sprinkle with everything bagel seasoning before the final rise. These adaptable gluten free sides work for casual weeknight dinners and special celebrations alike.
Variations & Dietary Adjustments
Kid-friendly sweet version: Add an extra tablespoon of sugar to the dough and brush the baked rolls with melted butter mixed with cinnamon sugar. They transform into a breakfast treat that rivals any bakery pastry, and they’re still simple enough to count as gluten free recipes easy for busy mornings.
Savory herb rolls: Knead 2 tablespoons of fresh chopped rosemary, thyme, or Italian herbs into the dough before refrigerating. The aromatic oils infuse the rolls with incredible flavor that pairs beautifully with pasta or roasted chicken.
Dairy-free option: As mentioned in substitutions, swap all dairy for plant-based alternatives. Use dairy-free butter and unsweetened coconut or almond milk yogurt. The rolls stay just as tender and flaky—I serve them to dairy-free friends all the time without mentioning they’re allergen-friendly.
Mini rolls for appetizers: Cut the dough circle into 16-20 smaller triangles instead of 12. Reduce baking time to 10-12 minutes and watch them closely. These bite-sized gluten free rolls are perfect for party platters or serving alongside
Gluten Free Crescent Rolls FAQs
Are Pillsbury crescent rolls gluten-free?
Unfortunately, traditional Pillsbury crescent rolls contain wheat flour and are not gluten-free. Man, oh man, I wish they made a gluten-free version! But this homemade recipe gives you that same buttery, flaky texture without any gluten—and honestly, they taste even better fresh from your own oven.
Can you buy gluten-free crescent dough?
Currently, there are very limited options for store-bought gluten free crescent roll dough in the refrigerated section. A few specialty brands occasionally release seasonal products, but they’re not widely available. Making your own gives you complete control over ingredients and guarantees fresh, delicious results every time.
Is there gluten-free refrigerated dough?
Some brands like Wholly Wholesome offer frozen gluten-free pie crusts and pizza dough, but ready-to-bake gluten free rolls in the refrigerated section remain rare. The good news is that this recipe’s make-ahead dough can be refrigerated for up to 5 days, giving you that convenience factor without the premium price tag.
Can croissants be made gluten-free?
Absolutely! While traditional laminated croissant dough is more challenging with gluten-free flour, these crescent rolls offer a wonderful alternative with similar buttery layers and tender texture. According to gluten-free baking experts, using a starter method and proper flour blends creates structure that mimics traditional yeast breads beautifully.
What’s the best gluten free bread flour for these rolls?
Better Batter, Caputo Fioreglut, and King Arthur Measure for Measure all work wonderfully in this recipe. The key is choosing a blend specifically formulated for yeast breads with xanthan gum or psyllium husk already included. All-purpose gluten-free blends won’t provide enough structure for proper rising.
Final Thoughts
These gluten free crescent rolls prove that living gluten-free doesn’t mean missing out on warm, comforting bread fresh from the oven. With a little patience and the right techniques, you’ll have golden, buttery rolls that rival any bakery—and your kitchen will smell absolutely incredible while they bake.


