Gluten-Free No-Bake Peanut Butter Apple Bars
Make gluten-free no-bake peanut butter apple bars with just 7 ingredients. Step-by-step guide with storage tips, substitutions, and troubleshooting.
The first time I made a no-bake bar for my daughter’s after-school snack, I grabbed a store-bought mix—and she read the label and spotted wheat starch hiding in plain sight. That moment sent me straight to my kitchen to figure out a bar she could grab without a second thought.
These gluten-free no-bake peanut butter apple bars came out of that afternoon, and they’ve been on weekly rotation ever since.
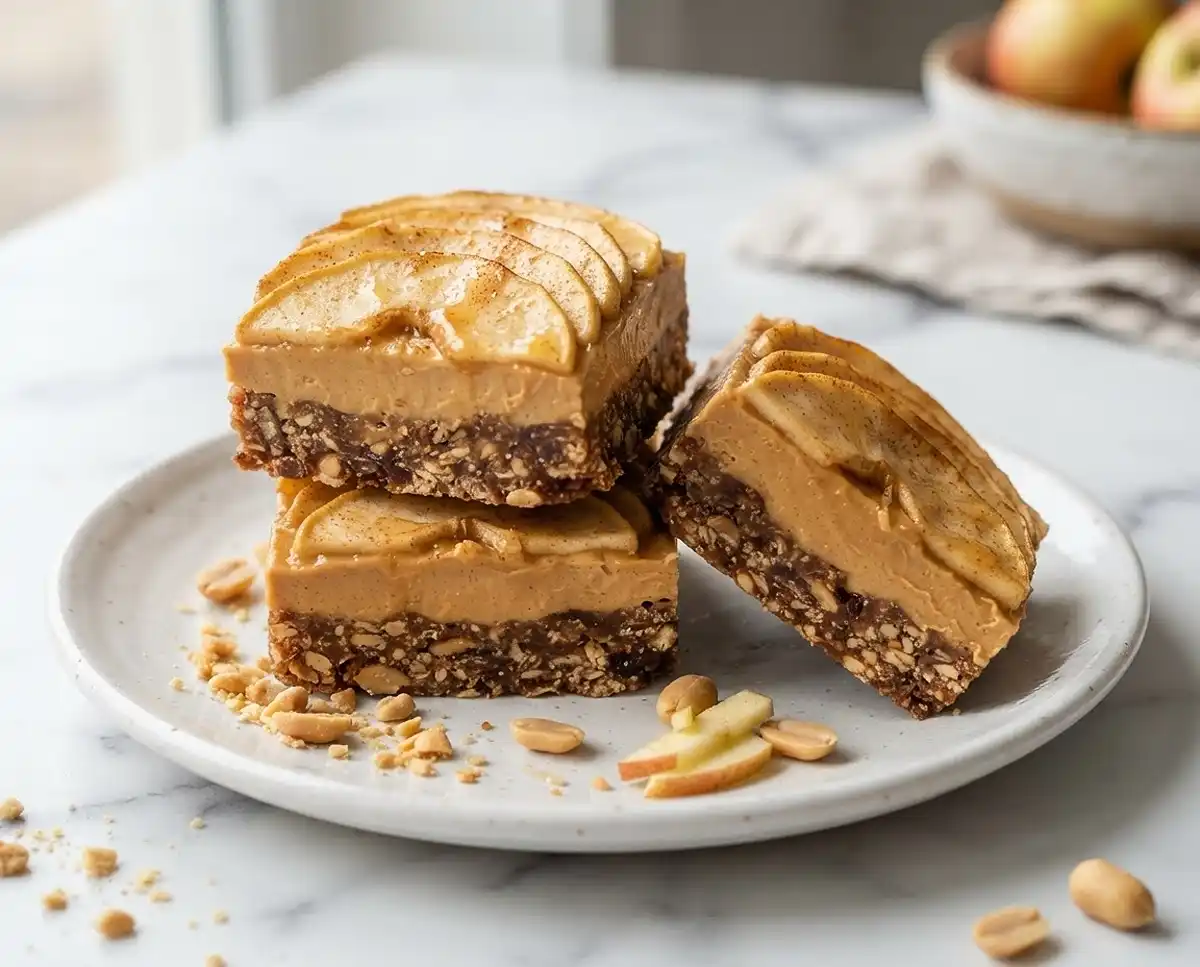
There’s something quietly satisfying about pressing a date crust into a pan and knowing the whole thing will be ready with zero oven time. Well… it almost feels like cheating. You get warm cinnamon apples layered over creamy peanut butter, all sitting on a naturally sweet, chewy base—no baking, no fuss.
Can you believe a snack this wholesome comes together in under 30 minutes of active time? If you’ve ever felt nervous about gluten-free baking, this recipe is your stress-free starting point.
Why You’ll Love These Gluten-Free No-Bake Peanut Butter Apple Bars
- Texture that earns its place: The date crust holds together like a firm brownie—dense, chewy, and satisfying—while the peanut butter layer is as smooth as a spread straight from a fresh jar.
- Beginner-friendly: No oven, no thermometer, no special skills. A food processor and a baking dish are all you need.
- Naturally gluten-free and dairy-free: Every ingredient is naturally free from gluten and dairy, making these bars safe for a wide range of dietary needs.
- Works for lunchboxes, road trips, and holiday snack boards: These bars hold up well chilled and are easy to portion, wrap, and pack.
The Secret to Perfect Gluten-Free No-Bake Peanut Butter Apple Bars
- Medjool dates are the binder: Their natural sugar and moisture content create a crust that holds without eggs, flour, or heat. Dry dates will crumble—if yours feel stiff, soak them in warm water for 10 minutes before processing.
- Pulse, don’t blend: Over-processing turns the crust into a paste that’s too dense to press evenly. Stop when the mixture is just combined but still slightly textured—you want it to stick when pressed between your fingers, not turn into dough.
- Warm the apples gently: Cooking the apple slices for just 5 minutes softens them enough to release excess moisture without turning them mushy. This keeps the bar from getting soggy after chilling.
- Chill before cutting: Thirty minutes in the refrigerator is non-negotiable. The peanut butter firms up and the layers set, giving you clean, even slices instead of a smeared mess.
Table of Contents
Ingredients
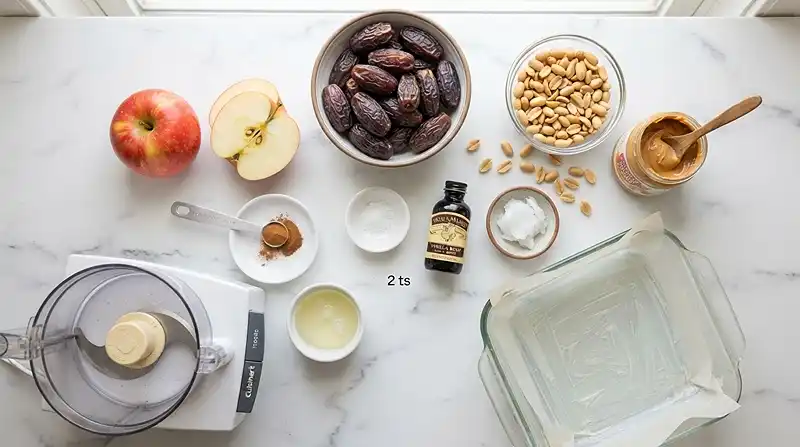
Crust
| Ingredient | Amount | Notes |
|---|---|---|
| Medjool dates, pitted | 2 cups (about 260 g / 15–16 dates) | Soft and fresh gives the best result; soak if dry |
| Dry roasted peanuts | 1 cup | Adds crunch and structure to the base |
| Vanilla bean paste or vanilla extract | 1 teaspoon | Vanilla bean paste gives deeper flavor |
| Sea salt | Pinch | Balances the sweetness of the dates |
Topping
| Ingredient | Amount | Notes |
|---|---|---|
| Natural crunchy peanut butter, certified gluten-free | 1 cup | Stir well before measuring |
| Coconut oil | 2 teaspoons | For cooking the apples; plus extra for greasing |
| Medium apples, thinly sliced | 2 (about 300 g) | Honeycrisp or Fuji hold their shape well |
| Ground cinnamon | 1 teaspoon | Sprinkled over the cooked apples |
Gluten-Free No-Bake Peanut Butter Apple Bars Instructions
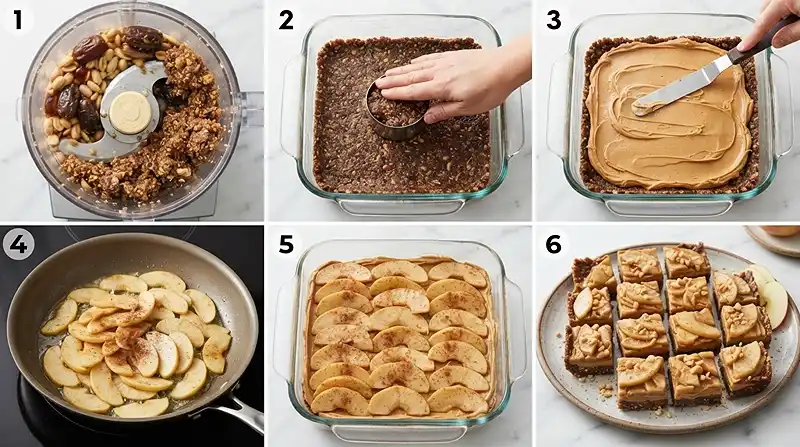
- Prepare the pan. Lightly grease an 8×8-inch glass baking dish with coconut oil or nonstick cooking spray. Set aside.
- Make the crust. In a food processor, combine the dates, roasted peanuts, vanilla, and a pinch of sea salt. Pulse for about 1 minute, until the mixture is well combined but still slightly textured. If the dates are dry, add 1 tablespoon of water to help the mixture come together.
- Press the crust. Transfer the date mixture to the prepared dish. Press it firmly and evenly into the bottom to create a solid base layer.
- Spread the peanut butter. Spoon the peanut butter over the date layer and spread it into an even coat using the back of a spoon or an offset spatula. Work slowly—it spreads more easily at room temperature.
- Cook the apples. Heat 2 teaspoons of coconut oil in a large skillet over medium-low heat. Add the apple slices and cook for about 5 minutes, stirring occasionally, until slightly softened but still holding their shape. You’re looking for translucent edges with a gentle golden color.
- Season the apples. Sprinkle the apples with the cinnamon and a pinch of sea salt. Stir to coat evenly.
- Layer the apples. Arrange the warm apple slices in an even layer over the peanut butter. Overlap them slightly for full coverage.
- Chill. Refrigerate for 30 minutes, or until the bars are firm and easy to slice.
- Slice and serve. Cut into 16 bars and serve chilled. Store leftovers in an airtight container in the refrigerator.
Make It Your Own
Swap the crunchy peanut butter for almond butter or sunflower seed butter if peanuts are a concern. Both options have a similar fat content, so the spreadability stays the same. Sunflower seed butter works especially well for school-safe lunchbox treats.
You know… the apple variety matters more than you’d think. Honeycrisp and Fuji hold their shape beautifully after a quick sauté. Softer apples like McIntosh will work but tend to release more liquid, so pat them dry before layering to protect the peanut butter underneath.
If you’d like a different flavor profile, try adding a tablespoon of matcha powder to the date crust for an earthy, slightly bitter contrast to the sweet apples. It pairs especially well with almond butter instead of peanut butter.
For a nut-free version that’s still rich and satisfying, tahini makes a surprisingly good substitute. It’s thinner than peanut butter, so chill the bars an extra 15 minutes to help the layer set firmly before slicing. According to nutrition research on sesame-based spreads, tahini is also a solid source of plant-based calcium and healthy fats.
Want to lean into the peanut butter apple snack angle even further? Drizzle a little melted dark chocolate over the top before refrigerating. It sets into a thin shell that makes these bars feel a lot closer to dessert.
Common Problems & Solutions
The crust won’t stick together. Your dates are likely too dry. Add 1 tablespoon of warm water to the food processor and pulse again. If the mixture still crumbles, add another tablespoon—but add slowly, since too much water makes the base sticky and hard to press.
The peanut butter is too stiff to spread. Natural peanut butter thickens when cold. Let it sit at room temperature for 15–20 minutes before using, or place the open jar in a bowl of warm water for a few minutes. It should spread like soft frosting once it loosens up.
The bars are soggy after chilling. Excess moisture from the apples is usually the culprit. Make sure to cook them long enough to drive off surface moisture, and don’t skip the cinnamon-and-salt toss—it draws out a little more liquid before the apples hit the peanut butter layer.
Man, oh man… if your bars slide apart when you cut them, your crust wasn’t pressed firmly enough. Use the flat bottom of a measuring cup to really pack it in before adding the peanut butter layer. A firmly pressed crust is what makes every slice hold together cleanly.
The apple layer slides off when sliced. This usually happens if the peanut butter layer isn’t thick enough to anchor the apples, or if the bars weren’t chilled long enough. Chill for the full 30 minutes—or up to an hour if your kitchen runs warm. Cold peanut butter grips the apple slices like glue.
Storage & Meal Prep
| Method | Duration | Notes |
|---|---|---|
| Counter | Not recommended | Apples and peanut butter layer best kept cold |
| Fridge | Up to 5 days | Store in an airtight container; serve chilled |
| Freezer | Up to 2 months | Wrap bars individually; thaw in the refrigerator overnight |
These bars are genuinely meal-prep friendly. Make a batch on Sunday, wrap individual bars in parchment, and stack them in a container for the week. They thaw beautifully overnight in the fridge with no texture loss.
If you freeze them, don’t try to thaw at room temperature—the apple layer softens unevenly and can get a little watery. A slow overnight thaw in the refrigerator keeps everything firm and cohesive.
Gluten-Free No-Bake Peanut Butter Apple Bars FAQs
Can I use regular peanut butter instead of natural?
Natural peanut butter is strongly recommended here. Conventional peanut butter contains added sugar and stabilizers that change the texture of the layer—it won’t set as cleanly after chilling and can make the bars overly sweet. If natural peanut butter isn’t available, look for a version with two ingredients: peanuts and salt.
How do I keep the bars from crumbling when I cut them?
Chill the bars for the full 30 minutes before slicing—longer if your fridge runs warm. Use a sharp knife and press straight down rather than sawing back and forth. If the bars still crumble, your crust may need more moisture; add a tablespoon of water to the date mixture next time.
What’s the best apple variety to use in this recipe?
Honeycrisp and Fuji are the top picks because they hold their shape after cooking and have a natural sweetness that complements the peanut butter. Granny Smith works well if you prefer a slightly tart contrast. Avoid very soft apples like McIntosh, which can turn mushy and release too much liquid.
Why did my date crust turn out too sticky to press?
Too much liquid in the mixture is usually the cause. This happens if the dates are very fresh and moist, or if you added too much water while processing. If the mixture is sticking to your hands, wet your fingers lightly before pressing—or lay a sheet of parchment over the mixture and press through that.
Can I make these bars nut-free for school lunches?
Yes. Swap both the roasted peanuts and the peanut butter for sunflower seeds and certified nut-free sunflower seed butter. The texture and structure stay very similar, and sunflower seed butter has a mild, slightly toasty flavor that pairs well with cinnamon apples. Always check labels to confirm nut-free processing.
Serving Suggestions
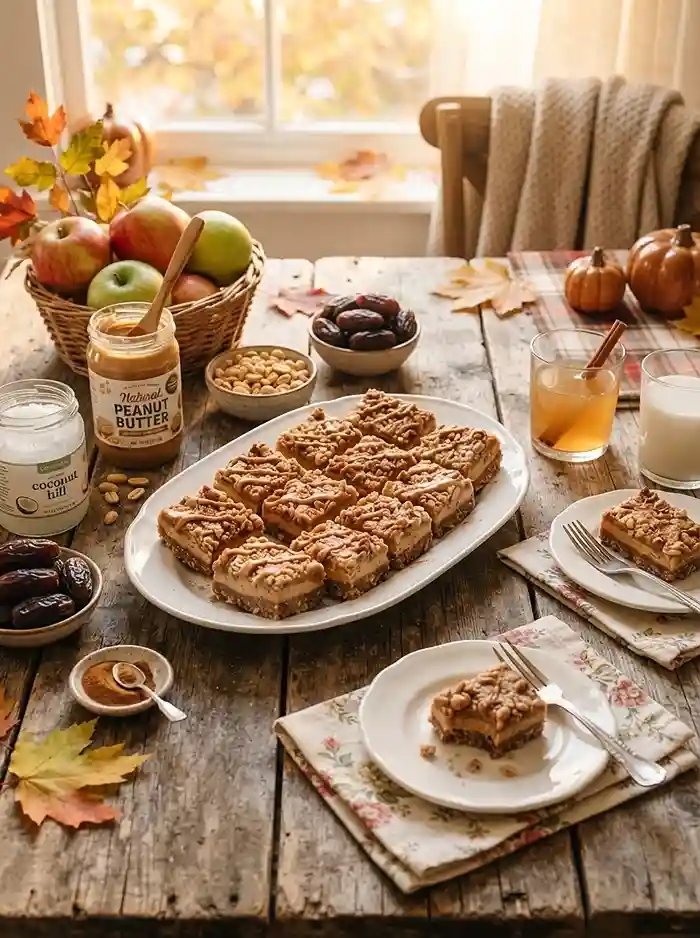
These bars are genuinely at home on a Thanksgiving snack board alongside dried cranberries and dark chocolate pieces—they look festive and hold up beautifully at room temperature for an hour or two.
Pair them with a cold glass of oat milk or a warm mug from this gluten-free coconut matcha latte for a snack that actually feels like a treat.
If you’re building out a full gluten-free snack spread, these bars complement the flavors in these gluten-free blueberry almond crumb squares beautifully—fruit-forward, naturally sweet, and easy to prep ahead.
For something lighter to round out a snack plate, these gluten-free yogurt noodles make a fun, unexpected pairing that kids especially love.
If you make these bars, I’d genuinely love to hear how they turned out—drop a comment below with any tweaks you tried or share a photo on Pinterest so others can find them too.
Did you go almond butter? Add chocolate? Use a tart apple? Tell me everything. Real kitchen feedback from real people is what makes these recipes better for everyone.
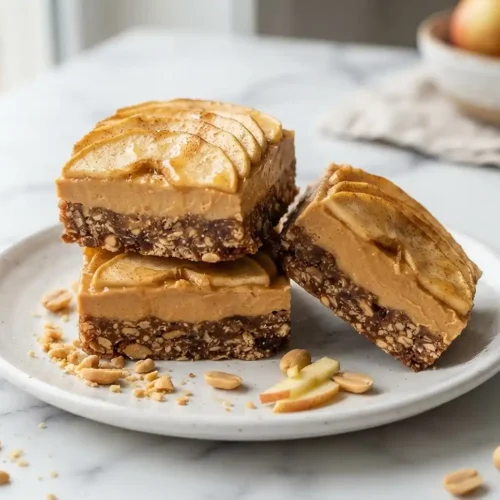
Easy Gluten-Free No-Bake Peanut Butter Apple Bars
Equipment
- 8×8-inch baking dish
- Food processor
- Large skillet
- Offset Spatula or Spoon
- Measuring cups and spoons
- Refrigerator
Ingredients
Crust
- 2 cups Medjool dates, pitted about 260 g / 15–16 dates; soak if dry
- 1 cup Dry roasted peanuts adds crunch and structure
- 1 teaspoon Vanilla bean paste or vanilla extract vanilla bean paste gives deeper flavor
- 1 pinch Sea salt balances sweetness
Topping
- 1 cup Natural crunchy peanut butter certified gluten-free; stir well before measuring
- 2 teaspoons Coconut oil plus extra for greasing the pan
- 2 Medium apples about 300 g; thinly sliced; Honeycrisp or Fuji recommended
- 1 teaspoon Ground cinnamon for seasoning apples
Instructions
- Lightly grease an 8×8-inch baking dish with coconut oil or nonstick spray and set aside.
- Combine the dates, roasted peanuts, vanilla, and sea salt in a food processor. Pulse until well combined but still slightly textured. Add 1 tablespoon of water if the dates are too dry.
- Press the date mixture firmly and evenly into the prepared baking dish to form the crust.
- Spread the peanut butter evenly over the crust using the back of a spoon or an offset spatula.
- Heat the coconut oil in a large skillet over medium-low heat. Cook the apple slices for about 5 minutes until slightly softened but still holding their shape.
- Sprinkle the apples with cinnamon and a pinch of sea salt, then stir to coat evenly.
- Arrange the warm apples evenly over the peanut butter layer, overlapping slightly if needed.
- Refrigerate for 30 minutes until firm.
- Slice into 16 bars and serve chilled. Store leftovers in an airtight container in the refrigerator.