Gluten-Free Sushi Cups
Learn how to make gluten-free sushi cups with salmon, rice, and nori in a muffin tin. Step-by-step recipe with baking tips and storage advice.
I learned the hard way that broiling salmon and wandering off to answer a homework question is a bad plan. By the time I came back, the smoke alarm was singing and my salmon cubes had turned into tiny jerky nuggets. My kids still call that night the Great Fish Fiasco.
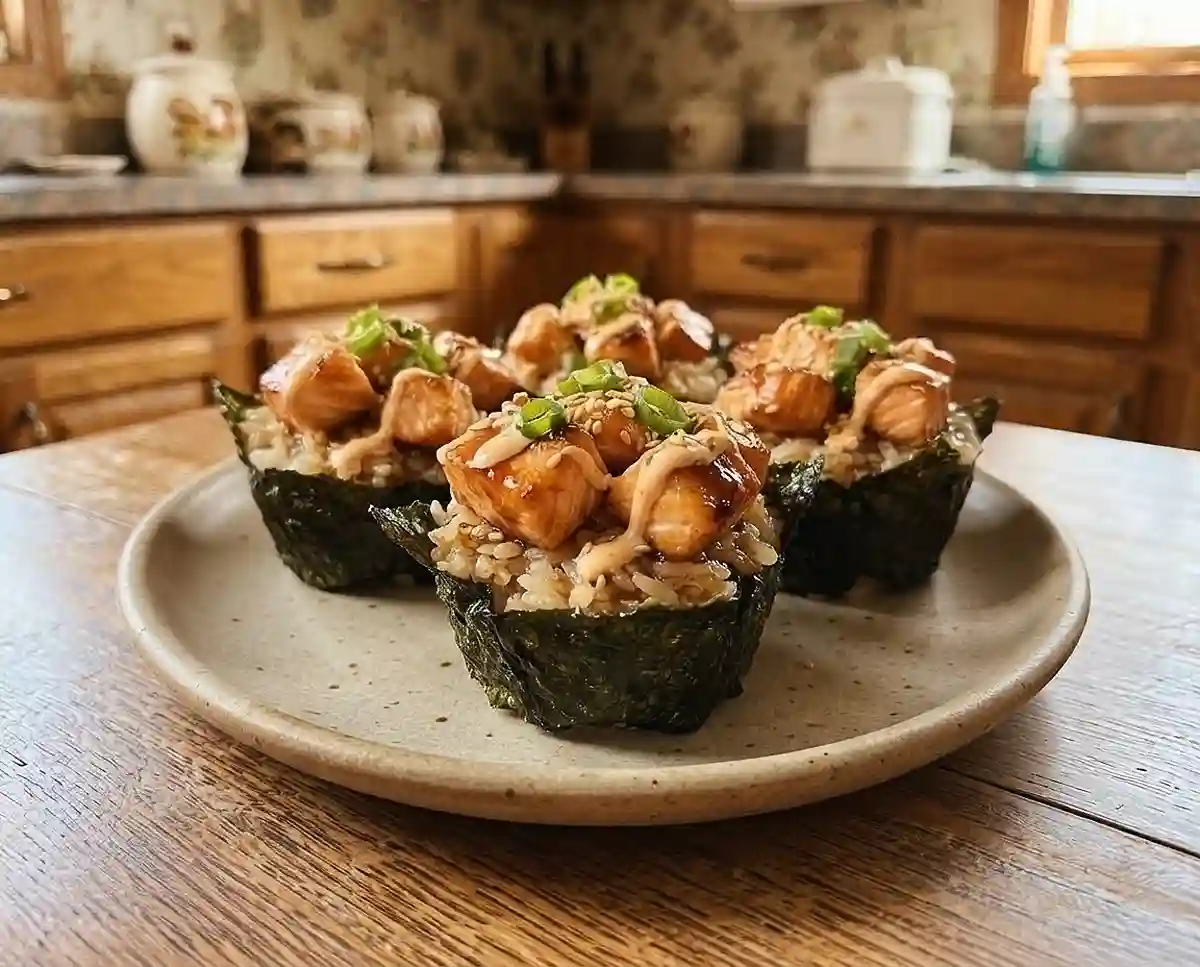
Honestly… that disaster is why I now stand at the oven for the whole broil step. These gluten-free sushi cups take the flavors of a spicy salmon roll and bake them into a muffin tin. Each cup has a rice base, a crisp nori wrapper, and juicy, golden salmon on top.
These sushi cups are a fun, bite-sized party appetizer that will have everyone reaching for seconds! Explore more gluten-free party snacks for crowd-pleasing ideas that could make your next gathering unforgettable!
What Makes These Gluten-Free Sushi Cups Worth Making
- Texture and flavor: Tender, lightly spicy salmon sits on seasoned rice, and the nori edges crisp up so they crackle like a paper lantern.
- Difficulty level: Beginner-friendly. There’s no rolling, and you only need two bowls and a 12-cup muffin tin.
- Unique advantages: They’re dairy-free, fully cooked, and easy to make gluten-free with tamari, so they work for cautious eaters and sushi skeptics.
- Best for: Weeknight dinners, party appetizers, and lunch-box prep, since each cup makes a neat single portion.
The Science Behind Great Gluten-Free Sushi Cups
Great sushi cups come down to moisture control and a two-stage bake. Each step below solves a problem I ran into during testing.
- Dry, even cubes cook evenly. Patting the salmon dry removes surface water that would steam the fish instead of browning it. Bite-size pieces are about the same thickness, so they finish at the same time.
- Tamari keeps the flavor and drops the gluten. Regular soy sauce is typically brewed with wheat. Tamari labeled gluten-free gives you the same salty, savory depth.
- Mayonnaise in the marinade protects the salmon. The fat coats each cube, which helps it stay moist and brown at the edges under the broiler.
- Baking, then broiling, gives you both doneness and color. The 400°F bake cooks the fish gently. A short broil then browns the tops quickly, before the rice dries out.
Table of Contents
Ingredients
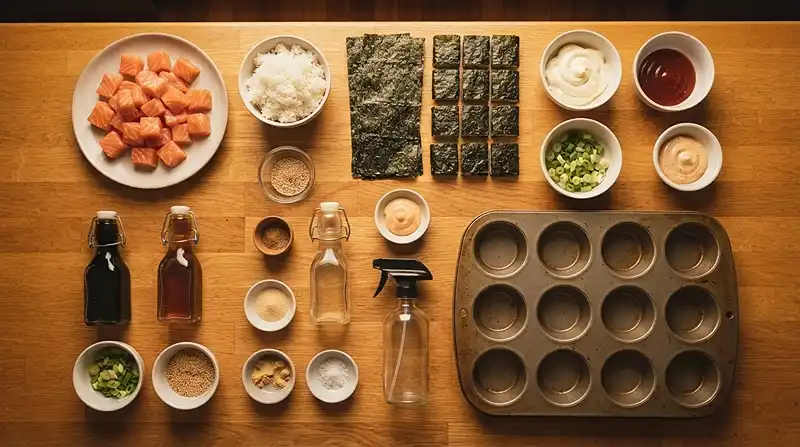
This recipe makes 12 sushi cups. Everything is grouped by how it’s used so you can prep in order.
For the Salmon
- 1½ pounds skinless salmon, cut into bite-size cubes
- 2 tablespoons gluten-free tamari
- 1 tablespoon mayonnaise, labeled gluten-free
- ½ tablespoon sriracha or hot sauce, labeled gluten-free
- 1½ teaspoons sesame oil
- ½ teaspoon garlic powder, labeled gluten-free
- ½ teaspoon ground ginger, labeled gluten-free
- Pinch of salt
For the Rice and Cups
- 1¾ cups cooked jasmine rice or sushi rice
- 2 teaspoons rice vinegar, labeled gluten-free
- 3 nori sheets, cut into 4 squares each
- Avocado oil spray, labeled gluten-free
Optional Toppings
- 3 tablespoons sliced scallions
- 1 tablespoon sesame seeds
- ½ cup spicy mayonnaise, made with mayonnaise, gluten-free sriracha, and a little sesame oil
Nori is the dried seaweed used to wrap sushi rolls. Plain nori sheets are naturally gluten-free, but the Celiac Disease Foundation’s label-reading guide is a handy way to double-check sauces, tamari, and flavored products.
Either jasmine or sushi rice works here. Sushi rice is a bit stickier, while jasmine is softer and a little more fragrant.
Instructions
Prep and Season
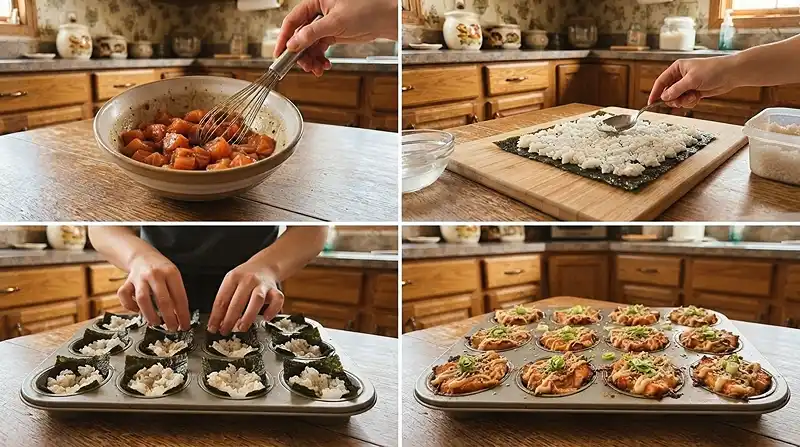
- Prepare the oven: Preheat the oven to 400°F (200°C). Lightly spray a 12-cup muffin tin with avocado oil spray.
- Season the salmon: Pat the salmon dry, remove any skin, and cut it into bite-size cubes. Place the cubes in a bowl with the gluten-free tamari, mayonnaise, sriracha, sesame oil, garlic powder, ginger, and salt. Gently toss until evenly coated and glossy. Pro Tip: Toss with a spatula instead of your hands so the cubes stay whole.
- Season the rice: In a separate bowl, combine the cooked rice and rice vinegar. Stir gently until the vinegar is evenly distributed and the rice smells lightly tangy.
- Prepare the nori: Cut each nori sheet into four equal squares, making 12 pieces in total.
Assemble the Cups
- Assemble the cups: Place approximately 1½ tablespoons of seasoned rice onto each nori square. Gently spread the rice over the surface without tearing the seaweed. Pro Tip: Wet your fingertips slightly so the rice won’t stick to them.
- Fill the muffin tin: Press each rice-covered nori square into a prepared muffin cup, with the rice facing upward. Add 4–5 pieces of seasoned salmon to each cup.
Bake and Finish
- Bake: Bake for 8–10 minutes, until the salmon is nearly cooked through and turns opaque at the edges.
- Broil: Move the muffin tin to the upper oven rack and broil on high for 2–5 minutes, watching closely, until the salmon is golden and cooked to an internal temperature of 145°F (63°C). Pro Tip: Confirm with a food thermometer, since USDA’s safe temperature chart lists 145°F for fish.
- Cool slightly: Let the sushi cups rest in the muffin tin for 5 minutes before carefully removing them. This helps the nori set so the cups hold their shape.
- Add toppings and serve: Finish with spicy mayonnaise, sliced scallions, and sesame seeds, if desired. Serve warm.
Ways to Customize This Recipe
Turn up the heat by adding more sriracha to the spicy mayonnaise instead of the salmon marinade. Keeping the marinade as written protects the baked salmon sushi recipe’s balance, while the drizzle lets everyone choose their own spice level.
Look… if you love baked sushi rolls, think of these cups as the simpler cousin. You get the same salmon-and-rice flavor, but you skip the rolling, slicing, and sticky counters. They’re also easier to portion for a crowd.
Salmon cups are great with extra toppings. Thin avocado slices, shredded carrot, or cucumber matchsticks add freshness against the warm fish. Add them after baking, since raw vegetables turn limp under the broiler.
Sushi rice makes a slightly stickier base, while jasmine gives a softer, more fragrant one. Both work in this recipe. I haven’t tested cauliflower rice, so I can’t promise it will hold together in the nori cups.
If Something Went Wrong, Start Here
Problem: The salmon turned dry. Solution: Shorten the broil and check the temperature at 2 minutes. Explanation: Oh wow, salmon goes from juicy to chalky quickly under the broiler, because small cubes have very little thermal cushion once the surface is hot.
Problem: The nori tore while I spread the rice. Solution: Use a light touch and press the rice outward from the center. Explanation: Dry nori is brittle until the rice moisture softens it slightly, so gentle pressure works better than scraping.
Problem: The rice at the top feels hard. Solution: Press the rice down gently into the cup and keep the salmon in a snug layer on top. Explanation: Exposed rice grains dry out under the broiler, while covered rice stays tender.
Problem: The cups fell apart when I removed them. Solution: Wait the full 5 minutes before lifting them out. Explanation: As the cups cool, the rice firms up and the nori sets, which gives you a sturdy wrapper.
Storage & Meal Prep
| Method | Duration | Notes |
|---|---|---|
| Counter | Up to 2 hours | Cooked salmon should not sit out longer |
| Fridge | 3-4 days | Airtight container; bring to room temp |
| Freezer | 2-3 months | Wrap individually |
Reheat chilled cups in a 350°F oven for about 10 minutes, or microwave them for 30 to 45 seconds. The oven keeps the nori crisper, while the microwave is faster for lunches.
For no-waste ideas, chop any leftover cups and toss them into a rice bowl with cucumber and a little tamari. Stir leftover spicy mayonnaise into tuna or chicken salad.
Frequently Asked Questions
Can I make gluten-free sushi cups ahead of time?
Yes, you can prep the components up to a day ahead. Keep the seasoned salmon and cooked rice in separate airtight containers in the fridge, then assemble and bake when you’re ready. Bake straight from assembly so the nori stays crisp.
How do I keep the nori from getting soggy?
Assemble the cups right before baking and serve them warm. Nori softens as it sits against wet rice and sauces. Add the spicy mayonnaise only at the end, just before serving.
What’s the best rice for sushi cups?
Sushi rice or jasmine rice both work well. Sushi rice is stickier and holds together firmly, while jasmine is softer and slightly more fragrant. Either one needs to be fully cooked and cooled enough to handle before you season it.
Why did my salmon cook unevenly?
Uneven cubes are the usual cause. Cut the salmon into pieces of similar size so they finish at the same time. Pat them dry first, and use a thermometer to confirm 145°F in the thickest piece.
Can I use regular soy sauce?
Not if you need the recipe to be gluten-free. Regular soy sauce usually contains wheat, so choose a tamari labeled gluten-free. Always check the label on your sriracha, mayonnaise, and rice vinegar too.
Serving Suggestions
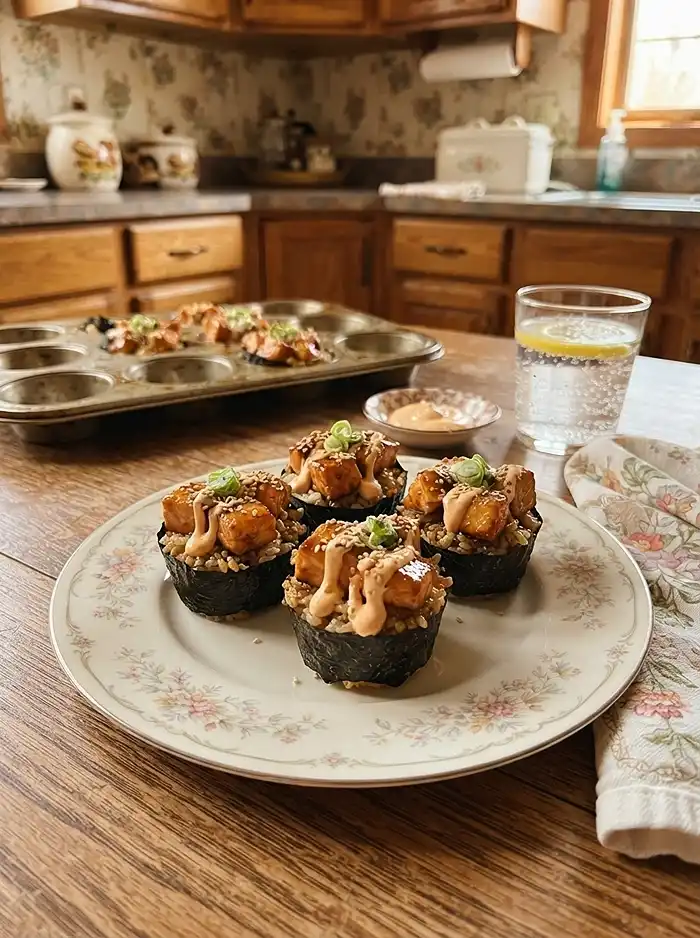
These cups are a hit at a Fourth of July cookout, where they sit next to burgers as the one appetizer that disappears first. Pair them with a dairy-free chili cream cheese dip and a crisp cucumber salad.
For back-to-school weeks, pack them next to gluten-free pizza pinwheel lunch boxes. For an afternoon snack, a handful of gluten-free pizza trail mix adds a crunchy contrast.
Give these gluten-free sushi cups a try this week, then pin them to your Pinterest dinner board so you can find them again. Tell me in the comments how your batch turned out and which toppings you tried. A star rating helps other readers know what to expect!
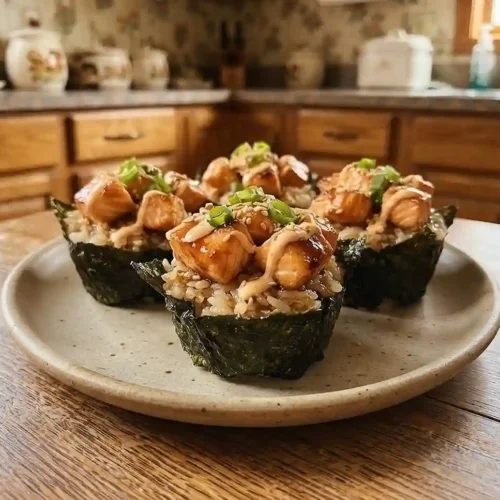
Gluten-Free Sushi Cups
Equipment
- 12-cup muffin tin
- Two mixing bowls
- Measuring spoons
- Knife
- Cutting board
- Food Thermometer
Ingredients
For the Salmon
- 1½ pounds skinless salmon cut into bite-size cubes
- 2 tablespoons gluten-free tamari
- 1 tablespoon mayonnaise labeled gluten-free
- ½ tablespoon sriracha or hot sauce labeled gluten-free
- 1½ teaspoons sesame oil
- ½ teaspoon garlic powder labeled gluten-free
- ½ teaspoon ground ginger labeled gluten-free
- 1 pinch salt
For the Rice and Cups
- 1¾ cups cooked jasmine rice or sushi rice
- 2 teaspoons rice vinegar labeled gluten-free
- 3 sheets nori cut into 4 squares each
- avocado oil spray labeled gluten-free
Optional Toppings
- 3 tablespoons sliced scallions
- 1 tablespoon sesame seeds
- ½ cup spicy mayonnaise made with mayonnaise, gluten-free sriracha, and a little sesame oil
Instructions
- Preheat the oven to 400°F (200°C). Lightly spray a 12-cup muffin tin with avocado oil spray.
- Pat the salmon dry, remove any skin, and cut it into bite-size cubes. Place the cubes in a bowl with the gluten-free tamari, mayonnaise, sriracha, sesame oil, garlic powder, ginger, and salt. Gently toss until evenly coated and glossy.
- In a separate bowl, combine the cooked rice and rice vinegar. Stir gently until the vinegar is evenly distributed.
- Cut each nori sheet into four equal squares, making 12 pieces in total.
- Place approximately 1½ tablespoons of seasoned rice onto each nori square. Gently spread the rice over the surface without tearing the seaweed. Wet your fingertips slightly to prevent the rice from sticking.
- Press each rice-covered nori square into a prepared muffin cup, with the rice facing upward. Add 4–5 pieces of seasoned salmon to each cup.
- Bake for 8–10 minutes, until the salmon is nearly cooked through and turns opaque at the edges.
- Move the muffin tin to the upper oven rack and broil on high for 2–5 minutes, watching closely, until the salmon is golden and cooked to an internal temperature of 145°F (63°C). Confirm doneness with a food thermometer.
- Let the sushi cups rest in the muffin tin for 5 minutes before carefully removing them. This helps the nori set so the cups hold their shape.
- Finish with spicy mayonnaise, sliced scallions, and sesame seeds, if desired. Serve warm.