No-Fail Gluten Free Pie Crust Recipe
Master this no-fail gluten free pie crust recipe with our foolproof method. Flaky, buttery, and easier than you think—perfect for holidays and weeknight desserts!
You know what? I used to think making a gluten free pie crust was some kind of dark kitchen magic reserved for professional bakers. My first attempt looked more like a crumbly science experiment than anything you’d want to serve at Thanksgiving dinner.
But here’s the thing—once I figured out the secret (hint: it’s all about the right ratio of fats and not overthinking it), everything changed.
This gluten free pie crust recipe is genuinely foolproof, and I mean that. Whether you’re rolling out your very first piecrust or you’ve been gluten-free for years, this method works every single time. It’s buttery, flaky, and holds together beautifully without any of that cardboard texture we’ve all experienced with sad gluten-free baking fails.
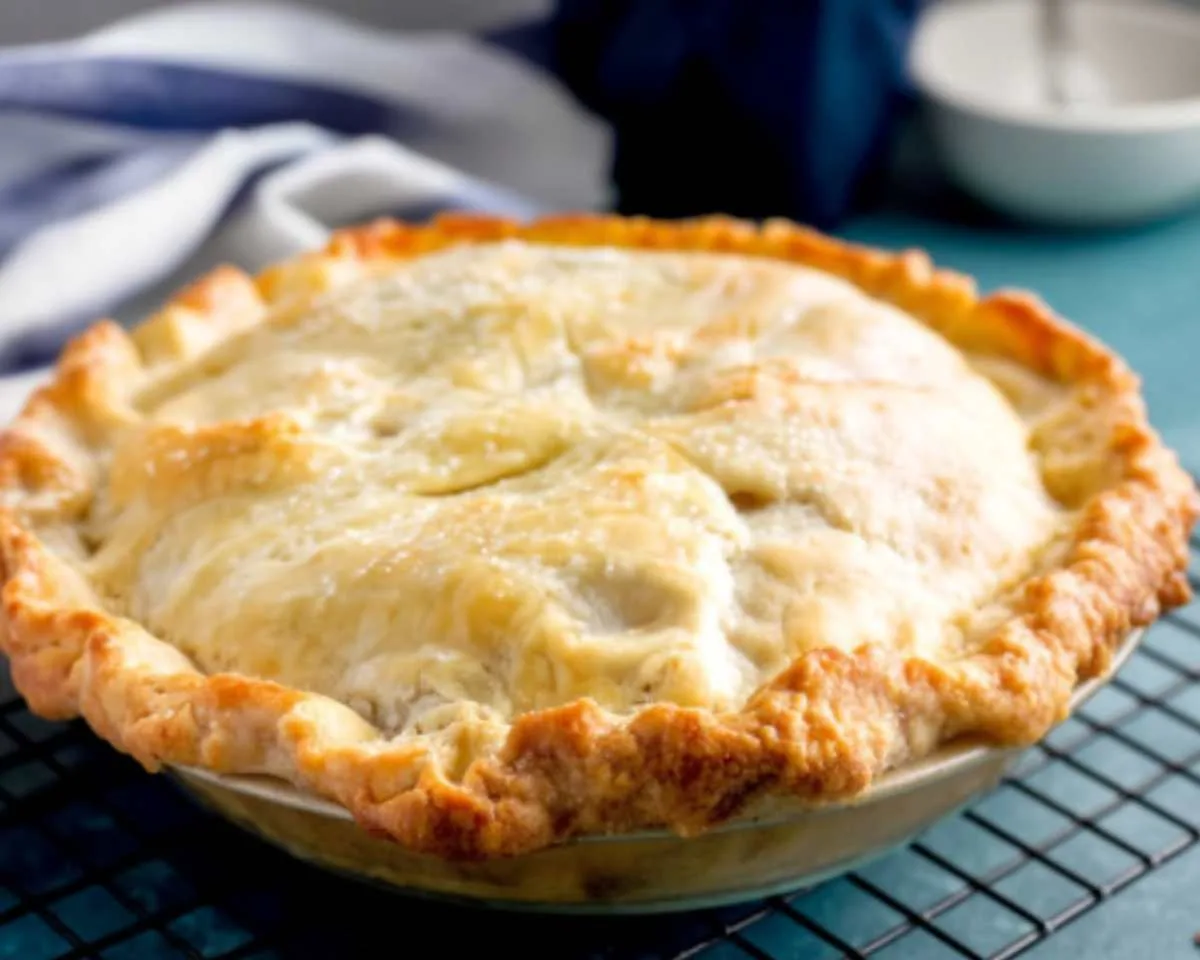
I’ve made this best gluten-free piecrust for everything from classic apple pie to savory quiches, and it never disappoints. The combination of butter and shortening creates those gorgeous flaky layers, while a touch of baking powder gives it just enough structure to roll out easily. Trust me, your family won’t even know it’s gluten-free—they’ll just know it’s delicious.
Table of Contents
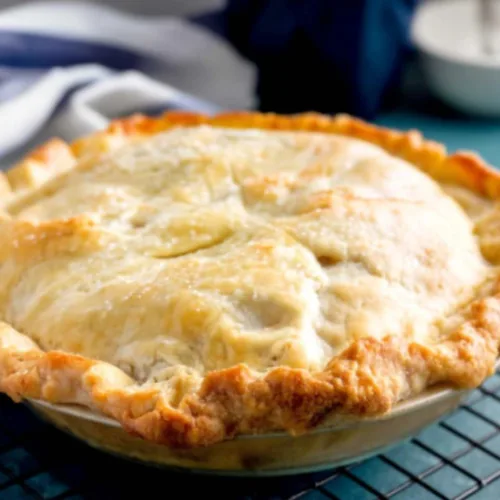
The BEST No-Fail Gluten Free Pie Crust
Equipment
- Stand mixer or mixing bowl
- Rolling Pin
- 9-inch pie plate
- Plastic wrap
- Pastry brush
- Fork
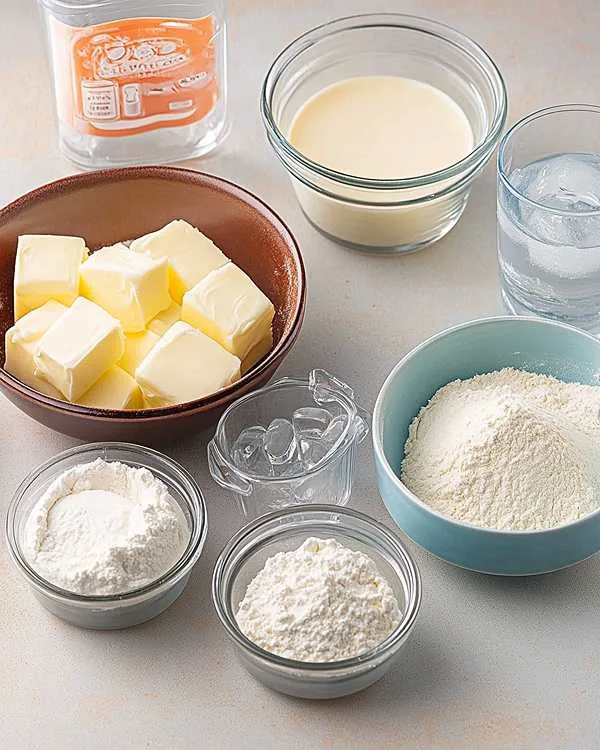
Ingredients
- ½ cup salted butter cold and cut into 8 pieces
- ⅓ cup shortening Spectrum brand recommended
- ⅓ cup butter-flavored Crisco shortening
- 1 tablespoon sugar
- ½ teaspoon baking powder
- 1 teaspoon salt
- 1 tablespoon dry milk
- 2 ¾ cups high quality gluten free flour divided – Bob’s Red Mill 1-to-1 or King Arthur Measure for Measure recommended
- ⅔ cup ice-cold water
- 1 egg for egg wash, optional
Instructions
- In the bowl of your stand mixer, combine the cold butter and both shortenings. Mix on medium speed for about 30 seconds until you’ve got a fairly creamy mixture with visible butter pieces scattered throughout.
- Add the sugar, baking powder, salt, dry milk, and 1 ½ cups of gluten free flour to the mixer. Use the stir setting (or lowest speed) and mix for just 10 seconds.
- Pour in the remaining 1 ¼ cups flour along with the ice-cold water, then mix just until everything comes together. The dough won’t look smooth like regular cookie dough—it should look a bit choppy and rough. If it seems overly dry and won’t hold together when you squeeze it, add one more tablespoon of water.
- Lay out a large sheet of plastic wrap on your counter. Scoop out half the dough and gently pat it into a disc shape, then wrap it tightly in the plastic wrap. Repeat with the second half, and pop both discs into the fridge for 30-60 minutes.
- When you’re ready to bake, preheat your oven to 375°F. Take one disc from the fridge and let it sit for just a minute or two.
- Lightly dust your work surface with about 1 tablespoon of gluten free flour. Roll the dough into a circle about 2 inches larger than your pie plate, working from the center outward.
- Carefully invert the rolled dough onto your pie plate, gently pressing it into the bottom and sides. Use a fork to poke 2-3 holes in the bottom.
- Whisk the egg in a small bowl and use a pastry brush to lightly coat the crust. This gives you gorgeous golden color and crispy edges.
- For a single pre-baked crust, bake for 14-17 minutes until lightly golden and fragrant. For a double-crust pie, fill your bottom crust, roll out the second disc and place it on top. Seal the edges, cut steam vents, brush with egg wash, sprinkle with sugar, and bake according to your filling’s recipe (typically 50-60 minutes).
Notes
No-Fail Gluten Free Pie Crust Recipe Ingredients
| Ingredient | Amount | Notes |
|---|---|---|
| Salted butter (cold) | ½ cup | Cut into 8 pieces |
| Shortening | ⅓ cup | Spectrum brand recommended |
| Butter-flavored Crisco shortening | ⅓ cup | Adds extra flakiness |
| Sugar | 1 tablespoon | Balances flavor |
| Baking powder | ½ teaspoon | Creates tender texture |
| Salt | 1 teaspoon | Enhances overall taste |
| Dry milk | 1 tablespoon | Adds richness |
| High-quality gluten free flour | 2 ¾ cups | See notes for best brands |
| Ice-cold water | ⅔ cup | Must be very cold |
| Egg (optional) | 1 | For golden egg wash |
Instructions
Step 1: In the bowl of your stand mixer, combine the cold butter and both shortenings. Mix on medium speed for about 30 seconds until you’ve got a fairly creamy mixture with visible butter pieces scattered throughout. This combination of fats is what makes your gluten free pastry incredibly flaky, so don’t skip either one.
Step 2: Add the sugar, baking powder, salt, dry milk, and 1 ½ cups of your gluten free flour to the mixer. Use the stir setting (or lowest speed) and mix for just 10 seconds. You’re not trying to fully incorporate everything yet—just getting these dry ingredients acquainted with the fats.
Step 3: Pour in the remaining 1 ¼ cups flour along with that ice-cold water, then mix just until everything comes together. Here’s where people often panic—the dough won’t look smooth like regular cookie dough, and that’s exactly right! It should look a bit choppy and rough. If it seems overly dry and won’t hold together when you squeeze it, add one more tablespoon of water.
Step 4: Lay out a large sheet of plastic wrap on your counter. Scoop out half the dough and gently pat it into a disc shape, then wrap it tightly in the plastic wrap. Repeat with the second half, and pop both discs into the fridge for 30-60 minutes. This rest time lets the flour hydrate and makes rolling out your best gluten-free piecrust so much easier.
Step 5: When you’re ready to bake, preheat your oven to 375°F. Take one disc from the fridge and let it sit for just a minute or two—you want it cold but not rock-hard.
Step 6: Lightly dust your work surface or pie crust bag with about 1 tablespoon of gluten free flour. Roll the dough into a circle about 2 inches larger than your pie plate, working from the center outward. The dough should feel smooth and pliable under your rolling pin.
Step 7: Carefully invert the rolled dough onto your pie plate, gently pressing it into the bottom and sides. Use a fork to poke 2-3 holes in the bottom—this prevents any bubbling during baking.
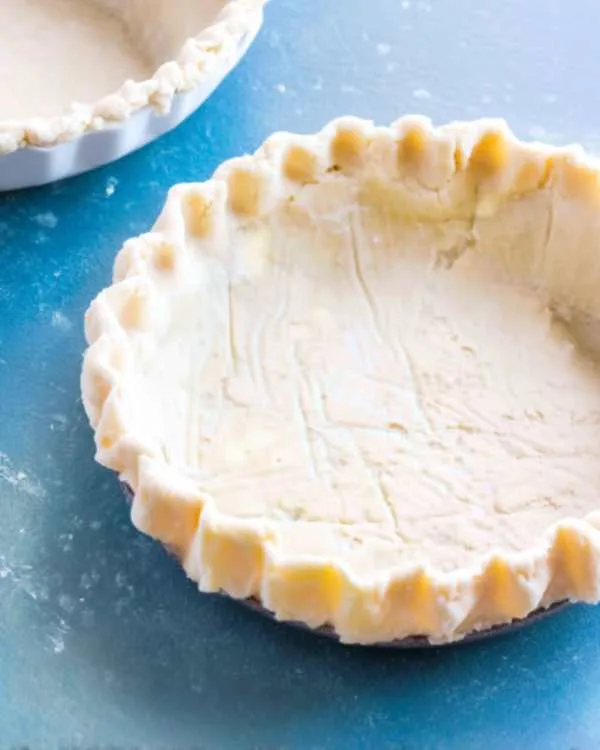
Step 8: Whisk your egg in a small bowl and use a pastry brush to lightly coat the crust. You won’t need much, but this egg wash gives you that gorgeous golden color and creates delightfully crispy edges. It’s totally optional but highly recommended!
Step 9: For a single pre-baked crust, slide it into the oven and bake for 14-17 minutes until it’s lightly golden and fragrant. For a double-crust pie, fill your bottom crust with your chosen filling, roll out the second disc, and place it on top. Seal the edges together, cut a few steam vents, brush with egg wash, sprinkle with sugar, and bake according to your filling’s recipe (typically 50-60 minutes).
Substitutions
Butter alternatives: If you need a dairy-free version, swap the butter for an equal amount of cold vegan butter or additional shortening. The texture will be slightly different but still wonderfully flaky for your gluten free pie crust. I’ve used Earth Balance sticks with great success.
Shortening options: You can use all butter-flavored Crisco if you don’t want to buy two types of shortening, or use all regular vegetable shortening. The butter-flavored variety just adds a richer taste that mimics traditional pastry beautifully.
Flour choices: I’ve tested this gluten free pastry with Bob’s Red Mill 1-to-1, King Arthur Measure for Measure, and Cup4Cup—all work beautifully. Avoid bean-heavy flours as they can create a gritty texture. According to trusted gluten-free baking resources, choosing a quality blend with xanthan gum already included makes all the difference.
Sugar substitution: Feel free to use coconut sugar or leave out the sugar entirely if you’re making a savory crust for quiche. The tablespoon of sugar doesn’t make the crust sweet—it just balances the overall flavor.
Troubleshooting
Dough too crumbly? Add ice water one tablespoon at a time until the dough holds together when squeezed. Gluten free flour can be finicky about hydration, and humidity in your kitchen affects how much water you’ll need. Don’t be afraid to add that extra splash.
Crust shrinking in the pan? Make sure you’re not stretching the dough when you place it in the pie plate—just gently press it into place. The 30-60 minute rest time in the fridge is crucial for preventing shrinkage, so don’t rush this step with your best gluten-free piecrust.
Edges browning too fast? Simply cover the edges with strips of aluminum foil or a pie crust shield about halfway through baking. This protects the edges while letting the center continue cooking to golden perfection.
Dough sticking to rolling pin? Well… you might need just a touch more flour on your surface, or try rolling between two sheets of parchment paper. Some people swear by silicone pie crust mats, which prevent sticking without adding extra flour.
Storage & Meal Prep
Store unbaked gluten free pie crust discs tightly wrapped in plastic wrap in the refrigerator for up to 3 days, or freeze them for up to 3 months. I always make a double or triple batch and freeze extras—it’s like having a secret weapon ready for last-minute desserts! Just thaw overnight in the fridge before rolling.
Pre-baked crusts can be stored at room temperature (covered) for 2 days, or wrap them well and freeze for up to 1 month. For the crispest texture, I recommend baking your crust fresh when possible, but frozen pre-baked shells work great for no-bake pies and make weeknight desserts ridiculously easy.
Serving Suggestions
This versatile gluten free pastry works for literally any pie you’re craving. Fill it with classic apple cinnamon, tangy lemon meringue, or rich chocolate cream—the buttery flavor complements both sweet and tart fillings beautifully. For a stunning presentation, brush with egg wash and sprinkle coarse sugar on top before baking.
Try this crust with our irresistible pecan bar filling for a twist on traditional pecan pie. It’s also perfect for savory applications like chicken pot pie or spinach and feta quiche—just skip the sugar and add an extra pinch of salt.
Variations
Dairy-free version: Replace the butter with vegan butter and use coconut milk powder instead of dry milk. Use non-dairy shortening, and you’ll have a completely dairy-free gluten free pie crust that’s just as flaky and delicious. My lactose-intolerant sister can’t tell the difference!
Kid-friendly mini pies: Roll the dough slightly thicker and cut circles with a large biscuit cutter or drinking glass. Press into muffin tins and fill with their favorite jam or pudding for adorable hand pies. Bake for 10-12 minutes and let the kids help decorate with whipped cream.
Herb and cheese savory crust: Add 2 tablespoons of finely grated Parmesan and 1 teaspoon of dried herbs (try rosemary or thyme) to the dough. This creates an amazing base for quiches, savory tarts, or pot pies—perfect for turning dinner into something special.
Sweet cinnamon variation: Mix ½ teaspoon of cinnamon into your flour for a subtly spiced crust that pairs beautifully with apple, pumpkin, or sweet potato pies. This is my go-to for Thanksgiving, and guests always ask what makes it taste so special!
No-Fail Gluten Free Pie Crust Recipe FAQs
Can I make this gluten free pie crust without a stand mixer?
Absolutely! Use a pastry cutter or two forks to cut the fats into the flour, or even do it by hand. A food processor also works beautifully—just pulse until the mixture resembles coarse crumbs, then add the water and pulse until it barely comes together.
How do I prevent my crust from getting soggy with wet fillings?
Brush the pre-baked crust with a thin layer of beaten egg white before adding your filling, then bake for 5 minutes. This creates a seal that keeps moisture out. You can also sprinkle a light coating of ground nuts or graham cracker crumbs on the bottom before filling.
What’s the best gluten free flour for this recipe?
I’ve had consistently great results with Bob’s Red Mill 1-to-1 Baking Flour and King Arthur Measure for Measure. Both contain xanthan gum, which helps bind the gluten free pastry and makes it easier to roll out. Cup4Cup also works wonderfully if you prefer that brand.
Why does my gluten free pie crust crack when I roll it?
Your dough is likely too cold or hasn’t rested long enough. Let it sit at room temperature for 5-10 minutes before rolling, and make sure you’ve refrigerated it for at least 30 minutes initially. If it cracks while rolling, just press the pieces back together—gluten-free dough is surprisingly forgiving!
Best way to get a flaky texture in gluten free baking?
The secret is keeping your fats cold and not overmixing the dough. The combination of butter and shortening in this best gluten-free piecrust creates distinct fat layers that melt during baking, forming those beautiful flaky pockets. Man, oh man, does it make a difference!
Can I use this recipe for hand pies or galettes?
Yes! This dough is sturdy enough to hold fillings in hand pies and rustic galettes. For hand pies, roll slightly thicker (about ¼ inch) so they hold together during folding. For galettes, roll thinner and fold the edges over your fruit filling for that gorgeous free-form look.
Final Tips
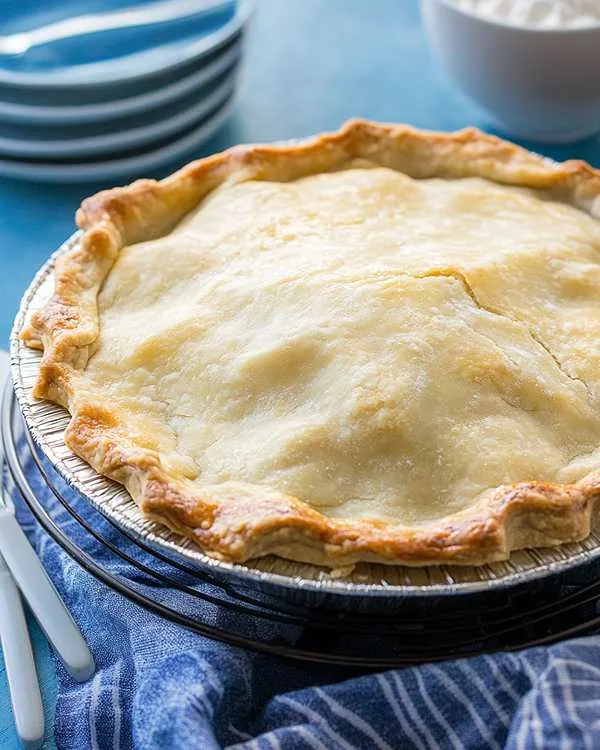
Making a perfect gluten free pie crust doesn’t have to be stressful or complicated. The key is embracing the slightly different texture of gluten-free dough and not expecting it to behave exactly like traditional pastry. Once you make this recipe a couple of times, you’ll develop a feel for the dough and it’ll become second nature.
Pair this crust with our tropical pineapple coconut cake for a stunning dessert spread, or try it with the filling from our beloved cinnamon rolls for an inventive cinnamon roll pie. The possibilities are truly endless!
Remember, practice makes progress—not perfection. Your first attempt might not be Instagram-worthy, but it’ll still taste amazing. By your third or fourth time making this gluten free pastry, you’ll be rolling out crusts like a seasoned baker and wondering why you ever thought it was difficult.
Happy baking, friend! I can’t wait to hear about all the delicious pies you create with this recipe. Drop a comment and let me know which filling you tried first!

