Coconut Mango Rice Pudding Pops
Make creamy gluten-free coconut mango rice pudding pops at home with simple ingredients, step-by-step instructions, and easy storage tips for a tropical frozen treat.
The first summer I went gluten-free, I stood in front of the freezer aisle for a solid ten minutes reading labels on popsicles — only to put them all back. Hidden starches, wheat-based thickeners, vague “natural flavors.” It was frustrating.
That’s what pushed me to start making my own gluten-free coconut mango rice pudding pops, and honestly? I never looked back. The combination of creamy coconut milk and sweet ripe mango is like a tropical vacation in every bite.
Well… it surprised even me how simple this recipe turned out to be. If you have leftover rice and one can of coconut milk, you’re already halfway there. Have you ever tasted something that made you close your eyes and just breathe for a second? That’s what these do.
Why You’ll Love This Coconut Mango Rice Pudding Pops Recipe
- Naturally creamy texture — full-fat coconut milk blended with rice creates a rich, smooth base that sets like a dream without any artificial thickeners.
- Beginner-friendly — no candy thermometers, no special techniques. If you can blend and pour, you can make these.
- Dairy-free and naturally gluten-free — a perfect treat for households managing multiple dietary needs at once.
- Works for meal prep — make a batch on Sunday and pull pops from the freezer all week long.
The Secret to Perfect Gluten-Free Coconut Mango Rice Pudding Pops
Most frozen pops get icy and hard. These stay silky because of one key move: blending cooked rice with full-fat coconut milk.
- Full-fat coconut milk is non-negotiable — the high fat content prevents ice crystals from forming, giving you that soft, scoopable texture even straight from the freezer.
- Leave a little rice texture — pulsing rather than fully blending keeps the classic rice pudding feel. Completely smooth is fine too, but the texture is part of the charm.
- Maple syrup over granulated sugar — liquid sweeteners integrate without graininess and also help keep the pops from freezing rock-solid.
- The pinch of sea salt — it sounds small, but it sharpens the mango flavor and balances the sweetness in a way that makes every element pop.
According to Beyond Celiac’s authoritative gluten-free nutrition guide, understanding ingredient sources is key when cooking for celiac disease or gluten sensitivity. Always verify that your vanilla extract and any mix-ins are certified gluten-free.
Table of Contents
Ingredients
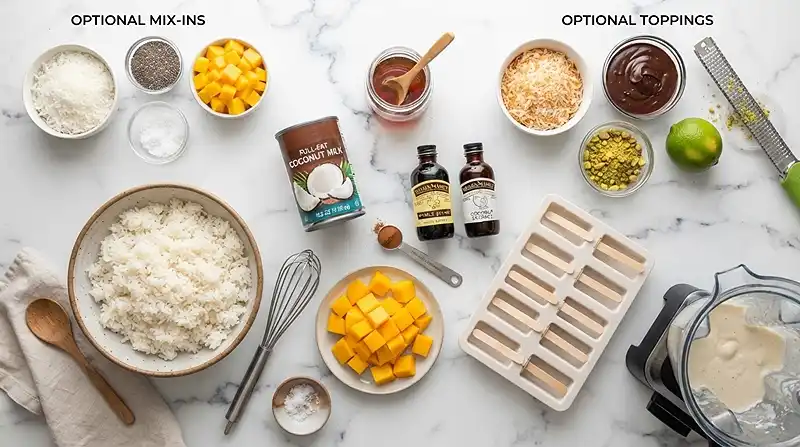
| Category | Ingredient | Amount | Notes |
|---|---|---|---|
| Base | Cooked white rice, cooled | 2 cups | Leftover rice works great |
| Base | Full-fat coconut milk | 1 (13.5-ounce) can | Do not substitute light coconut milk |
| Base | Diced ripe mango | 1 cup | Fresh or thawed frozen |
| Sweetener | Maple syrup or honey | 1/4 cup | Adjust to taste |
| Flavoring | Vanilla extract | 1 teaspoon | Use certified gluten-free |
| Flavoring | Coconut extract (optional) | 1/2 teaspoon | Deepens coconut flavor |
| Spice | Ground cinnamon | 1/2 teaspoon | Adds warmth |
| Spice | Sea salt | Pinch | Balances sweetness |
| Optional Mix-Ins | Unsweetened shredded coconut | 1/4 cup | Adds texture |
| Optional Mix-Ins | Chia seeds | 2 tablespoons | Boosts fiber and omega-3s |
| Optional Mix-Ins | Finely diced mango (extra) | 1/4 cup | For fruit bursts throughout |
| Optional Toppings | Toasted shredded coconut | To taste | Press on before serving |
| Optional Toppings | Certified gluten-free dark chocolate, melted | To taste | Drizzle after unmolding |
| Optional Toppings | Crushed pistachios | To taste | Adds crunch and color |
| Optional Toppings | Lime zest | To taste | Bright, citrusy finish |
Instructions
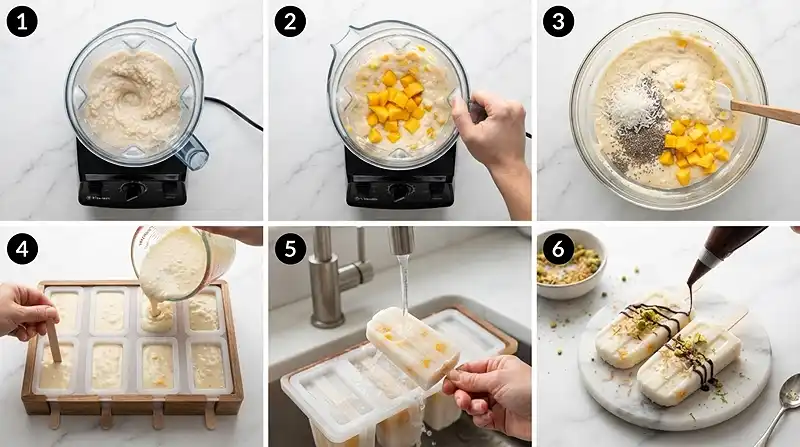
Step 1: Blend the Base
In a blender, combine the cooked rice, coconut milk, maple syrup, vanilla extract, coconut extract (if using), cinnamon, and salt. Blend until mostly smooth, leaving a little rice texture for a classic rice pudding consistency.
Pro Tip: Make sure your rice is fully cooled before blending. Warm rice can make the coconut milk separate slightly, which affects the final texture.
Step 2: Add the Mango
Add the diced mango and pulse a few times to create small mango pieces throughout the mixture. If you prefer a completely smooth pop, blend until fully smooth.
Pro Tip: The mango should smell intensely sweet and floral at the stem end — that’s how you know it’s ripe enough. An underripe mango will taste flat once frozen.
Step 3: Fold in Mix-Ins
Stir in the shredded coconut, chia seeds, or additional diced mango if using. Fold gently rather than blending so the mix-ins stay distributed without breaking down.
Step 4: Fill the Molds
Divide the mixture evenly among 8 popsicle molds. Tap the molds gently on the counter a few times to release any air bubbles and settle the mixture.
Step 5: Insert Sticks and Freeze
Insert popsicle sticks and freeze for 6-8 hours, or until completely firm. Overnight is ideal — don’t rush the freeze or the center will still be soft.
Step 6: Unmold
To unmold, run the molds under warm water for 10-15 seconds, then gently pull out the popsicles. Hold the mold and stick firmly — they should release with just a little resistance.
Step 7: Add Toppings and Serve
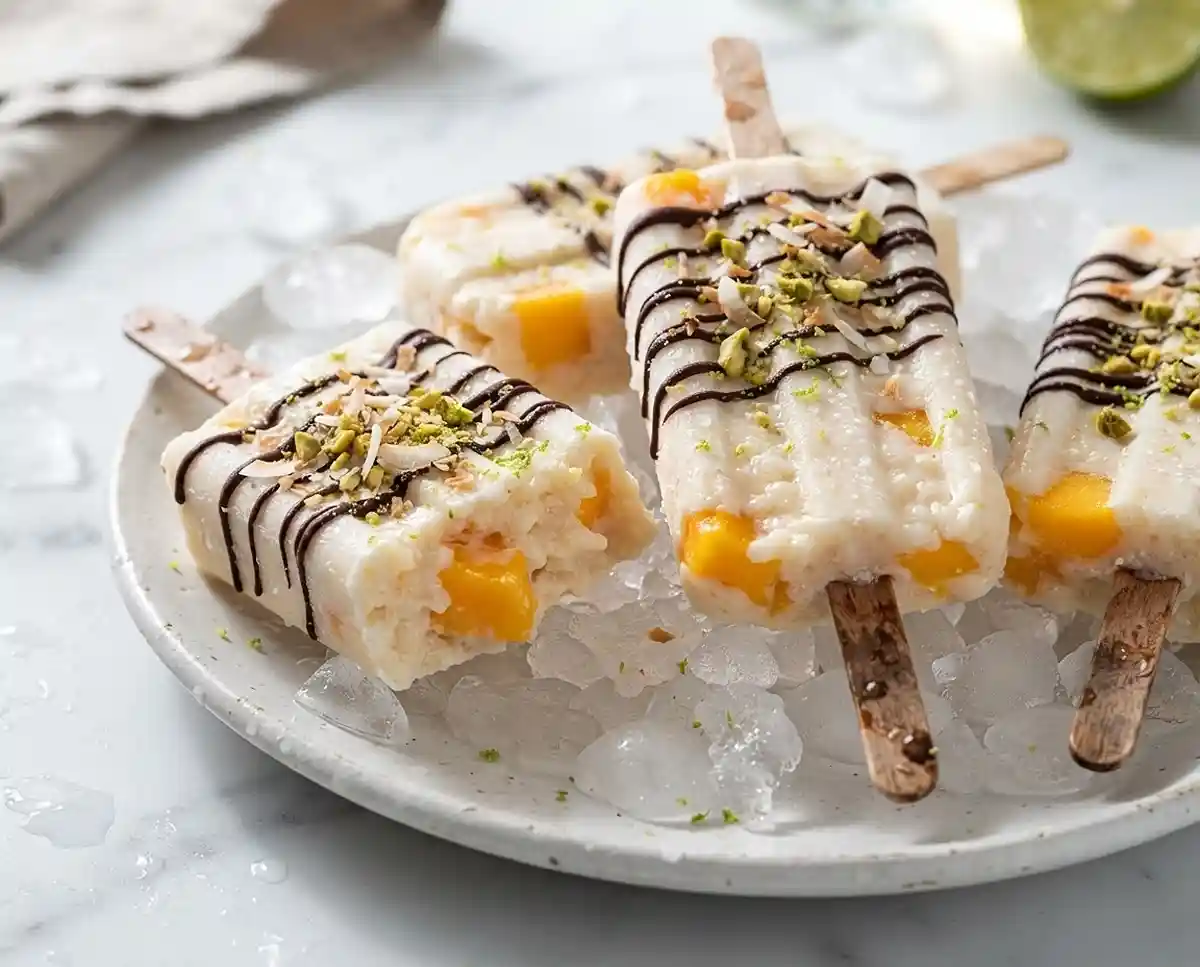
If desired, drizzle with melted gluten-free dark chocolate and sprinkle with toasted coconut, crushed pistachios, or fresh lime zest before serving. Store the popsicles in a freezer-safe container for up to 2 months.
Make It Your Own
These gluten free dairy free popsicles are incredibly flexible. Swap the mango for fresh pineapple or ripe peaches when mango isn’t in season — both fruits have enough natural sugar to keep the flavor bright after freezing.
Man, oh man… if you have kids who “don’t like fruit,” try the chocolate drizzle version. A dip in melted certified gluten-free dark chocolate changes everything. Suddenly, tropical desserts are their idea.
For a lower-sugar version, reduce the maple syrup to 2 tablespoons and rely on the natural sweetness of very ripe mango. This works best in peak mango season when the fruit is at its sweetest. The result is a more subtle, grown-up pop that still satisfies.
You can also try jasmine rice instead of standard white rice for a more aromatic, floral-leaning flavor that pairs beautifully with the coconut. Just make sure it’s fully cooked and cooled before blending. Jasmine rice blends slightly smoother than long-grain white rice, so expect a creamier final texture.
Love the idea of a heartier frozen treat? Check out these gluten-free banana bread cinnamon rolls for another way to turn classic comfort into something special.
Common Problems & Solutions
Problem: Pops are icy and hard, not creamy. This usually means light coconut milk was used instead of full-fat. Full-fat coconut milk is the fat buffer that prevents large ice crystals. Switch to the full-fat version and the texture will transform completely.
Problem: The mixture separated in the mold. This happens when warm rice is blended directly with cold coconut milk. Always cool your rice to at least room temperature before blending. A quick stir of the mixture right before pouring into molds also helps keep everything even.
You know… the most common mistake I see is under-freezing. Six to eight hours is the minimum — if you pull them at four hours, the center is still soft and they’ll fall apart on the stick. Overnight is the safest bet, especially in a busy household where the freezer gets opened frequently.
Problem: Mold is stuck and won’t release. Don’t yank. Run warm (not hot) water over the outside of the mold for a full 15 seconds, then try again with steady, gentle pressure on the stick. Hot water can melt the exterior of the pop before the interior releases.
For certified gluten-free ingredient sourcing, the Celiac Disease Foundation’s trusted guide to gluten sources is an excellent reference when shopping for extracts, chocolate, and packaged mix-ins.
Storage & Meal Prep
| Method | Duration | Notes |
|---|---|---|
| Freezer (in molds) | Up to 2 months | Keep molds covered with plastic wrap |
| Freezer (unmolded) | Up to 2 months | Wrap individually in parchment, store in zip bag |
| Counter | 5-10 minutes max | Let sit briefly before serving for best texture |
These pops don’t need reheating, but if they’ve been in the freezer for several weeks, letting them rest on the counter for 5 minutes before eating makes them noticeably creamier.
For no-waste prep, double the batch and keep half the blended mixture in the fridge for up to 2 days. Use it as a coconut mango rice pudding — serve warm or chilled in bowls with a sprinkle of cinnamon on top.
Coconut Mango Rice Pudding Pops FAQs
Can I use brown rice instead of white rice?
Yes, you can substitute brown rice, though the texture will be slightly denser and nuttier. Make sure it is fully cooked and cooled before blending, and expect the pops to be a bit less silky than the white rice version. The flavor is still great.
How do I know when the popsicles are fully frozen?
Fully frozen pops feel completely solid when you press the mold gently on the sides. The stick should feel firmly set with no give. Six to eight hours in a standard freezer is usually enough, but overnight is always the safest option.
What’s the best way to add toppings without them falling off?
Work quickly right after unmolding while the exterior is slightly tacky from the warm-water release. Press toppings like toasted coconut or crushed pistachios gently into the surface, then return to the freezer for 5 minutes to set. For chocolate drizzle, let it set at room temperature for 1 to 2 minutes before serving.
Why did my pops turn out gummy instead of creamy?
Gummy texture usually means too much starch relative to fat in the base. This can happen if the rice-to-coconut-milk ratio is off or if a low-fat coconut milk was used. Stick to the recipe ratios and use full-fat coconut milk for the best results.
Can I make these without popsicle molds?
Absolutely. Pour the mixture into small paper cups, cover with foil, and push a popsicle stick through the foil to hold it upright while freezing. Once frozen, tear away the paper cup to release. They won’t have the polished shape of molded pops, but they taste exactly the same.
Serving Suggestions
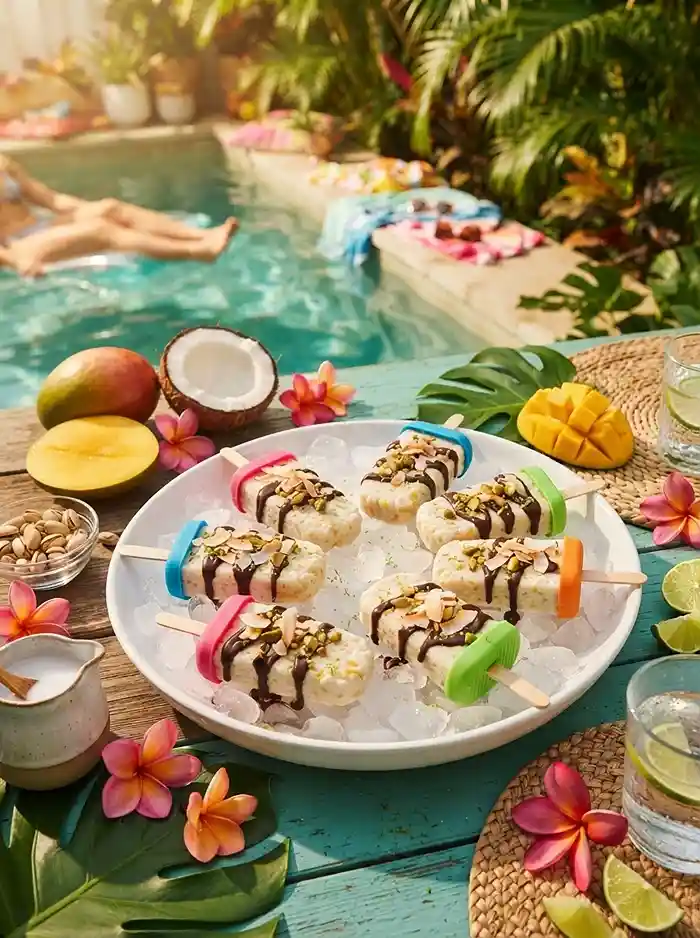
These coconut mango rice pudding pops shine brightest alongside other bright, fresh flavors. Pair them with a simple fruit salad of lime-tossed berries and kiwi for a backyard Fourth of July spread that feels festive without any fuss.
They’re also the kind of dessert that earns compliments at potlucks because nobody expects something that elegant to come out of a popsicle mold. If you’re building a full gluten-free summer menu, the gluten-free herb roasted potato salad makes a fantastic savory companion before you pull out these pops for dessert.
For a cozy contrast on cooler evenings, serve one pop alongside a warm mug of tea or finish a comforting dinner with these after a batch of cinnamon rolls with brown sugar and butter — the tropical and warm-spice pairing is unexpectedly wonderful.
Conclusion
Gluten-free coconut mango rice pudding pops are proof that frozen desserts don’t need a long ingredient list to taste incredible. A blender, eight popsicle molds, and about ten minutes of active time is all it takes.
If you make these, I’d love to hear how they turned out. Drop a comment below with your favorite mix-in or topping combination — and if you share them on Pinterest, tag the recipe so others can find it too.
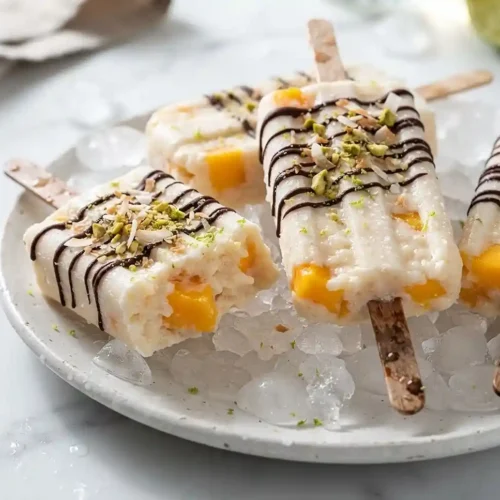
Coconut Mango Rice Pudding Pops
Equipment
- Blender
- Popsicle molds
- Popsicle sticks
- Mixing bowl
- Spatula
Ingredients
Base
- 2 cups Cooked white rice, cooled Leftover rice works great
- 1 13.5-ounce can Full-fat coconut milk Do not substitute light coconut milk
- 1 cup Diced ripe mango Fresh or thawed frozen
Sweetener
- ¼ cup Maple syrup or honey Adjust to taste
Flavoring
- 1 teaspoon Vanilla extract Use certified gluten-free
- ½ teaspoon Coconut extract Optional; deepens coconut flavor
Spice
- ½ teaspoon Ground cinnamon Adds warmth
- 1 pinch Sea salt Balances sweetness
Optional Mix-Ins
- ¼ cup Unsweetened shredded coconut Adds texture
- 2 tablespoons Chia seeds Boosts fiber and omega-3s
- ¼ cup Finely diced mango For fruit bursts throughout
Optional Toppings
- Toasted shredded coconut To taste
- Certified gluten-free dark chocolate, melted To taste
- Crushed pistachios To taste
- Lime zest To taste
Instructions
- Blend the cooked rice, coconut milk, maple syrup, vanilla extract, coconut extract (if using), cinnamon, and sea salt until mostly smooth, leaving a little rice texture if desired.
- Add the diced mango and pulse a few times for small fruit pieces, or blend completely smooth if preferred.
- Fold in the shredded coconut, chia seeds, and additional diced mango if using.
- Divide the mixture evenly among 8 popsicle molds and tap the molds gently to remove air bubbles.
- Insert popsicle sticks and freeze for 6 to 8 hours, preferably overnight, until completely firm.
- Run the molds under warm water for 10 to 15 seconds and gently pull out the popsicles.
- Drizzle with melted gluten-free dark chocolate and garnish with toasted coconut, crushed pistachios, or lime zest if desired. Serve immediately or store in the freezer.