Gluten-Free Cheeseburger Bombs
Make gluten-free cheeseburger bombs with cold-butter biscuit dough and a cheesy beef filling. Step-by-step directions plus fixes for leaks and crumbling.
I once pulled a tray of gluten-free cheeseburger bombs from the oven and found nothing but flat biscuit pancakes sitting in a puddle of melted cheese. I had overfilled them, skipped the firm pinch, and baked them with hot filling. My kids named the result “cheeseburger explosions” and ate every crumb anyway.
Honestly… that disaster is why this recipe works. I learned the hard way that cooled filling and a tight seal matter more than any fancy trick. Ever wonder why a stuffed dough pocket bursts in the oven? Usually the filling was too warm or too generous.
These cheesy, juicy cheeseburger bombs are the kind of party appetizer everyone reaches for first! Discover more gluten-free party snacks packed with crowd-pleasing bites before your next gathering sneaks up on you!
What Makes This Gluten-Free Cheeseburger Bomb Recipe Worth Making
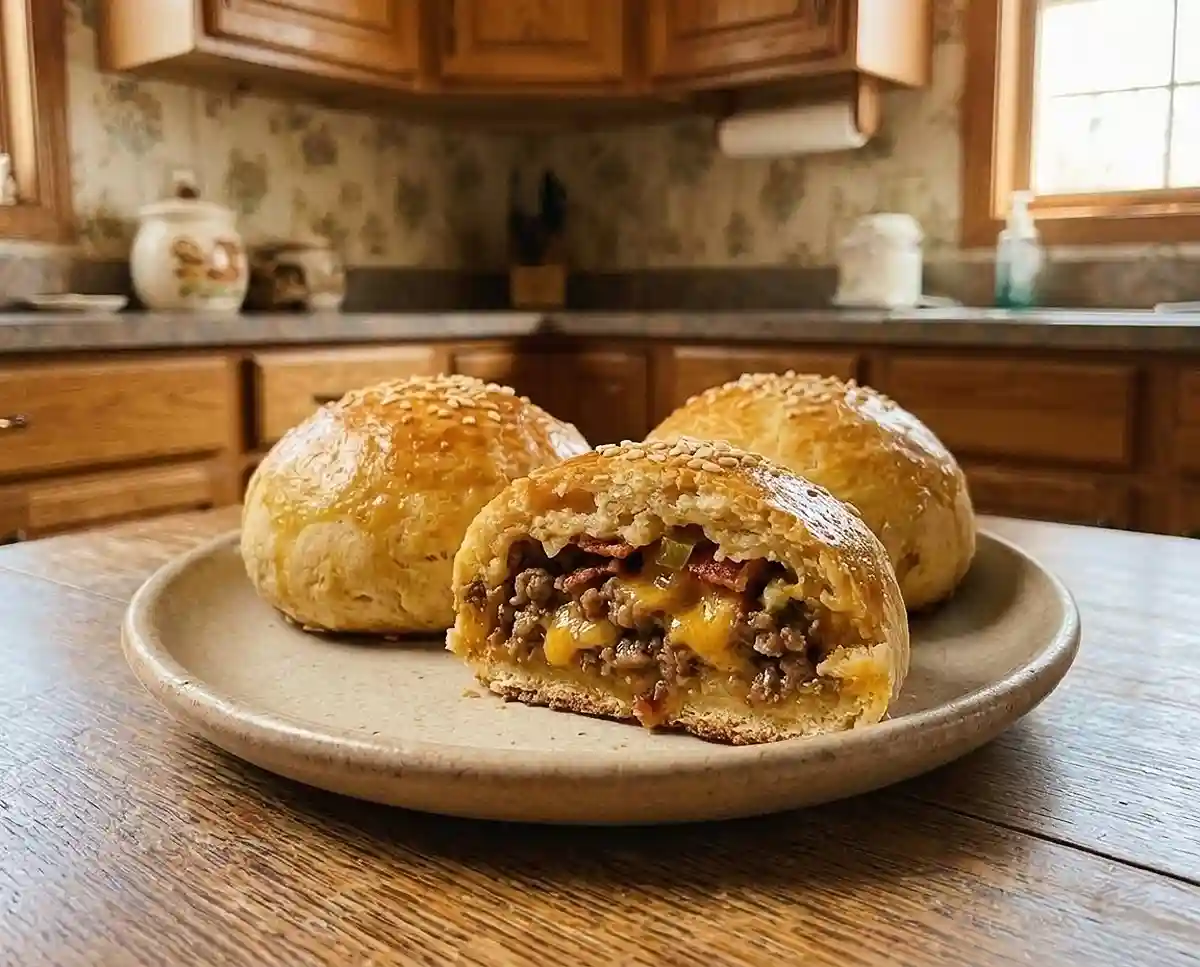
These are handheld cheeseburgers in a golden, tender biscuit shell, and a beginner can make them in an afternoon.
- Texture: the tops bake up golden and crackle faintly like dry leaves underfoot, while the inside stays soft and cheesy.
- Difficulty: easy. The dough comes together in one bowl with a pastry cutter or your fingertips.
- Kid friendly: children can help roll, fill, and brush on the egg.
- Best for: game days, lunch boxes, and weeknight dinners when everyone wants something handheld.
The Science Behind Great Gluten-Free Cheeseburger Bombs
The key to great gluten-free cheeseburger bombs is a cold, well-hydrated biscuit dough that holds together around a cooled filling.
- Cold butter cubes: they melt in the oven and release steam, which creates flaky layers instead of a dense, gummy crumb.
- A flour blend with xanthan gum: xanthan gum stands in for gluten, giving the dough enough stretch to fold over the filling without tearing.
- Buttermilk and baking powder: the acid in buttermilk activates the leavening for a lift that gluten-free doughs often lack.
- Cooled filling: warm filling melts the butter in the dough too early and makes the seams slippery and weak.
Hidden gluten often lurks in condiments, so I only use ketchup, mustard, pickles, cheese, and baking powder with a gluten-free label. A trusted celiac food label reading guide walks through how to check them.
Table of Contents
Ingredients
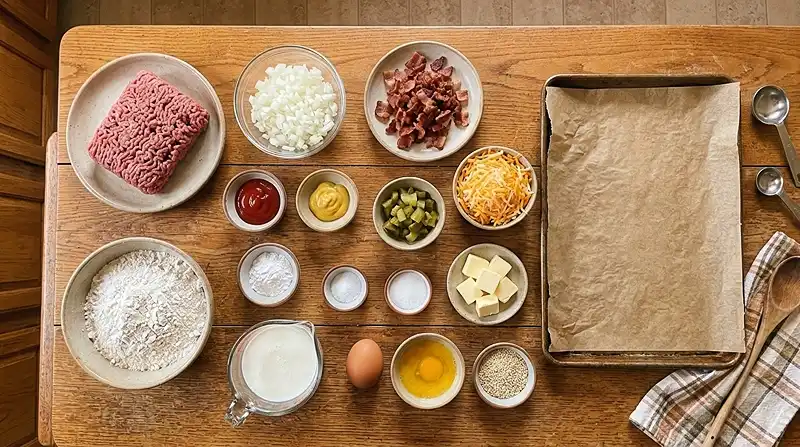
This recipe makes 8 cheeseburger bombs and is divided into the filling, the biscuit dough, and the topping.
For the Cheeseburger Filling
- ½ pound ground beef
- ¼ cup finely chopped onion
- ¼ cup crumbled cooked beef bacon
- ¼ cup ketchup, labeled gluten-free
- 2 tablespoons prepared mustard, labeled gluten-free
- 2 tablespoons chopped dill pickles or pickle relish, labeled gluten-free
- ½ cup shredded Cheddar cheese, labeled gluten-free
For the Gluten-Free Biscuit Dough
- 2 cups gluten-free all-purpose flour blend with xanthan gum
- 1 tablespoon baking powder, labeled gluten-free
- ½ teaspoon salt
- ½ teaspoon granulated sugar
- 6 tablespoons cold unsalted butter, cut into small cubes
- ¾ cup cold buttermilk, plus 1–2 tablespoons if needed
For the Topping
- 1 large egg, beaten
- ½ teaspoon sesame seeds
Ingredient note: your flour blend must already contain xanthan gum. If it does not, the dough will crumble and tear when you fold it around the filling.
Instructions
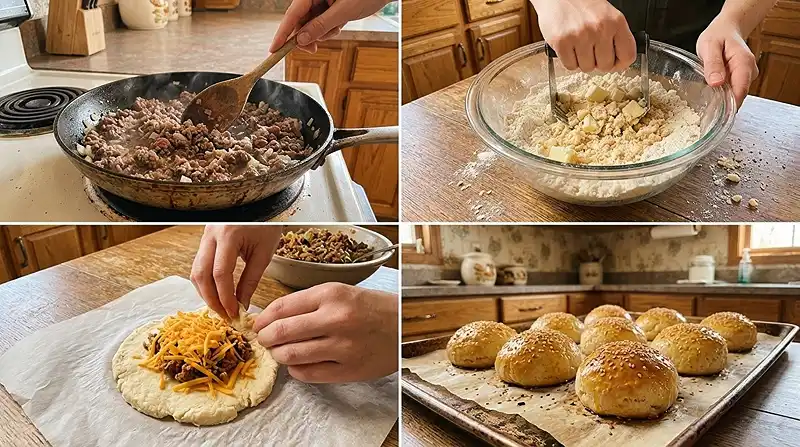
You will make the filling first, then the biscuit dough, then fill, seal, and bake for 18 to 22 minutes.
Prep and Make the Filling
- Prepare the oven: preheat the oven to 350°F (175°C). Line a large baking sheet with parchment paper.
- Cook the beef: heat a large skillet over medium heat. Add the ground beef and chopped onion. Cook for 3–4 minutes, breaking the beef into small crumbles, until the beef is fully cooked and the onion is tender. Drain excess grease.
- Make the filling: stir in the crumbled beef bacon, ketchup, mustard, and chopped pickles. Mix well, then remove from the heat and let the filling cool slightly.
Pro Tip: use a food thermometer to confirm the beef is done. The USDA food safety guidance on ground beef temperature recommends 160°F and warns that color alone can mislead.
Make the Biscuit Dough
- Prepare the dry ingredients: in a large bowl, whisk together the gluten-free flour, baking powder, salt, and sugar.
- Make the biscuit dough: add the cold butter cubes. Use a pastry cutter or your fingertips to work the butter into the flour until the mixture resembles coarse crumbs. Gradually stir in the cold buttermilk until a soft, slightly sticky dough forms. Add a little more buttermilk if the dough is too dry.
- Shape the dough: divide the dough into 8 equal portions. Place each portion between two sheets of parchment paper and gently roll into a circle about 5 inches wide.
Pro Tip: the dough should feel soft and slightly tacky, not wet. Rolling between parchment keeps it from sticking to your hands and the counter.
Fill, Seal, and Bake
- Fill the bombs: place about 1 tablespoon of shredded Cheddar in the center of each dough circle. Add approximately 2 tablespoons of the cooled beef mixture on top.
- Seal: bring the edges of the dough up and over the filling. Pinch the edges firmly together to seal completely. Place each bomb seam-side down on the prepared baking sheet.
- Add the topping: brush the tops with beaten egg and sprinkle with sesame seeds.
- Bake: bake for 18–22 minutes, or until the dough is cooked through and the tops are golden brown.
- Serve: let the cheeseburger bombs cool for a few minutes before serving warm.
Ways to Customize This Recipe
You can swap the protein, cheese, or dairy and keep the same dough, as long as the filling stays cool and moist but not wet.
For a dairy-free batch, use a firm dairy-free butter stick and a plant milk soured with a splash of lemon juice in place of the buttermilk. Choose a firm stick rather than a tub spread, because tub spreads hold extra water. Look… the dough will be a little softer, so keep it cold and roll gently.
Swap the ground beef for ground turkey if you want a lighter cheesy cheeseburger flavor. Turkey is leaner, so add a splash of extra ketchup to keep the filling moist. Brown it until fully cooked, as the recipe directs for the beef.
Try pepper jack labeled gluten-free instead of Cheddar for a little heat. It melts in much the same way, so the sealed bombs stay gooey in the center. Always check the cheese label, since some shredded cheeses carry anti-caking agents.
If you love hamburger recipes with a pickle tang, use pickle relish instead of chopped dill pickles. Relish is finer and spreads evenly through the filling. Squeeze out extra brine first so the biscuit dough stays crisp.
If Something Went Wrong, Start Here
Most failures with gluten-free biscuit dough come from warm ingredients, too much filling, or a weak seal.
Problem: the filling leaks during baking. Cool the filling, use only about 2 tablespoons per bomb, and pinch the seam firmly. Overfilled or warm pockets stretch the dough thin and split at the seam.
Problem: the dough tears when you fold it. Roll between parchment and patch any crack with a fingertip dipped in cold water. Gluten-free dough has little natural stretch, so small repairs are normal.
Problem: the biscuit shell is dense or gummy. Keep the butter cold and stop mixing once the dough forms. Oh wow, overworking melts the butter into the flour, which removes the steam pockets that make the shell light.
Problem: the dough is dry and crumbly. Add the extra 1–2 tablespoons of buttermilk a little at a time. Gluten-free flours absorb liquid slowly, so dough that seems dry can need a minute to hydrate.
Problem: the center is doughy. Bake the full 18–22 minutes until the tops are deep golden, then rest for a few minutes. Pale tops usually mean the dough is not yet cooked through.
Storage & Meal Prep
Cool the bombs completely before storing them so steam does not soften the shell.
| Method | Duration | Notes |
|---|---|---|
| Counter | 2-3 days | Airtight container |
| Fridge | 5-7 days | Bring to room temp |
| Freezer | 2-3 months | Wrap individually |
Reheat in a 350°F oven until warm through, usually 10 to 12 minutes, so the shell crisps back up. The microwave works in a pinch but softens the crust. Leftover filling is great spooned over a baked potato or tucked into a lettuce wrap.
Frequently Asked Questions
Can I make cheeseburger bombs ahead of time?
Yes, bake them, cool them, and store them airtight. They keep in the fridge for 5 to 7 days or in the freezer for 2 to 3 months when wrapped individually. Reheat in a 350°F oven so the biscuit shell crisps back up.
How do I keep the bottoms from getting soggy?
Drain the beef well and cool the filling before you fill the dough. Place each bomb seam-side down on parchment so the steam can escape. Squeeze extra brine from the pickles too.
What’s the best flour for gluten-free biscuit dough?
Use a gluten-free all-purpose blend that already contains xanthan gum. The xanthan gum gives the dough the stretch it needs to fold over the filling. Blends without it tend to crack and crumble.
Why did my cheeseburger bombs burst open?
The seam was not sealed firmly, or the bombs were overfilled. Use about 2 tablespoons of filling, let it cool, and pinch the edges together firmly. Always place the bombs seam-side down.
Can I make these dairy-free?
Yes, with a few swaps. Use a firm dairy-free butter stick, a soured plant milk for the buttermilk, and a dairy-free cheese labeled gluten-free. The dough will be softer, so keep it cold and roll gently.
Serving Suggestions
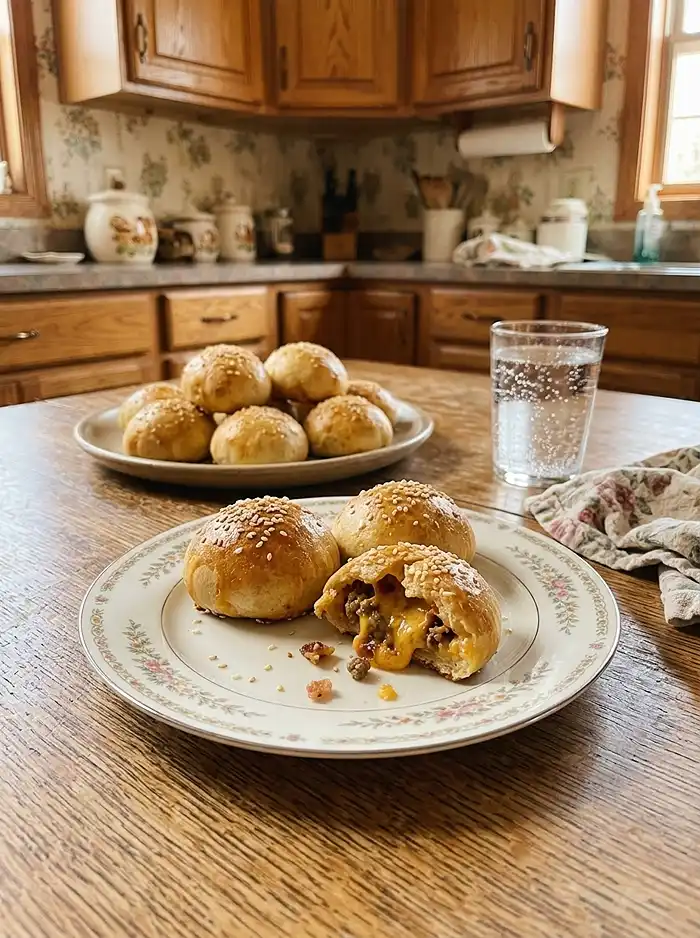
Serve these warm on a Super Bowl snack table with extra ketchup, mustard, and a pile of pickles for dipping. They also work for back-to-school lunch boxes once cooled.
For a full game-day spread, add easy gluten-free pizza rolls and a bowl of gluten-free cinnamon sugar Chex mix for something sweet.
If you want more handheld ideas, try 3-ingredient gluten-free air fryer bagels at your next brunch.
If you make these gluten-free cheeseburger bombs, leave a star rating and tell me how they turned out in the comments. Pin the recipe to your game-day or weeknight dinner board on Pinterest so it is easy to find later.
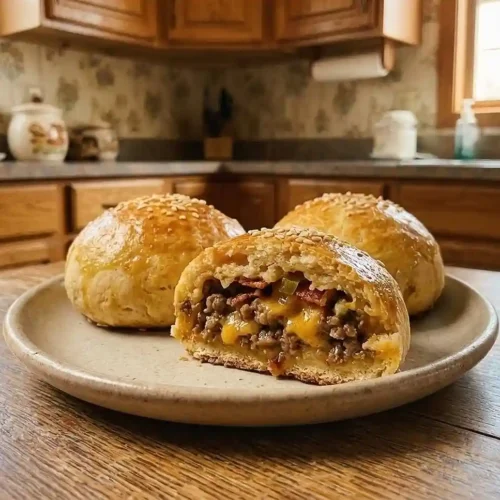
Gluten-Free Cheeseburger Bombs
Equipment
- Large skillet
- Large baking sheet
- Parchment paper
- Large mixing bowl
- Whisk
- Pastry cutter
- Rolling Pin
- Food Thermometer
- Pastry brush
Ingredients
For the Cheeseburger Filling
- ½ pound ground beef
- ¼ cup onion finely chopped
- ¼ cup beef bacon cooked and crumbled
- ¼ cup ketchup labeled gluten-free
- 2 tablespoons prepared mustard labeled gluten-free
- 2 tablespoons dill pickles or pickle relish chopped and labeled gluten-free
- ½ cup Cheddar cheese shredded and labeled gluten-free
For the Gluten-Free Biscuit Dough
- 2 cups gluten-free all-purpose flour blend must contain xanthan gum
- 1 tablespoon baking powder labeled gluten-free
- ½ teaspoon salt
- ½ teaspoon granulated sugar
- 6 tablespoons unsalted butter cold and cut into small cubes
- ¾ cup buttermilk cold, plus 1–2 tablespoons if needed
For the Topping
- 1 large egg beaten
- ½ teaspoon sesame seeds
Instructions
- Preheat the oven to 350°F (175°C). Line a large baking sheet with parchment paper.
- Heat a large skillet over medium heat. Add the ground beef and chopped onion. Cook for 3–4 minutes, breaking the beef into small crumbles, until the beef is fully cooked and the onion is tender. Drain excess grease.
- Stir in the crumbled cooked beef bacon, ketchup, mustard, and chopped pickles. Mix well, remove from the heat, and let the filling cool slightly.
- In a large bowl, whisk together the gluten-free flour blend, baking powder, salt, and sugar.
- Add the cold butter cubes. Use a pastry cutter or your fingertips to work the butter into the flour until the mixture resembles coarse crumbs. Gradually stir in the cold buttermilk until a soft, slightly sticky dough forms. Add 1–2 tablespoons more buttermilk if the dough is too dry.
- Divide the dough into 8 equal portions. Place each portion between two sheets of parchment paper and gently roll into a circle about 5 inches wide.
- Place about 1 tablespoon of shredded Cheddar in the center of each dough circle. Add approximately 2 tablespoons of the cooled beef mixture on top.
- Bring the edges of the dough up and over the filling. Pinch the edges firmly together to seal completely. Place each cheeseburger bomb seam-side down on the prepared baking sheet.
- Brush the tops with beaten egg and sprinkle with sesame seeds.
- Bake for 18–22 minutes, or until the dough is cooked through and the tops are golden brown.
- Let the cheeseburger bombs cool for a few minutes before serving warm.