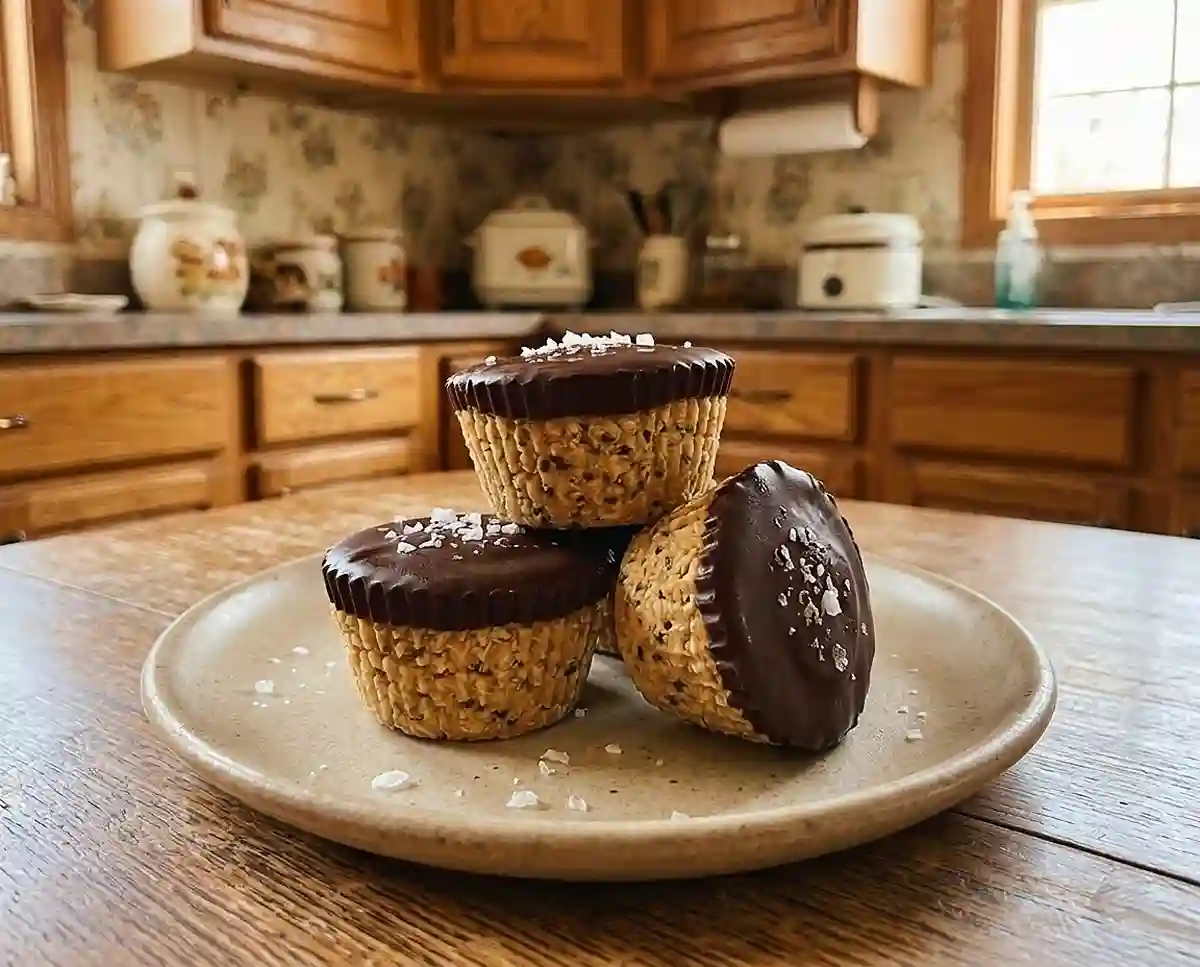
No-Bake Peanut Butter Oat Cups
Make gluten-free no-bake peanut butter oat cups with a chocolate layer. Get the ingredients, step-by-step directions, and freezer storage tips.
A student in my Saturday workshop once told me she had stopped baking after her celiac diagnosis, because every recipe felt like a chemistry exam. These gluten-free no-bake peanut butter oat cups won her back, since there is no oven, no flour blend, and nothing to collapse.
Love the combination of creamy peanut butter and chewy oats? Discover these no bake gluten free snacks for more effortless treats that satisfy sweet cravings without turning on the oven. You might find your next bite-sized favorite among these irresistible ideas!
At a Glance: Why This Peanut Butter Oat Cups Recipe Delivers
- Texture and flavor: A chewy, peanut-buttery base sits under a snappy chocolate layer, with sea salt to balance the sweetness.
- Difficulty: Beginner-friendly. There is no baking, and the only real skill is judging how moist the dough feels.
- Flexibility: Use sunflower seed butter for a nut-free version, or choose maple syrup or honey as the sweetener.
- Best for: Make-ahead snacks, lunchboxes, and anything you want waiting in the freezer.
What Makes This Gluten-Free No-Bake Peanut Butter Oat Cups Actually Work
Gluten-free treats often fall apart because nothing replaces the structure that gluten would provide. This recipe solves that in four ways.
- Chia seeds act as the binder. They absorb liquid and form a gel as they hydrate, which holds the oats and protein powder together without eggs or flour.
- Quick oats pack tightly. They are cut smaller than old-fashioned oats, so they soften faster and press into a dense, sliceable base instead of a crumbly one.
- The dough is adjustable. Protein powders absorb liquid at very different rates, so an extra spoonful of nut butter or syrup lets you correct the texture as you mix.
- Coconut oil keeps the chocolate clean to bite. It thins the melted chocolate and softens the set, so the layer snaps cleanly instead of shattering.
Table of Contents
Ingredients
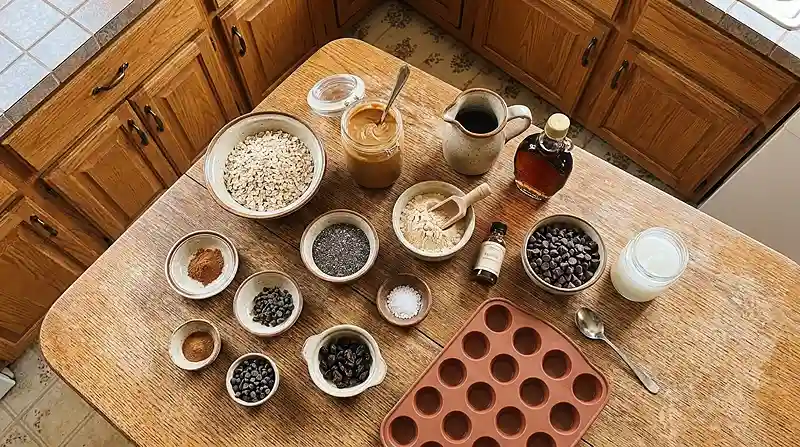
Oatmeal Cups
- 3/4 cup quick oats (see oat note below)
- 1/2 cup peanut butter or almond butter, etc. (use sunflower seed butter for nut-free)
- 1/4 cup maple syrup or honey
- 2 tbsp chia seeds
- 1/4 cup protein powder, of choice (use a flavor you love)
- 1 tsp vanilla extract and a good pinch of sea salt
- Optional add-ins: cinnamon, mini chocolate chips or cacao nibs, raisins, etc.
Chocolate Layer
- 1 1/4 cups chocolate chips
- 2 tsp coconut oil (if needed to help thin the chocolate)
Oat note: Quick oats make the tightest dough. For celiac disease, use oats clearly labeled gluten-free, because standard oats are often processed alongside wheat. The Celiac Disease Foundation’s label-reading guidance explains the under-20-ppm standard behind that label.
Check the labels on your protein powder and chocolate chips too, since both can carry gluten or cross-contact warnings.
Instructions
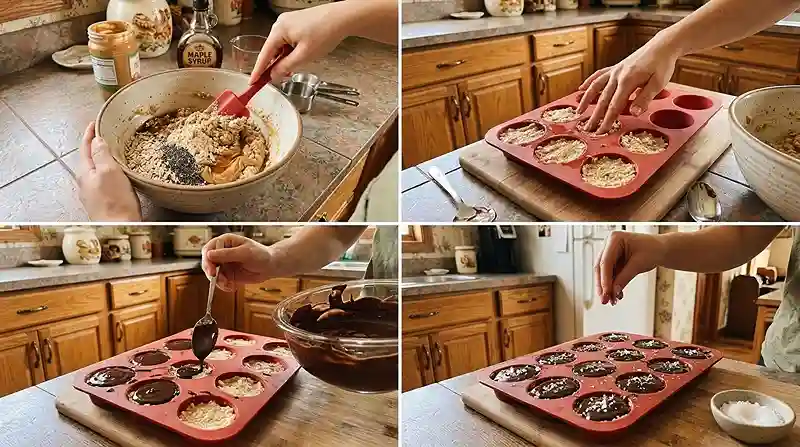
- Mix the dough. In a large bowl, combine all of the oatmeal cup ingredients until well combined. The dough should look thick and hold together when you pinch it. Pro Tip: Depending on your protein powder, you may need an extra tablespoon or two of nut butter or maple syrup/honey, so the dough is moist but not super sticky or dry.
- Prepare the pan. Grab a silicone mini muffin tin or a similar pan. If it is not silicone, I highly recommend parchment baking cups, or spray every cavity really well with spray oil.
- Fill the cups. Divide the mixture among the cavities, filling each about 2/3 of the way. Press it down firmly with the back of a spoon so there are no air pockets.
- Melt the chocolate. In a small bowl, combine the chocolate chips and coconut oil. Microwave in 30-second increments, stirring well between each, until completely melted and glossy. You can also melt it using the double-boiler method.
- Add the chocolate layer. Divide the chocolate among the cups, filling the last 1/3 of the way. Tap the tin gently on the counter so the tops level out.
- Freeze. Place the tray in the freezer for at least 2-3 hours before removing the cups from the pan. Top with sea salt, then store in an airtight container in the freezer. Pro Tip: If the salt slides off, sprinkle it on right after pouring the chocolate next time.
Adapting This Recipe to Your Kitchen
Nut-free: Swap the peanut butter for sunflower seed butter. It is just as creamy and spreads the same way, which keeps the dough workable. If allergies are serious, read the label for peanut and tree nut cross-contact.
Maple syrup or honey: Both bind the dough well. Honey is thicker and makes a slightly stiffer dough, while maple syrup gives a looser one with a milder sweetness. Start with the amount listed and adjust only if the dough feels dry.
Oats: Quick oats give the tightest texture. If you only have old-fashioned oats, pulse them a few times in a food processor so the pieces are smaller. Newly diagnosed readers should ask their care team first, and Beyond Celiac’s guidance on certified gluten-free oats explains the gradual approach.
Protein powder: Trust me on this one… choose a flavor you genuinely like, because a chalky powder tastes chalky in the finished cup. Plant-based powders tend to absorb more liquid than whey, so expect to use that extra spoonful of nut butter or syrup.
Chocolate: The dark chocolate peanut pairing works because the bitterness cuts through the sweet nut butter. Semi-sweet chips make a sweeter cup if you prefer that. For a dairy-free version, choose a dairy-free chip that is also labeled gluten-free.
Vanilla extract and add-ins: Pure vanilla extract rounds out the peanut butter, though imitation works if that is what you have. Cinnamon, mini chocolate chips, cacao nibs, or raisins all fold in easily. Add them at the end of mixing so they stay evenly spread.
Troubleshooting: Fixes for the Most Common Issues
The dough is crumbly or dry. Stir in an extra tablespoon of nut butter or maple syrup/honey, then check again. Protein powder and quick oats both soak up moisture, and chia needs a few minutes to gel, so give the bowl a short rest before adding more.
The dough is too sticky to press. Chill the bowl in the refrigerator for 10 minutes, then try again. The chia seeds keep absorbing liquid as the dough rests, which firms it up without changing the recipe.
The chocolate layer cracks or shatters. Make sure the coconut oil goes in, and let the melted chocolate cool for a minute before pouring. On my third test batch, I skipped the coconut oil and ended up with a thick, brittle layer that popped right off the base.
The cups stick to the pan. I’ll be straight with you… a bare, un-sprayed metal tin will fight you every time. Use silicone, parchment cups, or a generous coat of spray oil. Frozen nut butter grips metal tightly, and a minute at room temperature loosens it.
The chocolate turns grainy while melting. Microwave in 30-second increments and stir well between each. Chocolate scorches easily, and a double boiler gives gentler heat if your microwave runs hot.
Storage & Meal Prep
| Method | Duration | Notes |
|---|---|---|
| Counter | About 1 hour | Serve right away, since the chocolate softens |
| Fridge | 5-7 days | Bring to room temp for a few minutes |
| Freezer | 2-3 months | Airtight container, wrap individually |
The freezer is the default home for these cups, so keep a stash in an airtight container. Let a cup sit on the counter for five minutes so the chocolate softens enough to bite cleanly. Crumble any broken cups over yogurt or warm oatmeal so nothing goes to waste.
Common Questions, Straight Answers
Can I make these peanut butter oat cups nut-free?
Yes, use sunflower seed butter in place of the peanut butter. It has a similar creamy texture, so the dough behaves the same way. Check that the label states no cross-contact with peanuts or tree nuts if allergies are severe.
How do I keep the cups from sticking to the pan?
Use a silicone mini muffin tin, parchment baking cups, or a well-sprayed pan. Frozen nut butter grips bare metal tightly. Let the tray sit on the counter for a minute before removing the cups.
What’s the best way to store these cups?
Store them in an airtight container in the freezer. They keep for 2-3 months when wrapped individually, and 5-7 days in the fridge. Give them a few minutes at room temperature before eating.
Why did my dough turn out dry or crumbly?
Your protein powder is probably absorbing extra moisture. Add an extra tablespoon or two of nut butter or maple syrup/honey until the dough holds together. Let it rest briefly so the chia seeds can gel.
Can I eat these if I have celiac disease?
Yes, as long as every ingredient is labeled gluten-free, including the oats. Protein powder and chocolate chips deserve a careful label check. If you were diagnosed recently, ask your doctor or dietitian about adding oats.
Serving Suggestions
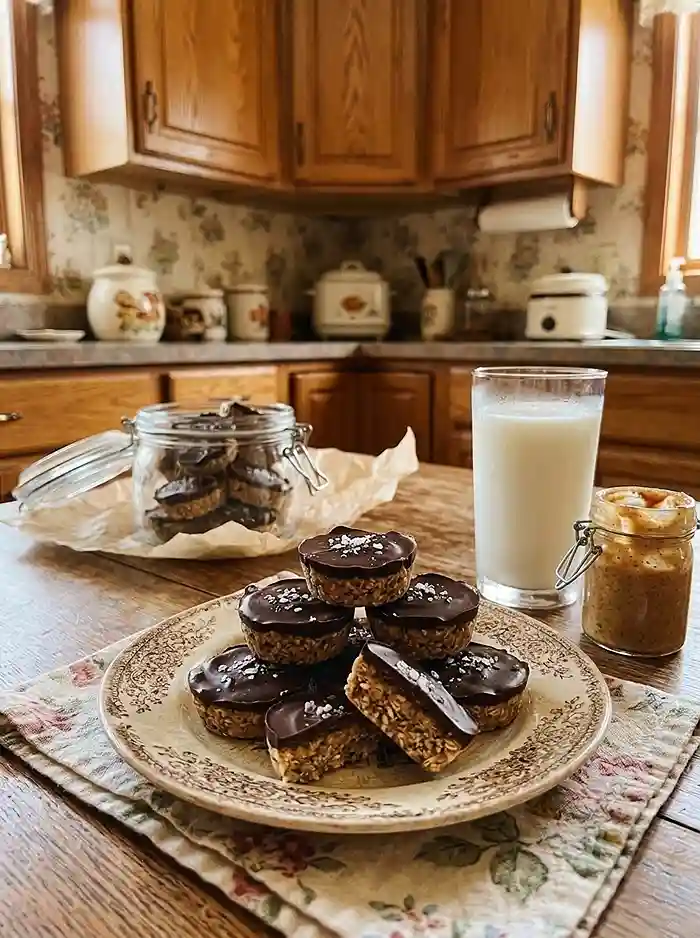
Serve the cups straight from the freezer for a firm, cold bite, or give them five minutes, when the warm, toasty smell of peanut butter starts to fill the kitchen. They are cool and dense at first, like chilled fudge, then soften into something creamier.
For Halloween, tuck a few into treat bags so a child with celiac disease has something safe to enjoy alongside the candy pile. They also travel well in a cooler for a Memorial Day picnic.
For more no-bake ideas, try the no-bake peanut butter brownie cups for a fudgier cousin,.
Try the no-bake turtle brownies when you want caramel. The vegan, gluten-free no-bake pecan pie bars suit a holiday table.
Final Thoughts
Make a batch this week and tell me how the dough felt in your kitchen. If you swapped the nut butter, the protein powder, or the sweetener, leave a comment so other readers can learn from it. A star rating helps too, and I read every note.
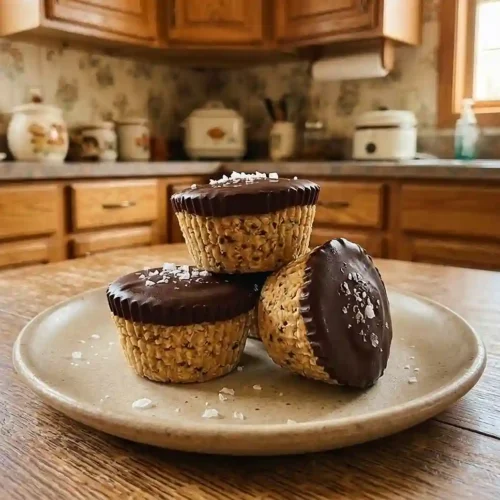
Gluten-Free No-Bake Peanut Butter Oat Cups
Equipment
- Large mixing bowl
- Mixing spoon
- Measuring cups
- Measuring spoons
- Silicone Mini Muffin Tin
- Parchment Baking Cups
- Small microwave-safe bowl
- Microwave
- Food processor
- Double boiler
Ingredients
For the Oatmeal Cups
- ¾ cup Quick oats Clearly labeled gluten-free; certified gluten-free recommended for celiac disease
- ½ cup Peanut butter or almond butter Use sunflower seed butter for a nut-free version; check labels for cross-contact
- ¼ cup Maple syrup or honey Choose one
- 2 tablespoons Chia seeds
- ¼ cup Protein powder Flavor of choice; check that it is labeled gluten-free
- 1 teaspoon Vanilla extract Check gluten-free labeling
- Sea salt A good pinch
- Optional add-ins Cinnamon, mini chocolate chips, cacao nibs, or raisins
For the Chocolate Layer
- 1¼ cups Chocolate chips Check gluten-free labeling; use dairy-free chips if desired
- 2 teaspoons Coconut oil Use if needed to thin the chocolate
For Topping
- Sea salt For sprinkling; optional
Instructions
- In a large bowl, combine the quick oats, peanut butter or almond butter, maple syrup or honey, chia seeds, protein powder, vanilla extract, and a pinch of sea salt. Mix until well combined. The dough should be thick and hold together when pinched. Depending on your protein powder, add an extra tablespoon or two of nut butter or maple syrup or honey if the mixture feels dry.
- Prepare a silicone mini muffin tin or a similar pan. If using a non-silicone pan, line it with parchment baking cups or spray each cavity generously with cooking spray.
- Divide the oatmeal mixture among the cavities, filling each about two-thirds full. Press the mixture down firmly with the back of a spoon to remove air pockets and create an even base.
- Combine the chocolate chips and coconut oil in a small microwave-safe bowl. Microwave in 30-second increments, stirring well between each interval, until completely melted and glossy. Alternatively, melt the chocolate using a double boiler.
- Divide the melted chocolate among the cups, filling the remaining one-third of each cavity. Gently tap the tin on the counter to level the chocolate layer.
- Place the tray in the freezer for at least 2–3 hours, until the cups are completely set. Sprinkle with sea salt, then remove from the pan and store in an airtight container in the freezer.