Gluten-Free No Bake Cookies
Make Gluten-Free No Bake Cookies with simple dairy-free ingredients and no oven required. Follow this easy recipe with step-by-step instructions, helpful tips, and storage advice for a quick, chocolatey treat.
Craving a sweet treat without the oven or dairy? Discover these no bake gluten free snacks packed with easy, delicious ideas for satisfying your sweet tooth. Don’t miss the fuss-free treats that could become your new go-to desserts for busy days!
Have you ever worried that a gluten-free or dairy-free cookie would taste like a compromise? These do not, because the chocolate-peanut butter flavor does the work. This batch makes 3 dozen, so it is easy to share.
At a Glance: Why This Gluten-Free No Bake Cookies Recipe Delivers
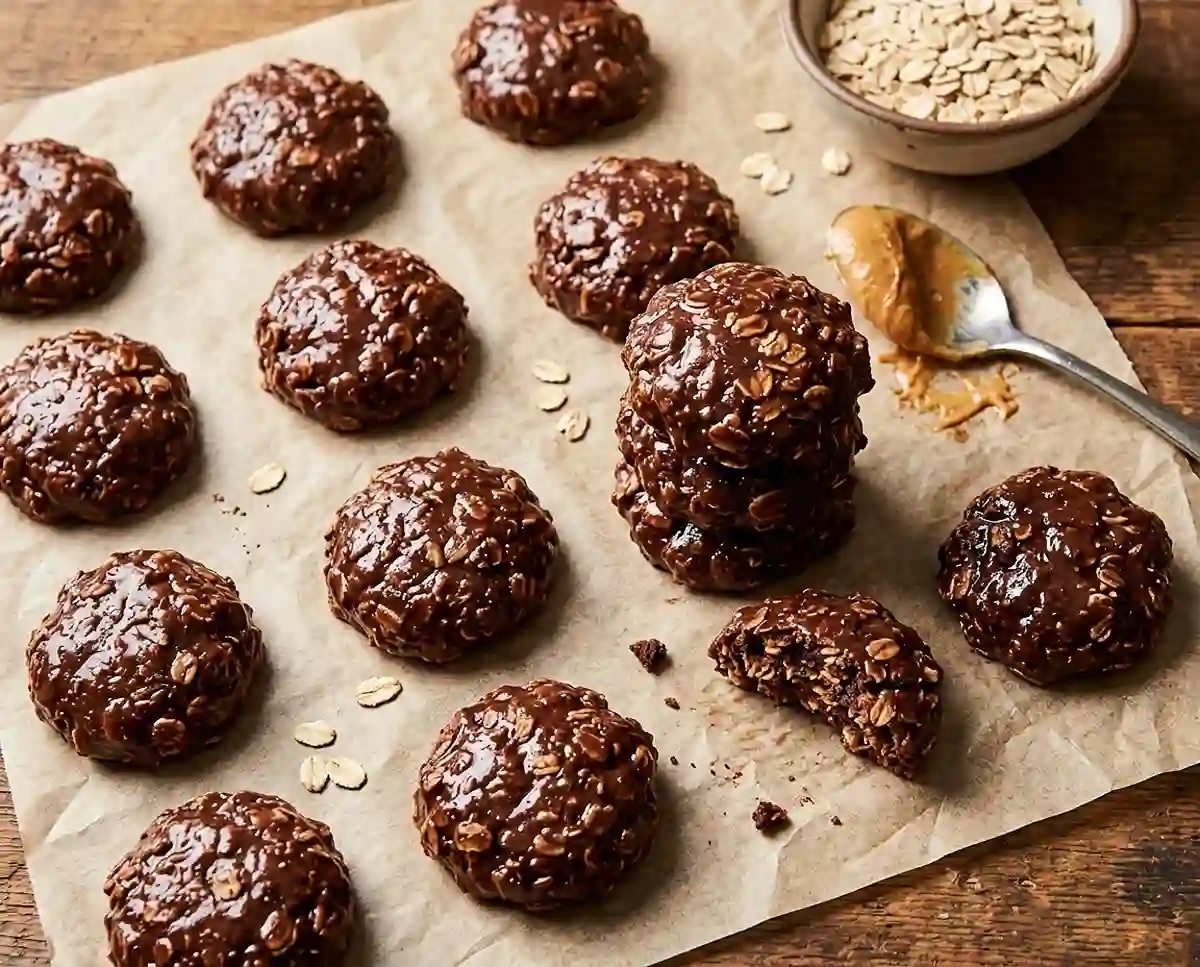
- Texture and flavor: Fudgy, chewy cookies with a rich cocoa and peanut butter flavor and a soft oat bite.
- Difficulty level: Beginner friendly. You need one pan, a spoon, and about 10 minutes of active time.
- Dietary fit: Made with dairy-free butter and almond or cashew milk, and free of gluten when you use certified gluten-free oats.
- Best for: Hot days when you do not want the oven on, school events, and last-minute cookie trays.
What Makes This Gluten-Free No Bake Cookies Recipe Actually Work
Boiling the sugar mixture for exactly 1 minute is what makes the cookies set. Heating sugar with liquid concentrates it, and as it cools it firms up and holds the oats together.
- A timed boil sets the structure: One full minute at a boil brings the syrup close to the soft-ball stage, so it firms as it cools.
- Quick oats bind better: Their smaller pieces soak up the syrup and pack tightly, which stops the cookies from crumbling.
- Cocoa powder adds body: Fine cocoa particles thicken the syrup and give a deep chocolate flavor without adding more fat.
- Peanut butter finishes the texture: Stirring it in off the heat keeps the cookies creamy and prevents the oil from separating.
These steps solve the two biggest no bake problems: cookies that never set and cookies that turn crumbly. For oat safety, read this published systematic review on oats and celiac disease.
Table of Contents
Ingredients
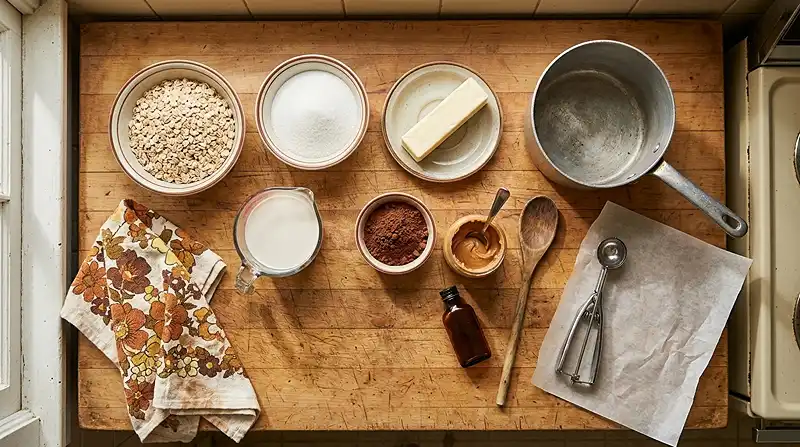
This recipe makes 3 dozen cookies. If you cook for someone with celiac disease, use oats labeled gluten-free, as explained in the Celiac Disease Foundation food label reading guide. Also check that your dairy-free butter and peanut butter are labeled gluten-free.
Dry Ingredients
- 3 cups gluten-free quick oats (or 4 cups gluten-free old-fashioned oats)
- ⅓ cup cocoa powder
- 2 cups sugar
Wet Ingredients
- ½ cup dairy-free butter
- ½ cup almond or cashew milk
- ½ cup peanut butter
- 2 teaspoons vanilla extract
Instructions
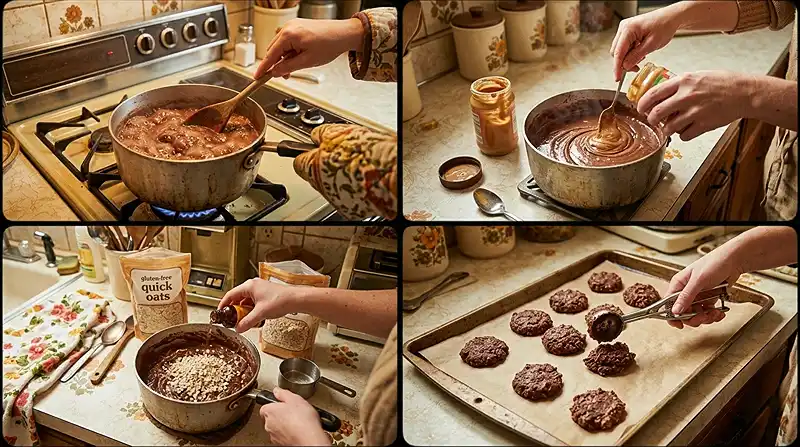
- Prepare the oats. If you do not have quick oats, pulse 4 cups of old-fashioned oats in a food processor 4-5 times to break them up. That gives you the 3 cups of quick oats this recipe needs.
- Set up your station. Measure all of your ingredients before you start, because each step goes quickly. Lay a large piece of parchment or waxed paper on the counter for the cookies to cool on.
- Heat the syrup. Put the sugar, cocoa powder, almond milk, and dairy-free butter in a medium to large pan. Bring to a boil, stirring frequently, until the mixture looks glossy and smooth.
- Boil, then add the peanut butter. Boil for 1 minute, then remove the pan from the heat. Stir in the peanut butter and blend well.
- Add the oats and vanilla. Mix in the oats and vanilla extract. Stir until every oat is coated and the mixture looks thick and shiny.
- Scoop the cookies. Use a medium cookie scoop or two spoons to drop the cookie dough onto the parchment paper. Work quickly while the mixture is warm and easy to scoop.
- Let them set. Allow the cookies to rest and set. Once they are cool, they will be firm enough to pick up and enjoy.
Pro Tip: Start your 1-minute timer when the whole surface is bubbling, not when the first bubbles appear at the edge.
Adapting This Recipe to Your Kitchen
Use old-fashioned oats if that is what you have. Pulse them 4-5 times to break them up, which gives the same 3 cups of quick oats. Whole rolled oats absorb syrup more slowly, so the cookies come out looser.
Trust me on this one… the oat size matters more than people expect. If you skip the pulsing and use whole rolled oats, the cookies may look rough and crumble when you pick them up. A few pulses solve it.
Choose almond or cashew milk based on what you like. Both work because they are neutral and thin. Cashew milk is a little creamier, which can make the syrup feel smoother.
Stir in dairy-free chocolate chips for chip cookies. Add them after the oats, and start with a small handful. Chips can melt into the warm mixture, so let it cool slightly if you want visible pieces.
Keep the peanut butter cookies classic. Creamy peanut butter blends smoothly into the syrup, while crunchy adds texture. A natural, oily peanut butter can leave a greasy sheen, so stir it well first.
Cocoa powder works best in the amount given. Unsweetened cocoa powder gives the deepest flavor in this recipe. Adding more can make the cookies dry, so keep it at ⅓ cup.
Troubleshooting: Fixes for the Most Common Issues
Problem: the cookies will not set. Boil the syrup for a full 1 minute at a steady boil next time. An under-boiled syrup stays too wet, so the cookies stay soft and sticky.
Problem: the cookies are dry or crumbly. Stick to a 1-minute boil and do not boil longer. An over-boiled syrup turns hard as it cools and cannot hold the oats together.
I’ll be straight with you… the greasy cookie is the one that trips people up most. Problem: the cookies look oily. Stir the peanut butter well before measuring and blend it in fully off the heat. Natural peanut butter can separate, and the oil pools on the cookie.
Problem: the cookies feel grainy. Stir frequently while the mixture comes to a boil so the sugar dissolves. Undissolved sugar crystals leave a sandy texture once the cookies cool.
Storage & Meal Prep
| Method | Duration | Notes |
|---|---|---|
| Counter | 3-4 days | Airtight container |
| Fridge | 5-6 days | Bring to room temp |
| Freezer | 2-3 months | Wrap individually |
For the best texture, let chilled cookies sit at room temperature for 10 to 15 minutes before eating. Frozen cookies thaw on the counter in about 30 minutes.
Crumbled cookies make a good topping for oatmeal or dairy-free ice cream. You can also press the crumbs into a bowl with a splash of milk for a quick snack.
Common Questions, Straight Answers
Can I use old-fashioned oats instead of quick oats?
Yes, use 4 cups of gluten-free old-fashioned oats and pulse them 4-5 times. This breaks them into smaller pieces that soak up the syrup. You will end up with about 3 cups of quick oats.
How do I know when no bake cookies are done setting?
They are set when they feel firm enough to pick up without bending. Let them rest on the parchment until they are completely cool. The surface should look matte rather than wet.
What’s the best dairy-free butter for no bake cookies?
A firm, stick-style dairy-free butter or buttery spread works best. Softer tub spreads contain more water, which can change how the syrup sets. Check the label to confirm it is gluten-free.
Why did my no bake cookies not set?
They usually did not boil long enough. Boil the syrup for a full 1 minute after the whole surface is bubbling. Measuring ingredients accurately also helps.
Can I freeze gluten-free no bake cookies?
Yes, you can freeze them for 2-3 months. Wrap each cookie individually so they do not stick together. Thaw them on the counter before serving.
Serving Suggestions
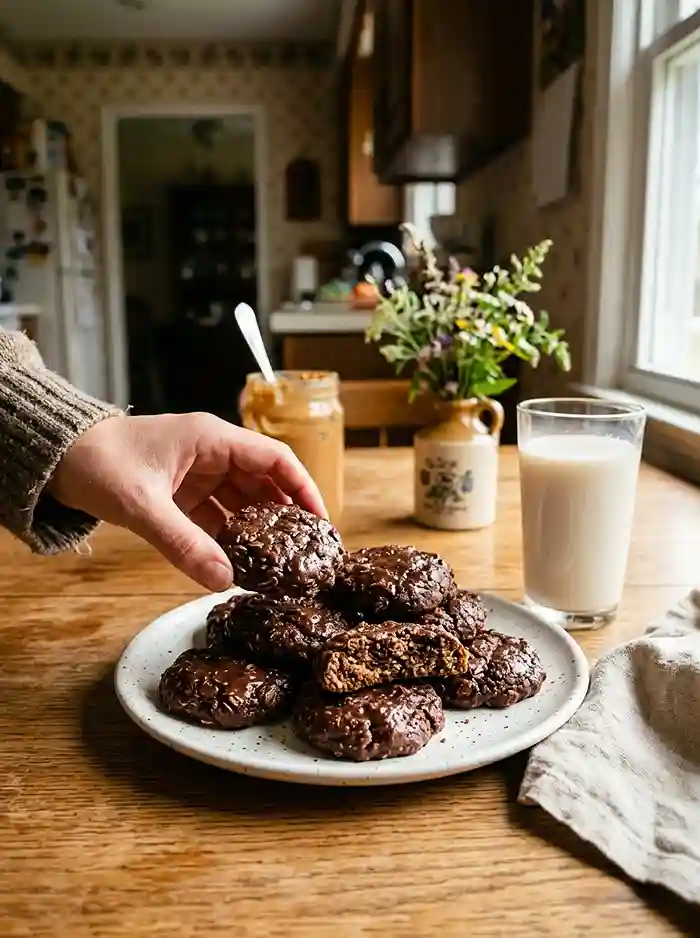
Serve these cookies on a Christmas cookie tray next to a mug of hot cocoa. The chocolate and vanilla fragrance fills the kitchen, and each cookie is cool and fudgy against the tongue. They also pack well into Halloween treat bags.
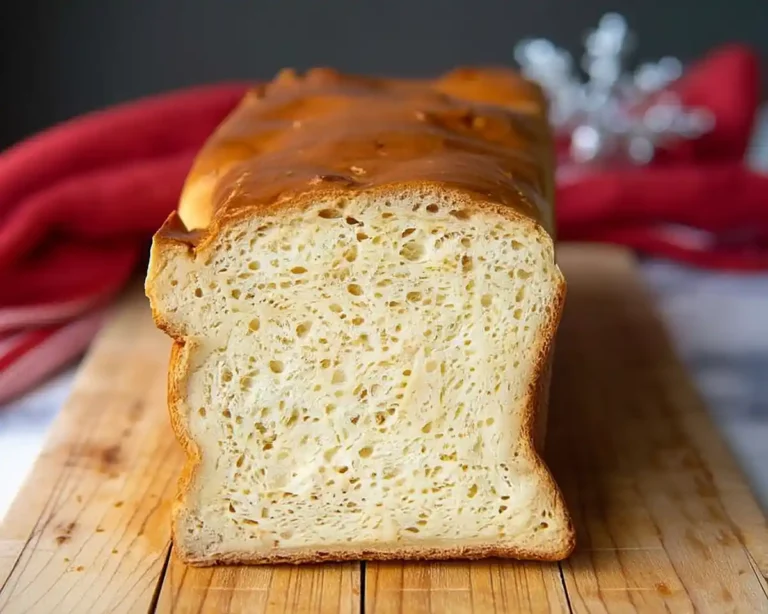
For a savory-sweet snack table, add gluten-free Brazilian cheese bread and farmhouse cheddar crackers.
You can also add crisp grain-free tortilla chips for a crunchy option.
Final Thoughts
Once you time the boil, gluten-free no bake cookies are one of the easiest treats you can make. Try the recipe and leave a rating and comment below. I would love to hear about any questions or changes from your own kitchen.
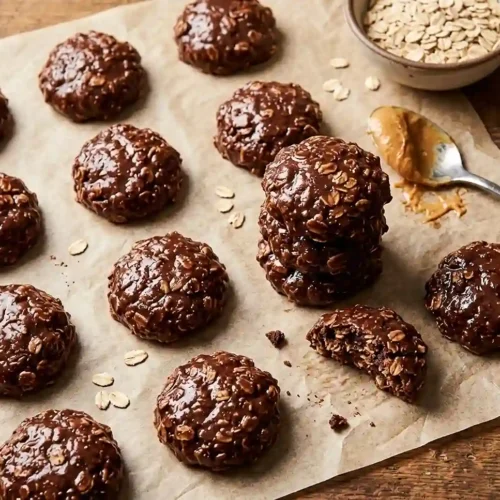
Gluten-Free No Bake Cookies
Equipment
- Medium to Large Saucepan
- Measuring cups
- Measuring spoons
- Wooden Spoon or Heatproof Spatula
- Cookie Scoop or Two Spoons
- Parchment Paper or Waxed Paper
- Food processor (optional)
Ingredients
Dry Ingredients
- 3 cups Gluten-free quick oats Use certified gluten-free oats; alternatively, pulse 4 cups gluten-free old-fashioned oats 4–5 times to yield about 3 cups of quick oats.
- ⅓ cup Cocoa powder Unsweetened cocoa powder is recommended.
- 2 cups Sugar
Wet Ingredients
- ½ cup Dairy-free butter A firm, stick-style dairy-free butter or buttery spread works best; check the label for gluten-free status.
- ½ cup Almond or cashew milk Use an unsweetened variety; check the label for gluten-free status.
- ½ cup Peanut butter Creamy or crunchy peanut butter works; stir well before measuring, and check the label for gluten-free status.
- 2 teaspoons Vanilla extract
Instructions
- Prepare the oats. If using old-fashioned oats, pulse 4 cups in a food processor 4–5 times to break them into smaller pieces. Measure out approximately 3 cups of the resulting quick-oat texture.
- Set up your station. Measure all ingredients before beginning. Lay a large piece of parchment paper or waxed paper on the counter for the cookies to cool on.
- Heat the syrup. Add the sugar, cocoa powder, almond or cashew milk, and dairy-free butter to a medium-to-large saucepan. Bring the mixture to a boil, stirring frequently, until glossy and smooth.
- Boil, then add the peanut butter. Once the entire surface is bubbling, boil for exactly 1 minute. Remove the pan from the heat and stir in the peanut butter until fully blended.
- Add the oats and vanilla. Stir in the oats and vanilla extract until every oat is coated and the mixture looks thick and shiny.
- Scoop the cookies. Use a medium cookie scoop or two spoons to drop portions of the warm mixture onto the prepared parchment paper. Work quickly while the mixture is easy to scoop.
- Let them set. Leave the cookies on the parchment until completely cool and firm enough to pick up without bending. The surface should look matte rather than wet.