Gluten-Free Publix White Mountain Bread
Make gluten-free Publix white mountain bread at home with a soft crumb and golden crust. Get exact ingredients, step-by-step instructions, and troubleshooting tips.
The first time I tried to recreate this gluten-free Publix white mountain bread, I pulled a flat, dense brick out of the oven. You know, gluten-free dough behaves nothing like the wheat version, and I learned that the hard way.
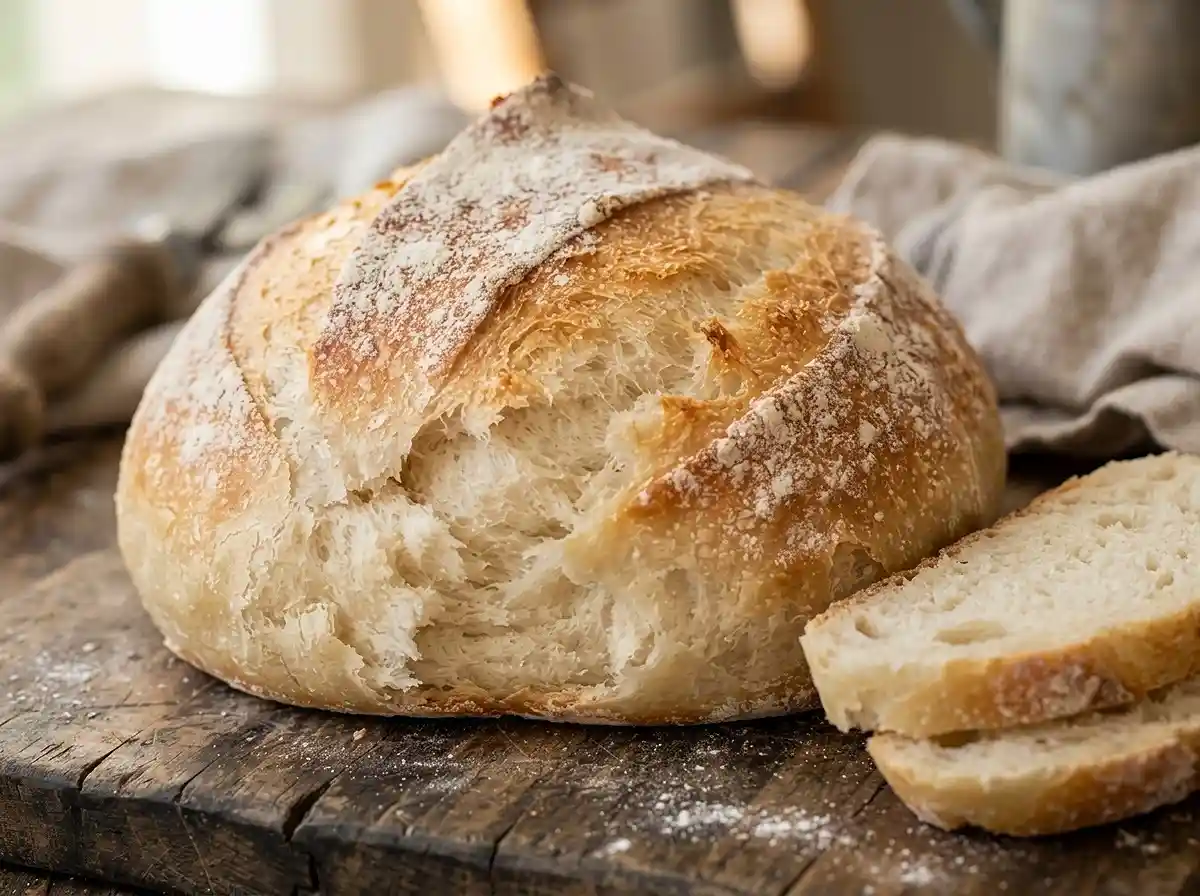
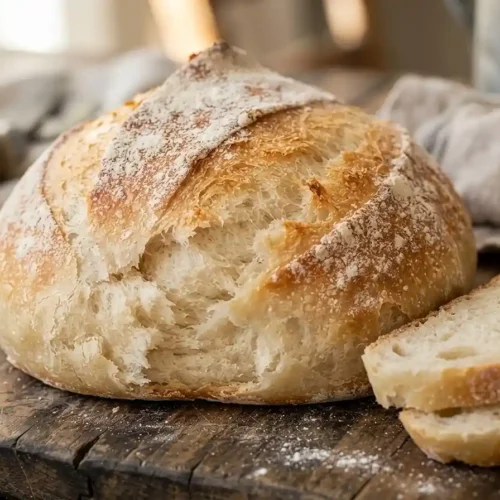
After a few more tries, I finally landed on a version with a golden crust and a soft, pillowy crumb, as light as a cloud when you tear into it. Have you ever wondered why gluten-free bread so often falls short of bakery bread? It usually comes down to hydration and rise time, both of which this recipe gets right.
This loaf mimics that familiar round shape with a flour-dusted top, just like the bakery original, but every ingredient here is gluten-free from the start.
Table of Contents
Why You’ll Love This Gluten-Free Publix White Mountain Bread
- Soft, tender crumb with a golden, slightly crisp crust
- Beginner-friendly: no kneading required, just mix, rise, and bake
- Naturally adaptable with cheese, herbs, or garlic mix-ins
- Works well for sandwiches, dinner sides, or a Sunday family bread basket
The Secret to Perfect Gluten-Free Publix White Mountain Bread
Well, the biggest secret is treating this dough like a thick batter instead of traditional bread dough. Gluten-free flour blends can’t stretch the way wheat gluten does, so a stiffer dough just bakes up dense.
Publix bakes its original white mountain bread fresh daily with a light eggshell crust dusted in flour, which is exactly the texture this gluten-free version is built to echo.
Letting the yeast mixture sit until foamy confirms it’s active before you commit the rest of your ingredients. Skipping this step is one of the most common reasons gluten-free bread fails to rise properly.
The long cooling time at the end also matters more than people expect. Gluten-free bread continues to set its crumb structure as it cools, so slicing too early leads to a gummy interior.
Ingredients
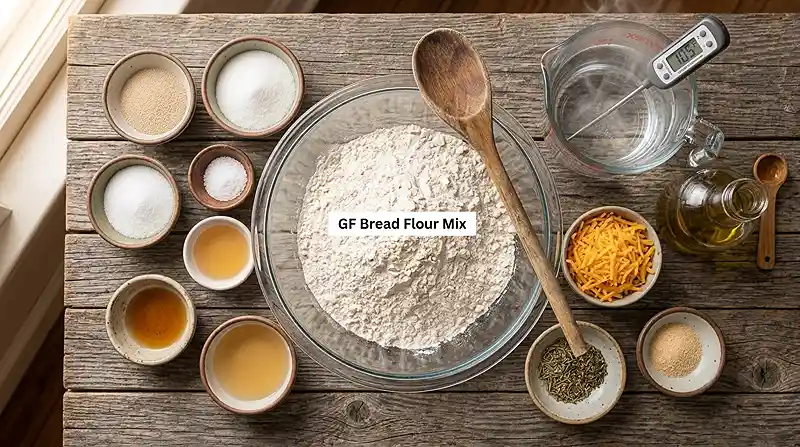
| Component | Amount | Notes |
|---|---|---|
| Active dry yeast or instant yeast | 1 teaspoon | Confirm the packet is fresh |
| Sugar | 1/2 teaspoon | Feeds the yeast |
| Warm water | 1 2/3 cups (391 g), about 110°F | Too hot will kill the yeast |
| Gluten-free all-purpose flour blend with xanthan gum | 3 1/2 cups (about 420-450 g) | Amount varies by brand |
| Salt | 2 teaspoons (12 g) | |
| Olive oil | 1 tablespoon | |
| Apple cider vinegar | 1 teaspoon | Helps improve rise and crumb |
| Dried herbs, certified gluten-free | 1 tablespoon, optional | Mix-in |
| Shredded cheese | 1/2 cup, optional | Mix-in |
| Garlic powder, certified gluten-free | 1/2 teaspoon, optional | Mix-in |
Instructions
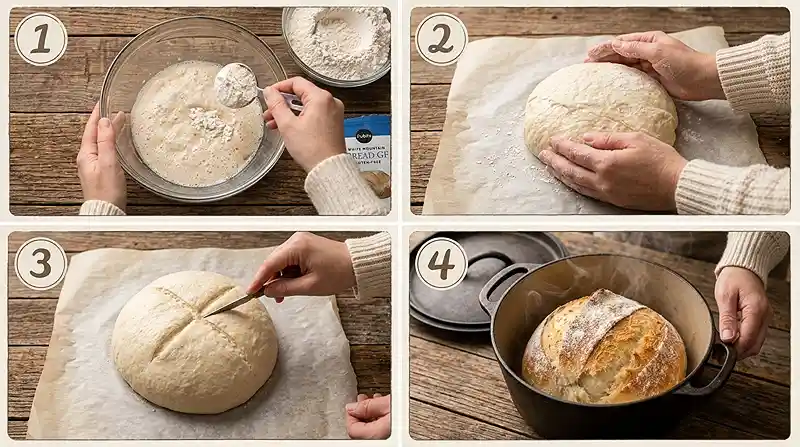
- In a large bowl, combine the warm water, sugar, and yeast. Let stand for about 5 minutes, until foamy.
- Add the gluten-free flour blend, salt, olive oil, and apple cider vinegar.
- Mix with a stand mixer fitted with the paddle attachment on medium speed for 3-4 minutes. Pro tip: the dough should be very soft and sticky, more like a thick batter than traditional wheat bread dough. Do not add extra flour.
- Fold in any optional herbs, cheese, or garlic powder.
- Scrape the dough into a lightly oiled bowl. Smooth the surface with a wet spatula or wet hands.
- Cover and let rise in a warm place for about 45-60 minutes, or until noticeably puffy. Gluten-free dough may not double exactly like wheat dough.
- Line a Dutch oven or baking sheet with parchment paper. Transfer the dough onto the parchment and shape it into a round loaf using wet hands. Smooth the surface.
- Cover loosely and let it rest for another 30-40 minutes.
Baking the Loaf
- During the final rise, preheat the oven to 450°F. If using a Dutch oven, preheat it as well.
- Brush or lightly wet the top of the loaf and score it with a sharp knife or bread lame.
- Dutch oven method: Carefully place the dough into the hot Dutch oven. Cover and bake for 25 minutes. Remove the lid and bake for another 15-20 minutes, until deeply golden.
- Baking sheet method: Bake at 450°F for 15 minutes, then reduce the temperature to 425°F and bake for another 25-30 minutes.
- The bread should reach an internal temperature of approximately 200-205°F and have a firm, golden crust with a nutty aroma filling your kitchen.
- Transfer to a wire rack and let it cool completely, at least 1-2 hours, before slicing. Gluten-free bread needs this cooling time to finish setting.
Make It Your Own
Adding shredded cheese turns this into a savory dinner bread that pairs beautifully with soup. Fold it in gently at the mix-in stage so it distributes evenly without deflating the dough.
Man, oh man, the garlic powder and herb combination is my favorite variation. It gives the loaf a focaccia-like flavor without changing the basic technique at all.
If you’re avoiding dairy along with gluten, simply skip the cheese and rely on the herbs and garlic powder for flavor instead. The bread still holds its texture without it.
Different gluten-free flour blends absorb water differently, so if your dough seems too stiff to spread when shaping, add a tablespoon of warm water at a time until it loosens.
Common Problems & Solutions
Problem: The loaf turned out dense and heavy instead of light.
Solution: Check that your yeast foamed properly in step one, since dead yeast is the most common cause of dense gluten-free bread.
You know, this can also happen if the dough rises somewhere too cold. A slightly warm oven with the light on works well as a proofing spot.
Problem: The crust is pale instead of golden brown.
Solution: Brush the top with water again before the final bake stage, and make sure your oven is fully preheated to 450°F.
Problem: The inside feels gummy even after baking.
Solution: Let the loaf cool completely before slicing, since gluten-free bread firms up as it cools and cutting too soon traps steam inside.
Storage & Meal Prep For mountain bread
| Method | Duration | Notes |
|---|---|---|
| Counter | 2-3 days | Airtight container |
| Fridge | 5-7 days | Bring to room temp |
| Freezer | 2-3 months | Wrap individually |
Slice the whole loaf before freezing so you can pull out single portions as needed. A quick toast straight from frozen brings back that fresh-baked crust without any waste.
Gluten-Free Publix White Mountain Bread FAQs
What is White Mountain bread?
It is a round, flour-dusted sandwich bread with a light crust and soft, tender crumb, baked fresh daily at Publix bakeries.
Is White Mountain bread the same as sourdough?
No. White Mountain bread is yeast-leavened, while sourdough relies on a wild fermentation starter for its rise and tang.
What’s the most popular gluten-free bread?
Store-bought gluten-free sandwich loaves and copycat bakery recipes like this one are both popular choices among gluten-free shoppers.
Why did my dough spread too flat instead of holding its shape?
This usually means the dough was too wet. Add flour a tablespoon at a time until the dough holds its shape when mounded.
Can I make this bread ahead for a holiday gathering?
Yes, this loaf keeps well for a few days on the counter, making it a good make-ahead choice for a family dinner bread basket.
Serving Suggestions
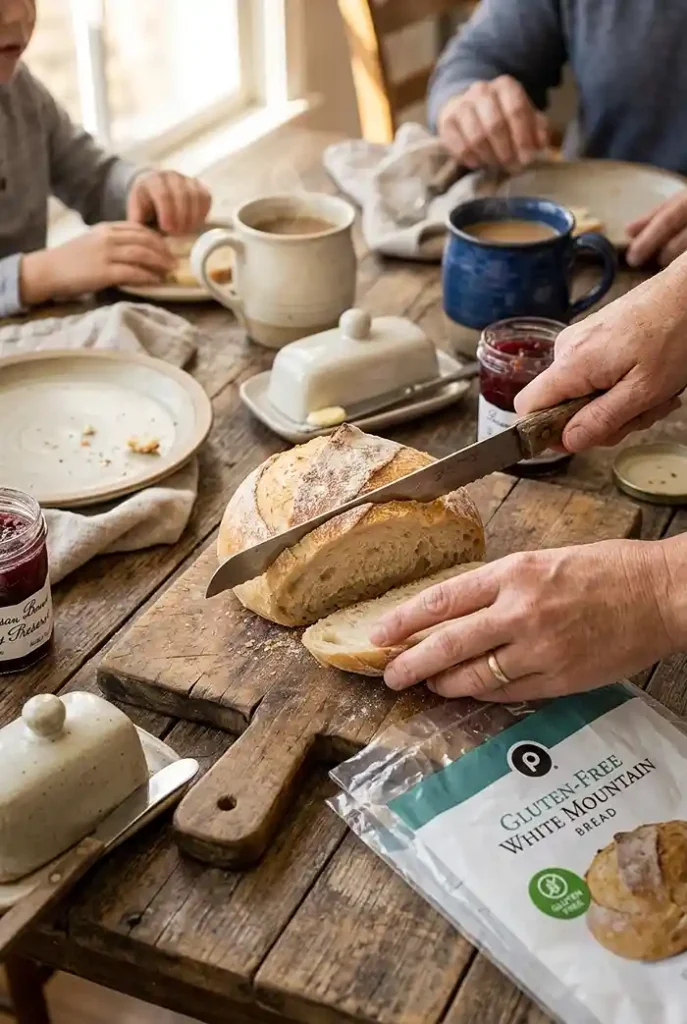
This bread makes a wonderful addition to a family Sunday dinner spread, sliced thick and served warm with butter. It also holds up well alongside a bowl of a comforting soup recipe for dipping.
For a full spread, round things out with a cozy fall-inspired dessert to serve after the meal.
Give It a Try
Give this gluten-free Publix white mountain bread a try this weekend and see how that golden crust turns out for you. If it becomes a favorite, snap a photo and pin it for later.
Drop a comment below and let me know which mix-ins you tried. I love hearing how readers make this loaf their own.
Gluten-Free Publix White Mountain Bread
Equipment
- Large mixing bowl
- Stand mixer with paddle attachment
- Dutch oven or baking sheet
- Parchment paper
- Wire rack
- Sharp knife or bread lame
Ingredients
Yeast Mixture
- 1 teaspoon Active dry yeast or instant yeast Confirm the packet is fresh
- ½ teaspoon Sugar Feeds the yeast
- 1 ⅔ cups Warm water 391 g, about 110°F; too hot will kill the yeast
Bread Base
- 3 ½ cups Gluten-free all-purpose flour blend with xanthan gum About 420-450 g; amount varies by brand
- 2 teaspoons Salt 12 g
- 1 tablespoon Olive oil
- 1 teaspoon Apple cider vinegar Helps improve rise and crumb
Optional Mix-Ins
- 1 tablespoon Dried herbs Use certified gluten-free; optional
- ½ cup Shredded cheese Optional
- ½ teaspoon Garlic powder Use certified gluten-free; optional
Instructions
- In a large bowl, combine the warm water, sugar, and yeast. Let stand for about 5 minutes, until foamy.
- Add the gluten-free flour blend, salt, olive oil, and apple cider vinegar.
- Mix with a stand mixer fitted with the paddle attachment on medium speed for 3-4 minutes. The dough should be very soft and sticky, more like a thick batter than traditional wheat bread dough. Do not add extra flour.
- Fold in any optional herbs, cheese, or garlic powder.
- Scrape the dough into a lightly oiled bowl. Smooth the surface with a wet spatula or wet hands.
- Cover and let rise in a warm place for about 45-60 minutes, or until noticeably puffy. Gluten-free dough may not double exactly like wheat dough.
- Line a Dutch oven or baking sheet with parchment paper. Transfer the dough onto the parchment and shape it into a round loaf using wet hands. Smooth the surface.
- Cover loosely and let it rest for another 30-40 minutes.
- During the final rise, preheat the oven to 450°F. If using a Dutch oven, preheat it as well.
- Brush or lightly wet the top of the loaf and score it with a sharp knife or bread lame.
- Dutch oven method: Carefully place the dough into the hot Dutch oven. Cover and bake for 25 minutes. Remove the lid and bake for another 15-20 minutes, until deeply golden.
- Baking sheet method: Bake at 450°F for 15 minutes, then reduce the temperature to 425°F and bake for another 25-30 minutes.
- The bread should reach an internal temperature of approximately 200-205°F and have a firm, golden crust.
- Transfer to a wire rack and let it cool completely, at least 1-2 hours, before slicing. Gluten-free bread needs this cooling time to finish setting.