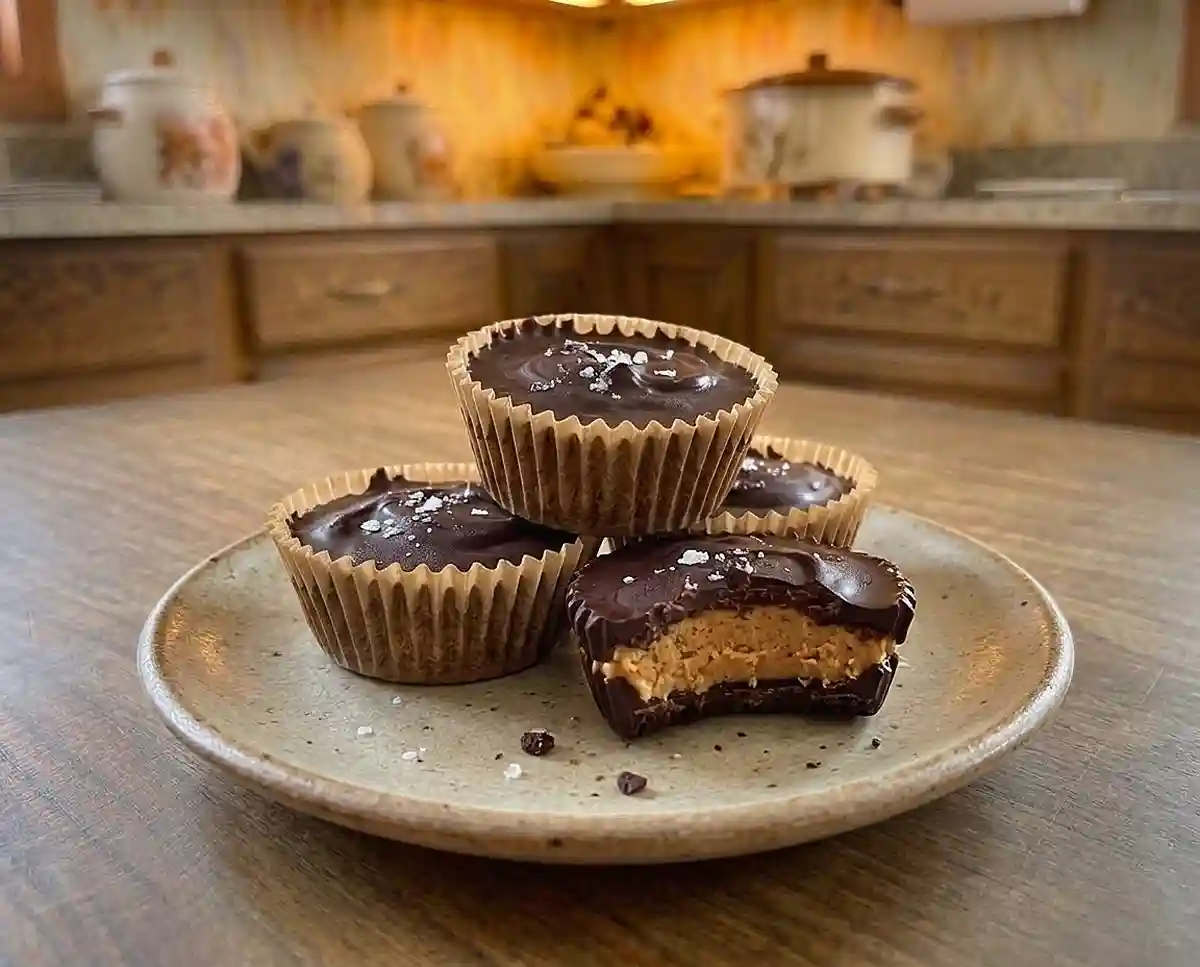
3-Ingredient Peanut Butter Cups
Make gluten-free 3-ingredient peanut butter cups with peanut butter, chocolate, and maple syrup. Step-by-step recipe with storage and fix-it tips.
The first time I made gluten-free 3-ingredient peanut butter cups, I scorched the chocolate by microwaving it for a full minute. It turned into a dull, grainy clump, and my kids watched me scrape it into the trash.
Well… that mistake taught me everything I know about melting chocolate gently, which is why this recipe uses short 20-second bursts. Can a handful of pantry staples really taste like the candy-aisle classic without the cross-contact worry?
It can. You need natural peanut butter, gluten-free chocolate, and a little maple syrup, plus an optional pinch of flaky sea salt. The hands-on time is short, and the refrigerator does the rest.
These 3-ingredient peanut butter cups are rich, creamy, and irresistibly simple—an easy no-bake treat that disappears fast! Discover more no-bake gluten-free snacks for quick sweet bites with minimal effort.
Why You’ll Love These Gluten-Free Peanut Butter Cups
- Texture: A snappy chocolate shell wraps a creamy filling that is as smooth as pudding.
- Difficulty: Beginner friendly. You only need a muffin pan, paper liners, and a microwave-safe bowl.
- Flexible: The maple syrup and the sea salt are both optional, so you can control the sweetness. Choose dairy-free chocolate if you need a dairy-free treat.
- Best for: Lunchbox surprises, potlucks, and make-ahead dessert trays. The recipe makes 12 cups.
The Secret to Perfect Gluten-Free 3-Ingredient Peanut Butter Cups
The secret is gentle heat plus a little extra peanut butter in the chocolate. Each choice solves a specific problem that trips up homemade candy.
- Short microwave bursts: Chocolate scorches quickly because cocoa solids burn at high heat. Stirring between 20-second intervals lets the leftover warmth finish melting it without overheating.
- Peanut butter stirred into the chocolate: The added fat softens the shell slightly. It bites cleanly instead of shattering into shards.
- A thoroughly stirred filling: Natural peanut butter separates as it sits. Blending the oil back in gives you a smooth, spoonable center that sets evenly.
- Filling kept off the liner edges: The chocolate seals the whole cup, so the filling can’t leak out in the fridge.
Labels matter just as much as technique here. Peanut butter and chocolate are usually gluten-free by nature, but cross-contact happens in factories. This trusted celiac label-reading guide explains what a gluten-free claim means in the United States.
Table of Contents
Ingredients
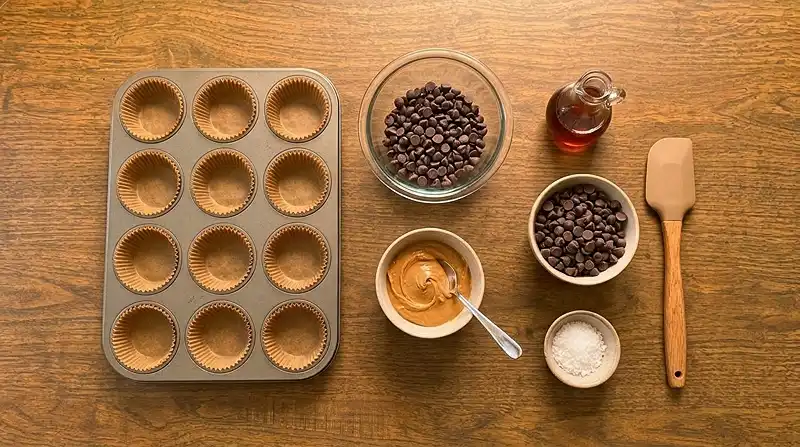
This makes 12 peanut butter cups. For anyone with celiac disease, this step-by-step guide to reading gluten-free labels is a handy shopping companion.
Peanut Butter Filling
- ½ cup natural creamy peanut butter, labeled gluten-free
- 1 tablespoon pure maple syrup (optional)
Chocolate Layers
- 1 cup chocolate chips or chopped chocolate, labeled gluten-free
- 1 tablespoon natural creamy peanut butter, labeled gluten-free
Finishing Touch
- Flaky sea salt, optional
Ingredient note: Natural peanut butter has a looser, oilier texture than shelf-stable brands. Stir it thoroughly before measuring so the oil and solids are evenly blended.
Instructions
Prep the Pan and Filling
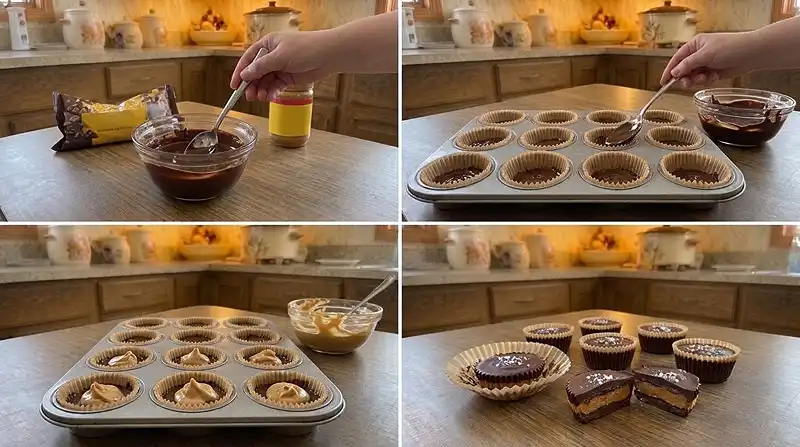
- Line a standard 12-cup muffin pan with paper liners.
- If the peanut butter has separated, stir it until the oil is fully blended in. Mix ½ cup peanut butter with the maple syrup, if using. Pro Tip: Set the filling aside now so it’s ready the moment your chocolate is melted.
Melt the Chocolate and Layer the Cups
- Melt the chocolate in a microwave-safe bowl in 20-second intervals, stirring after each interval until smooth. Be careful not to overheat it. Pro Tip: Stop heating when a few small pieces remain and stir until they melt.
- Stir 1 tablespoon peanut butter into the melted chocolate until smooth and glossy.
- Spoon about 2 teaspoons of the chocolate mixture into each liner, spreading it enough to cover the bottom completely.
- Add about 2 teaspoons of the peanut butter filling to the center of each cup, keeping it away from the liner edges.
- If the remaining chocolate has thickened, microwave it for about 20 seconds and stir until smooth. Spoon about 2 teaspoons over each peanut butter center, spreading to completely cover the filling.
- Sprinkle lightly with flaky sea salt, if desired.
Chill Until Firm
- Refrigerate for about 1 hour or freeze for 30 minutes, until firm. The tops should look matte and feel solid when you press gently.
Make It Your Own
You can skip the maple syrup entirely. The filling will taste more like pure roasted peanuts, and the chocolate layers still provide plenty of sweetness. Keep in mind the syrup also loosens the filling slightly, so the plain version will feel a bit thicker.
For a nut-free swap, try a gluten-free sunflower seed butter in place of the peanut butter. It behaves much like peanut butter, though the flavor is earthier. Check the label for gluten-free status, just as you would with any other ingredient.
You know… these cups also work as a flavor base for other treats. Chop a cup or two over a warm mug cake recipe, or serve them next to a simple butter cookies recipe. If you like the fruity flavor of jelly cups, add a tiny dab of gluten-free jam over the filling, though too much can make the center soft.
Common Problems & Solutions
Problem: The chocolate turned grainy or stiff. Start over with fresh chocolate and use 20-second intervals, stirring every time. Overheating or a stray drop of water makes cocoa solids clump, and that texture cannot be fixed once it happens.
Problem: The filling leaks out the sides. Keep the peanut butter at the center and leave a small gap around the liner edges. The top chocolate layer needs to touch the bottom layer all the way around to seal it.
Man, oh man, I once spooned the filling right to the edge and ended up with oily, leaky cups. Problem: The shell cracks when you bite it. Make sure the 1 tablespoon of peanut butter is stirred into the chocolate, and let the cups sit at room temperature for a few minutes before eating. Very cold chocolate is brittle.
Problem: The tops look dull or streaky. The chocolate was likely cooled too fast or overheated. Warm the leftover chocolate gently for about 20 seconds, stir until glossy, and spread it quickly over the filling.
Storage & Meal Prep
| Method | Duration | Notes |
|---|---|---|
| Counter | 2-3 days | Airtight container |
| Fridge | 5-7 days | Bring to room temp |
| Freezer | 2-3 months | Wrap individually |
Let chilled or frozen cups sit at room temperature for a few minutes before serving. The chocolate softens a little, and the filling becomes creamy again.
If a few cups crack or look uneven, chop them up and fold them into oatmeal or yogurt. Nothing goes to waste.
Your Questions Answered
Can I make these peanut butter cups without maple syrup?
Yes, the maple syrup is optional. Without it, the filling will be a little thicker and less sweet. The chocolate layers still give the cups a balanced flavor.
How do I make sure these peanut butter cups are gluten-free?
Choose peanut butter and chocolate that are labeled gluten-free. Cross-contact can happen during manufacturing, so the label is more reliable than the ingredient list alone. Check each product every time you buy, because recipes can change.
What’s the best chocolate for peanut butter cups?
Chocolate chips or chopped chocolate labeled gluten-free both work. Chopped bar chocolate often melts smoother, while chips can hold their shape a little more. Use whichever type you prefer, and melt it gently in 20-second intervals.
Why did my chocolate turn grainy?
It was likely overheated or touched a little water. Cocoa solids clump when chocolate gets too hot or meets moisture. Use fresh chocolate, short microwave bursts, and a dry bowl and spoon.
Can I freeze peanut butter cups?
Yes, they freeze for 2-3 months. Wrap each cup individually so they don’t stick together. Let them sit at room temperature for a few minutes before eating.
Serving Suggestions
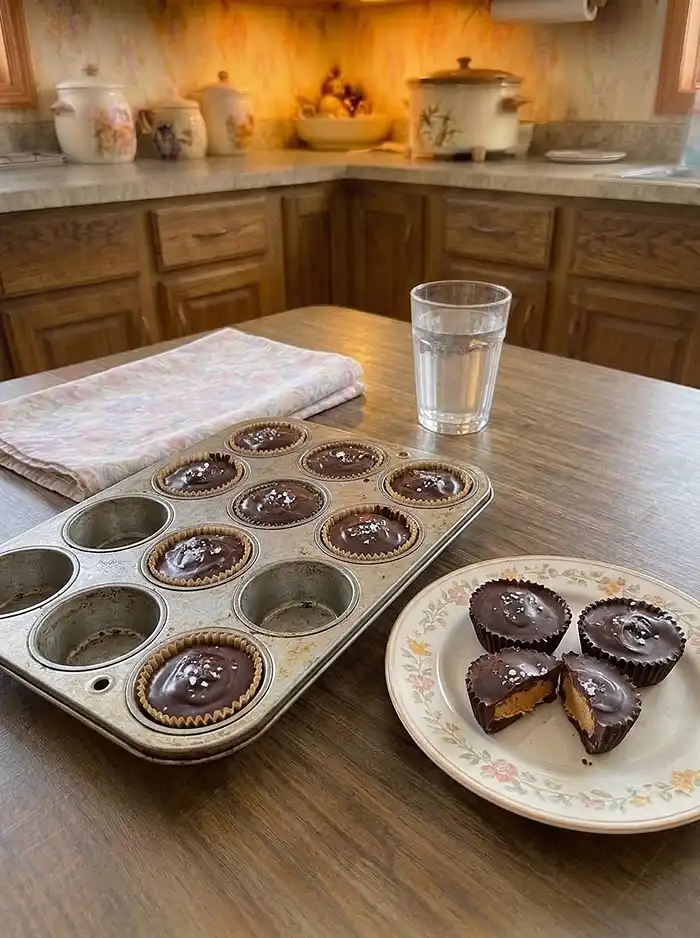
These cups fit right into a Halloween treat bag, and they’re a safe swap for kids who can’t trade for regular candy. Pair them with a plate of simple butter cookies and a glass of cold milk for an easy after-school snack.
For a dessert table, set them beside chocolate almond butter crispy rice bars and mini lemon cheesecake cups. You could also pack a few with a piece of dark chocolate pistachio cranberry bark for a holiday gift box.
Final Thoughts
Give these gluten-free 3-ingredient peanut butter cups a try this week, and let me know how they turn out. Leave a star rating and a comment below if you changed anything, whether it was the chocolate, the filling, or the sea salt.
If you loved them, save the recipe to your Pinterest board so you can find it again before the next potluck.
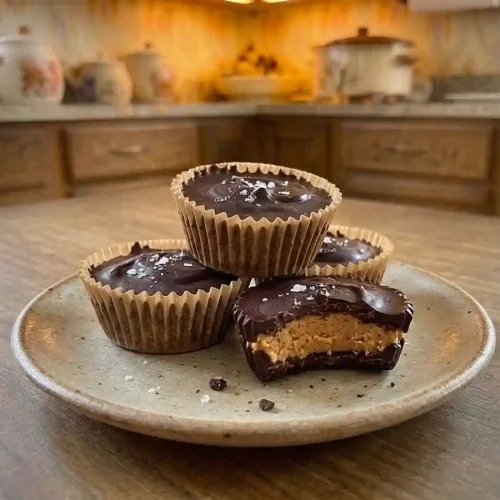
Gluten-Free 3-Ingredient Peanut Butter Cups
Equipment
- 12-cup muffin pan
- Paper muffin liners
- Microwave-safe bowl
- Spoon
Ingredients
Peanut Butter Filling
- ½ cup natural creamy peanut butter labeled gluten-free; stir thoroughly before measuring
- 1 tablespoon pure maple syrup optional
Chocolate Layers
- 1 cup chocolate chips or chopped chocolate labeled gluten-free
- 1 tablespoon natural creamy peanut butter labeled gluten-free; stirred into the melted chocolate
Finishing Touch
- flaky sea salt optional
Instructions
- Line a standard 12-cup muffin pan with paper liners.
- If the peanut butter has separated, stir it until the oil is fully blended in. Mix ½ cup peanut butter with the maple syrup, if using.
- Melt the chocolate in a microwave-safe bowl in 20-second intervals, stirring after each interval until smooth. Stop heating when a few small pieces remain and stir until they melt.
- Stir 1 tablespoon peanut butter into the melted chocolate until smooth and glossy.
- Spoon about 2 teaspoons of the chocolate mixture into each liner, spreading it enough to cover the bottom completely.
- Add about 2 teaspoons of the peanut butter filling to the center of each cup, keeping it away from the liner edges.
- If the remaining chocolate has thickened, microwave it for about 20 seconds and stir until smooth. Spoon about 2 teaspoons over each peanut butter center, spreading to completely cover the filling.
- Sprinkle lightly with flaky sea salt, if desired.
- Refrigerate for about 1 hour or freeze for 30 minutes, until firm. The tops should look matte and feel solid when pressed gently.