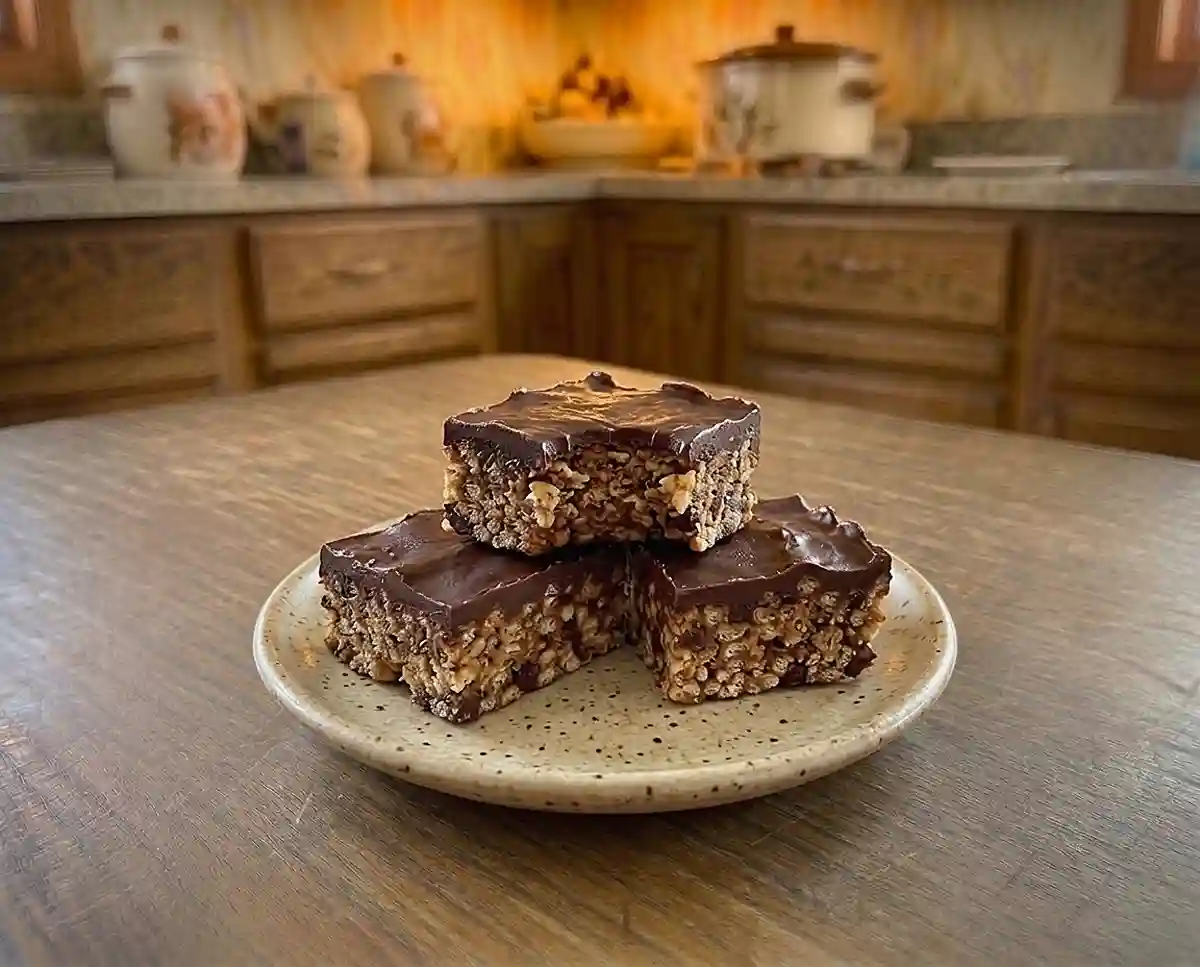
Chocolate Almond Butter Crispy Rice Bars
These gluten-free chocolate almond butter crispy rice bars need five ingredients. Get step-by-step directions, storage tips, and fixes for crumbly bars.
My first batch of these bars ended up in pieces. I skipped the parchment overhang, so I chiseled each square out with a butter knife while my kids hovered nearby. Well… lesson learned, and these gluten-free chocolate almond butter crispy rice bars have been a staple in our house ever since.
They take five ingredients and no oven, which makes them a lifesaver on busy weeknights. The almond butter base is chewy and rich, and the chocolate layer on top snaps as cleanly as a thin candy shell. Have you ever wanted a crispy treat that holds together without flour or fussy binders?
Below you’ll find the exact steps, the science behind why these bars stay together, and fixes for the most common problems. I’ve also included swaps for chocolate peanut butter, brown rice, and puffed rice versions.
These chocolate almond butter crispy rice bars are crunchy, chocolatey, and irresistibly easy to make without turning on the oven! Discover more no-bake gluten-free snacks for simple treats that satisfy a sweet craving with minimal effort.
Why You’ll Love This Chocolate Almond Butter Crispy Rice Bar Recipe
- Texture: A chewy, nutty center with crisp rice throughout and a thin chocolate layer that sets firm.
- Difficulty: Beginner-friendly. Everything melts in the microwave, so there is no baking and no candy thermometer.
- Flexibility: Kid-friendly, and easy to make dairy-free with dairy-free chocolate chips that are labeled gluten-free.
- Best for: Make-ahead snacks, lunchbox treats, potlucks, and party trays.
The Secret to Perfect Gluten-Free Chocolate Almond Butter Crispy Rice Bars
The secret is a warm, fat-based binder that sets firm in the fridge. Without flour or gluten, these bars rely on fat and cold temperatures to hold their shape, which solves the crumbly texture that plagues so many gluten-free bars.
- Coconut oil sets solid when chilled. It firms up the almond butter mixture so the bars slice cleanly instead of falling apart.
- A warm binder coats evenly. Melted almond butter flows around every piece of cereal, so you avoid dry pockets and loose rice.
- Firm pressing removes air gaps. Compacting the mixture puts the pieces in contact with each other, and that contact is what holds the bars together.
- Chilling before topping gives a smooth finish. A cold base keeps the melted chocolate from soaking in, so you get a clean, glossy layer.
Table of Contents
Ingredients
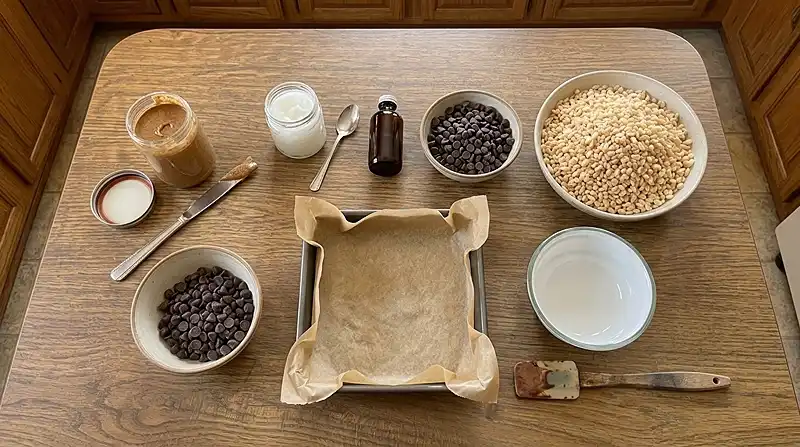
This recipe makes 16 bars. The ingredients are split into the base and the topping so measuring is easy.
Rice Bar Base
- 1 cup creamy almond butter, labeled gluten-free
- 2 tablespoons coconut oil
- 1½ teaspoons pure vanilla extract, labeled gluten-free
- 3 cups crispy rice cereal, certified gluten-free
- ½ cup chocolate chips, labeled gluten-free
Chocolate Topping
- 1 cup chocolate chips, labeled gluten-free
Ingredient note on the cereal: Many standard crisped rice cereals contain barley malt, so check for a certified gluten-free label. This trusted celiac label-reading guide explains which ingredients to watch for.
Under the FDA’s gluten-free labeling rule, foods that carry the claim must contain less than 20 parts per million of gluten. Stir your almond butter jar thoroughly before measuring so the oil is evenly blended.
Instructions
Make the Rice Bar Base
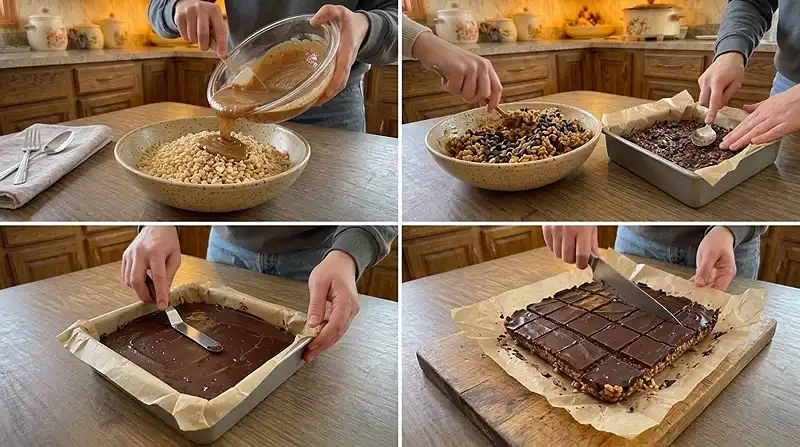
- Prepare the pan: Line an 8-inch square baking pan with parchment paper, leaving some overhang for easy removal. The overhang works like handles later. Pro Tip: Press the parchment into the corners so the bars get sharp edges.
- Melt the almond butter mixture: Add the almond butter and coconut oil to a microwave-safe bowl. Microwave in 20-second intervals, stirring between each, until smooth, glossy, and pourable. Stir in the vanilla extract. Pro Tip: Short bursts prevent scorching, which can make nut butter taste bitter.
- Add the cereal: Pour the melted almond butter mixture over the certified gluten-free crispy rice cereal. Fold gently with a spatula until every piece looks evenly coated. Pro Tip: Folding instead of stirring hard keeps the cereal from crushing into crumbs.
- Add chocolate chips: Stir ½ cup of the chocolate chips into the warm cereal mixture until evenly distributed. The chips will soften at the edges but won’t melt completely, which leaves little pockets of chocolate in each bite.
- Press into the pan: Transfer the mixture to the prepared pan. Press firmly and evenly into a compact layer, using a piece of parchment or the bottom of a measuring cup so the cereal doesn’t stick to your hands. Pro Tip: Lean into the corners, because this step is what holds the bars together.
Chill, Top, and Slice
- Chill: Refrigerate for about 30 minutes, or until the bars are firm. The surface should feel cold and dry when you touch it.
- Melt the remaining chocolate: Place the remaining 1 cup of chocolate chips in a microwave-safe bowl. Microwave in 20-second intervals, stirring between each, until completely smooth. Pro Tip: Stop heating while a few chips remain and keep stirring, since residual heat finishes the job and protects the chocolate from scorching.
- Add the chocolate topping: Spread the melted chocolate evenly over the chilled rice mixture. An offset spatula or the back of a spoon does the job. Push the chocolate all the way to the edges for a clean finish.
- Set: Place the pan in the freezer for 15–20 minutes, until the chocolate layer is firm. It should look matte instead of wet and shiny.
- Slice and serve: Lift the bars from the pan using the parchment paper and cut into 16 squares. Store in an airtight container in the refrigerator. Pro Tip: Run a sharp knife under hot water and wipe it dry between cuts for neat edges.
Make It Your Own
You can swap the nut butter, cereal, or chocolate without changing the method, as long as every swap stays gluten-free. Here are the variations I make most often.
You know… the chocolate peanut butter version is the one my kids ask for most. Use creamy peanut butter, labeled gluten-free, in place of the almond butter in the same 1 cup amount. The flavor is bolder, so the bars taste more like a classic candy bar.
For a brown rice version, use certified gluten-free brown rice crisp cereal in place of the 3 cups of crispy rice cereal. It brings a nuttier, heartier crunch. Always confirm the certified gluten-free label before you buy.
Plain puffed rice also works, but it is lighter and airier than crisped rice cereal. Keep the 3 cups measurement and fold gently, since the delicate puffs can crush easily. Expect a softer bite and a slightly less sweet bar.
To keep the bars dairy-free, choose dairy-free chocolate chips labeled gluten-free. The coconut oil and almond butter already contain no dairy, so the chips are the only ingredient that can add milk.
For a nut-free option, swap in sunflower seed butter, labeled gluten-free, using the same 1 cup amount. The flavor will be earthier than almond butter. Check that your chocolate chips are also made without nuts.
Common Problems & Solutions
Most issues with these bars come down to temperature and pressure. Here’s how to fix each one.
Problem: The bars fall apart when sliced. Solution: Press the mixture harder and chill the full 30 minutes. Why it works: firm pressing removes air gaps, and cold coconut oil acts as the glue holding the cereal together.
Problem: The bars feel greasy. Solution: Stir the almond butter jar thoroughly before measuring. Why it works: oil that has separated and pooled on top adds extra fat that never fully firms up in the fridge.
Problem: The chocolate topping shatters when cutting. Solution: Let the pan sit at room temperature for about 5 minutes and use a warm, dry knife. Why it works: Man, oh man… fridge-cold chocolate is brittle, and a little softening gives you a clean cut.
Problem: The melted chocolate turns grainy or stiff. Solution: Heat in 20-second intervals and make sure your bowl and spatula are completely dry. Why it works: even a drop of water or too much heat makes chocolate clump and lose its smooth flow.
Problem: The cereal tastes soft or stale. Solution: Use a fresh box and keep the bars in an airtight container. Why it works: crisp cereal absorbs moisture from the air, so sealing the container protects the crunch.
Storage & Meal Prep
The fridge gives the best texture, because the chocolate and coconut oil soften in a warm kitchen. Use the counter only when your kitchen is cool.
| Method | Duration | Notes |
|---|---|---|
| Counter | 2-3 days | Airtight container |
| Fridge | 5-7 days | Bring to room temp |
| Freezer | 2-3 months | Wrap individually |
Bars don’t need reheating. Let refrigerated or frozen bars sit at room temperature for about 10 minutes for a softer chew.
Broken corners and crumbs make a great topping for yogurt or ice cream, so nothing goes to waste.
Your Questions Answered
Can I freeze these bars?
Yes, you can freeze these bars for 2-3 months. Wrap each square individually so the chocolate doesn’t stick together. Let a bar sit at room temperature for about 10 minutes before eating for the best chew.
How do I know my crispy rice cereal is gluten-free?
Look for a certified gluten-free label on the box. Many standard crisped rice cereals contain barley malt, which is a source of gluten. Reading the ingredient list every time you buy is a smart habit, since formulas can change.
What’s the best way to cut clean squares?
Lift the slab out by the parchment, then use a long, sharp knife warmed under hot water and wiped dry. Let the chilled slab sit at room temperature for about 5 minutes first. Wipe the blade between cuts to keep the chocolate edges neat.
Why did my bars turn out crumbly?
Crumbly bars usually weren’t pressed firmly enough or didn’t chill long enough. Press the mixture into the pan with real pressure, especially in the corners. Give the base the full 30 minutes so the coconut oil can set.
Can I make these bars nut-free?
Yes, swap the almond butter for sunflower seed butter, labeled gluten-free, in the same 1 cup amount. The flavor will be earthier. Check that your chocolate chips are also made without nuts.
Serving Suggestions
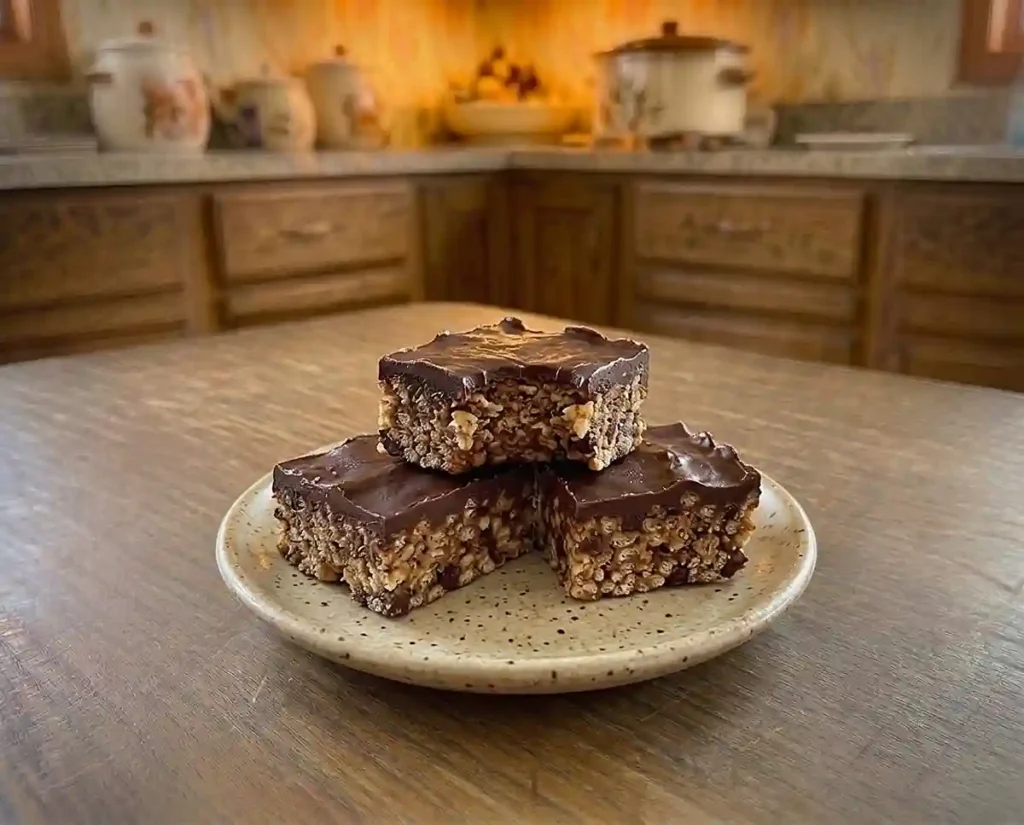
Serve these bars chilled with fresh berries or a cold glass of milk. Cut them into smaller squares for a party tray, and they’re easy to pack in a cooler for a Fourth of July potluck.
For a full gluten-free spread, pair them with crispy polenta bites with whipped ricotta.
A bowl of slow cooker buffalo pulled chicken dip and Vietnamese rice paper spring rolls with dip round out the savory side.
Final Thoughts
If you make these bars, I’d love to hear how they turned out. Leave a star rating and a comment about any swaps you tried, and tell me which version your family liked best.
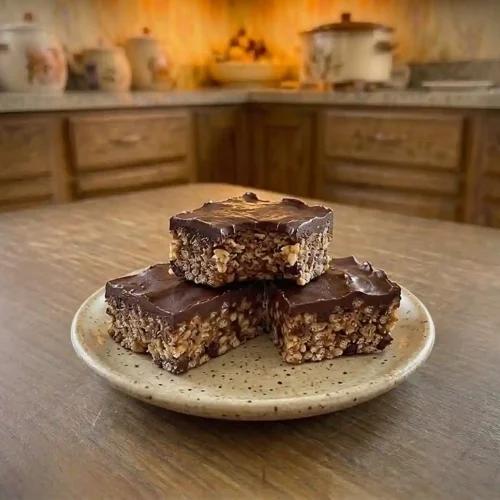
Gluten-Free Chocolate Almond Butter Crispy Rice Bars (Easy)
Equipment
- 8-inch square baking pan
- Parchment paper
- Microwave-safe bowl
- Spatula
- Measuring cup
- Sharp knife
Ingredients
Rice Bar Base
- 1 cup creamy almond butter labeled gluten-free
- 2 tablespoons coconut oil
- 1½ teaspoons pure vanilla extract labeled gluten-free
- 3 cups crispy rice cereal certified gluten-free
- ½ cup chocolate chips labeled gluten-free
Chocolate Topping
- 1 cup chocolate chips labeled gluten-free
Instructions
- Prepare the pan: Line an 8-inch square baking pan with parchment paper, leaving some overhang for easy removal. Press the parchment into the corners so the bars get sharp edges.
- Melt the almond butter mixture: Add the almond butter and coconut oil to a microwave-safe bowl. Microwave in 20-second intervals, stirring between each, until smooth, glossy, and pourable. Stir in the vanilla extract.
- Add the cereal: Pour the melted almond butter mixture over the certified gluten-free crispy rice cereal. Fold gently with a spatula until every piece looks evenly coated.
- Add chocolate chips: Stir ½ cup of the chocolate chips into the warm cereal mixture until evenly distributed.
- Press into the pan: Transfer the mixture to the prepared pan. Press firmly and evenly into a compact layer, using a piece of parchment or the bottom of a measuring cup so the cereal does not stick to your hands.
- Chill: Refrigerate for about 30 minutes, or until the bars are firm. The surface should feel cold and dry when touched.
- Melt the remaining chocolate: Place the remaining 1 cup of chocolate chips in a microwave-safe bowl. Microwave in 20-second intervals, stirring between each, until completely smooth.
- Add the chocolate topping: Spread the melted chocolate evenly over the chilled rice mixture. Push the chocolate all the way to the edges for a clean finish.
- Set: Place the pan in the freezer for 15–20 minutes, until the chocolate layer is firm.
- Slice and serve: Lift the bars from the pan using the parchment paper and cut into 16 squares. Store in an airtight container in the refrigerator. For neat edges, run a sharp knife under hot water and wipe it dry between cuts.