Mini Lemon Cheesecake Cups
Make gluten-free mini lemon cheesecake cups with a vanilla wafer base and lemon curd. Get step-by-step directions, storage tips, and fixes for cracked tops.
I learned the hard way that a cheesecake can double as a hockey puck. I once left a batch in the oven while I helped with homework, and my son tapped one on the counter and announced that it clunked. Honestly… that disaster is why I now trust the wobble as much as the timer.
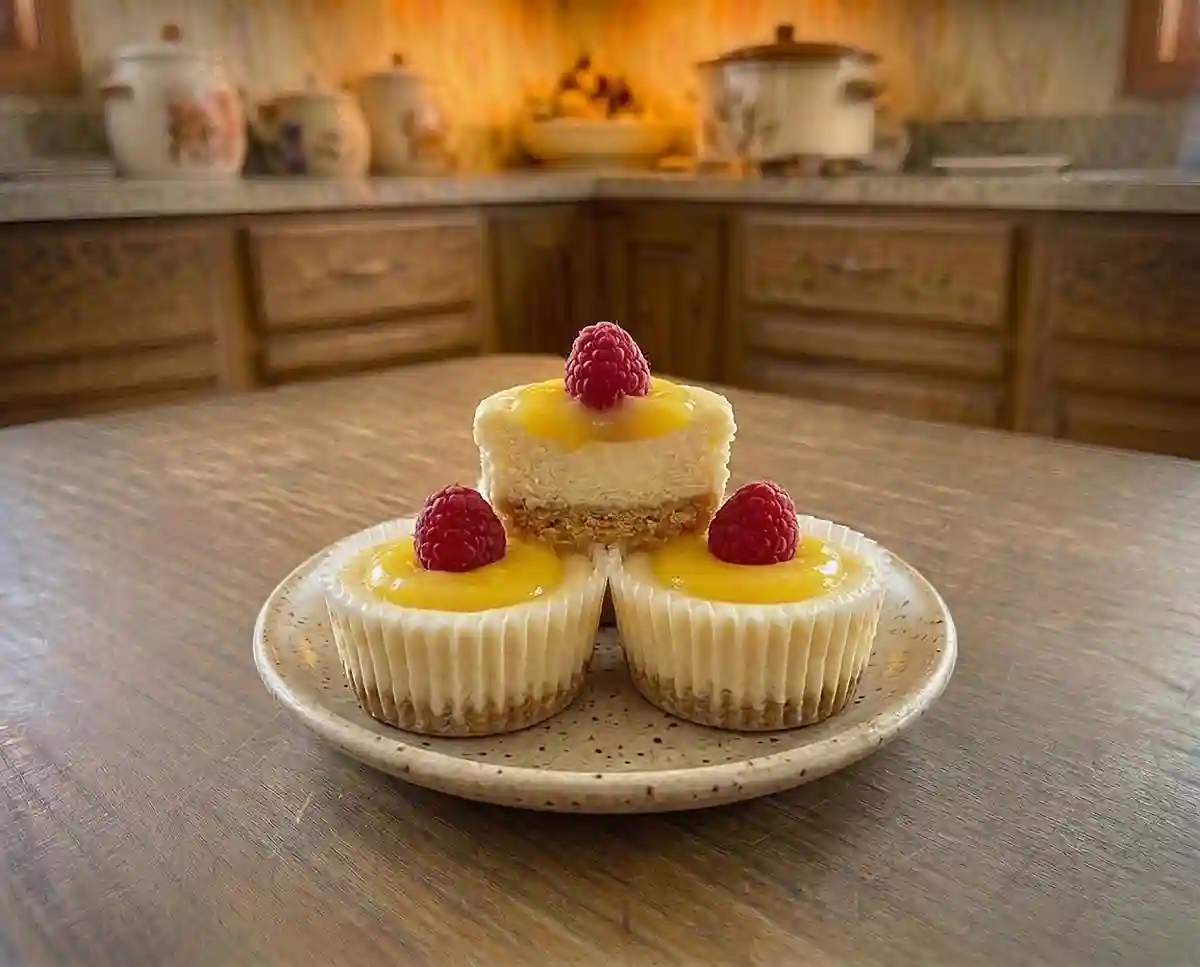
These gluten-free mini lemon cheesecake cups fix that problem with a gentle 325°F oven and a gluten-free vanilla wafer base. Each one has a creamy center as plush as a velvet cushion, topped with a spoonful of bright lemon curd. Who says gluten-free dessert has to feel like a compromise?
Everything bakes in a standard 12-cup muffin tin, so there is no springform pan and no water bath. I’ll walk you through the steps, share fixes for cracks, and show you how to try a lemon meringue cheesecake recipe twist or a cheesecake mousse-style bite.
These mini lemon cheesecake cups are creamy, tangy, and delightfully refreshing—little no-bake treats that bring sunshine to every bite! Discover more no-bake gluten-free snacks for easy sweet treats that are too tempting to keep to yourself!
What Makes This Mini Lemon Cheesecake Cup Recipe Worth Making
- Texture and flavor: A dense, creamy center with tangy lemon curd on top and a soft vanilla wafer base underneath.
- Difficulty level: Beginner-friendly. You need one muffin tin, a mixer, and no water bath or springform pan.
- Unique advantages: Individually portioned, kid-friendly, and easy to make ahead, with every ingredient labeled or certified gluten-free.
- Best for: Brunches, baby showers, holiday dessert tables, and any gathering where you want a neat, grab-and-go dessert.
The Science Behind Great Gluten-Free Mini Lemon Cheesecake Cups
These cheesecakes work because every step protects the egg-and-cream-cheese filling from overheating, overmixing, and cold lumps. Gluten-free desserts often struggle with texture, but this recipe has no flour, so the filling itself does all the work.
- Lemon sugar: Rubbing the zest into the sugar releases fragrant oils from the peel. Those oils dissolve into the fat in the cream cheese, so the lemon flavor spreads through every bite.
- Room temperature ingredients: Softened cream cheese and room temperature eggs blend into a smooth emulsion. Cold ingredients leave lumps that never fully disappear.
- Mixing just until smooth: Beating too long whips in extra air, which makes the filling puff up in the oven and then crack as it cools.
- A short, gentle bake and slow cool: Pulling the cups while the centers still wobble lets residual heat finish the set. Overbaked egg proteins tighten and squeeze out moisture, which causes dry, cracked tops.
Table of Contents
Ingredients
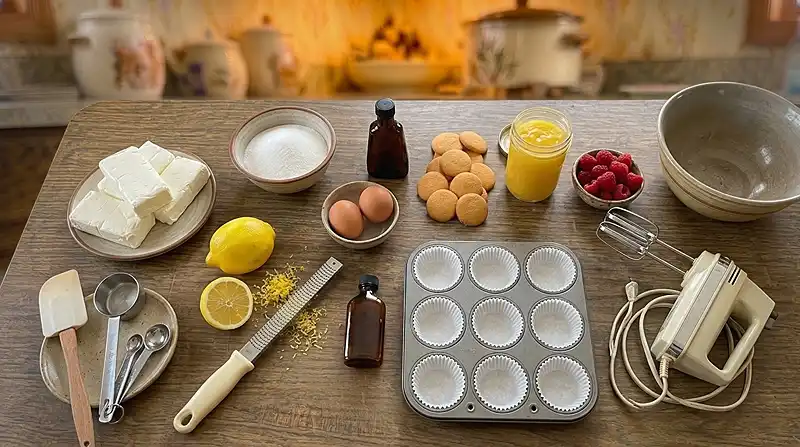
This recipe makes 12 mini cheesecakes.
For the Cheesecake
- 16 ounces cream cheese, softened and labeled gluten-free
- ⅔ cup granulated sugar
- Zest of 1 large lemon
- 2 large eggs, room temperature
- 2 teaspoons pure vanilla extract, labeled gluten-free
- 1 tablespoon freshly squeezed lemon juice
- 12 gluten-free vanilla wafer cookies, certified gluten-free
For the Topping
- 1 cup lemon curd, labeled gluten-free
- Fresh raspberries, optional
Ingredient note on the wafers: Regular vanilla wafers are made with wheat flour, so buy certified gluten-free ones. The cream cheese, vanilla extract, and lemon curd should also be labeled gluten-free. This trusted celiac label-reading guide shows how to read the fine print.
Take the cream cheese and eggs out of the fridge ahead of time so they reach room temperature. Zest the lemon before you juice it, and avoid the white pith underneath, which tastes bitter.
Instructions
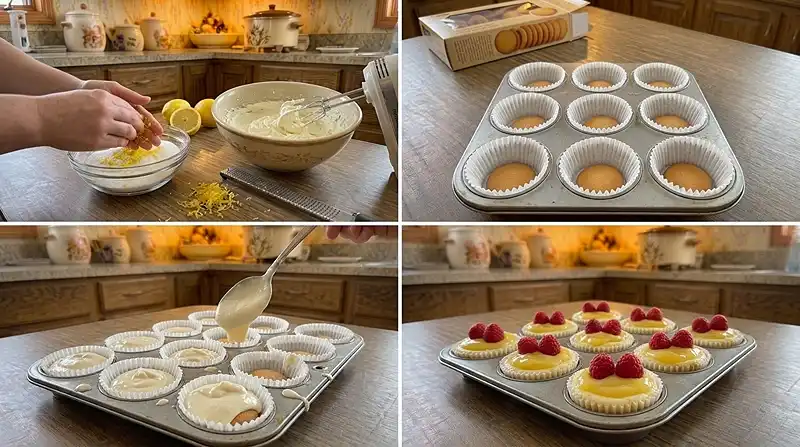
Prep and Mix the Batter
- Prepare the oven: Preheat the oven to 325°F (165°C). Line a 12-cup muffin tin with paper baking liners.
- Beat the cream cheese: Place the softened cream cheese in the bowl of a stand mixer fitted with the paddle attachment, or use a large mixing bowl and electric mixer. Beat for about 2 minutes, until smooth and creamy. Pro Tip: Scrape down the bowl once so no lumps hide at the bottom.
- Make the lemon sugar: Place the granulated sugar and lemon zest in a medium bowl. Rub them together with your fingertips until the sugar becomes moist and fragrant. Pro Tip: This step works like a quick infusion, so don’t skip it.
- Make the cheesecake batter: Add the lemon sugar to the cream cheese and beat until light and fluffy. Add the eggs, vanilla extract, and lemon juice. Mix just until smooth and fully combined, and stop as soon as no streaks remain.
Assemble and Bake
- Add the wafer bases: Place one certified gluten-free vanilla wafer, flat side down, in the bottom of each muffin liner. The flat side keeps the wafer steady so the filling doesn’t tip it.
- Fill the cups: Divide the cheesecake batter evenly among the 12 cups, filling each about two-thirds full. Pro Tip: Use a spring-loaded cookie scoop or a large spoon for even portions.
- Bake: Bake for 22–24 minutes, until the centers are almost set but still have a slight wobble. They should jiggle like softly set pudding when you nudge the pan. Pro Tip: Begin checking at 22 minutes, since ovens vary.
- Cool: Remove the muffin tin from the oven and place it on a wire rack. Let the cheesecakes cool completely in the pan. The centers will naturally sink slightly as they cool, which creates a little well for the curd.
Chill and Finish
- Chill: Refrigerate the mini cheesecakes for at least 4 hours, preferably overnight, until completely firm and chilled. The surface should feel cool and set, not tacky.
- Add the topping: Just before serving, spoon lemon curd into the center of each cheesecake and garnish with fresh raspberries, if desired. Pro Tip: Topping at the last minute keeps the curd glossy.
- Serve: Serve chilled.
Ways to Customize This Recipe
You can change the toppings and textures without touching the base recipe. Here are the variations I reach for most often.
Look… if you only try one twist, make it a lemon meringue cheesecake recipe version. Top each chilled cheesecake with a swirl of meringue and brown it briefly with a kitchen torch just before serving. The toasted sweetness plays against the tart curd like a slice of lemon meringue pie.
For a lighter, cheesecake mousse-style bite, add a dollop of lightly whipped cream beside the curd. The airy cream contrasts with the dense filling, much like a spoonful of mousse would. The baked cheesecake itself stays unchanged.
If you can’t find gluten-free lemon curd, spoon in 1 cup of lemon pudding, labeled gluten-free, instead. Lemon pudding is softer and milder than curd, so chill it first so it holds its shape on top.
Fresh blueberries or sliced strawberries can replace the raspberries. Pat the berries dry before adding them, because extra moisture will make the curd run.
If Something Went Wrong, Start Here
Most cheesecake problems come down to temperature, mixing, and timing. Here’s how to fix each one.
Problem: The tops cracked. Solution: Pull the pan while the centers still wobble, and cool it completely in the pan. Why it works: overbaked egg proteins tighten and split, and slow cooling lets the filling settle gently.
Problem: The filling is lumpy or grainy. Solution: Soften the cream cheese fully and beat it for about 2 minutes before adding anything else. Why it works: Oh wow… cold cream cheese resists blending, and the lumps stay in the batter.
Problem: The centers sank. Solution: Nothing went wrong, since a slight dip is normal. Why it works: the batter puffs a little in the oven and settles as it cools, which makes a handy well for the lemon curd.
Problem: The wafer bases turned soggy. Solution: Cool the cheesecakes completely in the pan before chilling. Why it works: trapped steam from warm cheesecakes condenses on the wafer and softens it.
Problem: The lemon curd looks watery. Solution: Add the curd just before serving. Why it works: the curd’s moisture soaks into the filling and runs if it sits for hours.
Storage & Meal Prep
These cheesecakes are made with eggs and cream cheese, so they belong in the fridge. Perishable desserts shouldn’t sit out longer than two hours, or one hour in heat above 90°F, according to this university extension two-hour food safety rule explainer.
| Method | Duration | Notes |
|---|---|---|
| Counter | Up to 2 hours | Serving time only |
| Fridge | 3-4 days | Airtight container, topping added just before serving |
| Freezer | 2-3 months | Wrap individually, without curd |
These are best served chilled, so there’s no reheating. Thaw frozen cups overnight in the fridge, then add the curd and berries.
Spoon leftover lemon curd over yogurt, or use it as a spread on toast.
Frequently Asked Questions
Can I make these gluten-free mini cheesecakes ahead of time?
Yes, you can bake and chill them up to 2 days before serving. Keep them in an airtight container in the fridge and wait to add the lemon curd and raspberries until just before serving. That keeps the topping glossy and the wafer base from softening.
How do I know when the cheesecake cups are done baking?
They are done when the centers are almost set but still have a slight wobble, around 22 to 24 minutes. The edges should look set while the middle jiggles gently. The cheesecakes finish setting as they cool in the pan and chill in the fridge.
What’s the best way to keep this recipe gluten-free?
Use certified gluten-free vanilla wafers and check that the cream cheese, vanilla extract, and lemon curd are labeled gluten-free. Regular vanilla wafers contain wheat flour, so the base is the most important swap. Read labels each time you buy, since ingredients can change.
Why did my mini cheesecakes crack?
Cracks usually come from overbaking, overmixing, or cooling too quickly. Pull the pan when the centers still wobble, mix only until smooth, and let the cheesecakes cool completely in the pan. Cracks are cosmetic, and lemon curd covers them nicely.
Can I freeze these mini lemon cheesecakes?
Yes, freeze them without the topping for 2 to 3 months. Wrap each cheesecake individually so it stays fresh. Thaw overnight in the fridge, then add the lemon curd and raspberries before serving.
Serving Suggestions
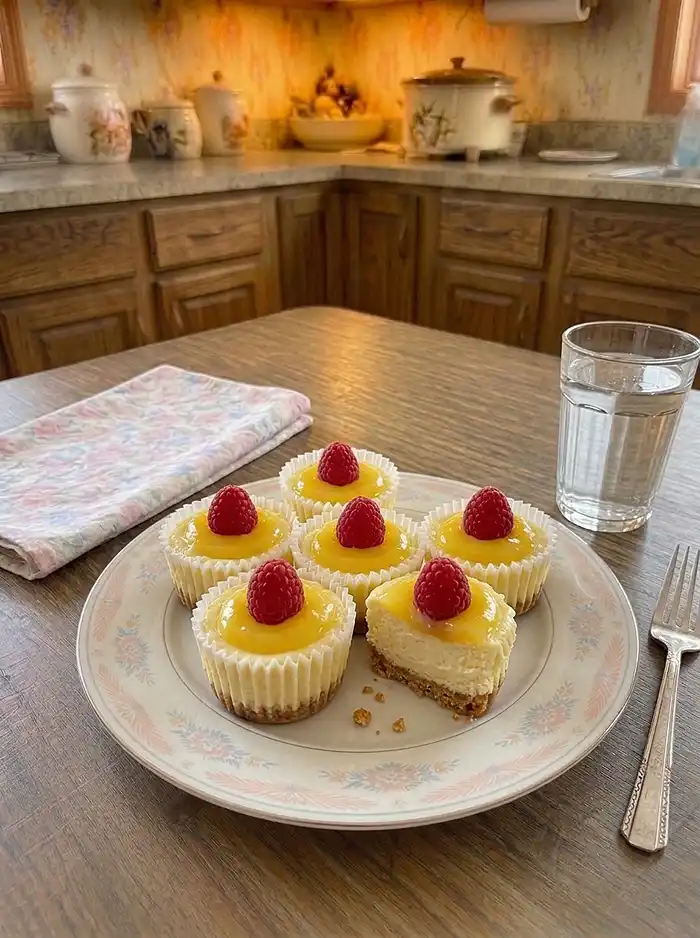
These cheesecake cups are made for an Easter brunch table, where a pastel dessert tray is practically a family tradition. Arrange them with a bowl of extra raspberries and let guests help themselves.
For a full spread, pair them with slow cooker buffalo pulled chicken dip and Vietnamese rice paper spring rolls with dip.
For a dessert board, add a plate of gluten-free chocolate almond butter crispy rice bars alongside.
Final Thoughts
If you make these mini lemon cheesecake cups, I’d love to hear how they turned out. Leave a star rating and a comment about any changes you tried.
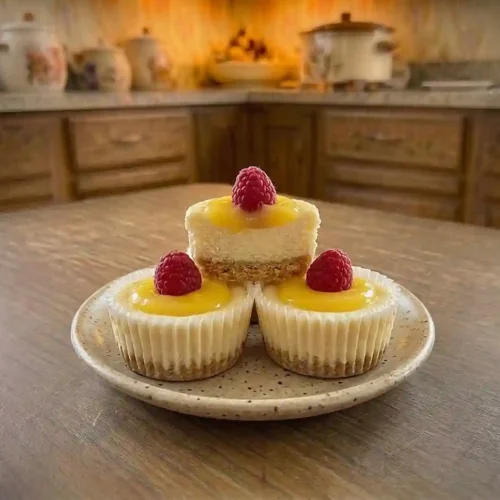
Gluten-Free Mini Lemon Cheesecake Cups
Equipment
- 12-cup muffin tin
- Paper baking liners
- Stand mixer or electric hand mixer
- Mixing bowls
- Zester
- Measuring cups and spoons
- Wire cooling rack
- Cookie scoop or large spoon
- Kitchen torch (optional)
Ingredients
For the Cheesecake
- 16 ounces cream cheese softened and labeled gluten-free
- ⅔ cup granulated sugar
- 1 large lemon lemon zest zest of 1 large lemon
- 2 large eggs room temperature
- 2 teaspoons pure vanilla extract labeled gluten-free
- 1 tablespoon freshly squeezed lemon juice
- 12 gluten-free vanilla wafer cookies certified gluten-free
For the Topping
- 1 cup lemon curd labeled gluten-free
- fresh raspberries optional
Instructions
- Prepare the oven: Preheat the oven to 325°F (165°C). Line a 12-cup muffin tin with paper baking liners.
- Beat the cream cheese: Place the softened cream cheese in the bowl of a stand mixer fitted with the paddle attachment, or use a large mixing bowl and electric mixer. Beat for about 2 minutes, until smooth and creamy. Scrape down the bowl once to remove any lumps.
- Make the lemon sugar: Place the granulated sugar and lemon zest in a medium bowl. Rub them together with your fingertips until the sugar becomes moist and fragrant.
- Make the cheesecake batter: Add the lemon sugar to the cream cheese and beat until light and fluffy. Add the eggs, vanilla extract, and lemon juice. Mix just until smooth and fully combined, stopping as soon as no streaks remain.
- Add the wafer bases: Place one certified gluten-free vanilla wafer, flat side down, in the bottom of each muffin liner.
- Fill the cups: Divide the cheesecake batter evenly among the 12 cups, filling each about two-thirds full. Use a spring-loaded cookie scoop or a large spoon for even portions.
- Bake: Bake for 22–24 minutes, until the centers are almost set but still have a slight wobble. The centers should jiggle like softly set pudding when you gently nudge the pan. Begin checking at 22 minutes.
- Cool: Remove the muffin tin from the oven and place it on a wire rack. Let the cheesecakes cool completely in the pan. The centers will naturally sink slightly as they cool.
- Chill: Refrigerate the mini cheesecakes for at least 4 hours, preferably overnight, until completely firm and chilled.
- Add the topping: Just before serving, spoon lemon curd into the center of each cheesecake and garnish with fresh raspberries, if desired.
- Serve: Serve chilled.