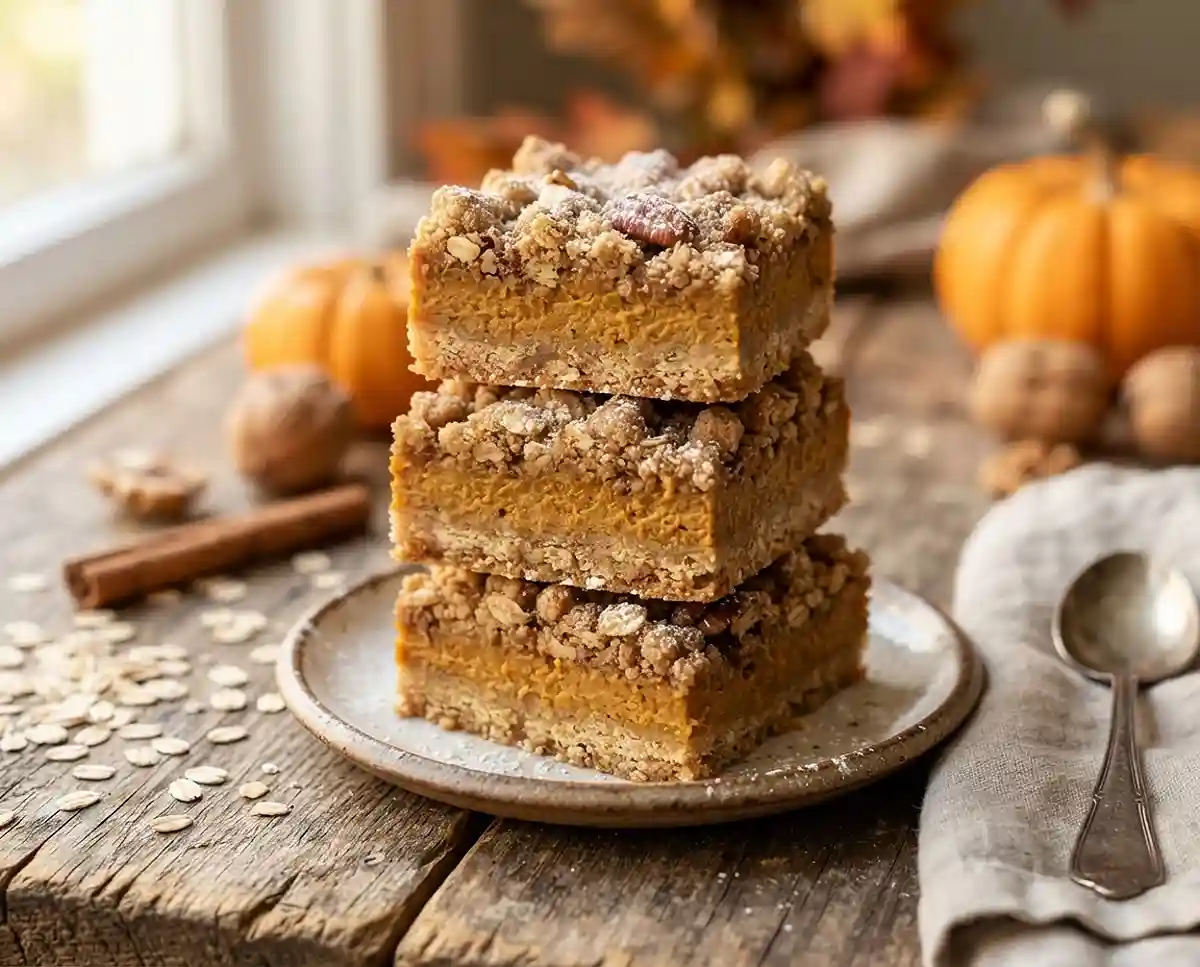
Brown Butter Pumpkin Streusel Bars
Make gluten-free brown butter pumpkin streusel bars with a nutty oat crust and step-by-step tips, plus storage advice so every bar cuts clean.
The first time I made gluten-free brown butter pumpkin streusel bars, I wandered off to answer a text while the butter sizzled. I came back to black flecks and a bitter smell, and I had to start over. That little disaster taught me that browned butter needs your full attention for about five minutes, and it’s worth every second.
Have you ever pulled a pan of gluten-free bars from the oven, only to watch them crumble into pieces the moment the knife touches them? Man, oh man…I’ve been there more times than I’d like to admit. This recipe fixes that with a firmly pressed oat crust, a silky pumpkin layer, and a streusel topping that stays crisp at the edges.
These easy dessert bars come together in one saucepan and two bowls, with no mixer required. The browned butter smells like toasted hazelnuts, and it gives the pumpkin a depth that plain melted butter can’t match. Each batch makes 16 bars.
Why You’ll Love This Brown Butter Pumpkin Streusel Bar Recipe
- Three textures in every bite. A chewy oat crust, a smooth pumpkin layer, and a lightly crisp streusel top, all with a nutty browned butter flavor.
- Beginner-friendly. If you can stir a saucepan and press dough into a pan, you can make these. There’s no mixer, no chilling, and no special technique beyond watching the butter.
- Made with everyday ingredients. Gluten-free all-purpose flour blend and certified gluten-free oats do the work, and there’s a dairy-free option in the variations below.
- Best for fall gatherings. They travel well, slice into 16 portions, and taste even better the day after baking, which makes them ideal for potlucks and bake sales.
The Secret to Perfect Gluten-Free Brown Butter Pumpkin Streusel Bars
- Browning the butter builds flavor and cuts moisture. Heating butter toasts its milk solids through the Maillard reaction and cooks off some of its water. The result is a richer taste and a less soggy crust.
- Splitting the butter gives you two textures. Two-thirds goes into the oat mixture so the crust and streusel clump and hold together. The rest goes into the pumpkin layer for a smoother, richer filling.
- Eggs and oats replace the structure gluten would normally provide. Eggs set as their proteins firm up in the oven, and rolled oats absorb moisture and add chew. Together they keep gluten-free bars from turning crumbly or pasty.
- Cooling in the pan is part of the recipe. The starches in gluten-free flour blends continue to firm up as they cool. Cutting too early is the most common reason for gummy, messy slices.
Choosing the right oats matters too, since regular oats are often cross-contaminated during processing. Look for the certified gluten-free label.
If you’re cooking for someone with celiac disease, check trusted celiac research and education for guidance on safe ingredients.
Table of Contents
Ingredients
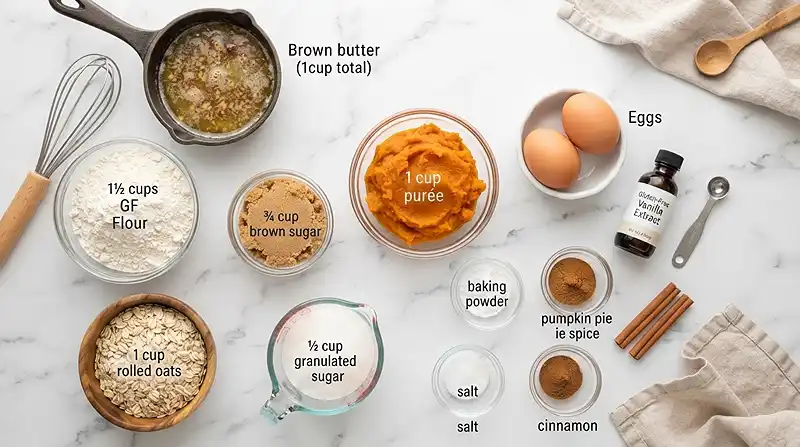
Yield: 16 bars
For the Crust and Streusel
- 1 cup unsalted butter (browned, divided as directed below)
- 1½ cups gluten-free all-purpose flour blend (choose one that includes xanthan gum)
- 1 cup certified gluten-free old-fashioned rolled oats
- ¾ cup packed brown sugar
- ½ cup granulated sugar
- 1 teaspoon baking powder
- 1 teaspoon pumpkin pie spice
- ½ teaspoon salt
For the Pumpkin Layer
- 1 cup pumpkin purée (plain purée, not pie filling)
- 2 large eggs
- 1 teaspoon gluten-free vanilla extract
- ½ teaspoon ground cinnamon
- Remaining browned butter from above
Instructions
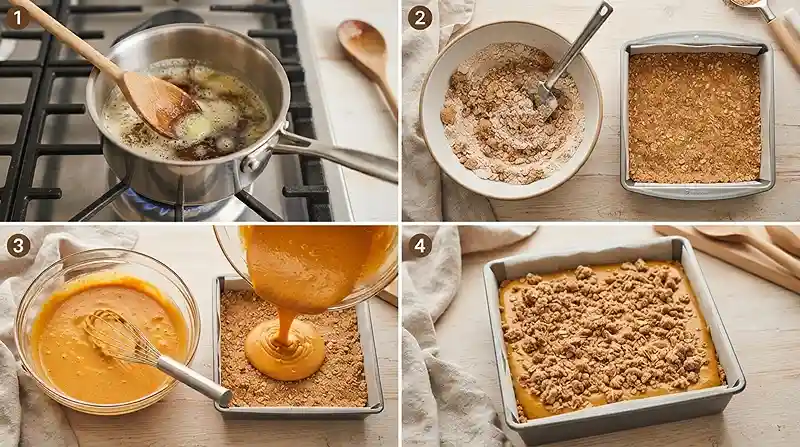
Prep and Brown the Butter
- Preheat the oven to 350°F (175°C). Line an 8-inch square baking pan with parchment paper, leaving some overhang so you can lift the bars out later.
- Melt the butter in a saucepan over medium heat. Keep cooking and stirring frequently until it turns golden brown and smells nutty, then remove it from the heat and let it cool slightly.
Pro Tip: Use a light-colored saucepan so you can see the color change. Pull the pan off the heat the moment you see amber flecks and smell toasted nuts, because the butter keeps cooking in the hot pan.
Make the Crust and Streusel
- In a large bowl, whisk together the gluten-free flour, rolled oats, brown sugar, granulated sugar, baking powder, pumpkin pie spice, and salt. Whisking well spreads the baking powder evenly so the bars rise consistently.
- Pour in about two-thirds of the browned butter and stir until a crumbly mixture forms. Reserve the remaining browned butter for the pumpkin layer.
- Press about two-thirds of the oat mixture firmly into the bottom of the prepared pan. Use the bottom of a measuring cup to pack it down.
Pro Tip: A tightly packed crust is your best defense against crumbling, so press until the surface looks smooth and compact.
Add the Pumpkin Layer and Bake
- In another bowl, whisk together the pumpkin purée, eggs, vanilla, cinnamon, and remaining browned butter until smooth. The mixture should look glossy with no streaks of egg.
- Pour the pumpkin mixture over the crust and spread it evenly. Crumble the remaining oat mixture over the top, leaving some larger clumps for a rustic streusel.
- Bake for 35–40 minutes, until the center is set and the streusel is lightly golden. The edges should look slightly darker and the center should barely jiggle when you nudge the pan.
- Cool completely in the pan before lifting out and cutting into 16 bars. Patience here gives you clean, tidy edges.
Make It Your Own
Dairy-free bars. Swap the unsalted butter for a plant-based butter. You’ll lose the toasted flavor, since plant-based butter has no milk solids to brown, but the bars still bake up tender and sliceable.
Extra crunch. You know…a handful of chopped pecans or walnuts scattered over the streusel adds a lovely crunch. Toast them lightly first so they taste as nutty as the browned butter.
Sugar swaps. Coconut sugar can stand in for the brown sugar, though the bars will taste slightly less caramel-like because coconut sugar has less molasses. The texture stays about the same, so this swap works well if you’re avoiding refined brown sugar.
Homemade spice blend. If you’re out of pumpkin pie spice, stir together ground cinnamon, ginger, nutmeg, and a little clove. This keeps the pumpkin spice fall recipe flavor intact and lets you adjust the warmth to your family’s taste.
Common Problems & Solutions
Problem: The bars crumble when you cut them. → Press the bottom layer firmly and cool the pan completely before slicing. Gluten-free flour blends and oats hold together only once their starches firm up, so cold bars slice cleanly while warm ones fall apart.
Problem: The center is gummy. → Bake until the center is set, and don’t cut early. Well…gummy bars usually mean underbaking or slicing while the starches are still soft, so add a few minutes if the middle looks wet.
Problem: The bottom is greasy or soggy. → Let the browned butter cool slightly before mixing, and don’t add extra butter. Very hot butter can melt the sugars and make the crust dense instead of crumbly.
Problem: The bars taste bitter. → Remove the butter from the heat as soon as it smells nutty and looks golden. Once the milk solids turn dark brown, they move from toasty to burnt, and there’s no fixing that later.
Problem: The streusel isn’t crisp. → Leave larger clumps on top and make sure the bars cool completely before covering them. Trapped steam from warm bars softens the topping quickly.
Storage & Meal Prep
| Method | Duration | Notes |
|---|---|---|
| Counter | 2-3 days | Airtight container |
| Fridge | 5-7 days | Bring to room temp |
| Freezer | 2-3 months | Wrap individually |
Because the pumpkin layer is egg-based, I move the bars to the fridge if my kitchen runs warm or they’ll sit longer than a day. To reheat, warm a bar in a 300°F oven for 8 to 10 minutes or microwave it for about 15 seconds.
Leftover crumbs make a great topping for an easy gluten-free breakfast idea like this caramelized pear oat smoothie bowl.
Brown Butter Pumpkin Streusel Bars FAQs
Can I make these bars ahead of time?
Yes, they keep beautifully. Bake them up to two days ahead and store them airtight, or freeze individually wrapped bars for up to three months. The flavors deepen as they sit, so they often taste better the next day.
How do I know when the bars are done baking?
The center should be set and the streusel lightly golden. Give the pan a gentle nudge, and if the middle barely jiggles, it’s ready. The edges will pull slightly away from the parchment.
What’s the best gluten-free flour blend for these bars?
Choose a one-to-one all-purpose blend that already contains xanthan gum. The gum acts as a binder and helps replace the structure gluten would normally give. Without it, the crust may crumble more easily.
Why did my streusel topping turn soft instead of crisp?
Steam is the usual culprit. If you cover the pan while the bars are still warm, moisture condenses and softens the topping. Let the bars cool completely first, and store them with a paper towel on top if your kitchen is humid.
Can I use regular rolled oats?
Only if they’re labeled certified gluten-free. Regular oats are often processed alongside wheat, barley, and rye, so cross-contact is common.
For more on living gluten-free, the Celiac Disease Foundation offers reliable guidance.
Serving Suggestions
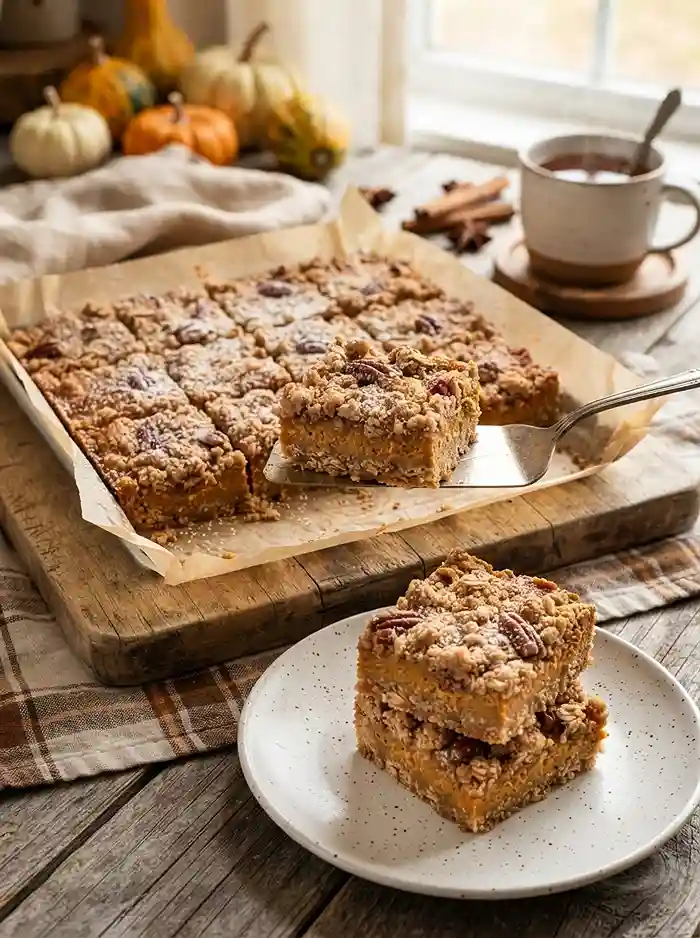
These bars are a natural fit for the Thanksgiving dessert table, where they sit happily beside the pie and give gluten-free guests something they can truly enjoy.
For a fall snack board, pair them with apple cheddar cracker stack bites for a sweet and savory mix.
After a cozy weeknight dinner like this French onion chicken rice skillet, serve a bar with coffee and a spoonful of whipped cream.
Final Thoughts
If you make these gluten-free brown butter pumpkin streusel bars, I’d love to hear how they turned out. Leave a comment with any swaps you tried, and give the recipe a star rating so other readers know what to expect.
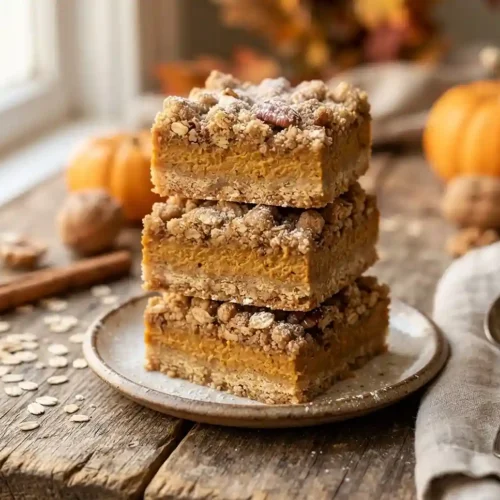
Gluten-Free Brown Butter Pumpkin Streusel Bars
Equipment
- 8-inch square baking pan
- Saucepan
- Large mixing bowl
- Mixing bowl
- Whisk
- Measuring cup
Ingredients
For the Crust and Streusel
- 1 cup unsalted butter browned and divided as directed
- 1½ cups gluten-free all-purpose flour blend choose one that includes xanthan gum
- 1 cup certified gluten-free old-fashioned rolled oats
- ¾ cup packed brown sugar
- ½ cup granulated sugar
- 1 teaspoon baking powder
- 1 teaspoon pumpkin pie spice
- ½ teaspoon salt
For the Pumpkin Layer
- 1 cup pumpkin purée plain purée, not pie filling
- 2 large eggs
- 1 teaspoon gluten-free vanilla extract
- ½ teaspoon ground cinnamon
- remaining browned butter from above
Instructions
- Preheat the oven to 350°F (175°C). Line an 8-inch square baking pan with parchment paper, leaving some overhang so you can lift the bars out later.
- Melt the butter in a saucepan over medium heat. Keep cooking and stirring frequently until it turns golden brown and smells nutty, then remove it from the heat and let it cool slightly. Use a light-colored saucepan so you can see the color change, and remove it from the heat as soon as you see amber flecks and smell toasted nuts.
- In a large bowl, whisk together the gluten-free flour, rolled oats, brown sugar, granulated sugar, baking powder, pumpkin pie spice, and salt.
- Pour in about two-thirds of the browned butter and stir until a crumbly mixture forms. Reserve the remaining browned butter for the pumpkin layer.
- Press about two-thirds of the oat mixture firmly into the bottom of the prepared pan. Use the bottom of a measuring cup to pack it down until the surface looks smooth and compact.
- In another bowl, whisk together the pumpkin purée, eggs, vanilla, cinnamon, and remaining browned butter until smooth and glossy with no streaks of egg.
- Pour the pumpkin mixture over the crust and spread it evenly. Crumble the remaining oat mixture over the top, leaving some larger clumps for a rustic streusel.
- Bake for 35–40 minutes, until the center is set and the streusel is lightly golden. The edges should look slightly darker and the center should barely jiggle when you nudge the pan.
- Cool completely in the pan before lifting out and cutting into 16 bars.