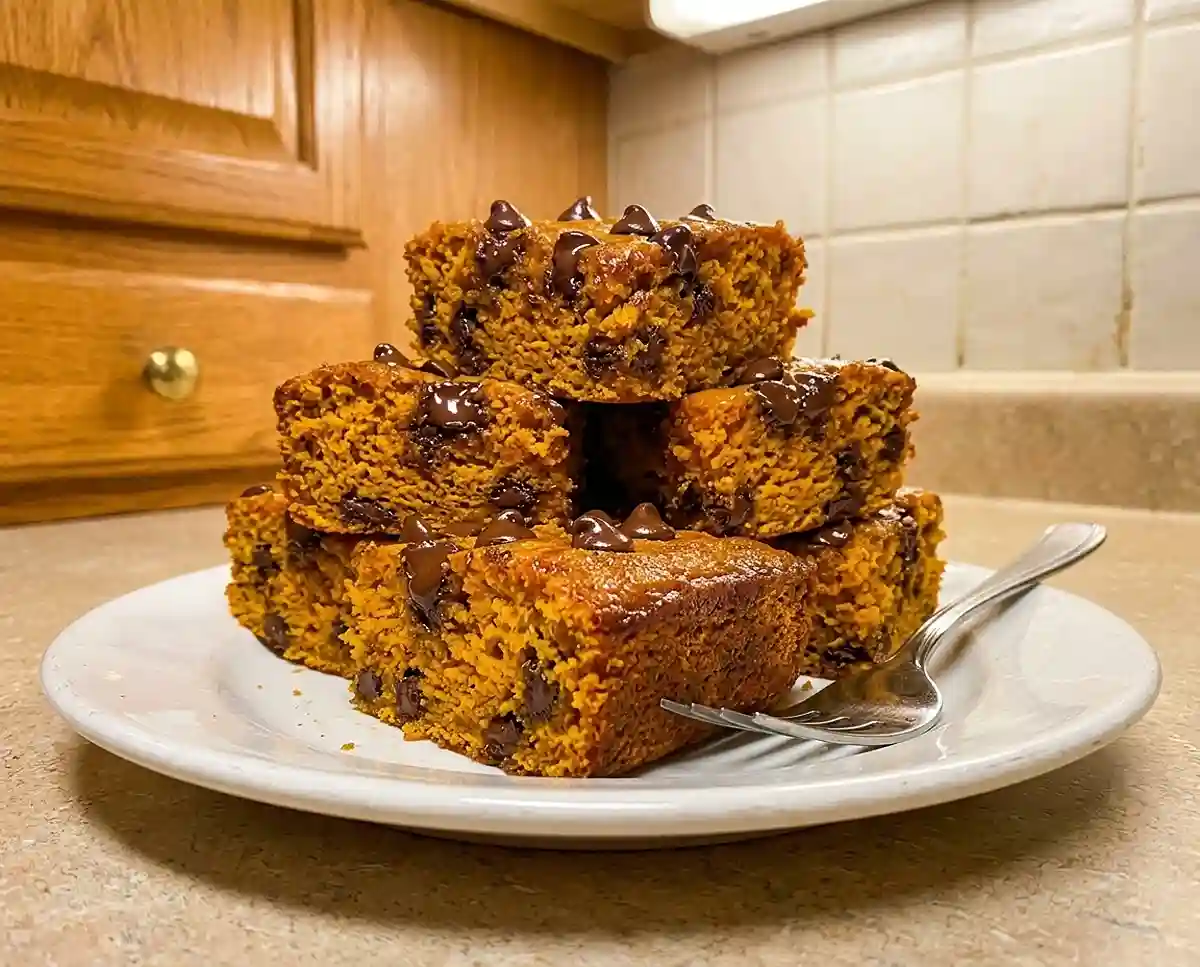
Chocolate Chip Pumpkin Bread Squares
Learn how to make gluten-free chocolate chip pumpkin bread squares in a 9 x 13 pan, with step-by-step directions, troubleshooting, and storage tips.
Gluten-free chocolate chip pumpkin bread squares are one of the most forgiving first bakes I teach, as long as you start with the right can. A student in my Saturday workshop once asked why her pumpkin bread turned gummy in the middle every time. Turns out she had grabbed pumpkin pie filling instead of plain purée.
Here’s the thing… gluten-free batter doesn’t need the kneading, rising, or shaping that scares newcomers. Why make a first bake harder than it has to be? You whisk, fold, and bake, and the squares slice cleanly once they cool.
Before you start, check the labels on your flour blend, baking soda, vanilla, and chocolate chips. The Celiac Disease Foundation food labeling guide shows how to read them for hidden gluten.
At a Glance: Why This Pumpkin Bread Squares Recipe Delivers
This recipe makes 24 moist, chocolate-studded squares from one bowl of wet ingredients and one bowl of dry.
- Texture and flavor: A tender, moist crumb with warm cinnamon, ginger, and nutmeg, plus melty chocolate in every bite.
- Difficulty level: Beginner-friendly. There is no mixer, no rising time, and no special technique.
- Unique advantages: Kid-friendly to help with, easy to carry in the pan, and simple to cut into 24 portions.
- Best for: Cozy fall baking, potlucks, school events, and lunchbox treats.
What Makes This Gluten-Free Chocolate Chip Pumpkin Bread Squares Actually Work
These squares work because each step protects moisture and structure, the two things gluten-free baking loses most easily.
- Melted butter and two sugars: Fat coats the flour starches and keeps the crumb tender, while brown sugar adds moisture and a caramel note.
- A blend with xanthan gum: The gum stands in for gluten, giving the batter enough stretch to trap steam and hold its shape.
- Gentle stirring: Mixing just until no dry flour remains prevents the gummy, dense texture that overworked gluten-free batter gets.
- Baking soda with acidic ingredients: Pumpkin and brown sugar are mildly acidic, so they react with the baking soda to create lift.
Binders like xanthan gum are why a blend matters. The Colorado State University Extension gluten-free baking basics explain how blends and binders work together.
Table of Contents
Ingredients
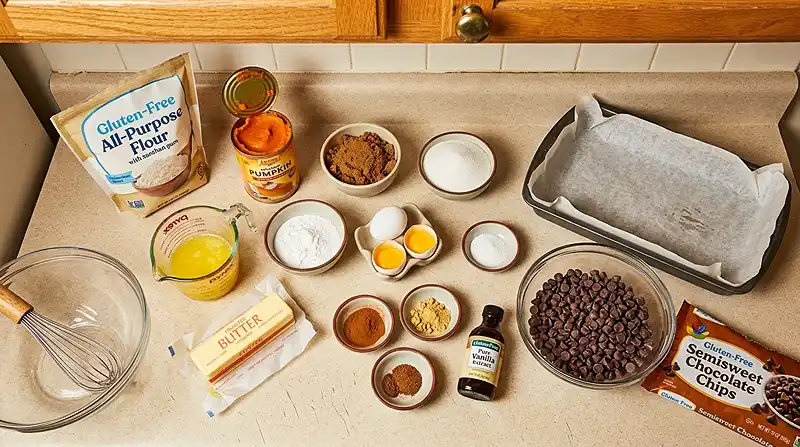
Makes 24 squares.
Dry Ingredients
- 2 cups gluten-free all-purpose flour blend with xanthan gum
- 1 teaspoon gluten-free baking soda
- ¾ teaspoon salt
- 1½ teaspoons ground cinnamon
- ½ teaspoon ground ginger
- ¼ teaspoon ground nutmeg
Wet Ingredients
- 1 cup canned pumpkin purée, not pumpkin pie filling
- 1 cup unsalted butter, melted and slightly cooled
- ½ cup packed brown sugar
- 1 cup granulated sugar
- 2 large eggs, at room temperature
- 2 teaspoons pure vanilla extract, labeled gluten-free
Mix-In
- 1½ cups semisweet chocolate chips, labeled gluten-free
Pumpkin pie filling already contains sugar and spices, so it throws off the balance. Let the melted butter cool slightly so it doesn’t cook the eggs. Room-temperature eggs blend in smoothly and keep the batter even.
Instructions
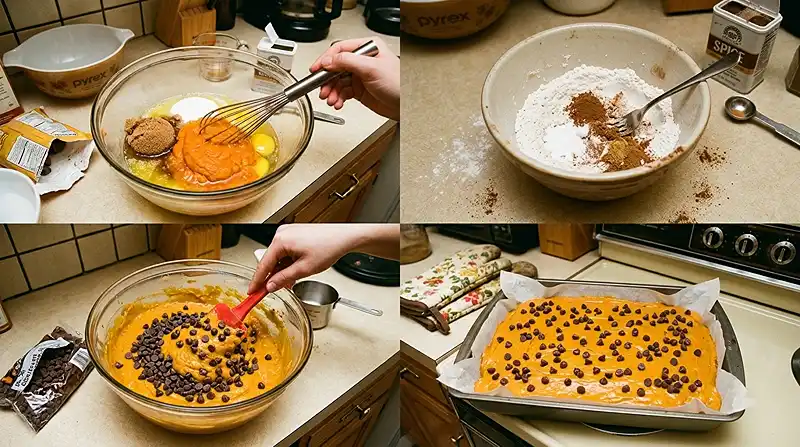
- Prepare the pan: Preheat the oven to 350°F (175°C). Grease a 9 × 13-inch baking pan or line it with parchment paper, leaving an overhang for easy removal. Pro Tip: Parchment makes lifting out the whole slab simple, which gives you cleaner cuts.
- Mix the wet ingredients: In a large bowl, whisk together the melted butter, brown sugar, and granulated sugar until combined. Add the pumpkin purée, eggs, and vanilla extract. Whisk until smooth and glossy.
- Combine the dry ingredients: In a separate bowl, whisk together the gluten-free flour blend, baking soda, salt, cinnamon, ginger, and nutmeg. Whisking spreads the spices and baking soda evenly, so no square tastes bitter or flat.
- Make the batter: Add the dry ingredients to the pumpkin mixture. Stir gently just until no dry flour remains. Avoid overmixing, because the batter should look thick and slightly lumpy, not smooth like cake batter.
- Add the chocolate chips: Fold in about 1¼ cups of the chocolate chips. Spread the batter evenly in the prepared pan and sprinkle the remaining chocolate chips over the top. Pro Tip: Use a damp spatula to smooth the batter into the corners.
- Bake: Bake for 35–45 minutes, checking at 35 minutes. The edges should be set, and a toothpick inserted into the center should come out with a few moist crumbs rather than wet batter. The kitchen will smell like warm brown sugar and cinnamon, the way a farmhouse does on the first cold morning.
- Cool and slice: Let the pumpkin bread squares cool completely in the pan so they can firm up before cutting. Lift them out using the parchment paper and slice into 24 squares. Pro Tip: Wipe the knife between cuts for neat edges and unsmeared chocolate.
Adapting This Recipe to Your Kitchen
Dairy-free or dark chocolate chips work well, as long as the label says gluten-free. Swap them cup for cup, since chip size drives how evenly they spread. I haven’t tested a butter swap, so I can’t promise how the crumb would turn out.
Chopped toasted pecans make a good topping for cozy fall baking. Replace a small handful of the chips on top with the nuts. They add crunch without changing the batter.
Trust me on this one… pick a flour blend that already contains xanthan gum, and don’t add more. Too much gum turns the crumb gummy and slick. If your blend has none, follow the binder amount on its package.
For a pumpkin spice fall recipe shortcut, you can use pumpkin pie spice in place of the cinnamon, ginger, and nutmeg. Check the label for gluten, since a few blends use fillers. The flavor will taste a bit more generic, but it saves a measuring step.
I’ve only tested these gluten free chocolate chip pumpkin bread squares in a 9 × 13-inch pan. A loaf pan will need a longer bake and a lower temperature to avoid a raw center. Check with a toothpick and cover loosely with foil if the top browns too fast.
Troubleshooting: Fixes for the Most Common Issues
Problem: The center is gummy. Bake a few minutes longer and test with a toothpick, which should come out with moist crumbs. Gluten-free starches need to finish setting, and underbaking leaves the middle pasty.
Problem: The squares are dry and crumbly. Check your oven with a thermometer and pull the pan at 35 minutes next time. Overbaking evaporates moisture, and gluten-free crumb has less gluten to hold on to what’s left.
Problem: The squares fell apart when cut. I’ll be straight with you… I’ve ruined a pan this way by cutting warm. Cool the squares completely in the pan first. The starches and gum firm up as they cool, which gives you clean edges.
Problem: The squares sank in the middle. Use a fresh baking soda and keep the oven door closed for the first 30 minutes. Old baking soda loses lift, and drafts collapse the batter before the structure sets.
Problem: The batter tastes too sweet or too spiced. Check that you used plain purée and not pie filling. Pie filling adds extra sugar and spices, so the finished squares overshoot the balance of this recipe.
Storage & Meal Prep
These squares keep well at room temperature for a few days, and they freeze nicely for later.
| Method | Duration | Notes |
|---|---|---|
| Counter | 2-3 days | Airtight container |
| Fridge | 5-7 days | Bring to room temp |
| Freezer | 2-3 months | Wrap individually |
To reheat, warm a square in the microwave for 10 to 15 seconds so the chocolate softens. It should feel gently warm and soft, not hot. For no-waste ideas, crumble stale squares over yogurt or warm them under vanilla ice cream.
Common Questions, Straight Answers
Can I use pumpkin pie filling instead of purée?
No, use canned pumpkin purée only. Pie filling contains added sugar and spices, which changes the sweetness and can leave the squares gummy. Check the can label and look for 100 percent pumpkin.
How do I know when the squares are done baking?
A toothpick in the center should come out with a few moist crumbs, and the edges should be set. Start checking at 35 minutes, since ovens vary. Wet batter on the toothpick means it needs a few more minutes.
What’s the best gluten-free flour blend for these squares?
Use an all-purpose gluten-free blend that already contains xanthan gum. This recipe was written for that kind of blend, so the structure comes built in. Check that the blend is labeled gluten-free.
Why did my pumpkin bread squares turn out gummy?
The most common causes are underbaking, overmixing, or using pie filling. Mix just until no dry flour remains, and bake until a toothpick shows moist crumbs rather than wet batter. Cool the squares completely in the pan before cutting.
Can I make these squares ahead of time?
Yes, you can bake them a day or two ahead. Store them in an airtight container at room temperature, or freeze them wrapped individually for up to 3 months. The flavor often settles in by the next day.
Serving Suggestions
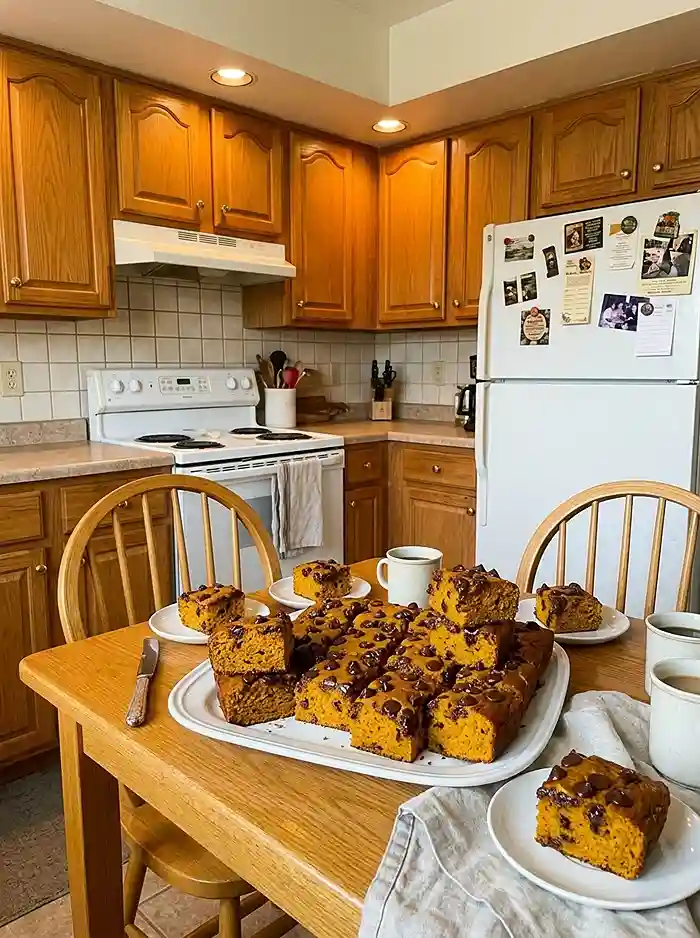
These squares fit right into Halloween treat bags, wrapped individually, so a child with celiac disease gets something safe to trade. They are also good with coffee after dinner.
- Follow a weeknight dinner of gluten-free Ina Garten jambalaya with a square for dessert.
- Add them to a cookie plate next to the gluten-free Nestle Toll House cookie recipe.
- Serve them with a bowl of Milton Hershey historical caramel for dipping.
Final Thoughts
Give these gluten-free chocolate chip pumpkin bread squares a try this weekend, then share a photo or pin the recipe for your next fall gathering. Tell me in the comments how it went and what you adjusted in your own kitchen. A star rating helps other gluten-free bakers trust the recipe too.
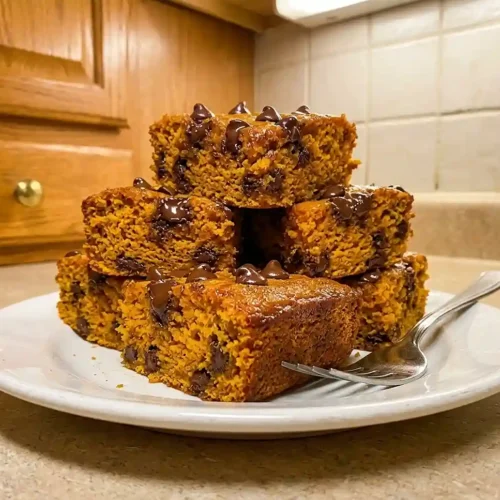
Gluten-Free Chocolate Chip Pumpkin Bread Squares
Equipment
- 9 × 13-inch baking pan
- Parchment paper
- Large mixing bowl
- Medium mixing bowl
- Whisk
- Spatula
- Measuring cups and spoons
- Toothpick
- Sharp knife
Ingredients
Dry Ingredients
- 2 cups gluten-free all-purpose flour blend with xanthan gum Use a blend labeled gluten-free that already contains xanthan gum. If the blend does not contain a binder, follow the package instructions.
- 1 teaspoon gluten-free baking soda Verify the product label.
- ¾ teaspoon salt
- 1 ½ teaspoons ground cinnamon Check packaged spice labels if gluten status is uncertain.
- ½ teaspoon ground ginger Check packaged spice labels if gluten status is uncertain.
- ¼ teaspoon ground nutmeg Check packaged spice labels if gluten status is uncertain.
Wet Ingredients
- 1 cup canned pumpkin purée Use plain pumpkin purée, not pumpkin pie filling.
- 1 cup unsalted butter Melted and slightly cooled.
- ½ cup packed brown sugar
- 1 cup granulated sugar
- 2 large eggs At room temperature.
- 2 teaspoons pure vanilla extract Use a product labeled gluten-free.
Mix-In
- 1 ½ cups semisweet chocolate chips Use chocolate chips labeled gluten-free. Dairy-free chips may be substituted if desired.
Instructions
- Preheat the oven to 350°F (175°C). Grease a 9 × 13-inch baking pan or line it with parchment paper, leaving an overhang for easy removal.
- In a large bowl, whisk together the melted, slightly cooled butter, brown sugar, and granulated sugar until combined. Add the pumpkin purée, eggs, and vanilla extract. Whisk until smooth and glossy.
- In a separate bowl, whisk together the gluten-free flour blend, baking soda, salt, cinnamon, ginger, and nutmeg until evenly combined.
- Add the dry ingredients to the pumpkin mixture. Stir gently just until no dry flour remains. Avoid overmixing; the batter should be thick and slightly lumpy.
- Fold about 1 1/4 cups of the chocolate chips into the batter. Spread the batter evenly in the prepared pan, using a damp spatula to reach the corners. Sprinkle the remaining 1/4 cup of chocolate chips over the top.
- Bake for 35–45 minutes, checking at 35 minutes. The edges should be set, and a toothpick inserted into the center should come out with a few moist crumbs rather than wet batter.
- Let the pumpkin bread squares cool completely in the pan so they can firm up before cutting. Lift them out using the parchment overhang and slice into 24 squares. Wipe the knife between cuts for neat edges.