Gluten-Free Coconut Cream Berry Trifle Cups
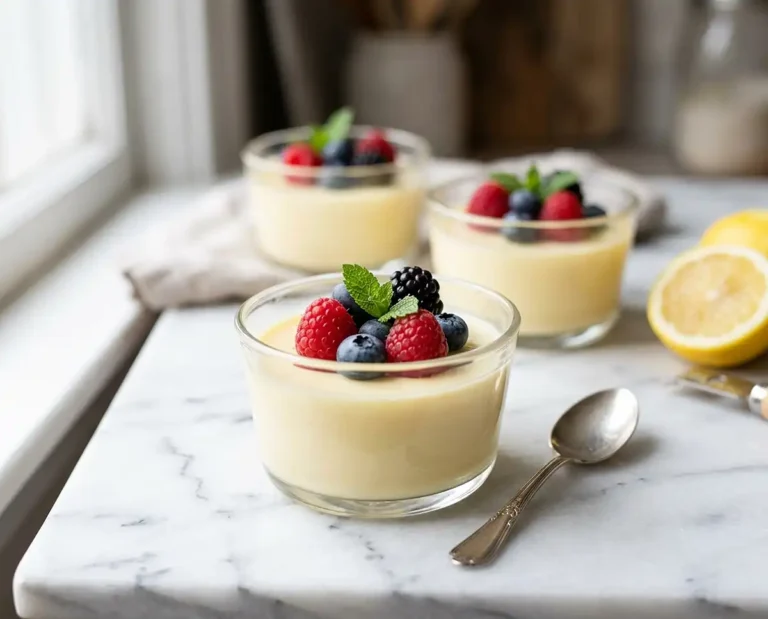
These Gluten-Free Coconut Cream Berry Trifle Cups layer fluffy coconut whip, juicy berries, and cake into a no-bake dessert ready in 30 minutes.
The first time I served these Gluten-Free Coconut Cream Berry Trifle Cups was at my niece’s graduation party, and I watched grown adults race to the dessert table like kids on Easter morning. I’d thrown them together the night before because I was out of time and ideas, and what came out of those little glass cups stole the show. My sister-in-law, who normally swears she doesn’t like coconut, asked for the recipe before she left.
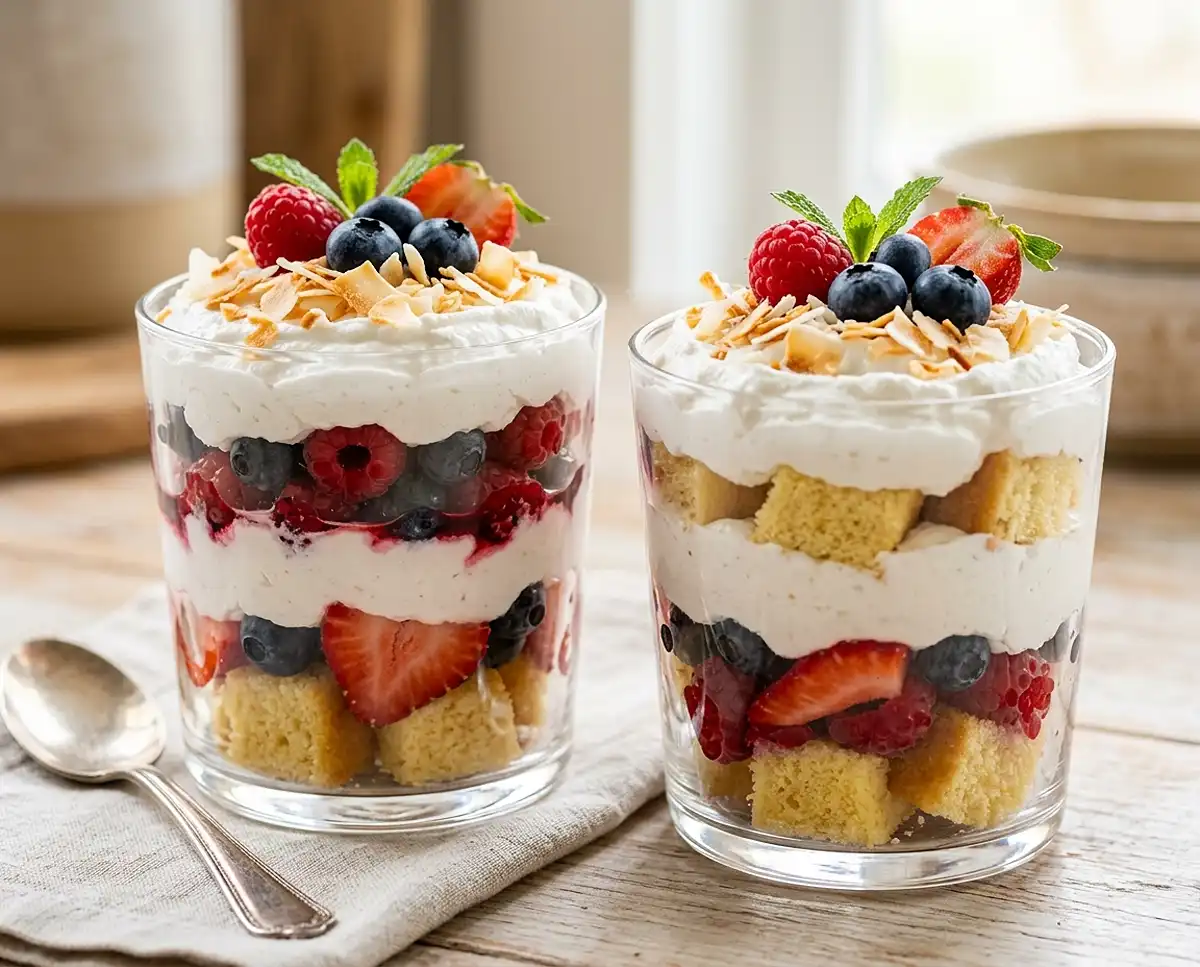
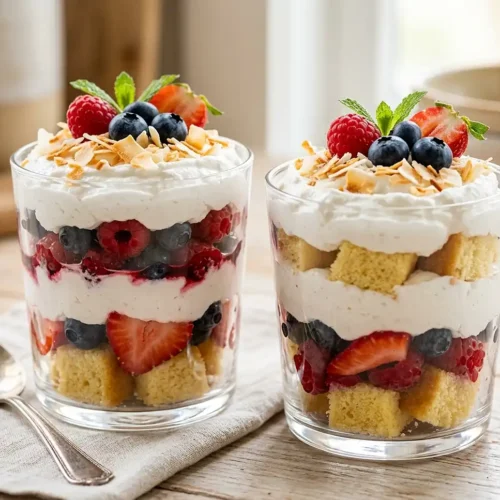
What is it about a layered dessert in a clear glass that makes everyone feel a little fancy? Well, I think it’s the way the ruby berries, snow-white coconut cream, and golden cake stack up like edible stained glass. These trifle cups deliver that visual magic without any baking, frosting, or fussing.
These gluten free trifle cups work beautifully for the Fourth of July with red strawberries, blueberries, and a cloud of white coconut whip on top. They’re naturally dairy-free, refined-sugar-free when you choose maple syrup, and they come together in about 30 minutes of hands-on time.
Why You’ll Love These Coconut Cream Berry Trifle Cups
- Texture contrast in every spoonful, with tender cake soaking up berry juice, juicy fruit, and pillowy coconut cream that feels like spooning into a fresh cloud after rain.
- Beginner-friendly and no-bake, so you only need a hand mixer and a few serving glasses.
- Naturally dairy-free and adaptable for vegan diets when you skip honey, plus gluten-free using your favorite cake or cookies.
- Works best for summer entertaining, holiday brunches, baby showers, or any time you want a make-ahead dessert that looks like you tried way harder than you did.
The Secret to Perfect Gluten-Free Coconut Cream Berry Trifle Cups
Coconut cream succeeds when fat separates cleanly from coconut water, which means temperature is the make-or-break variable. Get the chill wrong and you’ll end up with thin, sad cream that won’t hold a peak no matter how long you whip it.
- Chill the coconut milk for at least 24 hours, ideally in the back of the fridge where temperatures stay coldest. The fat needs time to solidify into a scoopable layer above the watery liquid.
- Use full-fat canned coconut milk only, with at least 17-20% fat content; lite versions and refrigerated coconut beverages won’t whip. Brands like Native Forest Classic, Thai Kitchen, and Aroy-D are reliable choices.
- Macerate the berries briefly, just 5 minutes with a touch of honey and lemon, so they release juice without turning to mush.
- Layer with patience, because rushing means muddy lines and soggy cake. Per the USDA’s berry handling guidelines, berries should be rinsed just before use and patted dry to keep them from watering down the cream.
Table of Contents
Ingredients
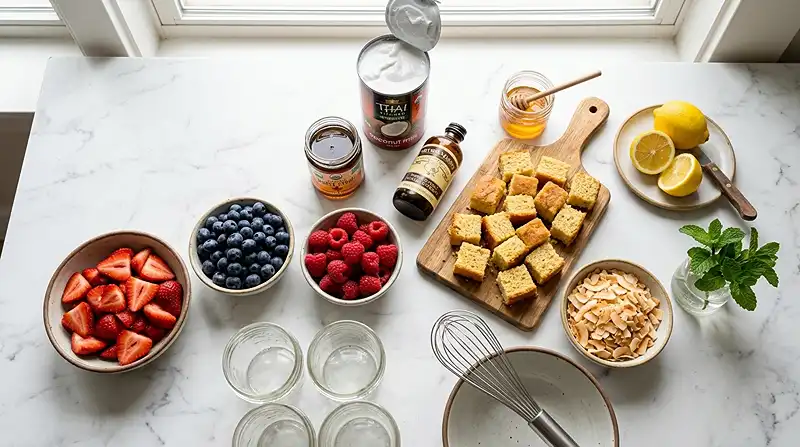
Coconut Cream Layer
| Amount | Ingredient | Notes |
|---|---|---|
| 1 can | full-fat coconut milk | chilled overnight, 17-20% fat |
| 2 tbsp | maple syrup or honey | adjust to taste |
| 1 tsp | vanilla extract | pure, not imitation |
Berry Layer
| Amount | Ingredient | Notes |
|---|---|---|
| 1 cup | strawberries | sliced |
| 1 cup | blueberries | rinsed and patted dry |
| 1 cup | raspberries | gentle handling |
| 1 tbsp | honey or maple syrup | for maceration |
| 1 tsp | lemon juice | brightens berry flavor |
Cake Layer
| Amount | Ingredient | Notes |
|---|---|---|
| 2 cups | gluten-free vanilla cake cubes | OR crushed gluten-free cookies or granola |
Optional Toppings
- Toasted coconut flakes
- Fresh mint leaves
- Extra berries
A quick note on cake options: a boxed gluten-free vanilla cake mix (King Arthur, Pillsbury, or Betty Crocker GF) works wonderfully when baked the day before. If you’re short on time, crushed gluten-free vanilla sandwich cookies or a sturdy granola give the same textural anchor.
Step-by-Step Instructions
1. Chill and Whip the Coconut Cream
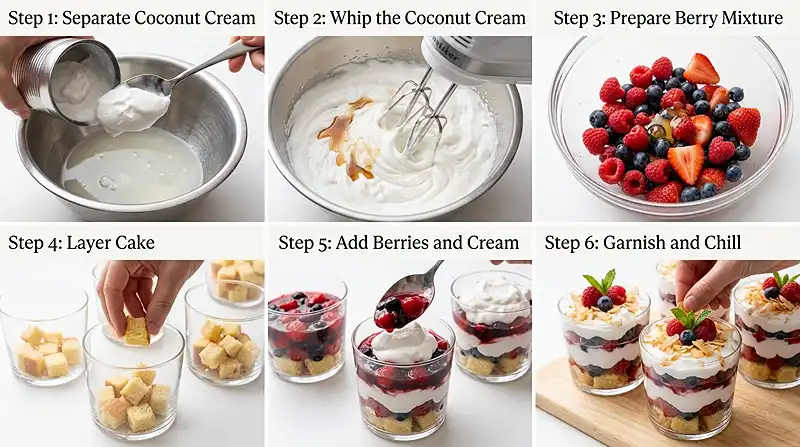
Chill the can of full-fat coconut milk overnight in the back of your fridge, where the cold air is most consistent. The next day, open the can without shaking and scoop the solid white cream off the top into a chilled mixing bowl, leaving the watery liquid behind.
Add 2 tablespoons maple syrup or honey and 1 teaspoon vanilla extract, then whip on medium-high speed for 2-3 minutes until smooth, fluffy, and holding soft peaks. Pro Tip: save that leftover coconut water in a jar; it’s gold for smoothies or a tropical chia pudding.
2. Macerate the Berries
In a medium bowl, combine 1 cup sliced strawberries, 1 cup blueberries, and 1 cup raspberries with 1 tablespoon honey or maple syrup and 1 teaspoon lemon juice. Toss gently with a rubber spatula, taking care not to crush the raspberries, which break down fastest.
Let the mixture sit for 5 minutes at room temperature so the sugar pulls out a glossy, ruby-red syrup. You’ll see the juice pooling at the bottom of the bowl, smelling bright and almost candy-like.
3. Prep the Cake Cubes
Cut your gluten-free vanilla cake into ½-inch cubes, measuring out 2 cups total. If you’re using crushed cookies or granola instead, break them into rough, bite-sized pieces so they hold their texture instead of turning to dust.
You know… cube size matters more than you’d think here. Pieces that are too big leave awkward gaps in the layers, and crumbs disappear into the cream.
4. Layer the Trifle Cups
Set out 4-6 clear serving glasses or mason jars on the counter, ideally with straight sides so the layers are visible. Drop in a spoonful of cake cubes first, then a generous layer of berries with some of the juice, then a fluffy dollop of coconut cream.
Repeat the layers until each cup is filled, finishing with a swirl of coconut cream on top. Pro Tip: use a piping bag or zip-top bag with the corner snipped for cleaner cream layers if you want that bakery look.
5. Garnish and Chill
Top each trifle cup with toasted coconut flakes, a few extra berries, and a small sprig of fresh mint. Refrigerate for 20-30 minutes before serving so the flavors meld and the cake softens slightly from the berry juice.
Serve cold, straight from the fridge, alongside savory bites like these crispy rice tuna bites for a balanced party spread.
Make It Your Own
Vegan version: swap the honey for maple syrup in both the cream and berry layers, and verify your cake or cookies are egg-free. The coconut cream itself is naturally vegan, which makes this no bake dessert ideal for mixed-diet gatherings.
Tropical twist: trade the berries for diced mango, pineapple, and kiwi tossed with lime juice instead of lemon. Toasted macadamia nuts on top take it to full island-vacation territory.
Chocolate lover’s edition: layer in shaved dark chocolate between the cream and fruit, and use gluten-free chocolate cake cubes instead of vanilla. Man, oh man… my husband requests this version for his birthday every single year.
Granola crunch version: replace the cake entirely with 2 cups crushed gluten-free granola for a parfait-style breakfast trifle. These coconut cream berries pair beautifully with crunchy oat clusters, and they double as a fancy weekend morning treat.
Common Problems & Solutions
Problem: My coconut cream won’t whip.
Solution: Check the fat percentage on your coconut milk can and chill longer.
Cans labeled “lite” or below 17% fat won’t solidify enough to whip. Also, your bowl and beaters should be cold; pop them in the freezer for 10 minutes before starting.
Problem: The cream is grainy or curdled-looking.
Solution: Stop whipping and let the cream rest for 2 minutes, then whip on low.
Overwhipping breaks the emulsion the same way it breaks dairy cream. Lower speed and shorter bursts rescue most batches.
Problem: My cake layer turned to mush.
Solution: Use sturdy cake cubes and serve within 4 hours of assembly.
Gluten-free cake absorbs liquid faster than wheat cake because of its different starch structure. Toast cake cubes briefly in a 300°F oven for 5 minutes to firm them up if your cake feels too soft.
Problem: The berry juice bled into the cream layer.
Solution: Drain the macerated berries lightly with a slotted spoon before layering.
A small spoon of juice on the cake is great, but flooding the cup turns everything pink. Well… a little color bleed is fine and even pretty, just don’t drown each layer.
Storage & Meal Prep
| Method | Duration | Notes |
|---|---|---|
| Counter | Up to 1 hour | Food safety limit before berries weep |
| Fridge | 2-3 days | Cover with plastic wrap touching surface |
| Freezer | Not recommended | Berries turn to mush when thawed |
For best texture, assemble the trifle cups no more than 4 hours before serving. If you need to prep further ahead, store the coconut cream, berries, and cake cubes separately in the fridge, then layer just before guests arrive. Leftover trifle still tastes great the next morning spooned into a bowl as a fancy breakfast yogurt stand-in.
Coconut Cream Berry Trifle Cups FAQs
Can I make these trifle cups the night before?
Yes, but the cake layer will soften considerably overnight. If you love a soaked, almost pudding-like texture (similar to traditional English trifle), prep them up to 12 hours ahead. For more distinct layers, prep the components separately and assemble within 4 hours of serving.
How do I toast coconut flakes without burning them?
Spread unsweetened coconut flakes on a dry skillet over medium-low heat and stir constantly for 3-4 minutes until golden. Coconut goes from pale to scorched in about 30 seconds once it starts coloring, so don’t walk away from the stove. The smell turns deeply nutty and almost caramel-like when they’re ready.
What’s the best gluten-free cake to use for trifle cups?
A sturdy boxed gluten-free vanilla or pound cake holds up best in layered desserts. King Arthur Gluten-Free Vanilla Cake Mix and Pillsbury Gluten-Free Funfetti both produce tight crumbs that absorb berry juice without disintegrating. Avoid super-tender or oily cake mixes, which collapse under the cream.
Why did my coconut cream taste watery?
You probably scooped too close to the liquid layer at the bottom of the can. Stop scooping the moment you see clear water; the goal is only the thick, white solid cream. If your batch is already watery, add 1-2 tablespoons of powdered sugar to thicken and re-whip briefly.
Can I use frozen berries instead of fresh?
Yes, but thaw them in a colander first and discard the excess liquid. Frozen berries release more juice than fresh ones, which can flood your trifle cups. Save that drained juice and stir it into sparkling water for a bonus drink.
Serving Suggestions
Serve these Gluten-Free Coconut Cream Berry Trifle Cups at brunch alongside fresh coffee, or as the grand finale to a summer cookout featuring hearty pesto turkey burger sliders for the main course. They pair gorgeously with a glass of prosecco or a chilled rosé, and they’re a stunning addition to red, white, and blue patriotic dessert spreads. For a complete dairy-free menu, start the day with creamy strawberry matcha chia pudding for breakfast inspiration and end with these trifle cups after dinner.
Give Them a Try
If you make these coconut cream berry trifle cups, I’d genuinely love to hear which fruit combo you chose and how your layers turned out. Pin this recipe to your no-bake desserts board for the next time summer berries are calling your name, and leave a star rating below to help other home cooks find it. Your comments and questions truly make this little corner of the internet feel like a community kitchen.
Gluten-Free Coconut Cream Berry Trifle Cups
Equipment
- Can opener
- Chilled mixing bowl
- Hand mixer or stand mixer
- Medium mixing bowl
- Rubber spatula
- Measuring cups and spoons
- Cutting board
- Chef’s knife
- 4-6 clear serving glasses or mason jars
- Slotted spoon
- Small skillet (for toasting coconut, optional)
Ingredients
Coconut Cream Layer
- 1 can full-fat coconut milk chilled overnight, 17-20% fat
- 2 tbsp maple syrup or honey adjust to taste
- 1 tsp vanilla extract pure, not imitation
Berry Layer
- 1 cup strawberries sliced
- 1 cup blueberries rinsed and patted dry
- 1 cup raspberries gentle handling
- 1 tbsp honey or maple syrup for maceration
- 1 tsp lemon juice brightens berry flavor
Cake Layer
- 2 cups gluten-free vanilla cake cubes OR crushed gluten-free cookies or granola
Optional Toppings
- toasted coconut flakes
- fresh mint leaves
- extra berries
Instructions
- Chill the can of full-fat coconut milk overnight in the back of your fridge, where the cold air is most consistent. The next day, open the can without shaking and scoop the solid white cream off the top into a chilled mixing bowl, leaving the watery liquid behind.
- Add 2 tablespoons maple syrup or honey and 1 teaspoon vanilla extract to the coconut cream, then whip on medium-high speed for 2-3 minutes until smooth, fluffy, and holding soft peaks.
- In a medium bowl, combine 1 cup sliced strawberries, 1 cup blueberries, and 1 cup raspberries with 1 tablespoon honey or maple syrup and 1 teaspoon lemon juice. Toss gently with a rubber spatula, taking care not to crush the raspberries.
- Let the berry mixture sit for 5 minutes at room temperature so the sugar pulls out a glossy, ruby-red syrup.
- Cut your gluten-free vanilla cake into ½-inch cubes, measuring out 2 cups total. If using crushed cookies or granola instead, break them into rough, bite-sized pieces so they hold their texture.
- Set out 4-6 clear serving glasses or mason jars. Drop in a spoonful of cake cubes first, then a generous layer of berries with some of the juice, then a fluffy dollop of coconut cream. Repeat the layers until each cup is filled, finishing with a swirl of coconut cream on top.
- Top each trifle cup with toasted coconut flakes, a few extra berries, and a small sprig of fresh mint.
- Refrigerate for 20-30 minutes before serving so the flavors meld and the cake softens slightly from the berry juice. Serve cold, straight from the fridge.