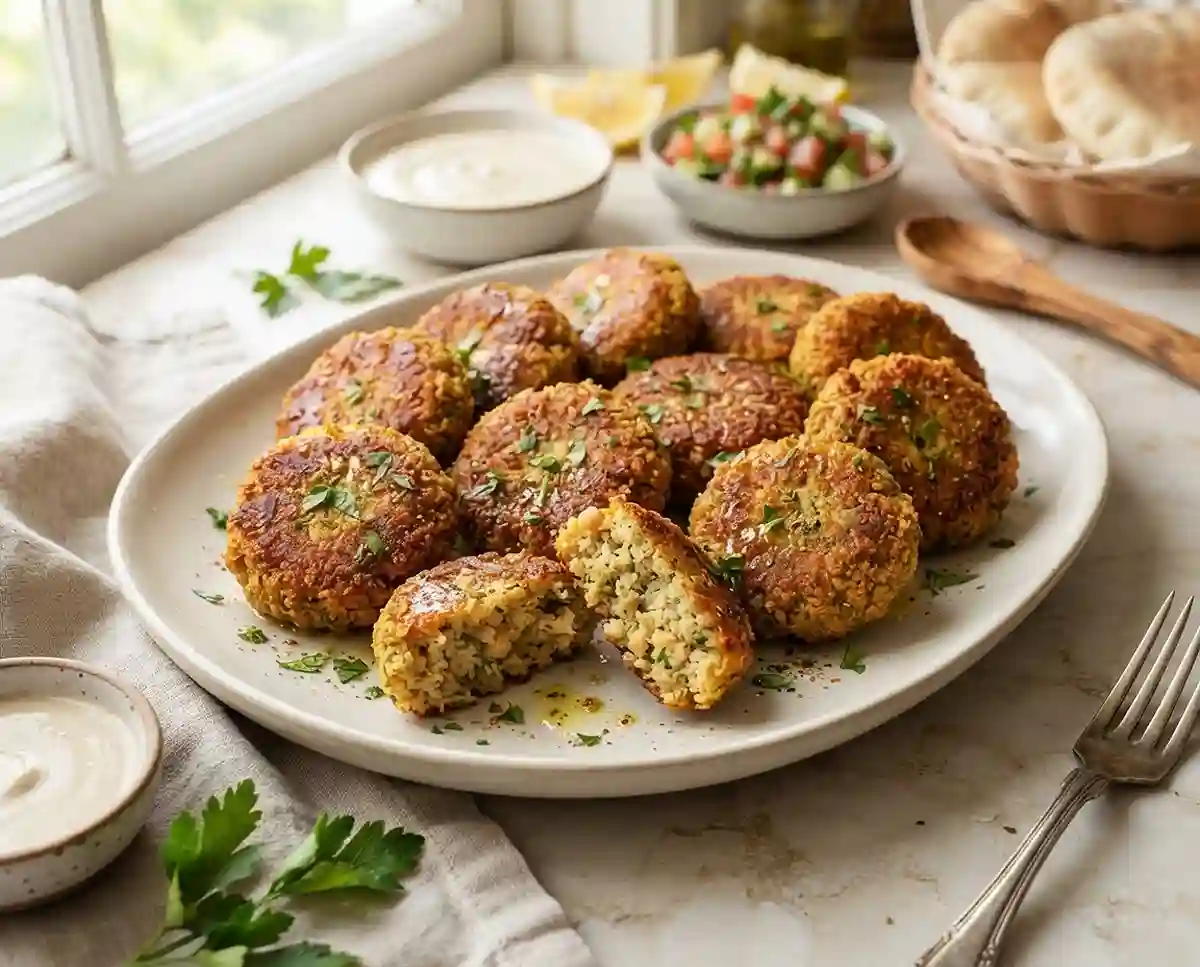
Gluten-Free falafel with canned chickpeas
Learn how to make gluten-free falafel with canned chickpeas—crispy outside, tender inside, with step-by-step instructions, substitutions, and storage tips.
The first time I tried to make falafel at home, I used canned chickpeas straight from the can—no drying, no chilling—and ended up with a skillet full of sad, soggy crumbles. It was a Thursday night, dinner was already late, and I nearly gave up on homemade falafel entirely.
That failure taught me everything I needed to know about how to make gluten-free falafel with canned chickpeas that actually holds together. Moisture is the enemy, and the fix is surprisingly simple once you know what to look for.
Crispy on the outside, fluffy inside, and ready in a snap, this Gluten-Free Falafel with Canned Chickpeas is a weeknight lifesaver. Want more? Check out my full collection of healthy chickpea meals.
Why You’ll Love This Gluten-Free Falafel
- Crispy outside, tender inside — the texture is satisfying without being heavy or dense.
- Beginner-friendly — no deep frying required; a standard skillet does the job beautifully.
- Naturally dairy-free — works for multiple dietary needs without any swaps.
- Ready in under an hour — including the 30-minute chill that makes all the difference.
The Secret to Perfect Gluten-Free Falafel with Canned Chickpeas
Most falafel failures trace back to the same root cause: too much moisture in the mixture. Traditional falafel uses dried, soaked chickpeas—not cooked ones—which naturally have less water content.
When you use canned chickpeas, you have to compensate. Here’s what makes this recipe work where others fall apart:
- Thorough drying — patting the chickpeas with paper towels removes surface moisture before processing, which prevents a wet, sticky dough.
- Pulse, don’t puree — a crumbly, coarse texture binds better than a smooth paste; the small pieces create structure when cooked.
- Gluten-free flour as binder — 3 tablespoons is enough to hold everything together without making the falafel dense or gummy.
- Cold rest time — refrigerating the mixture for 30 minutes firms it up so patties hold their shape in the pan instead of spreading.
According to trusted celiac disease research from Beyond Celiac, cross-contamination is a real risk with traditional falafel served at restaurants. Making it at home with certified gluten-free ingredients is the safest approach for anyone with celiac disease or gluten sensitivity.
Table of Contents
Ingredients
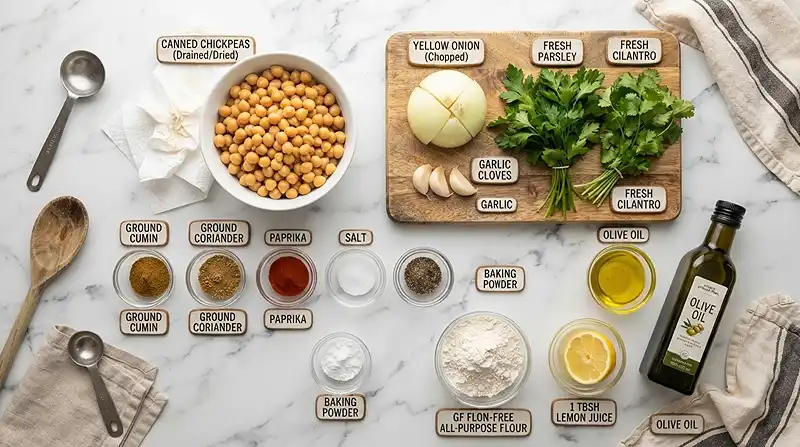
Here’s everything you need. Grouped below for easy prep.
Main Mixture
| Ingredient | Amount | Notes |
|---|---|---|
| Canned chickpeas, drained, rinsed, and thoroughly dried | 2 cans (15 oz each) | Drying is critical — use paper towels generously |
| Small yellow onion, roughly chopped | 1/2 | No need to dice finely; the processor handles it |
| Garlic cloves | 3 | Fresh garlic only for best flavor |
| Fresh parsley | 1 cup | Packed loosely; stems are fine |
| Fresh cilantro | 1/2 cup | Skip if you dislike cilantro — see substitutions |
| Ground cumin | 1 tsp | |
| Ground coriander | 1 tsp | |
| Paprika | 1/2 tsp | |
| Salt | 1/2 tsp | |
| Black pepper | 1/4 tsp |
Binders & Flavor
| Ingredient | Amount | Notes |
|---|---|---|
| Baking powder | 1/2 tsp | Creates a slightly lighter interior texture |
| Gluten-free all-purpose flour | 3 tbsp | A 1:1 blend works best here |
| Fresh lemon juice | 1 tbsp | Brightens the whole flavor profile |
| Olive oil | 2 tbsp, plus more for cooking | Adds richness and helps with crisping |
Instructions
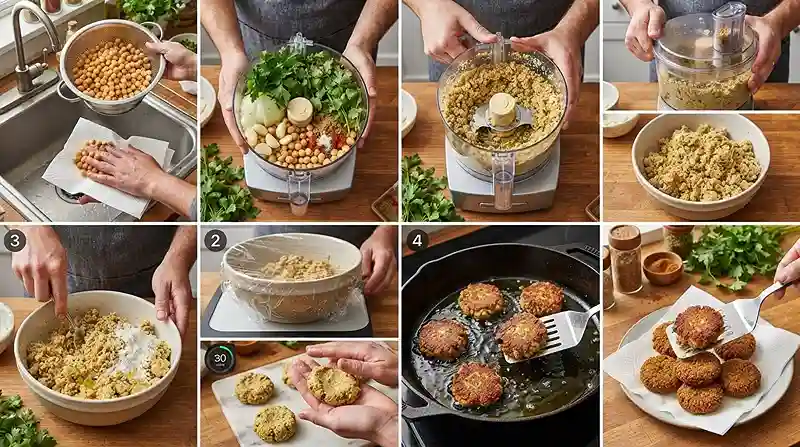
Dry the chickpeas. Pat the drained chickpeas very dry with paper towels. Spread them on a clean kitchen towel and press firmly — removing excess moisture helps the falafel hold together and prevents a soggy center.
Pulse the mixture. Add the chickpeas, onion, garlic, parsley, cilantro, cumin, coriander, paprika, salt, and black pepper to a food processor. Pulse several times until the mixture is finely chopped and crumbly. Do not process it into a smooth paste — you want texture, not hummus.
Add the binders. Transfer the mixture to a bowl. Stir in the baking powder, gluten-free flour, lemon juice, and olive oil until evenly combined. The mixture should hold together when pinched but still feel slightly coarse.
Chill for 30 minutes. Cover the bowl and refrigerate the mixture for 30 minutes. This rest firms it up so your patties won’t fall apart in the pan. Don’t skip this step — it’s the difference between crispy falafel and a mess.
Shape the falafel. Using about 2 tablespoons of mixture for each piece, shape into small patties or balls. Press them firmly — compact shapes hold together better during cooking than loose ones.
Pan-fry until golden. Heat a thin layer of olive oil in a large skillet over medium heat. Cook the falafel for about 3–4 minutes per side, turning carefully. You’re looking for a deep golden-brown crust and a nutty, toasted aroma before you flip.
Drain and serve. Transfer to a paper towel-lined plate to remove excess oil. Serve warm with gluten-free pita, salad, hummus, or your favorite tahini sauce.
Pro Tip: Don’t crowd the pan. Cook in two batches if needed — overcrowding traps steam and prevents that satisfying crust from forming.
Make It Your Own
Well… not everyone loves cilantro, and that’s completely fine. You can replace the 1/2 cup of fresh cilantro with an equal amount of additional parsley. The flavor will be slightly more herbaceous and a little less bright, but just as good.
If you want to bake these instead of pan-frying, brush them with olive oil and bake at 400°F for about 25–28 minutes, flipping once halfway through. They won’t be quite as crispy as skillet-fried, but they’re still golden and satisfying — and much easier for big batches.
For extra heat, add 1/4 teaspoon of cayenne pepper to the mixture along with the other spices. You can also try smoked paprika instead of regular paprika for a deeper, almost earthy warmth that works especially well if you’re serving these alongside our homemade gluten-free hummus with dried chickpeas.
A flax egg (1 tablespoon ground flaxseed + 3 tablespoons water, rested 5 minutes) can replace the flour if you need a grain-free binder. It works reasonably well, though the texture is slightly more delicate — handle those patties gently when flipping.
Common Problems & Solutions
Problem: The falafel falls apart in the pan. Add one more tablespoon of gluten-free flour and refrigerate for an additional 15 minutes before reshaping. The mixture likely has too much moisture or wasn’t chilled long enough to firm up. Make sure you’re pressing each patty firmly when shaping.
Problem: The falafel is gummy inside. This usually means the chickpeas weren’t dried enough before processing, or the mixture was over-processed into a paste. You want the texture of rough, damp sand — not smooth dough. Next time, spread the chickpeas on a towel for 10 minutes before patting dry.
Man, oh man… Problem: The outside burns before the inside cooks through. Your heat is too high. Medium heat is the right setting — it takes a little patience, but the result is even color and a cooked-through center. If the oil starts smoking, pull the pan off the heat for 30 seconds before continuing.
Problem: The falafel is dry and crumbly after cooking. Gluten-free flour can sometimes absorb too much moisture. If your mixture feels very dry before cooking, add 1 extra teaspoon of olive oil and stir to incorporate. The finished falafel should be tender inside, not chalky. You can read more about why gluten-free starches behave differently in the authoritative gluten-free flour guide from Gluten-Free Living.
Storage & Meal Prep
| Method | Duration | Notes |
|---|---|---|
| Counter | 2–3 days | Airtight container at room temperature |
| Fridge | 5–7 days | Bring to room temp before serving or reheat in skillet |
| Freezer | 2–3 months | Wrap individually and freeze on a sheet pan first |
To reheat, use a dry skillet over medium heat for 2–3 minutes per side. This brings the crust back to life far better than a microwave, which tends to make them soft and rubbery.
The uncooked mixture also freezes well — portion it into patties, freeze on a parchment-lined tray, then transfer to a freezer bag. Cook straight from frozen, adding an extra 2 minutes per side.
Gluten-Free falafel with canned chickpeas FAQs
Can I make gluten-free falafel ahead of time?
Yes. You can prepare the uncooked mixture up to 48 hours ahead and store it covered in the fridge. Shape and cook when you’re ready. Cooked falafel also keeps well — refrigerate for up to 7 days or freeze for 2 to 3 months.
How do I keep falafel from falling apart?
Dry your chickpeas thoroughly before processing, pulse to a crumbly texture instead of a smooth paste, and refrigerate the mixture for at least 30 minutes before shaping. Adding an extra tablespoon of gluten-free flour can also help if your mixture feels too wet.
What’s the best gluten-free flour to use in falafel?
A 1:1 gluten-free all-purpose blend works best here. Brands like Bob’s Red Mill 1-to-1 or King Arthur Measure for Measure perform well. Avoid single-ingredient flours like almond or coconut flour, as they change the texture significantly.
Why did my falafel turn out gummy?
Gumminess usually comes from over-processing the chickpea mixture into a paste or from insufficient drying before blending. Aim for a coarse, crumbly texture in the food processor — it should look like rough, damp sand, not dough.
Can I bake these instead of frying?
Yes. Brush the shaped falafel with olive oil and bake at 400 degrees Fahrenheit for 25 to 28 minutes, flipping once at the halfway mark. They won’t be quite as crispy as pan-fried, but they come out golden and fully cooked through.
Serving Suggestions
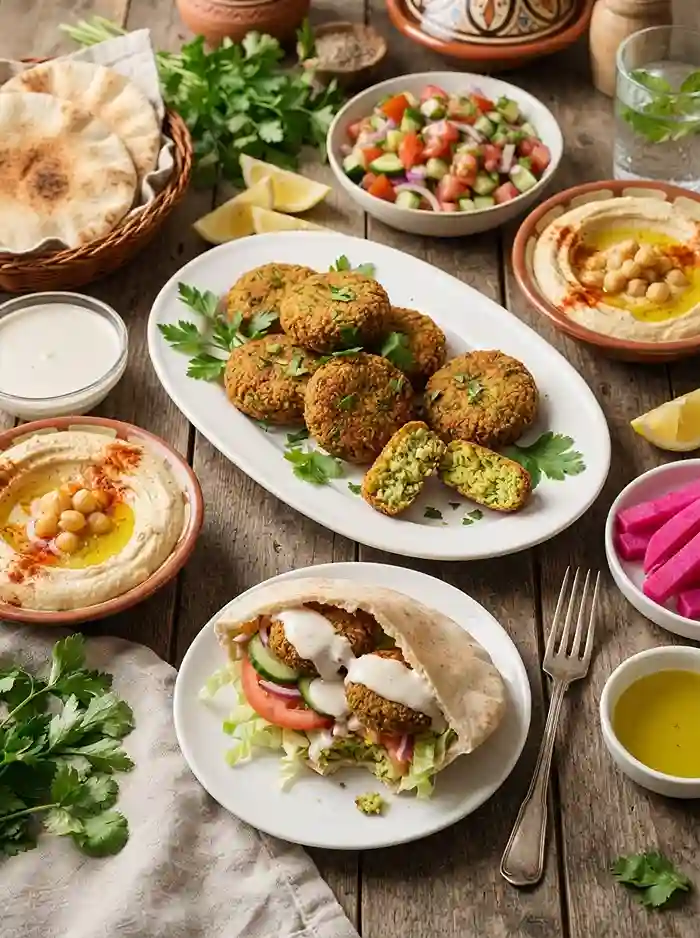
These falafel are as at home in a bowl as they are tucked inside gluten-free pita with cucumber, tomato, and a generous drizzle of tahini. For a plated spread, pair them with our cranberry whipped feta stuffed mini peppers for a colorful appetizer table.
You know… this platter is one of my go-to choices for Eid gatherings and summer cookouts where I want something crowd-pleasing that doesn’t require anyone to compromise on dietary needs.
If you’re building a full chickpea-forward dinner, our marry me chickpeas with coconut milk makes a rich, saucy companion dish that rounds out the meal beautifully.
Conclusion
Learning how to make gluten-free falafel with canned chickpeas is one of those kitchen wins that pays off every week. Once you’ve got the technique down — dry chickpeas, coarse pulse, cold rest — it becomes almost effortless.
Give this recipe a try and let me know how it goes in the comments. Did you bake or fry? Did you swap the cilantro? I’d love to hear what worked for you — and if you enjoyed it, sharing it on Pinterest helps other gluten-free cooks find it too.
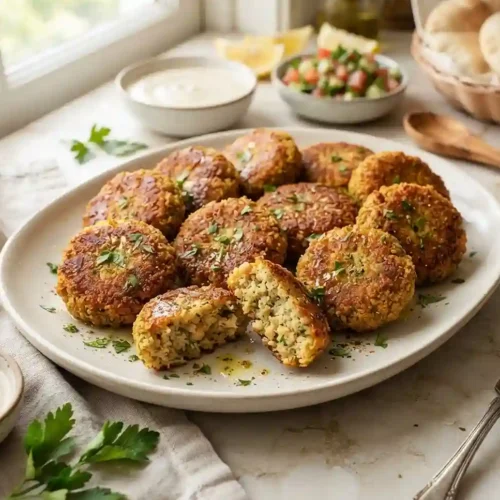
Gluten-Free Falafel with Canned Chickpeas
Equipment
- Food processor
- Large skillet
- Mixing bowl
- Paper towels
Ingredients
Main Mixture
- 2 cans (15 oz each) Canned chickpeas Drained, rinsed, and thoroughly dried; use paper towels generously
- ½ Small yellow onion Roughly chopped
- 3 cloves Garlic Fresh garlic only for best flavor
- 1 cup Fresh parsley Packed loosely; stems are fine
- ½ cup Fresh cilantro Skip if desired and replace with an equal amount of additional parsley
- 1 tsp Ground cumin
- 1 tsp Ground coriander
- ½ tsp Paprika
- ½ tsp Salt
- ¼ tsp Black pepper
Binders & Flavor
- ½ tsp Baking powder Creates a slightly lighter interior texture
- 3 tbsp Gluten-free all-purpose flour A 1:1 blend works best here
- 1 tbsp Fresh lemon juice Brightens the whole flavor profile
- 2 tbsp, plus more for cooking Olive oil Adds richness and helps with crisping
Instructions
- Dry the chickpeas. Pat the drained chickpeas very dry with paper towels. Spread them on a clean kitchen towel and press firmly to remove excess moisture.
- Pulse the mixture. Add the chickpeas, onion, garlic, parsley, cilantro, cumin, coriander, paprika, salt, and black pepper to a food processor. Pulse several times until finely chopped and crumbly. Do not process into a smooth paste.
- Add the binders. Transfer the mixture to a bowl. Stir in the baking powder, gluten-free flour, lemon juice, and olive oil until evenly combined. The mixture should hold together when pinched while remaining slightly coarse.
- Chill for 30 minutes. Cover the bowl and refrigerate the mixture for 30 minutes so it firms up and the patties hold their shape.
- Shape the falafel. Using about 2 tablespoons of mixture for each piece, shape into small patties or balls. Press them firmly so they hold together during cooking.
- Pan-fry until golden. Heat a thin layer of olive oil in a large skillet over medium heat. Cook the falafel for about 3–4 minutes per side, turning carefully, until deeply golden brown.
- Drain and serve. Transfer to a paper towel-lined plate to remove excess oil. Serve warm with gluten-free pita, salad, hummus, or tahini sauce.