Gluten-Free Hummus with Dried Chickpeas
Learn how to make gluten-free hummus with dried chickpeas—step-by-step, with tips for silky texture, skin removal, and make-ahead storage.
The first time I made hummus from dried chickpeas, I was convinced I’d ruined everything. The batch I’d been relying on from a can just wasn’t cutting it anymore—grainy, flat, and weirdly dense. So I soaked a cup of dried chickpeas overnight and hoped for the best.
What came out of that food processor was silky, pale, and impossibly fluffy—like whipped clouds with a nutty, lemony edge. I genuinely stood at the counter eating it with a spoon. That’s when I knew: learning how to make gluten-free hummus with dried chickpeas was worth every extra minute.
Is canned hummus ever good enough once you’ve tasted the real thing? Honestly, no. And here’s the best part—this recipe is naturally gluten-free, requires just a handful of pantry staples, and the technique is easier than it sounds.
Why You’ll Love This Gluten-Free Hummus with Dried Chickpeas
- Texture that can’t be faked: Dried chickpeas blend into a creamier, fluffier hummus than canned ever will. The difference is real and noticeable.
- Beginner-friendly process: If you can soak beans overnight and run a food processor, you’ve got this. No special equipment needed.
- Naturally gluten-free and dairy-free: Every ingredient is clean, simple, and safe for those with celiac disease or gluten sensitivity.
- Perfect for meal prep: Make a big batch on Sunday and it keeps beautifully in the fridge all week—or freeze it for later.
The Secret to Perfect Gluten-Free Hummus with Dried Chickpeas
- Baking soda in the cooking water: This softens the chickpea skins and speeds up cooking, giving you chickpeas tender enough to blend ultra-smooth.
- Skin removal after cooking: Gently rubbing warm chickpeas in water loosens the skins. Removing them is the single biggest upgrade you can make for silky hummus.
- Cold water, not warm: Streaming in cold water while the processor runs creates an emulsified, airy texture. Warm water makes it dense and gluey.
- Extended blending time: Processing the tahini and lemon juice for 3–5 full minutes before adding water builds the base flavor and creates that signature pale, whipped consistency.
Table of Contents
Ingredients
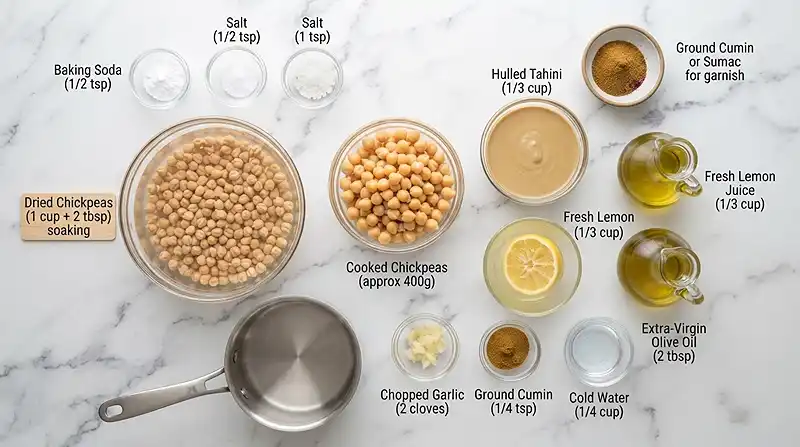
Dry Ingredients
- 1 cup plus 2 tbsp dried chickpeas (about 210 g)
- 1/2 tsp baking soda (added to cooking water)
- 1/2 tsp salt (for cooking water)
- 1 tsp salt (for blending)
- 1/4 tsp ground cumin, optional
- Ground cumin or sumac, for garnish
Wet Ingredients
- 4 cups water, for soaking
- 5 cups fresh water, for cooking
- 1/3 cup hulled tahini
- 1/3 cup fresh lemon juice
- 2 cloves garlic, chopped
- 1/4 cup cold water, plus more as needed
- 2 tbsp extra-virgin olive oil (for garnish)
- 1–2 tbsp cooked chickpeas, reserved for garnish
Note on tahini: Use hulled tahini for a smoother, lighter result. Unhulled tahini works but adds a slightly bitter edge. Stir your tahini jar well before measuring—the oil separates on top.
Instructions
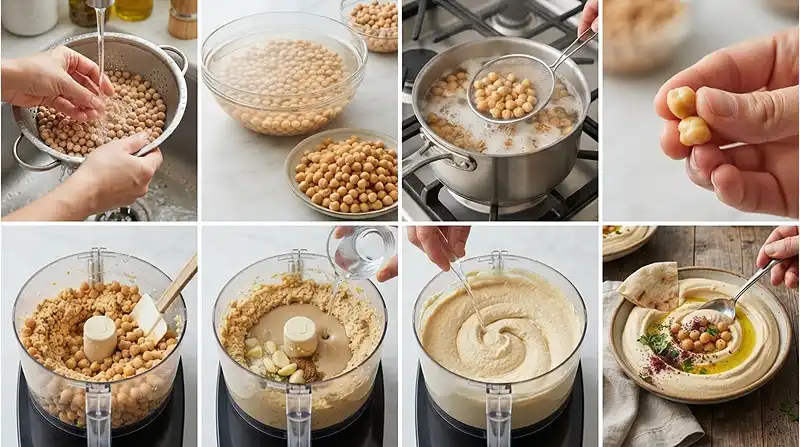
Step 1: Sort and Soak the Chickpeas
Pick through the dried chickpeas, removing any stones, debris, or discolored beans. Rinse thoroughly under cold water.
Place the chickpeas in a large bowl and cover with 4 cups of water. Soak for 8–12 hours or overnight. Drain and rinse well before cooking.
Step 2: Cook Until Tender
Transfer the soaked chickpeas to a saucepan. Add 5 cups fresh water, baking soda, and 1/2 teaspoon salt. Bring to a boil, then reduce to a steady simmer.
Cook for 30–35 minutes, skimming away foam and loose skins as needed. The chickpeas are ready when they easily collapse when pressed between your fingers.
Pro Tip: Don’t rush this step. Undercooked chickpeas won’t blend smooth, no matter how long you run the processor.
Step 3: Remove the Skins
Drain the chickpeas, reserving 1–2 tablespoons for garnish. For extra-smooth hummus, gently rub the warm chickpeas in water to loosen the skins, then remove as many as you can.
This step is optional but makes a noticeable difference in final texture. Even removing half the skins helps.
Step 4: Blend the Chickpea Base
Add the cooked chickpeas to a food processor and process for about 1 minute, until they form a smooth, stiff paste. Scrape down the sides as needed.
Step 5: Add Tahini, Lemon, and Garlic
Add the tahini, lemon juice, garlic, 1 teaspoon salt, and cumin if using. Process for 3–5 minutes, scraping down the sides as needed. You’ll notice the mixture turn lighter and thicker—that’s exactly what you want.
Step 6: Stream In Cold Water
With the processor running, slowly stream in the cold water. Continue blending until the hummus is pale, fluffy, and creamy.
Add more cold water 1 tablespoon at a time if needed. Taste and adjust the salt, lemon juice, or tahini to your preference.
Step 7: Serve and Garnish
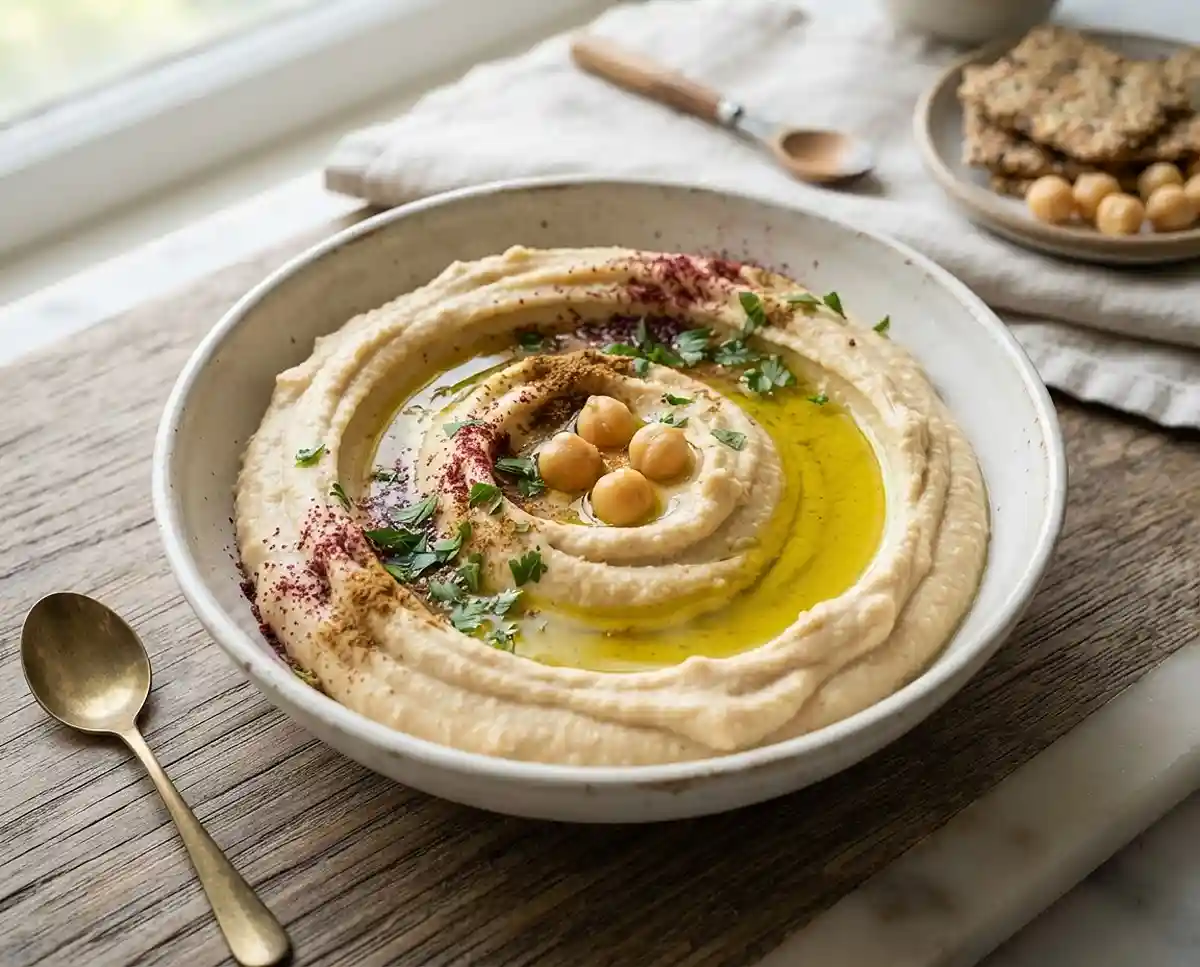
Spoon the hummus into a shallow serving bowl and create a swirl with the back of a spoon. Garnish with the reserved chickpeas, a drizzle of olive oil, and a pinch of cumin or sumac. Serve warm or at room temperature.
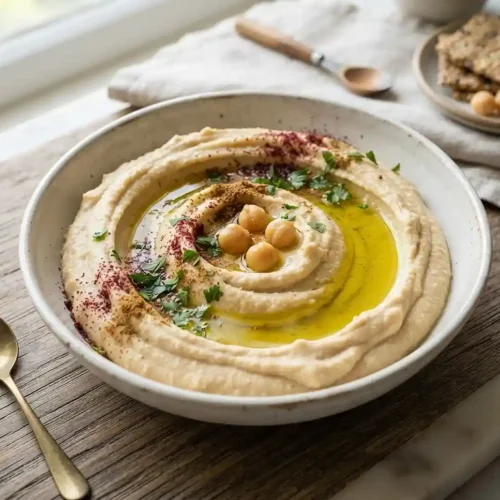
Alt text suggestion for image: “A shallow bowl of homemade gluten-free hummus with dried chickpeas, garnished with whole chickpeas, olive oil, and a dusting of sumac.”
Make It Your Own
Well… the beauty of homemade hummus is how easy it is to riff on. Roasted garlic is one of the most popular swaps—simply roast a whole head of garlic at 400°F for 40 minutes, then squeeze the cloves in during blending. It adds a mellow, caramelized sweetness that plays beautifully against the lemon.
For a spicy version, add 1/4 teaspoon of cayenne or a tablespoon of harissa paste. Both fold in easily during the tahini-blending stage and don’t disrupt the smooth texture you’ve worked to build.
If you’d like to cut back on oil, you can reduce or skip the olive oil garnish entirely. The hummus itself contains no added fat beyond the tahini, so it’s already lighter than most store-bought versions. A squeeze of extra lemon at the end keeps it bright without the oil.
For an even richer dip, some home cooks stir in a tablespoon of plain Greek yogurt (use dairy-free if needed) after blending. It deepens the tang and makes the texture even more velvety—check out these gluten-free stuffed mini peppers with whipped feta for another spin on creamy dips and spreads.
Common Problems & Solutions
Problem: My hummus is grainy or gritty. This usually means the chickpeas weren’t cooked long enough, or the processor didn’t run long enough. Solution: extend cooking until chickpeas fully collapse when pressed, and blend for the full 3–5 minutes before adding water. Skipping skin removal can also contribute to a rougher texture.
Problem: The hummus is too thick and won’t loosen. Add cold water one tablespoon at a time while the processor runs. The cold temperature is key—it keeps the emulsion stable and light. Warm water breaks the structure and makes hummus dense.
Man, oh man… nothing is worse than a gummy, stiff dip after all that soaking time. If yours turned out that way, it’s almost always a water temperature issue. Cold water into a running processor is non-negotiable for that airy, restaurant-style result.
Problem: My hummus tastes flat or lacks depth. Taste before serving and adjust in small increments: a little more lemon juice brightens it, a pinch of salt rounds out the flavor, and a touch more tahini adds nuttiness. Let the processor run an extra minute after each adjustment so the flavors fully incorporate.
According to Beyond Celiac’s gluten-free ingredient guidance, plain hummus made from whole food ingredients like chickpeas, tahini, lemon, and garlic is naturally gluten-free. Just be sure your tahini and spice brands are certified GF if you’re managing celiac disease.
Storage & Meal Prep
| Method | Duration | Notes |
|---|---|---|
| Counter | 2–3 hours | Covered, for serving; refrigerate after |
| Fridge | 5–7 days | Airtight container; bring to room temp before serving |
| Freezer | 2–3 months | Freeze in portions; thaw overnight in fridge |
To refresh refrigerated hummus, let it sit at room temperature for 20–30 minutes, then stir in a splash of cold water and a drizzle of olive oil. It comes back to life beautifully.
Frozen hummus thaws best overnight in the fridge. Give it a good stir after thawing—it may look separated at first, but it comes together with a brief re-blend or vigorous stir. This makes it ideal for meal prep: freeze in 1-cup portions for easy weekday lunches.
Gluten-Free Hummus with Dried Chickpeas FAQs
Can I use canned chickpeas instead of dried?
Yes, canned chickpeas work in a pinch, but the texture won’t be as smooth or fluffy. If using canned, drain and rinse them well, then simmer in fresh water with a pinch of baking soda for 20 minutes to soften them further before blending. Remove skins for the best result.
How do I make hummus even smoother?
Remove as many chickpea skins as possible after cooking, blend the chickpea base for a full minute before adding other ingredients, and stream in cold (not warm) water while the processor runs. These three steps together make a dramatic difference in final texture.
What’s the best tahini to use for homemade hummus?
Hulled tahini produces the lightest, smoothest, least bitter hummus. Look for brands where sesame seeds are the only ingredient. Stir the jar well before measuring, since the oil separates during storage. Unhulled tahini is nutritious but adds noticeable bitterness.
Why did my hummus turn out dense instead of fluffy?
Dense hummus is almost always caused by warm water or not blending long enough. Always use cold water and stream it in slowly while the processor runs. Blend for the full 3-5 minutes after adding tahini and lemon—this step builds the emulsion that creates a light, airy texture.
Can I make this recipe ahead of time for a party or holiday gathering?
Absolutely. Homemade gluten-free hummus actually tastes better after a few hours as the flavors meld. Make it up to 3 days ahead and store in an airtight container in the fridge. Add the olive oil and garnishes fresh just before serving for the best presentation.
Serving Suggestions
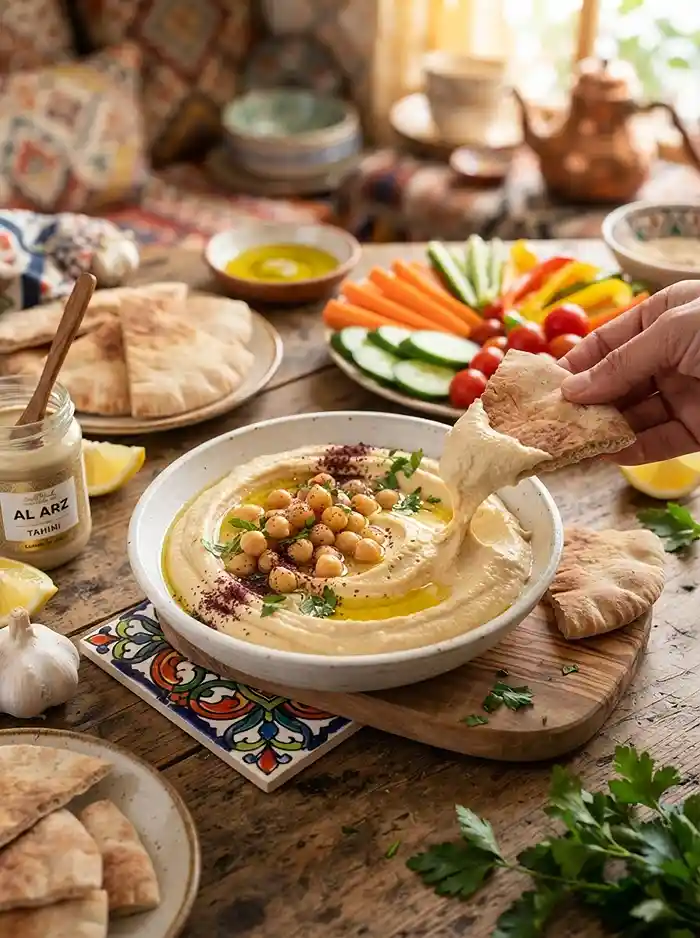
You know… this hummus is the kind of thing that disappears fast at a table. Serve it warm with warm pita (gluten-free, of course), sliced cucumbers, radishes, and carrots for a simple mezze spread that works as an appetizer or light lunch.
It’s also a natural fit for Thanksgiving or Christmas gatherings as a make-ahead appetizer that covers your gluten-free guests without any last-minute stress. Set it out with a platter of crudités and let people graze while the main meal comes together.
For a heartier pairing, try it alongside these apple cider overnight quinoa jars for a nutritious grab-and-go lunch, or serve it as a dip for sliced gluten-free flatbread. You can also dollop it over grain bowls, use it as a sandwich spread, or thin it slightly with lemon juice for a creamy salad dressing.
If you’re building a full spread, this gluten-free apple butter crumb cake makes a stunning sweet finish to balance the savory notes of the hummus platter.
Conclusion
Once you’ve made homemade gluten-free hummus from dried chickpeas, it’s genuinely hard to go back. The texture is in a different league, the flavor is brighter and more complex, and the whole process is far more manageable than it first appears.
Give this recipe a try and let me know how it turned out in the comments below. Did you try roasted garlic? Add harissa? I’d love to hear your spin on it—and if you loved it, save it to Pinterest so more people can find their new favorite hummus.
Gluten-Free Hummus with Dried Chickpeas
Equipment
- Large bowl
- Saucepan
- Food processor
Ingredients
Dry Ingredients
- 1 cup plus 2 tbsp dried chickpeas about 210 g
- ½ tsp baking soda added to cooking water
- ½ tsp salt for cooking water
- 1 tsp salt for blending
- ¼ tsp ground cumin optional
- ground cumin or sumac for garnish
Wet Ingredients
- 4 cups water for soaking
- 5 cups fresh water for cooking
- ⅓ cup hulled tahini stir jar well before measuring
- ⅓ cup fresh lemon juice
- 2 cloves garlic chopped
- ¼ cup cold water plus more as needed
- 2 tbsp extra-virgin olive oil for garnish
- 1-2 tbsp cooked chickpeas reserved for garnish
Instructions
- Pick through the dried chickpeas, removing any stones, debris, or discolored beans. Rinse thoroughly under cold water. Place the chickpeas in a large bowl and cover with 4 cups of water. Soak for 8–12 hours or overnight. Drain and rinse well before cooking.
- Transfer the soaked chickpeas to a saucepan. Add 5 cups fresh water, baking soda, and 1/2 teaspoon salt. Bring to a boil, then reduce to a steady simmer. Cook for 30–35 minutes, skimming away foam and loose skins as needed. The chickpeas are ready when they easily collapse when pressed between your fingers.
- Drain the chickpeas, reserving 1–2 tablespoons for garnish. For extra-smooth hummus, gently rub the warm chickpeas in water to loosen the skins, then remove as many as you can.
- Add the cooked chickpeas to a food processor and process for about 1 minute, until they form a smooth, stiff paste. Scrape down the sides as needed.
- Add the tahini, lemon juice, garlic, 1 teaspoon salt, and cumin if using. Process for 3–5 minutes, scraping down the sides as needed. The mixture should turn lighter and thicker.
- With the processor running, slowly stream in the cold water. Continue blending until the hummus is pale, fluffy, and creamy. Add more cold water 1 tablespoon at a time if needed. Taste and adjust the salt, lemon juice, or tahini to your preference.
- Spoon the hummus into a shallow serving bowl and create a swirl with the back of a spoon. Garnish with the reserved chickpeas, a drizzle of olive oil, and a pinch of cumin or sumac. Serve warm or at room temperature.