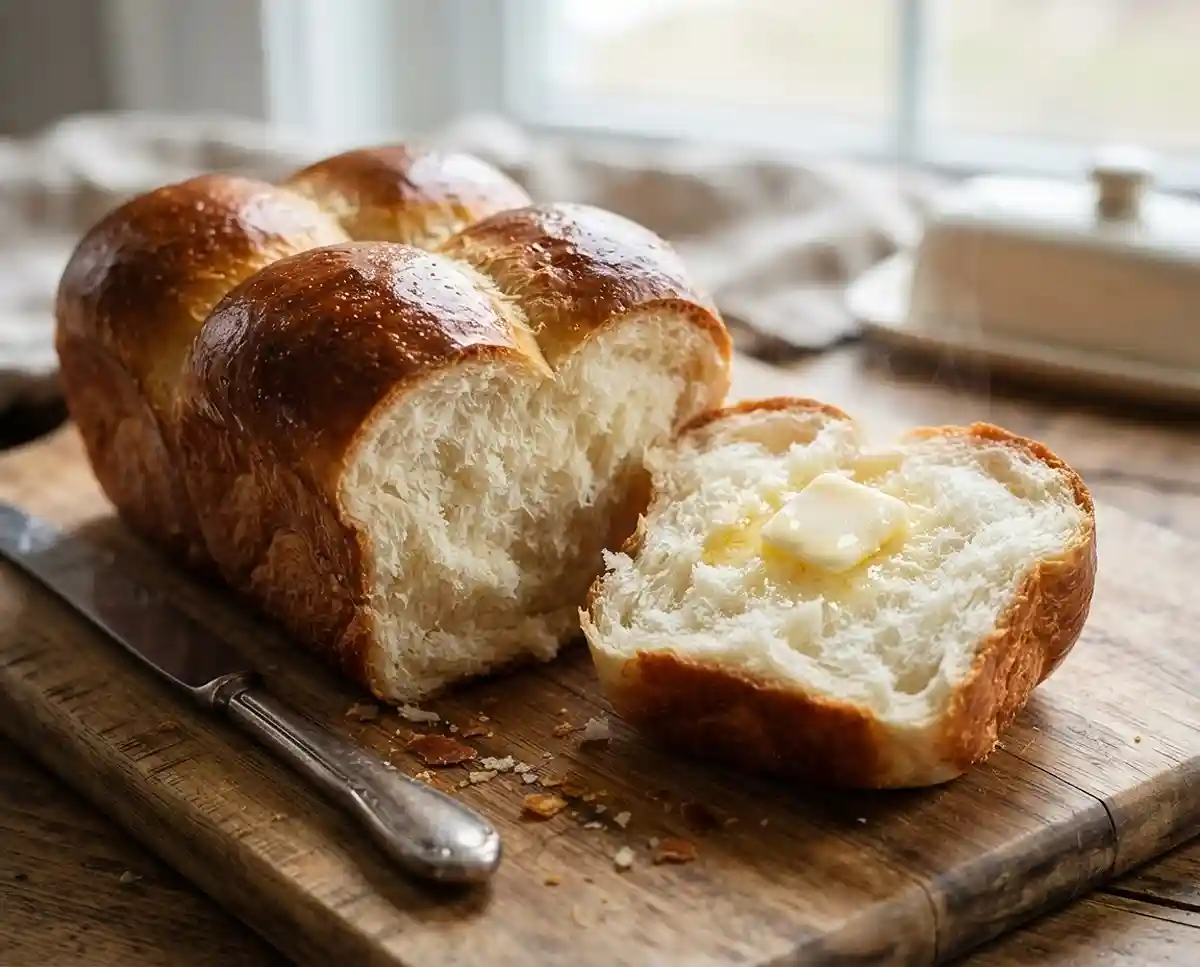
Gluten-Free Japanese Milk Bread
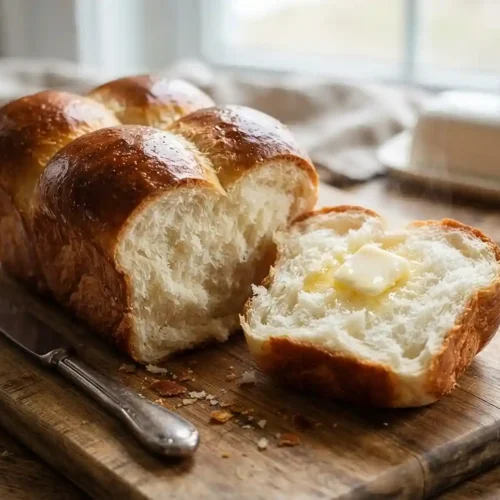
Learn how to make soft, pillowy gluten-free Japanese milk bread using the tangzhong method. Includes step-by-step instructions, substitutions, troubleshooting tips, and storage guide.
The first time I attempted gluten-free Japanese milk bread, I pulled what looked like a dense, crumbly doorstop out of the oven. I had skipped the tangzhong step because it seemed fussy, and my shortcut cost me two hours of work. That failure sent me back to the drawing board—and eventually led to the pillowy, cloud-soft loaf I’m sharing with you today.
Gluten-free Japanese milk bread isn’t just a novelty bake. It’s the kind of bread that makes you wonder why you ever settled for dry, crumbly store-bought loaves. You know, once you experience that soft, feathery crumb and the faintly sweet, milky aroma, it’s hard to go back to anything else.
Have you ever bitten into a slice of bread so tender it felt like it was dissolving on your tongue? That’s exactly what this recipe delivers—and it does it without a single gram of gluten.
Why You’ll Love This Gluten-Free Japanese Milk Bread
- Cloud-soft texture: The tangzhong method gelatinizes the starch before baking, producing a crumb as fluffy as freshly whipped cream.
- Beginner-friendly process: Clear, step-by-step instructions walk you through every stage, including the trickiest shaping steps.
- Make-ahead friendly: The dough can cold-proof overnight, making it easy to time around a busy morning or a holiday brunch.
- Free of common allergens: Naturally gluten-free and easily made dairy-free with simple swaps.
The Secret to Perfect Gluten-Free Japanese Milk Bread
- Tangzhong creates moisture retention: Cooking a small portion of flour with liquid before adding it to the dough pre-gelatinizes the starch. As BAKERpedia’s guide to the tangzhong method explains, this allows the starch granules to absorb significantly more water, which stays locked in during baking for a softer, longer-lasting crumb.
- Cold proofing deepens flavor: Refrigerating the dough overnight slows fermentation and develops a more complex, slightly sweet flavor while making the sticky dough easier to shape.
- Butter added in stages emulsifies properly: Adding softened butter in 3–4 small additions lets it incorporate fully, giving the dough a silky, smooth consistency instead of a greasy, separated mess.
- Internal temperature tells the truth: Baking to 190–205°F (88–96°C) internally guarantees the center is fully set, which prevents the gummy core that plagues so many gluten-free loaves.
Table of Contents
Ingredients
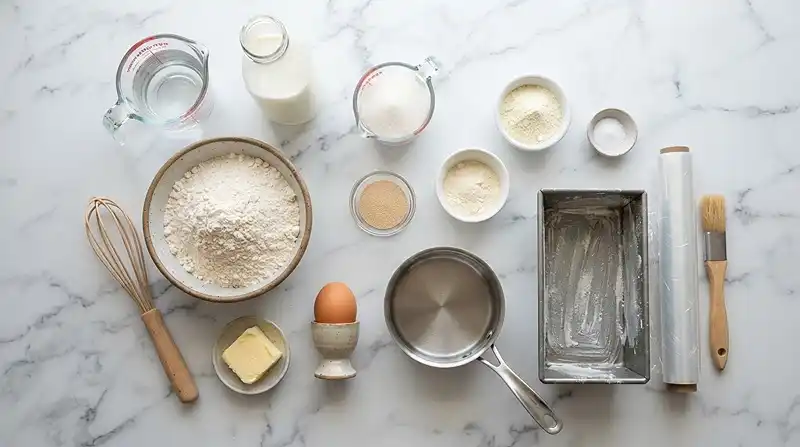
Tangzhong
| Ingredient | Amount | Notes |
|---|---|---|
| Water | 60 ml (¼ cup) | Room temperature |
| Milk | 60 ml (¼ cup) | Whole milk preferred; non-dairy works |
| Certified gluten-free bread flour | 23 g | Must be labeled certified gluten-free |
Milk Bread Dough
| Ingredient | Amount | Notes |
|---|---|---|
| Cooled tangzhong | All of the above | Must be fully cooled before using |
| Lukewarm milk | 120 ml (½ cup) | Between 100–110°F (38–43°C) |
| Active dry yeast | 7 g (about 2–2¼ tsp) | Check the expiration date before using |
| Granulated sugar, divided | 50 g | 1 tsp activates yeast; rest goes in dough |
| Dry milk powder | 15 g | Adds richness and browning; omit for dairy-free |
| Large egg, room temperature | 1 | Room temperature eggs incorporate more evenly |
| Certified gluten-free bread flour blend | 350 g | Use a high-quality blend with xanthan gum |
| Sea salt | 1 teaspoon | Enhances flavor and controls yeast activity |
| Unsalted butter, softened | 58 g | Must be truly soft, not melted |
For the Pan and Finish
- Butter, for greasing
- Gluten-free flour, for dusting
- Milk or egg wash, for brushing
Instructions
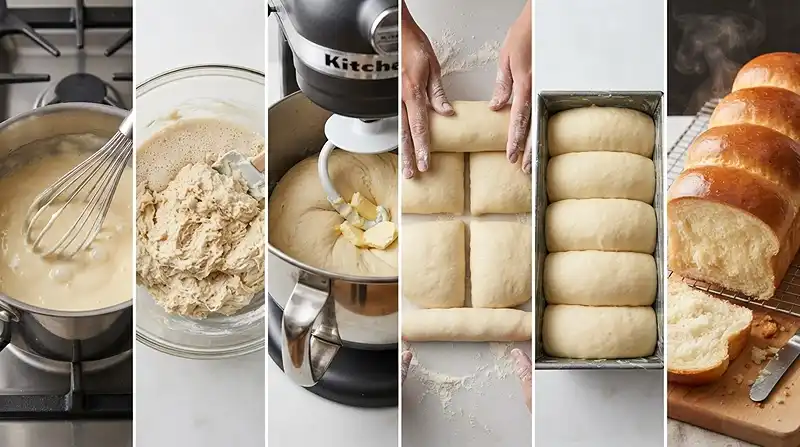
Step 1 — Make the Tangzhong
Whisk the water and 23 g certified gluten-free bread flour together in a small saucepan until smooth. Add the 60 ml milk and whisk again to combine.
Cook over medium heat, whisking constantly, until the mixture thickens into a smooth pudding-like paste, about 2–3 minutes. You’re looking for a thick, glossy consistency that holds its shape briefly when you lift the whisk.
Transfer the tangzhong to a bowl, press plastic wrap directly against its surface to prevent a skin from forming, and let it cool completely to room temperature.
Step 2 — Activate the Yeast
Add about 1 teaspoon of the 50 g granulated sugar to the 120 ml lukewarm milk. Sprinkle the 7 g active dry yeast over the top and gently stir.
Let stand for 10–20 minutes, until the mixture is foamy and smells yeasty. If it doesn’t foam, your yeast may be expired or your milk too hot—start over with a fresh packet.
Step 3 — Combine the Dough Ingredients
Add the 15 g dry milk powder, remaining sugar, cooled tangzhong, 1 egg, 350 g gluten-free flour blend, and 1 teaspoon sea salt to the yeast mixture. Mix with a spatula until a shaggy dough forms.
Step 4 — Knead with a Stand Mixer
Using a stand mixer fitted with a dough hook, knead on low speed for about 5 minutes. The dough will look rough at first—that’s normal.
Add the 58 g softened butter gradually in 3–4 additions, mixing about 20 seconds after each addition and scraping down the bowl as needed. Increase to medium speed and knead for another 5–7 minutes, until the dough is smooth and elastic. Gluten-free dough will remain softer and stickier than traditional wheat dough—don’t be tempted to add more flour.
Step 5 — First Rise
Shape the dough into a ball as much as possible and place it in a lightly greased bowl. Cover and let rise in a warm, draft-free place for 1–2 hours, or until noticeably expanded.
It may not double as dramatically as conventional wheat bread, and that’s perfectly fine. For easier shaping and deeper flavor, refrigerate the dough for several hours or overnight after this rise.
Step 6 — Prepare the Pan and Shape the Dough
Grease a 4½×8½-inch loaf pan with butter and lightly dust with gluten-free flour. If your refrigerated dough is very firm, let it sit at room temperature briefly before shaping.
Turn the dough onto a lightly floured gluten-free surface and gently press out excess air. Divide the dough into 4 equal pieces.
Working with one piece at a time, flatten or roll it into an approximately 6-inch square. Fold the opposite corners toward the center, then roll the dough firmly into a log starting from the pointed end. Tuck the pointed edge underneath and pinch the seam closed.
Place the four rolls seam-side down in the prepared loaf pan.
Step 7 — Second Proof
Cover and let proof in a warm place for 1–2 hours, until the dough has risen close to the top of the pan. The rolls should look puffy and fill the pan snugly.
Step 8 — Bake
Preheat the oven to 350°F (180°C). Brush the top of the dough gently with milk for a soft matte crust or egg wash for a glossy finish.
Bake for 30–35 minutes, loosely tenting with foil if the top becomes too dark. The center should reach approximately 190–205°F (88–96°C) on an instant-read thermometer.
Step 9 — Cool and Slice
Let the bread cool in the pan for several minutes, then carefully transfer it to a wire rack. Allow it to cool before slicing for the best structure—cutting too soon can cause the crumb to compress and become gummy.
Serve warm with butter and enjoy that first incredible slice.
Make It Your Own
Well… if you’re dairy-free, this recipe adapts beautifully. Swap the dairy milk for oat milk or full-fat coconut milk in both the tangzhong and the dough, and use vegan butter in place of the unsalted butter. Skip the dry milk powder or use a coconut milk powder instead. The fat content in these alternatives keeps the crumb rich and tender.
For an egg-free version, replace the large egg with a flax egg (1 tablespoon ground flaxseed mixed with 3 tablespoons water, left to gel for 5 minutes). The binding won’t be quite as strong, so expect a slightly more delicate crumb. It still works, though, and the flavor is wonderful.
Want to add a little something extra? Brush the shaped rolls with melted butter before the second proof and sprinkle the top with a pinch of flaky sea salt or a touch of sesame seeds. It adds a beautiful visual finish and a subtle savory contrast to the sweet, milky dough.
If you love easy gluten-free baking projects, you might also enjoy this 4-ingredient gluten-free yogurt cake—another beginner-friendly recipe that delivers impressive results with minimal effort.
Common Problems and Solutions
Problem: The dough isn’t rising much. Gluten-free dough simply doesn’t rise as dramatically as wheat-based dough. As long as the dough looks noticeably puffier after 1–2 hours and the yeast foamed during activation, the rise is working as it should. A warm, draft-free environment (around 75–80°F) helps—try placing the bowl in a turned-off oven with just the light on.
Problem: The center is gummy after baking. This is the most common gluten-free bread complaint, and it almost always comes down to underbaking. Use an instant-read thermometer and don’t pull the loaf until the center reads at least 190°F (88°C). Tent with foil if the top is browning too fast so the inside has time to finish.
Problem: The dough is too sticky to shape. Man, oh man… gluten-free dough is genuinely sticky, and that’s by design. A cold proof overnight in the refrigerator firms the dough significantly and makes shaping much more manageable. Lightly flour your hands and work surface with gluten-free flour, and work quickly.
Problem: The loaf crumbles when sliced. Cutting too soon is almost always the culprit. Give the loaf a full 30–45 minutes to cool on a wire rack before slicing. The internal structure needs time to set as it cools, and a sharp serrated bread knife makes a clean cut without compressing the crumb. As noted in this breakdown of the tangzhong technique for gluten-free baking, the pre-gelatinized starch holds moisture and helps prevent crumbling—but only when the bread has cooled properly.
Storage and Meal Prep
| Method | Duration | Notes |
|---|---|---|
| Counter | 2–3 days | Airtight container or wrapped tightly in plastic wrap |
| Fridge | 5–7 days | Bring to room temperature or toast before serving |
| Freezer | 2–3 months | Slice first, then wrap slices individually |
To reheat, wrap a slice in a damp paper towel and microwave for 15–20 seconds, or pop it in a toaster for a lightly crisped edge. Frozen slices go straight from the freezer to the toaster—no thawing needed.
For a no-waste idea, day-old slices are outstanding as gluten-free French toast. The slightly drier texture absorbs the egg custard better, and the result is a rich, golden breakfast that’s worth planning ahead for.
Gluten-Free Japanese Milk Bread FAQs
Can I make gluten-free Japanese milk bread without a stand mixer?
Yes, but it takes patience. Mix the dough by hand with a sturdy spatula or wooden spoon, working the butter in gradually with your hands. The kneading stage will take longer—about 10 minutes of vigorous hand-mixing—and the dough will be stickier to work with. The cold proof overnight is especially helpful when mixing by hand.
How do I know when the tangzhong is ready?
The tangzhong is ready when it has thickened into a smooth, glossy paste that resembles thick pudding or a very soft polenta. It should coat the back of a spoon and hold a brief line when you drag a finger through it. This takes about 2–3 minutes over medium heat with constant whisking.
What’s the best gluten-free flour blend to use for this recipe?
Use a certified gluten-free bread flour blend that already contains xanthan gum or a similar binder. Blends designed specifically for bread-baking (rather than all-purpose blends) tend to produce a better rise and more elastic dough. Avoid single-flour alternatives like almond flour or coconut flour, as they won’t behave the same way.
Why did my gluten-free milk bread turn out dense?
Dense texture is usually caused by one of three things: yeast that didn’t fully activate (the mixture should foam vigorously before you proceed), insufficient kneading, or dough that over-proofed during the second rise. Watch the dough, not the clock—pull it for baking once it has risen close to the top of the pan, regardless of how much time has passed.
Can I freeze the dough before baking?
Freezing shaped, unbaked dough is not recommended for this recipe. The yeast and the gelatinized starch from the tangzhong perform best when the dough goes through its rises fresh. Instead, freeze the fully baked and cooled bread in individual slices for the best texture when reheated.
Serving Suggestions
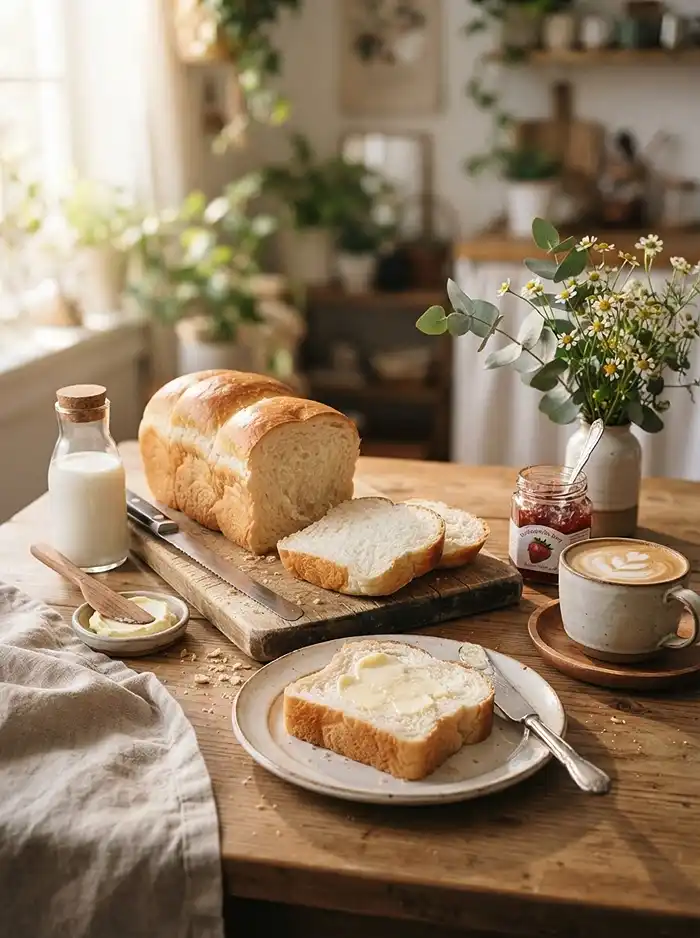
This gluten-free Japanese milk bread is wonderful served simply warm with a generous spread of good butter and a drizzle of honey. For something heartier, pair thick slices with a bowl of soup or use it to make the most indulgent gluten-free grilled cheese you’ve ever eaten.
It also shines on an Easter morning or a slow Thanksgiving weekend breakfast table—the pull-apart loaf shape makes it feel special without requiring any extra effort. If you want to round out a full gluten-free spread, these gluten-free crispy Parmesan corn rounds make a fantastic savory counterpart alongside this sweet, milky bread.
For more inspiration, check out these high-protein chicken cottage cheese meatballs for a complete gluten-free meal that’s just as satisfying as the bread itself.
Make This Recipe Your Own
If you give this gluten-free Japanese milk bread a try, I’d genuinely love to hear how it goes. Drop a comment below with your results, any modifications you made, or questions you ran into along the way—every piece of feedback helps make this recipe better for everyone.
Saved this recipe for later? Share it on Pinterest so other gluten-free bakers can find it too. A rating means the world and helps more people discover that gluten-free bread can be this good.
Gluten-Free Japanese Milk Bread
Equipment
- Small saucepan
- Whisk
- Mixing bowl
- Stand mixer
- Dough hook
- 4½×8½-inch loaf pan
- Instant-read thermometer
- Wire rack
Ingredients
Tangzhong
- 60 ml (¼ cup) Water Room temperature
- 60 ml (¼ cup) Milk Whole milk preferred; non-dairy works
- 23 g Certified gluten-free bread flour Must be labeled certified gluten-free
Milk Bread Dough
- All Cooled tangzhong Use all of the prepared tangzhong; must be fully cooled before using
- 120 ml (½ cup) Lukewarm milk Between 100–110°F (38–43°C)
- 7 g Active dry yeast About 2–2¼ tsp; check the expiration date
- 50 g Granulated sugar Divided; 1 tsp activates the yeast and the remainder goes in the dough
- 15 g Dry milk powder Adds richness and browning; omit for dairy-free
- 1 large Egg Room temperature
- 350 g Certified gluten-free bread flour blend Use a high-quality blend with xanthan gum
- 1 teaspoon Sea salt Enhances flavor and controls yeast activity
- 58 g Unsalted butter Softened, not melted
For the Pan and Finish
- Butter For greasing
- Gluten-free flour For dusting
- Milk or egg wash For brushing
Instructions
- Whisk the water and 23 g certified gluten-free bread flour together in a small saucepan until smooth. Add the 60 ml milk and whisk again to combine.
- Cook over medium heat, whisking constantly, until the mixture thickens into a smooth pudding-like paste, about 2–3 minutes. The tangzhong should be thick and glossy and briefly hold its shape when the whisk is lifted.
- Transfer the tangzhong to a bowl, press plastic wrap directly against its surface to prevent a skin from forming, and let it cool completely to room temperature.
- Add about 1 teaspoon of the 50 g granulated sugar to the 120 ml lukewarm milk. Sprinkle the 7 g active dry yeast over the top and gently stir.
- Let the yeast mixture stand for 10–20 minutes, until foamy and yeasty-smelling. If it does not foam, start over with fresh yeast and properly heated milk.
- Add the 15 g dry milk powder, remaining sugar, cooled tangzhong, 1 egg, 350 g gluten-free flour blend, and 1 teaspoon sea salt to the yeast mixture. Mix with a spatula until a shaggy dough forms.
- Using a stand mixer fitted with a dough hook, knead on low speed for about 5 minutes. The dough will look rough at first.
- Add the 58 g softened butter gradually in 3–4 additions, mixing about 20 seconds after each addition and scraping down the bowl as needed. Increase to medium speed and knead for another 5–7 minutes, until smooth and elastic. Do not add extra flour; gluten-free dough will remain softer and stickier than traditional wheat dough.
- Shape the dough into a ball as much as possible and place it in a lightly greased bowl. Cover and let rise in a warm, draft-free place for 1–2 hours, or until noticeably expanded.
- For easier shaping and deeper flavor, refrigerate the dough for several hours or overnight after the first rise.
- Grease a 4½×8½-inch loaf pan with butter and lightly dust with gluten-free flour. If refrigerated dough is very firm, let it sit briefly at room temperature before shaping.
- Turn the dough onto a lightly floured gluten-free surface and gently press out excess air. Divide the dough into 4 equal pieces.
- Working with one piece at a time, flatten or roll it into an approximately 6-inch square. Fold the opposite corners toward the center, then roll the dough firmly into a log starting from the pointed end. Tuck the pointed edge underneath and pinch the seam closed.
- Place the four rolls seam-side down in the prepared loaf pan.
- Cover and let proof in a warm place for 1–2 hours, until the dough has risen close to the top of the pan. The rolls should look puffy and fill the pan snugly.
- Preheat the oven to 350°F (180°C). Brush the top of the dough gently with milk for a soft matte crust or egg wash for a glossy finish.
- Bake for 30–35 minutes, loosely tenting with foil if the top becomes too dark. The center should reach approximately 190–205°F (88–96°C) on an instant-read thermometer.
- Let the bread cool in the pan for several minutes, then carefully transfer it to a wire rack. Allow it to cool before slicing so the crumb can fully set and avoid becoming gummy.
- Serve warm with butter and enjoy.