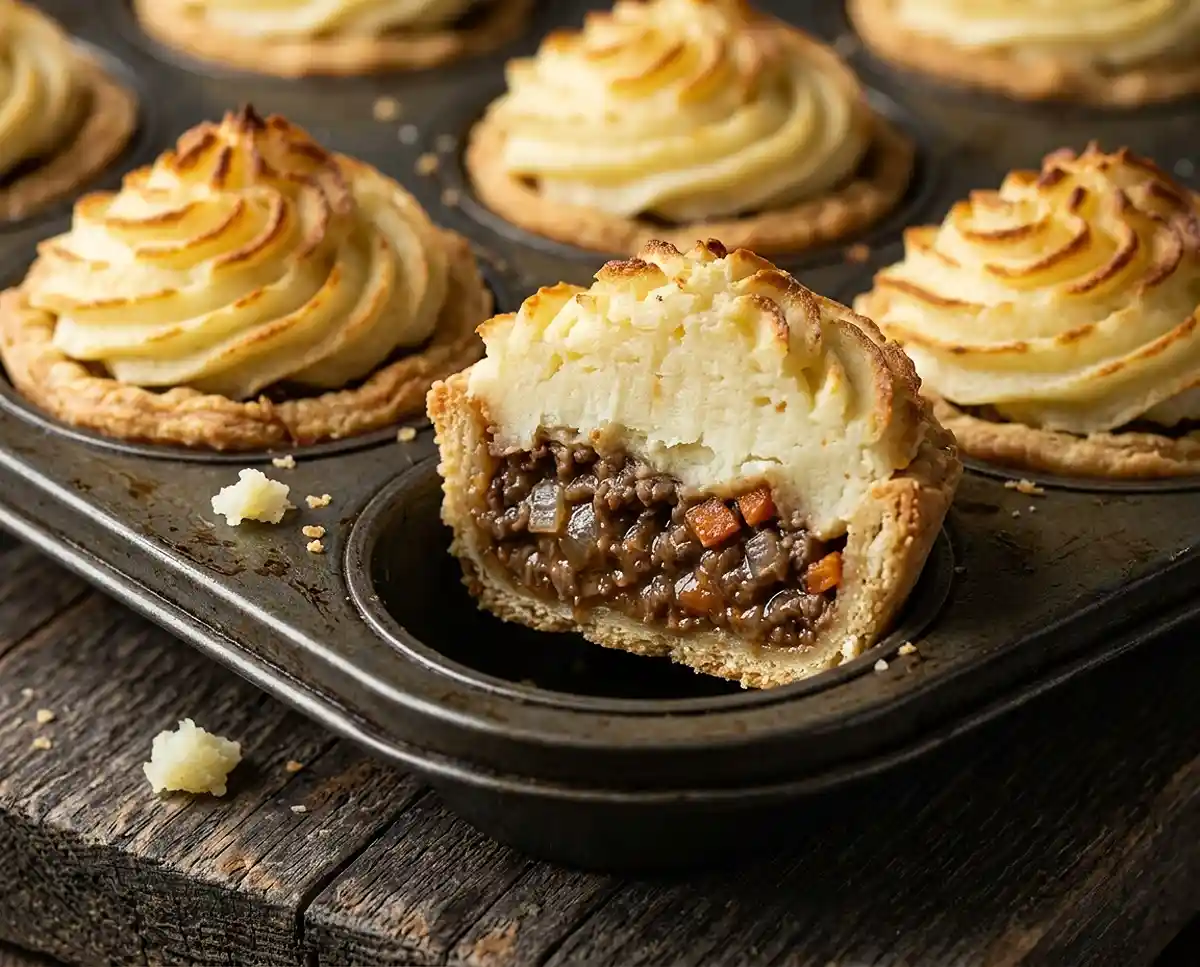
Gluten-Free Mini Cottage Pies
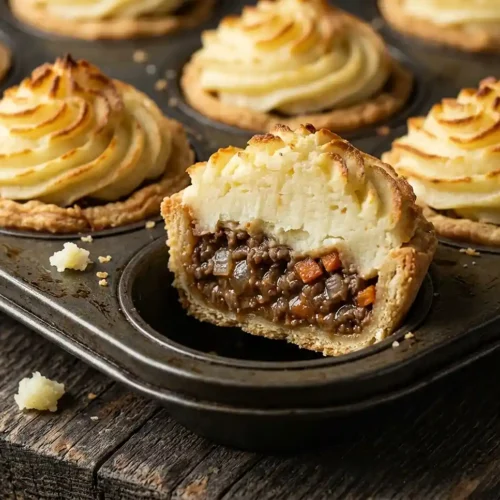
Make gluten-free mini cottage pies with a pastry base, beef filling, and piped mash. Step-by-step recipe for 18 pies, with make-ahead and freezing tips.
A reader emailed me last spring with a problem I hear a lot: her coeliac niece was coming to a party, and every canapé on the table had pastry or a breadcrumb coating. She wanted gluten-free mini cottage pies she could pass around on a platter. So I shrank my cottage pie into a pastry cup and tested it until it held together.
Listen, the idea sounds fiddly, but the work is mostly stirring and waiting. Who wants to hand a coeliac guest a plain bread roll while everyone else eats pastry? These mini beef cottage pies are a homemade take on frozen minis like Iceland mini cottage pies, with a crisp shortcrust base and a swirl of piped mash.
Table of Contents
The 60-Second Rundown on These Gluten-Free Mini Cottage Pies
- Texture and flavor: A crisp, crumbly pastry base, a savoury beef and carrot filling, and a mash topping that turns golden at the ridges.
- Difficulty: Confident beginner. Nothing is hard, but there are a few components, and gluten-free pastry needs gentle handling.
- Unique advantages: Make-ahead filling, kid-friendly size, and freezer-friendly once baked. Use dairy-free butter in the mash if you need to, but the pastry recipe you use will decide whether the whole pie is dairy-free.
- When it earns its spot: Parties, buffets, packed lunches, and any gathering where you want a hot bite that is safe for coeliacs.
Why These Ingredients Behave
- Floury potatoes for the mash: King Edward and other floury potatoes are high in starch and break down into a dry, fluffy mash. That structure holds a piped swirl in the oven, where waxy potatoes tend to turn gluey and slump.
- A cooled, thickened filling: Simmering the mince in just enough water concentrates the flavour, and the gravy granules thicken it with starch. Once cooled, the filling is spoonable and will not soak the pastry base.
- Skimmed fat and grated carrot: Gluten-free pastry has no gluten network to resist greasy filling, so skimming the fat protects the base. The grated carrot melts into the mince and keeps it moist without extra oil.
- Greaseproof paper handles: Fragile gluten-free pastry cracks when you pry it out of a tin. A paper strip under each case lets you lift the baked pie out in one piece.
Ingredients
Makes 18 pies.
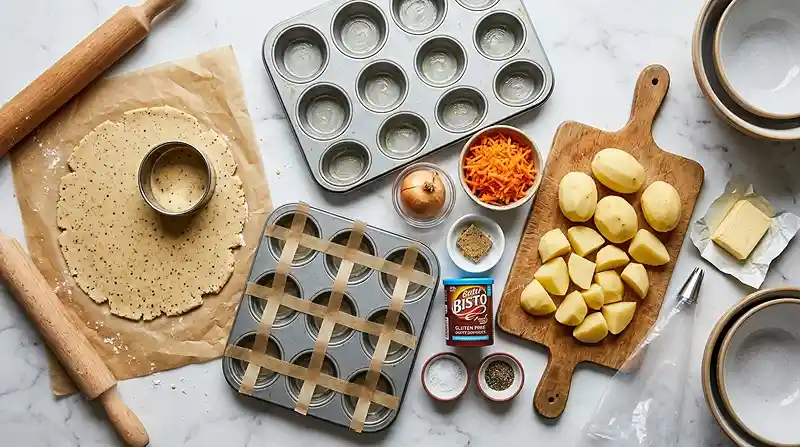
Gluten Free Shortcrust Pastry
- Gluten free shortcrust pastry (make the pastry recipe from the link above)
Minced Beef Filling
- 500g (1lb 2oz) minced beef
- 1 large brown onion, diced
- 1 large carrot, grated
- 1 gluten free beef stock cube
- Gluten free gravy granule/mix of your choice (I use Bisto gluten free granules)
- Salt and pepper to season
Always read the labels on stock cubes and gravy mixes, because gluten can hide in them. Coeliac UK’s guidance on living gluten-free is a useful place to check what to look for.
Mashed Potato Topping
- 830g (1lb 13oz) peeled weight, King Edward or any floury potato, peeled and cut into even size pieces
- 50g (2oz) butter
- Salt and white pepper to season
Instructions
Cook the Filling and the Mash
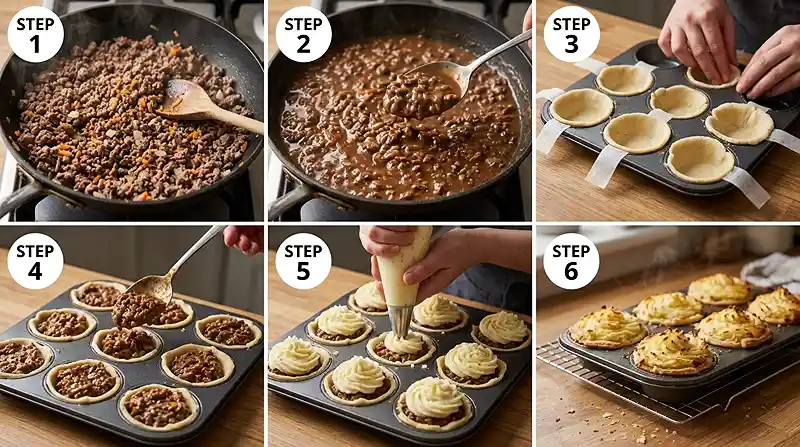
- Brown the mince off in a large pan, stirring constantly to prevent it from sticking and to break it down. I don’t add oil, but if the mince is sticking, pour in a drop. It is ready when it has lost its pink and turned deep brown.
- Add the diced onion and cook out for a few minutes, until soft. Add the grated carrot and cook for a couple more minutes.
- Crumble in the stock cube, stir to coat everything, and cook out for a minute or so. Pour in enough boiling water to just cover the mince. Bring to a boil, reduce to a simmer, pop a lid on, and cook for 25 minutes, checking as the water reduces.
- While the mince cooks, put the prepared potatoes in a large pan, cover with cold water, and pop a lid on. Bring to the boil, reduce to a simmer, and cook until a knife slips easily through the potatoes.
- Drain off all the water carefully. Add the butter and mash until nice and smooth. Season to taste, cover, and set aside to cool for around 30 minutes.
- Once the mince has cooked, skim off any excess fat. Gradually add enough gluten free gravy mix until the gravy coats the mince. Season to taste, cover, and set aside to cool for around 30 minutes.
Note to self: Only add more boiling water in step 3 if the pan is getting too dry, because extra water dilutes the flavour and leaves you with too much liquid. By the end, the kitchen should smell the way it does on a Sunday roast morning.
Moving the mince into a clean dish speeds up the cooling. You can make it a day in advance, then cover and chill it once it is cold. The finished filling should hold its shape on a spoon and not run.
Line the Tins and Fill the Pies
- Preheat the oven to 200C/400F/Gas 6/180C Fan. Grease the number of muffin tins you need. Cut thin strips of greaseproof paper (approx 14cm x 1½cm) and secure them across the centre of each muffin tin hole. This makes lifting the baked pies out an absolute doddle.
- Make the gluten free pastry and divide it into two. Lightly dust a clean worktop with gluten free plain/all purpose flour and roll out the first piece. Using a pastry cutter measuring approximately 9cm, cut out the bases for the pies.
- Gently lift each piece, place it over a muffin tin hole, and ease it into place. Patch up any gaps by pressing the pastry together or using bits of pastry. Repeat with the second piece, then squish the scraps together and roll out again until it is all used up.
- Fill each pastry base with a dessertspoonful of mince.
- Fill a large piping bag fitted with a star nozzle with mashed potato and pipe a swirl over the mince. You can instead simply spoon the mash over the mince.
Note to self: Thanks to Laura of My Gluten Free Guide for the paper strip idea. A reader once told me her pastry tore every time she lifted the pies, and the strips fixed it.
Bake and Rest
- Slip the pies into the oven and bake for 25 minutes, until the potato turns golden brown and the minced beef is piping hot. For even browning, you may need to turn the tray a couple of times in between.
- Remove the pies from the oven and leave them to stand for 5 minutes or so before tucking in.
Change It Up
Swap the minced beef for minced lamb and you have a shepherd’s pie version of these mini cottage pies. Lamb is fattier, so skim the pan a little more carefully before adding the gravy, or the filling will run.
Funny enough, the most popular reader tweak is turning these into mini cottage pie canapes. Use a mini muffin tin and a smaller cutter, fill each case with a teaspoon of mince, and pipe a small swirl on top. They bake faster than the full-size pies, so start checking early.
Sweet potato mash makes a colourful topping, but it holds more moisture than a floury potato. Dry it out in the hot pan after draining and spoon it on rather than piping. Skipping that step gives you a topping that slumps over the pastry.
If you want to avoid dairy, use a dairy-free butter alternative in the mash. It will taste a little less rich, but the topping still pipes and browns well. Check the pastry recipe you use as well.
Rescue Guide
Problem: the pastry cracks when you ease it into the tin. Let the rolled pastry sit for a minute, then lift it gently and patch any gaps with scraps. Gluten-free pastry has no gluten network to stretch, so it needs to be pressed and patched rather than pulled.
Problem: the bases are soggy. Skim the fat, keep the gravy at a spooning consistency, and let the filling cool for around 30 minutes before filling. Hot, loose filling steams the pastry from the inside while it bakes.
Whew, I once piped warm mash straight onto warm mince, and the whole tray slumped into a flat, pale mess. Problem: the mash topping sinks or will not hold a swirl. Drain the potatoes well, mash until smooth, and cool the mash for around 30 minutes before piping.
Problem: the filling is too runny or too dry. If it is runny, add more gravy mix a little at a time until it coats the mince. If it is dry, add a splash of boiling water, because it should be spooning consistency.
Problem: the pies stick in the tin. Grease the tin well and use the greaseproof paper strips, then rest the pies for 5 minutes before lifting. The pastry firms up as it stands and releases more cleanly.
Storage & Meal Prep
| Method | Duration | Notes |
|---|---|---|
| Counter | Up to 2 hours | Food safety limit for cooked meat; refrigerate promptly |
| Fridge | 3-4 days | Airtight container; bring to room temp before reheating |
| Freezer | 2-3 months | Wrap individually |
Reheat the pies in a 180C/350F oven until piping hot all the way through, about 15 minutes from the fridge and closer to 25 from frozen. The oven keeps the pastry crisp, while the microwave softens it.
For no-waste ideas, spoon any leftover filling over a baked potato or use leftover mash for a quick fish pie topping. Broken pies make a good lunch, with a little extra gravy on the side.
What Readers Keep Asking
Can I make mini cottage pies ahead of time?
Yes, you can make the filling a day ahead and keep it covered in the fridge. Bake the pies fresh on the day, since the pastry stays crisper that way. Baked pies also freeze well, wrapped individually, for 2-3 months.
How do I get the pastry cases out of the muffin tin without breaking them?
Lay a thin strip of greaseproof paper across each muffin hole before lining it with pastry. After baking, rest the pies for about 5 minutes, then lift them out by the paper ends. Greasing the tin as well helps the pastry release cleanly.
What’s the best potato for the mash topping?
A floury potato such as King Edward gives the best mash for piping. Floury varieties break down into a dry, fluffy mash that holds its ridges in the oven. Waxy potatoes tend to turn gluey and slump.
Why did my pastry bases go soggy?
Hot or loose filling is the usual cause. Skim the fat, keep the gravy at a spooning consistency, and let the filling cool for around 30 minutes before it goes into the pastry. Warm filling steams the base from the inside while it bakes.
Do I really need to cool the filling and mash first?
Yes, cooling both for around 30 minutes makes the pies easier to assemble and bake. Cooled mince thickens into a spoonable filling, and cooled mash pipes into neat swirls. Skipping this step is the quickest route to a soggy base and a slumped topping.
Serving Suggestions
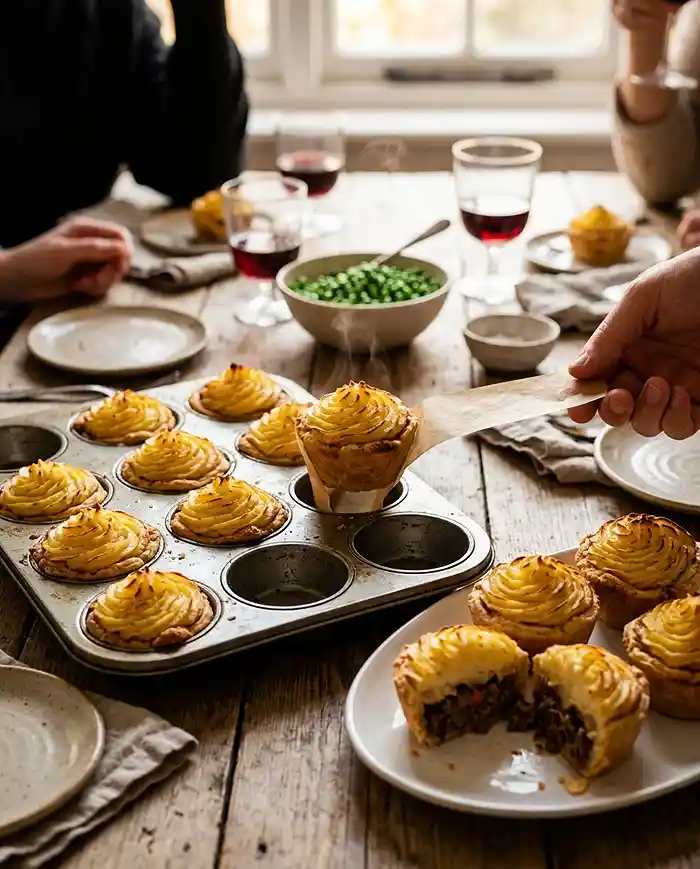
Serve these warm with peas, a spoonful of extra gravy for dipping, or a simple green salad. They also work well on a Super Bowl Sunday snack table, where a hot bite on a platter disappears quickly.
For a bigger spread, add the gluten-free spanakopita rice paper parcels alongside the pies.
For something saucier, the one-pot French onion pasta and the frozen lemon four-ingredient pasta are easy companions.
Final Thoughts
Give these gluten-free mini cottage pies a try, and pin the recipe so you can find it before your next party. Once the filling and mash are cooling, the rest goes quickly.
Leave a rating and a comment below, and tell me what you changed. Your tweaks are how this recipe keeps improving.
Gluten-Free Mini Cottage Pies, Easy Make-Ahead Recipe
Equipment
- Large frying pan or saucepan
- Large saucepan with lid
- Potato masher
- Muffin tins
- Greaseproof paper
- Rolling Pin
- 9 cm pastry cutter
- Large piping bag
- Star piping nozzle
- Measuring cups and spoons
- Spoon
Ingredients
Gluten-Free Shortcrust Pastry
- gluten-free shortcrust pastry Prepare using a separate gluten-free shortcrust pastry recipe; quantity not specified in the article
Minced Beef Filling
- 500 g minced beef approximately 1 lb 2 oz
- 1 large brown onion diced
- 1 large carrot grated
- 1 gluten-free beef stock cube
- gluten-free gravy granules or gravy mix use enough to thicken the filling; check the label
- salt and black pepper to season
Mashed Potato Topping
- 830 g King Edward or other floury potatoes peeled weight, peeled and cut into even-sized pieces; approximately 1 lb 13 oz
- 50 g butter approximately 2 oz
- salt and white pepper to season
Instructions
- Brown the minced beef in a large pan over medium heat, breaking it into small pieces and stirring frequently until no pink remains. Add a little oil only if the meat sticks.
- Add the diced onion and cook for a few minutes until softened. Stir in the grated carrot and cook for another couple of minutes.
- Crumble in the gluten-free beef stock cube and stir for about a minute. Add enough boiling water to just cover the mince. Bring to a boil, reduce to a simmer, cover, and cook for 25 minutes, adding a little more boiling water only if needed.
- Meanwhile, place the prepared potatoes in a large saucepan and cover with cold water. Bring to a boil, reduce to a simmer, and cook until a knife slides easily through the potatoes.
- Drain the potatoes thoroughly. Add the butter and mash until smooth. Season with salt and white pepper, cover, and leave to cool for about 30 minutes.
- Skim excess fat from the beef filling. Gradually stir in gluten-free gravy granules until the gravy coats the mince and the filling holds its shape on a spoon. Season to taste, cover, and cool for about 30 minutes.
- Preheat the oven to 400°F (200°C), or 180°C fan. Grease the muffin tins. Cut thin strips of greaseproof paper, approximately 14 cm x 1.5 cm, and lay one across the center of each muffin cup to create lifting handles.
- Prepare the gluten-free shortcrust pastry and divide it into two portions. Lightly dust the work surface with gluten-free flour and roll out the first portion. Use an approximately 9 cm pastry cutter to cut out the bases.
- Gently place each pastry round into a muffin cup and ease it into shape. Patch any cracks or gaps with small pieces of pastry. Repeat with the remaining pastry, re-rolling the scraps as needed.
- Fill each pastry case with about one dessertspoonful of cooled minced beef filling.
- Transfer the cooled mashed potato to a piping bag fitted with a star nozzle and pipe a swirl over each pie. Alternatively, spoon the mash over the filling.
- Bake for 25 minutes, turning the tray as needed for even browning, until the potato topping is golden and the beef filling is piping hot.
- Remove from the oven and leave the pies to rest for about 5 minutes. Use the greaseproof paper handles to lift them carefully from the muffin tins.