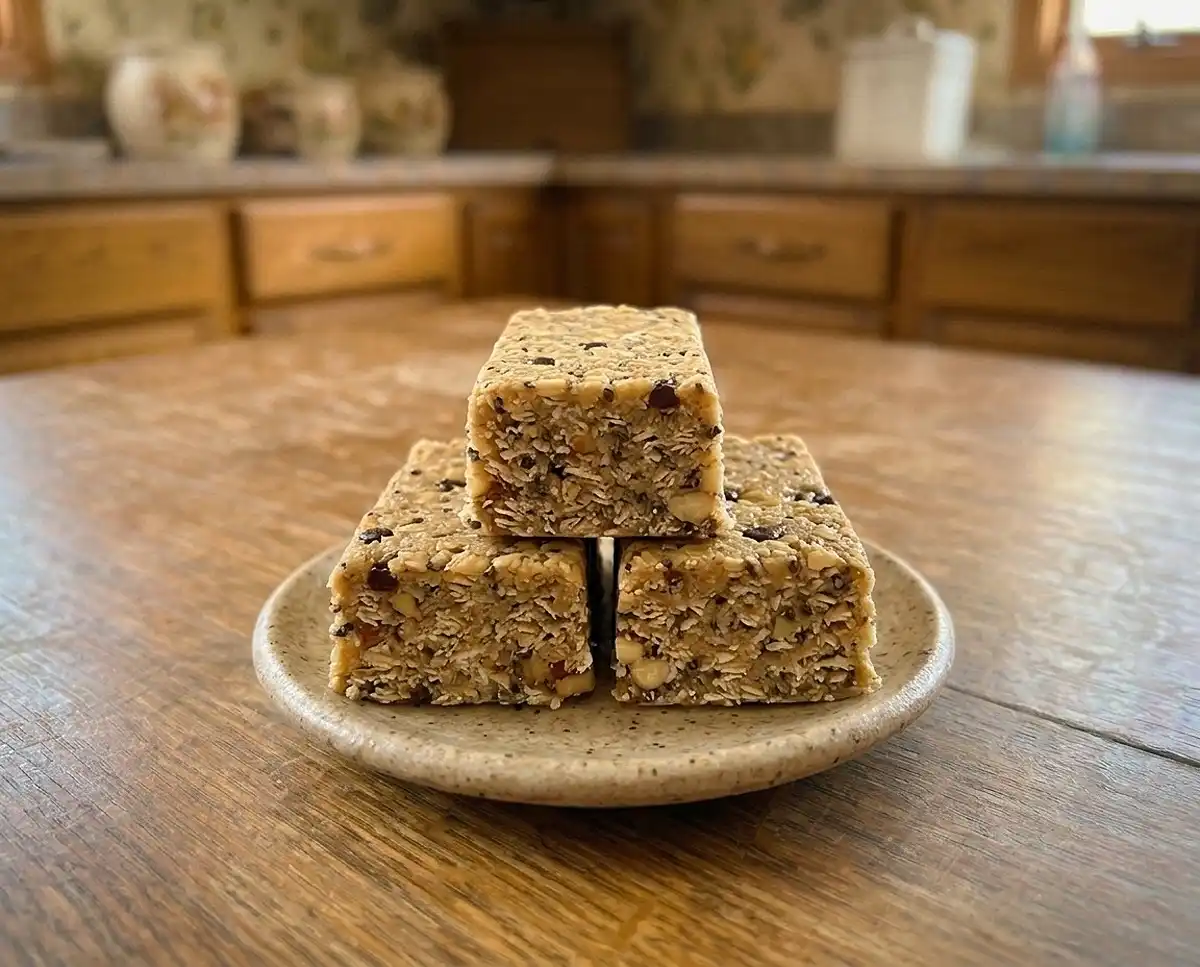
Gluten-Free Vegan Protein Energy Bars
Make gluten-free vegan protein energy bars with oats, almond butter, and maple syrup. Chill-and-slice steps, storage tips, and fixes for crumbly bars.
My first batch of gluten-free vegan protein energy bars didn’t hold together at all. I pressed the mixture into the pan so gently that it crumbled the moment I sliced it. My daughter called it granola gravel and poured it over yogurt, and honestly… that was a fair review.
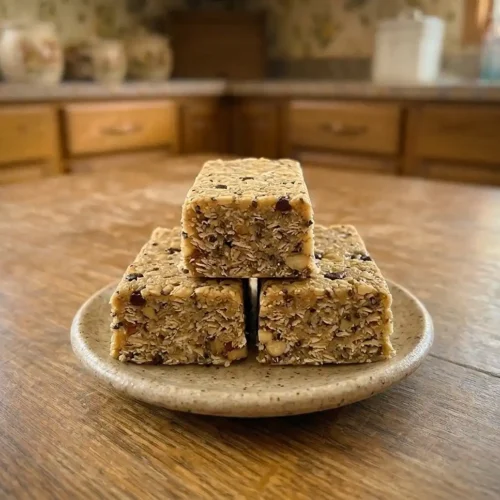
I learned the hard way that these bars depend on pressing firmly and chilling long enough. Once I fixed both, they turned into dense, chewy bars with almonds that crunch like fresh snow underfoot. They’re now my go-to for busy mornings and school pickup.
These gluten-free vegan protein energy bars are an easy, satisfying way to fuel your day with plant-based protein! Discover more high-protein gluten-free snacks for nourishing bites that could become your new go-to snack.
What Makes These Gluten-Free Vegan Protein Energy Bars Worth Making
- Chewy, dense texture. Oats, almond butter, and maple syrup give a chewy bite, and the chopped almonds and mini chocolate chips add crunch and sweetness.
- Beginner-friendly. You stir, press, chill, and slice. There’s no baking and no special equipment.
- Vegan, dairy-free, and gluten-free. They’re made with certified gluten-free oats and dairy-free chocolate chips. They do contain tree nuts, so they aren’t nut-free.
- Best for grab-and-go snacks. They keep in the fridge for up to 1 week, so they suit lunchboxes, hikes, and busy mornings.
The Science Behind Great Gluten-Free Vegan Protein Energy Bars
Great energy bars come down to binding and firming without eggs, wheat, or baking. Each ingredient does a specific job so the bars slice cleanly.
- Chia and flax form a gel. When they meet the almond milk, they thicken and help glue the oats together, like a built-in binder.
- Almond butter and maple syrup are the glue. The sticky syrup and oil-rich almond butter coat every oat and nut, which holds the bars together once chilled.
- Pressing removes air gaps. Compressing the mixture packs the oats tightly, so the bars don’t crumble when you slice them.
- Chilling firms the fats. The fat in almond butter and coconut hardens in the fridge, which turns a soft mixture into a sliceable bar.
Table of Contents
Ingredients
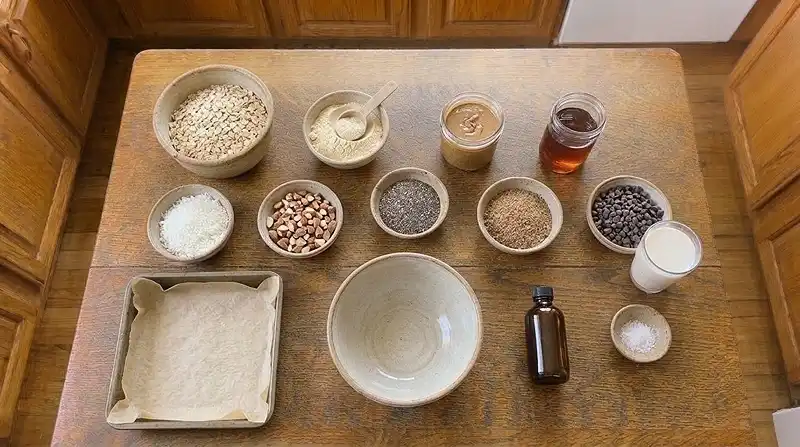
Servings: 10 bars
Dry ingredients
- 1½ cups gluten-free rolled oats, certified gluten-free
- ½ cup vegan protein powder, certified gluten-free
- ¼ cup unsweetened shredded coconut, labeled gluten-free
- ¼ cup chopped almonds
- 2 tablespoons chia seeds
- 2 tablespoons ground flaxseed
- 2 tablespoons dairy-free mini chocolate chips, labeled gluten-free
- ¼ teaspoon fine sea salt
Wet ingredients
- ½ cup creamy almond butter, labeled gluten-free
- ⅓ cup pure maple syrup
- 2 tablespoons unsweetened almond milk, plus more if needed
- 1 teaspoon pure vanilla extract, labeled gluten-free
Oats are naturally gluten-free, but they’re often cross-contacted with other grains, so use only certified gluten-free oats. Beyond Celiac’s overview of oats in the gluten-free diet recommends talking to your doctor before adding oats if you have celiac disease.
For the other labeled ingredients, Beyond Celiac’s cross-contact guide explains why checking each label matters.
Instructions
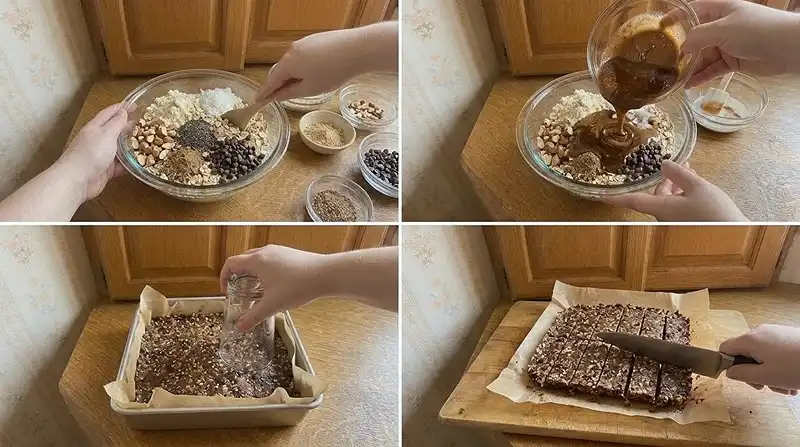
- Prepare the pan. Line an 8-inch square baking pan with parchment paper, leaving some overhang for easy removal.
- Combine the dry ingredients. In a large bowl, stir together the certified gluten-free oats, vegan protein powder, shredded coconut, chopped almonds, chia seeds, ground flaxseed, chocolate chips, and sea salt.
-
Mix the wet ingredients. In a separate bowl, stir together the almond butter, maple syrup, almond milk, and vanilla extract until smooth. If the almond butter is very thick, warm the mixture briefly to make it easier to combine.
Pro Tip: Stir the almond butter jar well before measuring, so the oil and solids are evenly mixed. - Make the bar mixture. Pour the wet mixture over the dry ingredients. Stir thoroughly until everything is evenly coated and the mixture holds together when pressed. Add another tablespoon of almond milk if needed.
-
Press into the pan. Transfer the mixture to the prepared pan. Press it firmly and evenly into a compact layer using the back of a spoon or the bottom of a glass.
Pro Tip: Press harder than feels natural, especially into the corners. Tight packing is what keeps the bars from crumbling. - Chill. Refrigerate for at least 2 hours, or until firm.
- Slice. Lift the chilled mixture from the pan using the parchment paper. Cut into 10 evenly sized bars.
- Serve and store. Enjoy chilled or let the bars sit at room temperature for a few minutes before serving. Store in an airtight container in the refrigerator for up to 1 week.
Ways to Customize This Recipe
For a chocolate protein version, use a chocolate-flavored vegan protein powder, certified gluten-free, in the same amount. The flavor is richer and tastes closer to a brownie. Some powders absorb more liquid, so you may need a splash more almond milk.
Chopped dark chocolate can replace the mini chips. Choose a dairy-free bar labeled gluten-free and chop it finely so it distributes evenly. Dark chocolate adds a deeper, slightly bitter note that balances the maple syrup.
Look… the nut butter swap is the easiest one to make. Sunflower seed butter works in place of almond butter, in the same amount, if you need a nut-free option. Swap the chopped almonds for pumpkin seeds too, and check that everything is labeled gluten-free.
For a sweeter or less sweet bar, adjust the maple syrup slightly and keep an eye on the texture. Less syrup means less binder, so the bars may need extra pressing and chilling. This is a good way to tailor your homemade protein bars to your taste.
If Something Went Wrong, Start Here
Problem: The bars crumble when I slice them. Press the mixture harder next time, and add another tablespoon of almond milk if it doesn’t hold together when pinched. Loose, dry oats can’t bind, while pressed and slightly moist ones can.
Problem: The bars are too sticky or soft. Chill them longer, and stir in a little extra oats or ground flaxseed next time. Oh wow, a few extra minutes in the fridge makes a big difference. Cold fats harden, and the extra dry ingredients absorb moisture.
Problem: The bars are too hard to cut. Let them sit at room temperature for a few minutes, then slice with a sharp knife. Chilled almond butter and coconut oil firm up almost solid, but they soften quickly at room temperature.
Problem: The bars feel greasy. Stir the almond butter thoroughly before measuring, and use a well-blended creamy style. Separated oil pools in the mixture, which leaves the bars oily instead of sticky.
Storage & Meal Prep
| Method | Duration | Notes |
|---|---|---|
| Counter | Up to 2 hours | A few minutes to soften before serving |
| Fridge | Up to 1 week | Airtight container, bring to room temp briefly |
| Freezer | 2-3 months | Wrap individually |
Frozen bars thaw in the fridge or at room temperature in about 20 minutes. There’s no need to reheat them.
Crumble any broken pieces over yogurt or oatmeal so nothing goes to waste.
Frequently Asked Questions
Can I freeze these protein energy bars?
Yes, you can freeze them for 2 to 3 months. Wrap each bar individually and store them in a freezer bag. Thaw them in the fridge or at room temperature for about 20 minutes.
How do I cut clean bars?
Chill the bars fully, lift them out with the parchment, and slice with a sharp knife. If they feel too firm, let them sit for a few minutes first. Wiping the knife between cuts keeps the edges neat.
What’s the best protein powder for these bars?
A vegan protein powder that’s certified gluten-free works best. Powders absorb different amounts of liquid, so you may need extra almond milk or oats to get the right texture. Choose a flavor you enjoy on its own, since it shapes the final taste.
Why did my energy bars fall apart?
The mixture was likely too dry or not pressed firmly enough. Add another tablespoon of almond milk if it doesn’t hold together when pinched. Press it tightly into the pan and chill for at least 2 hours.
Serving Suggestions
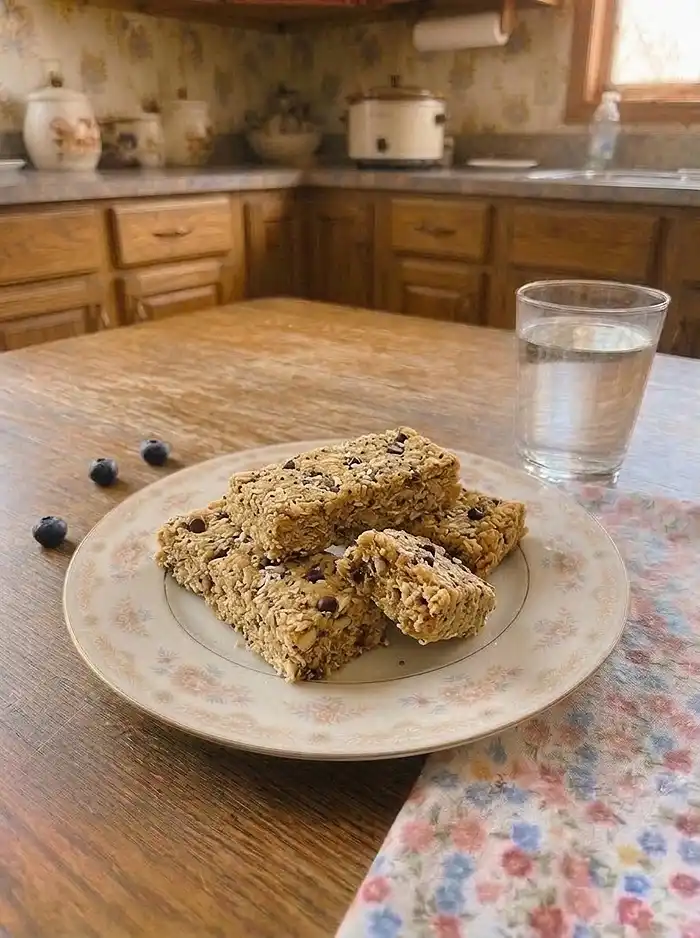
Pack a bar in a back-to-school lunchbox, or slice them smaller for an after-school snack. They also pair well with fresh fruit or a cup of coffee.
For a mixed snack plate where not everyone eats dairy-free, add some lemon blueberry cottage cheese protein bites or creamy blueberry cheesecake protein bites.
For something savory alongside, try low carb crispy broccoli cheese rounds.
Conclusion
Give these vegan protein energy bars a try this week, and pin the recipe on Pinterest so it’s easy to find when snack time sneaks up on you.
Tell me in the comments how they turned out and which swaps you tried. I read every note, and a star rating helps other families find the recipe too.
Gluten-Free Vegan Protein Energy Bars
Equipment
- 8-inch square baking pan
- Parchment paper
- Large mixing bowl
- Medium mixing bowl
- Mixing spoon or spatula
- Measuring cups and spoons
- Sharp knife
Ingredients
Dry ingredients
- 1½ cups gluten-free rolled oats certified gluten-free
- ½ cup vegan protein powder certified gluten-free
- ¼ cup unsweetened shredded coconut labeled gluten-free
- ¼ cup almonds chopped
- 2 tablespoons chia seeds
- 2 tablespoons ground flaxseed
- 2 tablespoons dairy-free mini chocolate chips labeled gluten-free
- ¼ teaspoon fine sea salt
Wet ingredients
- ½ cup creamy almond butter labeled gluten-free
- ⅓ cup pure maple syrup
- 2 tablespoons unsweetened almond milk plus more if needed
- 1 teaspoon pure vanilla extract labeled gluten-free
Instructions
- Line an 8-inch square baking pan with parchment paper, leaving some overhang for easy removal.
- In a large bowl, stir together the certified gluten-free oats, vegan protein powder, shredded coconut, chopped almonds, chia seeds, ground flaxseed, chocolate chips, and sea salt.
- In a separate bowl, stir together the almond butter, maple syrup, almond milk, and vanilla extract until smooth. If the almond butter is very thick, warm the mixture briefly to make it easier to combine. Stir the almond butter jar well before measuring so the oil and solids are evenly mixed.
- Pour the wet mixture over the dry ingredients. Stir thoroughly until everything is evenly coated and the mixture holds together when pressed. Add another tablespoon of almond milk if needed.
- Transfer the mixture to the prepared pan. Press it firmly and evenly into a compact layer using the back of a spoon or the bottom of a glass. Press especially firmly into the corners to prevent crumbling.
- Refrigerate for at least 2 hours, or until firm.
- Lift the chilled mixture from the pan using the parchment paper. Cut into 10 evenly sized bars with a sharp knife.
- Enjoy chilled or let the bars sit at room temperature for a few minutes before serving. Store in an airtight container in the refrigerator for up to 1 week.