No-Bake Coconut Cream Strawberry Bars
Meta Description: Make these No-Bake Coconut Cream Strawberry Bars with a buttery gluten-free crust, dreamy coconut layer, and fresh strawberries — ready in minutes, no oven needed.
The first time I made these bars, it was two days before a Fourth of July cookout and my oven had completely given out on me. I had a fridge full of strawberries, a can of coconut cream, and absolutely zero patience for anything complicated.
That afternoon taught me something I now swear by: no-bake coconut cream strawberry bars are not just a backup plan. They are, in many ways, the better plan.
Have you ever pulled a dessert out of the fridge to find it holds its shape perfectly, slices clean, and disappears from the plate before you even sit down? That is exactly what happens every time I make these.
Table of Contents
Why You’ll Love These No-Bake Coconut Cream Strawberry Bars
- The texture is cool, creamy, and layered — each bite melts like chilled silk against your tongue, with that sweet coconut richness and bright strawberry pop.
- Zero oven time means zero stress, even on the hottest summer days or during busy holiday weekends.
- Naturally gluten-free when made with certified gluten-free graham cracker crumbs — no complicated flour blends required.
- Kid-approved, crowd-pleasing, and easy enough for a total beginner to nail on the first try.
The Secret to Perfect No-Bake Coconut Cream Strawberry Bars
Most no-bake bars fail for one reason: the layers are rushed. Each layer needs time to firm up before the next goes on, or everything blends together into a muddy mess.
- Chill your crust first. Twenty minutes in the fridge before adding the coconut layer creates a firm base that won’t crumble when you slice.
- Use full-fat coconut cream, not coconut milk. The higher fat content is what gives the coconut layer its thick, mousse-like body rather than a runny soup.
- Macerate your strawberries. Tossing the diced strawberries with sugar and lemon juice for 10 minutes draws out their juices and intensifies the flavor dramatically.
- The full 4-hour chill is non-negotiable. This is what turns a soft, wobbly pan into clean, sliceable bars that hold their shape beautifully.
Ingredients
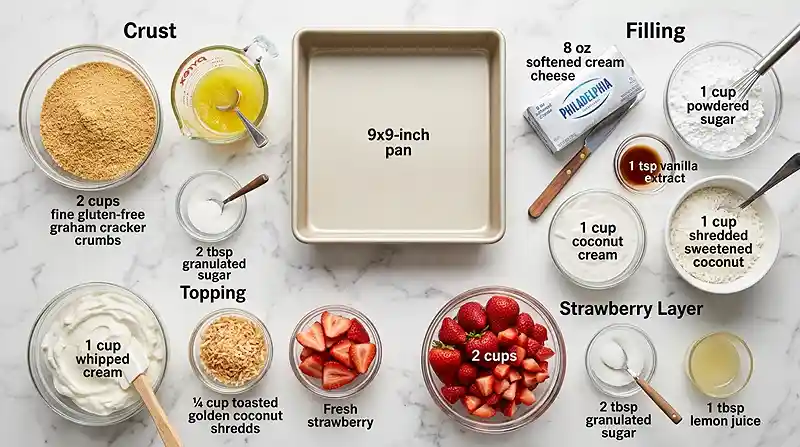
Crust
- 2 cups gluten-free graham cracker crumbs
- ½ cup unsalted butter, melted
- 2 tbsp granulated sugar
Coconut Cream Layer
- 1 package (8 oz / 225 g) cream cheese, softened
- 1 cup powdered sugar
- 1 tsp vanilla extract
- 1 cup coconut cream
- 1 cup shredded sweetened coconut
Strawberry Layer
- 2 cups fresh strawberries, diced
- 2 tbsp granulated sugar
- 1 tbsp lemon juice
Topping
- 1 cup whipped cream
- ¼ cup toasted shredded coconut
- Fresh strawberry slices for garnish
Ingredient note: For the coconut cream, refrigerate the can overnight and scoop the thick, solid cream from the top. This gives you the richest, most stable layer possible.
Step-by-Step Instructions
Step 1: Make the Crust
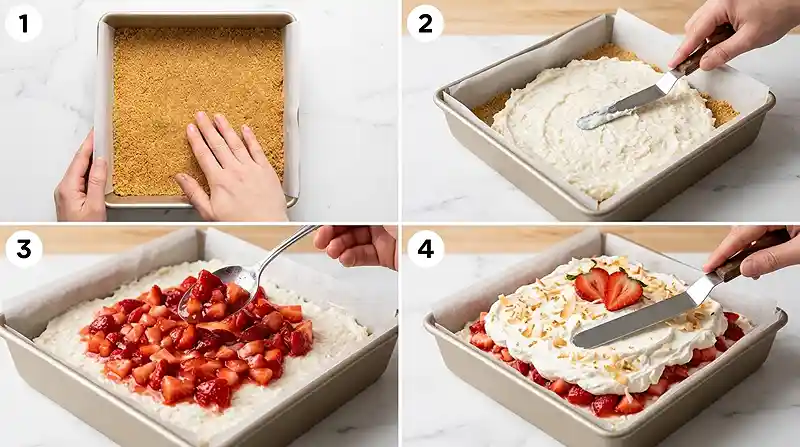
Mix the 2 cups gluten-free graham cracker crumbs, ½ cup melted butter, and 2 tbsp granulated sugar in a large bowl until the mixture resembles wet sand.
Press it firmly and evenly into the bottom of a 9×9-inch pan — use the flat bottom of a measuring cup to really pack it down. Refrigerate for 20 minutes until firm.
Step 2: Build the Coconut Cream Layer
Beat the softened cream cheese, 1 cup powdered sugar, and 1 tsp vanilla extract together until completely smooth and fluffy — no lumps allowed here.
Fold in the 1 cup coconut cream and 1 cup shredded sweetened coconut, mixing until just combined. Spread this evenly over the chilled crust, smoothing the top with an offset spatula.
Pro Tip: Make sure your cream cheese is fully at room temperature. Cold cream cheese will leave lumps no matter how long you beat it.
Step 3: Prepare the Strawberry Layer
Combine the 2 cups diced fresh strawberries, 2 tbsp granulated sugar, and 1 tbsp lemon juice in a bowl. Let the mixture sit for 10 minutes — you’ll see the berries release their gorgeous ruby-red juices.
Spoon the macerated strawberries evenly over the coconut cream layer, spreading gently so you don’t disturb the layer underneath.
Step 4: Add the Whipped Cream Topping
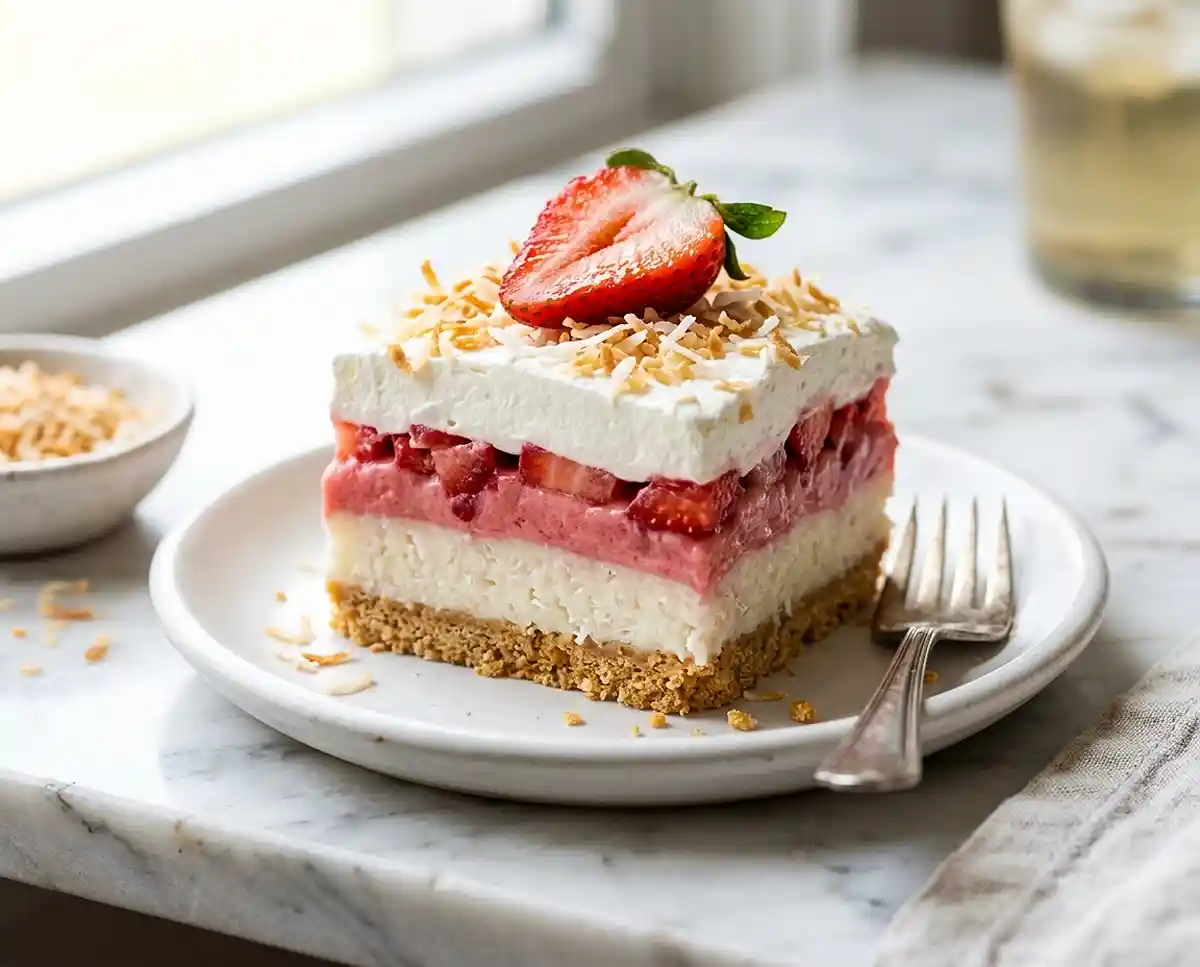
Spread the 1 cup whipped cream over the strawberry layer in an even cloud. Work from the center outward with a light hand so the layers below stay intact.
Sprinkle the ¼ cup toasted shredded coconut across the top and arrange fresh strawberry slices over everything for that polished, bakery-worthy finish.
Step 5: Chill and Serve
Cover the pan loosely and refrigerate for at least 4 hours, or overnight for the cleanest slices. When ready to serve, use a sharp knife warmed under hot water and wiped clean between each cut.
Slice into 12 bars and lift carefully with a thin spatula. Serve cold directly from the fridge for the best texture and flavor.
Make It Your Own
For a dairy-free version, swap the cream cheese for a full-fat dairy-free cream cheese alternative and use coconut whipped cream instead of regular. The coconut flavor actually deepens beautifully with this swap.
Well… if you want to add a tropical twist, stir ½ cup finely diced mango into the strawberry layer. The mango softens the tartness and makes these feel like a proper summer party treat straight from a beachside cafe.
You can also make these gluten-free no bake bars with an almond flour crust for a slightly nuttier, lower-sugar base. Replace the gluten-free graham cracker crumbs with 2 cups of almond flour and reduce the butter to 6 tablespoons.
For a more indulgent coconut cream strawberry dessert, fold 2 tablespoons of toasted coconut flakes directly into the whipped cream topping. It adds a subtle crunch that contrasts perfectly with the silky layers below.
If fresh strawberries aren’t in season, frozen strawberries work fine — just thaw and drain them very well before macerating, otherwise excess liquid will make the layers wet.
If you love summer no-bake recipes, my tropical coconut rice pudding cups use a similar layering technique and are just as easy to pull together for a crowd.
Common Problems and Solutions
Problem: The bars won’t slice cleanly and fall apart.
Solution: They haven’t chilled long enough. Return the pan to the fridge for another hour or two. Always use a warm, dry knife and wipe the blade between every single cut.
Problem: The coconut cream layer is runny and won’t hold its shape.
Solution: Your coconut cream was likely too liquid. For next time, refrigerate the can overnight and use only the thick solid cream that rises to the top, not the liquid at the bottom of the can.
Problem: The strawberry layer made everything watery.
Solution: After macerating, drain off most of the liquid before spooning the berries onto the coconut layer. A small amount of juice is fine, but too much will seep down and soften the crust.
Man, oh man — I’ve made every one of these mistakes myself over the years. The watery strawberry issue got me badly the very first time I brought these to a potluck. Now I always keep a fine mesh strainer nearby.
Problem: The crust is crumbling when you try to lift the bars.
Solution: The crust wasn’t packed firmly enough, or the butter ratio is off. Press the crust very firmly with a flat-bottomed glass and make sure your crumb-to-butter ratio is exact.
According to guidance from the Celiac Disease Foundation, cross-contamination is a real concern with gluten-free baking. Always check that your graham crackers are certified gluten-free, not just labeled “made with gluten-free ingredients.”
Storage Guide
| Method | Duration | Notes |
|---|---|---|
| Counter | Not recommended | Whipped cream will deflate |
| Fridge | 4-5 days | Cover tightly with plastic wrap or store in airtight container |
| Freezer | Up to 2 months | Wrap bars individually; thaw in fridge overnight before serving |
These bars are best eaten straight from the fridge — no reheating needed or recommended. For frozen bars, transfer to the fridge the night before and let them thaw slowly for the best texture.
If you have leftover crumbled bars (it happens!), layer the pieces in a glass with extra whipped cream for a quick no-fuss parfait.
Serving Suggestions
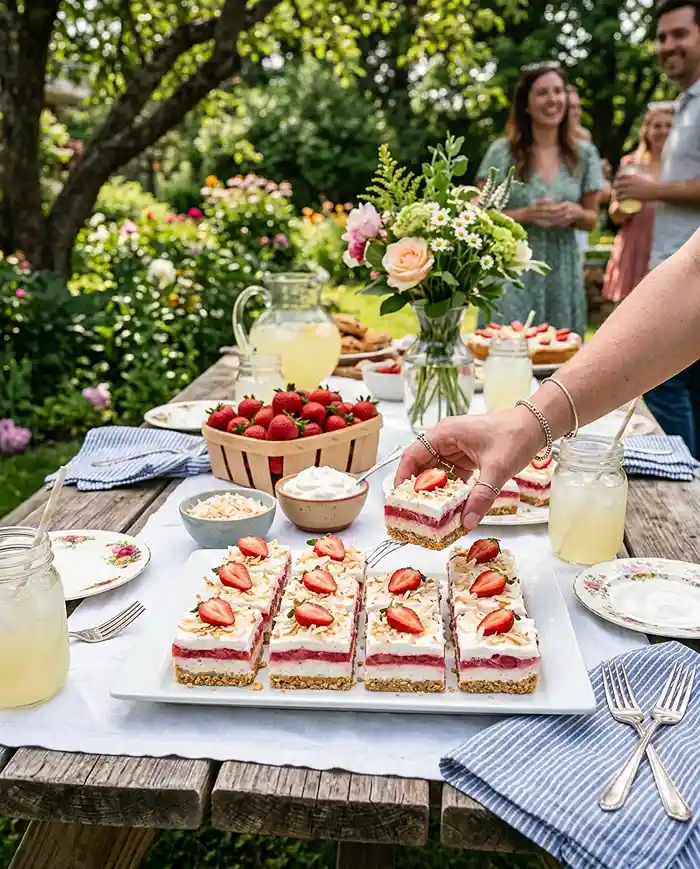
These bars shine brightest as a make-ahead dessert for summer cookouts, Mother’s Day spreads, or any warm-weather gathering where you need something that travels well and impresses easily.
Pair them alongside my gluten-free BBQ salmon taco salad for a complete summer menu that covers both savory and sweet without turning on the oven once.
You know, a light sparkling lemonade or a cold coconut water alongside these bars makes the whole experience feel even more refreshing on a hot afternoon.
For a full no-bake party spread, add my dill pickle ranch chickpea salad cups to the table — the tangy, savory flavors balance these sweet bars perfectly.
FAQs About No-Bake Coconut Cream Strawberry Bars
Do strawberry and coconut go together?
Yes — strawberry and coconut are a genuinely wonderful flavor pairing. The bright, slightly tart sweetness of fresh strawberries cuts through the richness of coconut cream beautifully, creating a balance that feels tropical without being overwhelming. This combination is a classic in Southeast Asian and Caribbean desserts for good reason.
How do I make a no-bake bar?
A no-bake bar is built in layers: a pressed crust (usually made from crushed cookies or nuts and butter), one or more chilled filling layers, and a topping. The key is patience — chill the crust before adding the filling, and chill the finished bars long enough (at least 4 hours) before slicing. No oven, no complicated steps.
Are coconut bars good for you?
Coconut cream provides healthy fats, and fresh strawberries add vitamin C and antioxidants, making these more nutritious than many conventional dessert bars. That said, these are still a treat with added sugar and cream cheese. They fit well into a balanced diet when enjoyed in reasonable portions — two bars at a cookout is not going to derail anyone.
What are common no-bake bar mistakes?
The most common mistakes are not chilling the crust long enough before adding filling, using liquid coconut milk instead of thick coconut cream, and skipping the full 4-hour set time. Rushing any of these steps leads to layers that slide, bars that crumble, and a lot of frustration that is entirely avoidable.
What is the coating on strawberry shortcake bars?
Traditional strawberry shortcake ice cream bars get their iconic coating from a mixture of white chocolate and freeze-dried strawberry crumbs, which creates that crumbly, pink exterior. In these homemade bars, the topping is toasted shredded coconut and fresh strawberry slices — no white chocolate needed, but equally satisfying and far easier to pull off at home.
Try These Bars This Weekend
These no-bake coconut cream strawberry bars are the kind of recipe you make once and then make again the following weekend because someone in your household keeps asking for them.
If you give them a try, leave a comment below and let me know how they turned out — or what creative twists you added. And if you share them on Pinterest, tag me so I can see your beautiful layers.
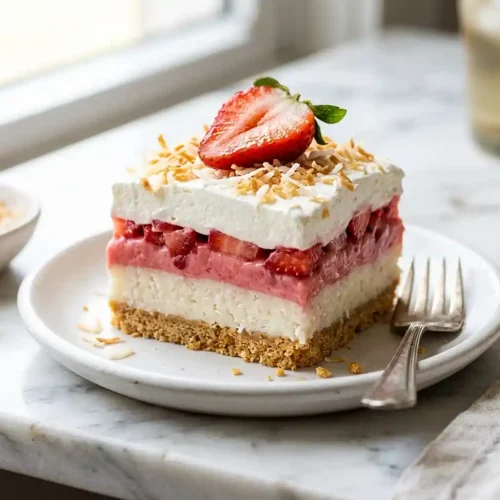
No-Bake Coconut Cream Strawberry Bars
Equipment
- 9×9 inch baking pan
- Large mixing bowl
- Hand mixer or stand mixer
- Offset spatula
- Fine mesh strainer
Ingredients
Crust
- 2 cups gluten-free graham cracker crumbs use certified gluten-free
- 0.5 cup unsalted butter melted
- 2 tbsp granulated sugar
Coconut Cream Layer
- 8 oz cream cheese softened to room temperature
- 1 cup powdered sugar
- 1 tsp vanilla extract
- 1 cup coconut cream use the thick solid cream from a refrigerated can
- 1 cup shredded sweetened coconut
Strawberry Layer
- 2 cups fresh strawberries diced
- 2 tbsp granulated sugar
- 1 tbsp lemon juice
Topping
- 1 cup whipped cream
- 0.25 cup shredded coconut toasted
- fresh strawberry slices for garnish
Instructions
- Mix the gluten-free graham cracker crumbs, melted butter, and sugar in a bowl. Press firmly into the bottom of a 9×9-inch pan. Refrigerate for 20 minutes.
- Beat the cream cheese, powdered sugar, and vanilla until smooth. Mix in the coconut cream and shredded coconut. Spread evenly over the chilled crust.
- Combine the diced strawberries, sugar, and lemon juice in a bowl. Let sit for 10 minutes, then spoon evenly over the coconut layer.
- Spread whipped cream over the strawberry layer.
- Sprinkle with toasted coconut and garnish with fresh strawberry slices.
- Refrigerate for at least 4 hours, or until set, before slicing and serving.