Smores Granola Butter Rice Bars Recipe
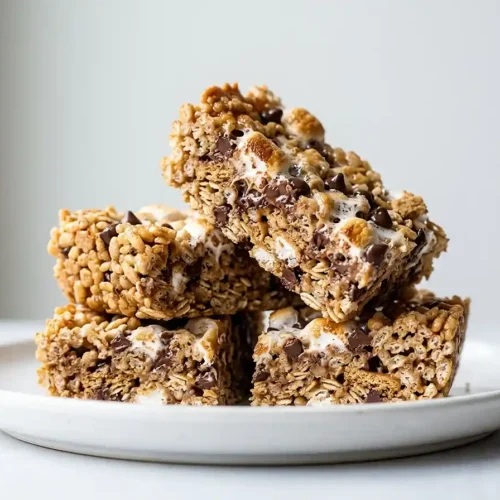
Make these gluten-free smores granola butter rice bars with crispy rice cereal, mini marshmallows, chocolate chips, and no oven required—12 bars in under 15 minutes.
My daughter handed me a regular s’mores rice crispy bar at a Fourth of July cookout a few years ago, and watching everyone else enjoy it while she quietly set hers aside—because it had wheat-based graham crackers—was the moment I decided to fix that.
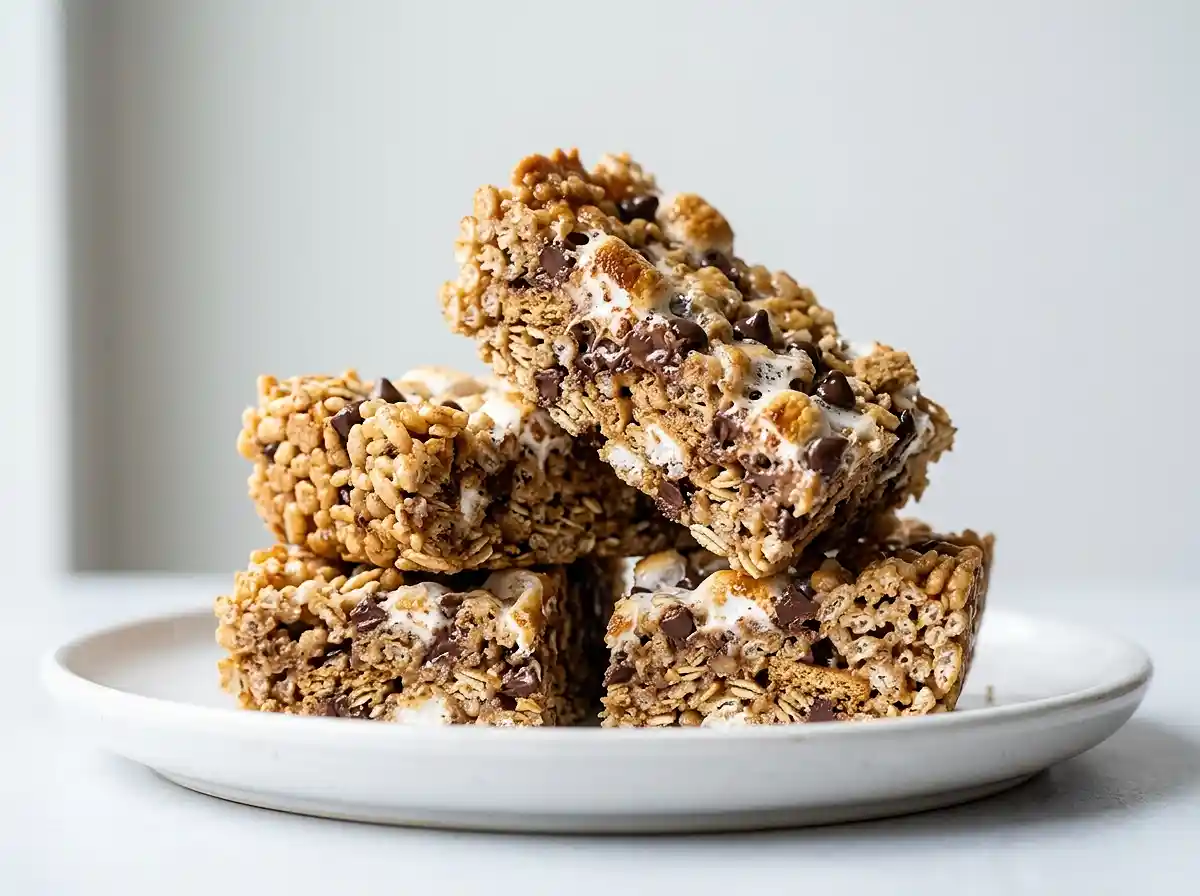
These gluten-free s’mores granola butter rice bars are exactly what came out of that mission. They’ve got the crunch of crispy rice cereal, the gooey pull of mini marshmallows, the deep warmth of chocolate chips, and that toasty, caramel-like flavor from granola butter—all in one pan, no oven required.
Table of Contents
Why You’ll Love These Gluten-Free S’mores Granola Butter Rice Bars
- No baking required. The entire recipe comes together on the stovetop and sets in the fridge—no oven, no waiting for it to heat up, no risk of overbaking.
- Lunchbox and school-friendly. Made with granola butter instead of nut butter, these bars are safe for many nut-free classrooms and make a reliable allergy-aware lunchbox treat.
- Kid-approved texture. The bars are crispy on the outside and chewy in the center—like a s’more that holds its shape and travels well.
- Scales to any crowd. This recipe makes 12 bars, but the stovetop method doubles easily if you need a larger batch for a party, bake sale, or holiday spread.
The Secret to Perfect Gluten-Free S’mores Granola Butter Rice Bars
- Granola butter does the heavy lifting. Unlike peanut butter or almond butter, granola butter is made from toasted oats and has a warm, cinnamon-forward flavor that mimics the graham cracker element of a classic s’more. That’s why the bars taste so complete even without traditional wheat graham crackers as the base.
- Low heat protects the marshmallows. Cooking the binder over low heat—not medium or high—keeps the marshmallows from seizing and the honey from burning. A scorched binder makes bars that are too dense and hard to cut.
- Chocolate chips go in last, slightly cooled. Adding mini chocolate chips after the mixture cools for 2–3 minutes keeps them from fully melting into the dough. You get distinct pockets of chocolate in every bite rather than a uniform brown bar.
- Press firmly and refrigerate fully. A full hour in the fridge is non-negotiable for clean cuts. Under-chilled bars crumble when sliced, which is the most common gluten-free rice bar problem—not a texture issue with the recipe itself.
Ingredients
Dry Ingredients
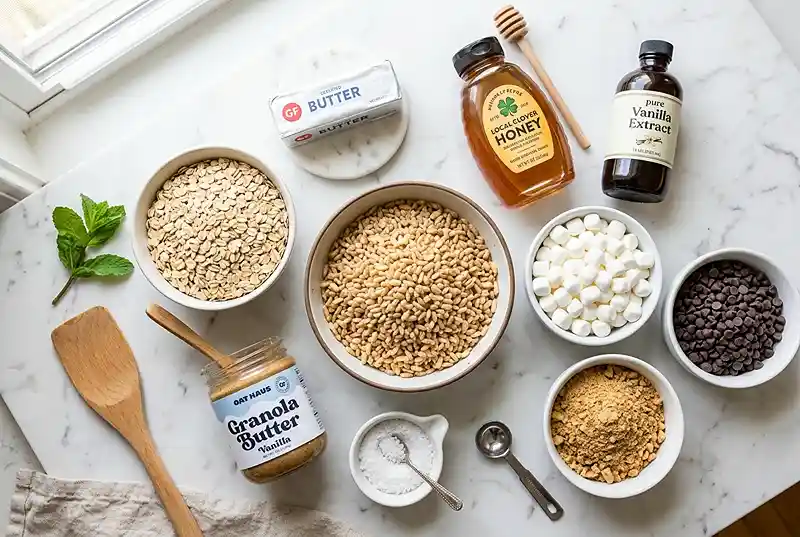
- 4 cups gluten-free crispy rice cereal
- 1 cup gluten-free rolled oats
- 2 gluten-free graham crackers, crushed
- 1 cup mini marshmallows (check the label for a certified gluten-free brand; most US marshmallows are naturally gluten-free, but cross-contamination can occur in shared facilities)
- ½ cup gluten-free mini chocolate chips
Wet Ingredients
- ½ cup granola butter (an oat-based, nut-free spread; use a certified gluten-free variety)
- ¼ cup honey
- 2 tbsp unsalted butter
- 1 tsp vanilla extract
- ¼ tsp salt
Ingredient note on granola butter: Granola butter is an oat-based spread that’s naturally nut-free, vegan-friendly, and has a warm, toasty flavor similar to cookie butter. It’s found at specialty grocery stores or online. According to trusted guidance on gluten-free marshmallow brands, always look for the certified gluten-free label on marshmallows—especially if you’re cooking for someone with celiac disease, since some brands share manufacturing lines with wheat-based products.
Instructions
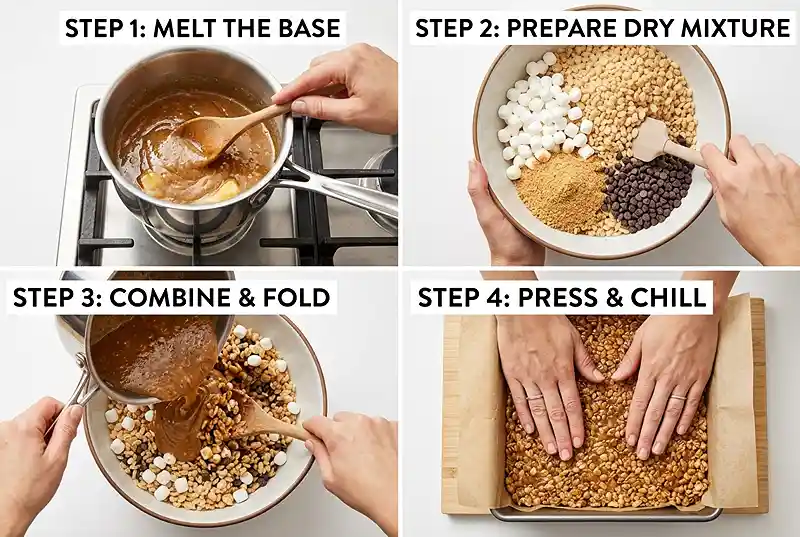
- Line an 8×8-inch baking pan with parchment paper. Leave some overhang on the sides so you can lift the bars out cleanly once they’re set.
- In a small saucepan over low heat, combine the granola butter, honey, unsalted butter, vanilla extract, and salt. Stir continuously until the mixture is completely smooth and glossy, like a pourable caramel sauce. Pro Tip: Keep the heat low throughout—if you see it starting to bubble aggressively, pull it off the burner immediately.
- In a large bowl, combine the gluten-free crispy rice cereal, rolled oats, crushed gluten-free graham crackers, and mini marshmallows. Toss them together so the dry ingredients are evenly distributed before you add the binder.
- Pour the warm granola butter mixture over the dry ingredients and stir with a silicone spatula until every piece is evenly coated. Work quickly—the binder starts to set as it cools and becomes harder to distribute evenly.
- Let the mixture cool for 2–3 minutes, then gently fold in the mini chocolate chips. You want them to soften slightly at the edges—sticky enough to hold—but not melt completely into the mix.
- Transfer the mixture to the prepared pan. Press it firmly into an even layer using the back of a lightly greased spatula or the flat bottom of a measuring cup. Pro Tip: Press harder than you think you need to—compressing the bars is what keeps them from falling apart when you cut them.
- Refrigerate for 1 hour, or until the bars are fully firm to the touch in the center, not just at the edges.
- Lift the parchment out of the pan, transfer to a cutting board, and cut into 12 bars. A sharp, slightly warmed knife gives the cleanest slices.
Make It Your Own
If you can’t find granola butter at your local store, sunflower seed butter is the closest swap in terms of binding power and fat content. The flavor is earthier and slightly less sweet, so add an extra teaspoon of honey to compensate. Almond butter or cashew butter also work if nut allergies aren’t a concern.
Well… for a dairy-free version, swap the unsalted butter for refined coconut oil and use dairy-free mini chocolate chips. The bars set up just as firmly and the coconut oil adds a subtle richness that actually complements the granola butter really well.
Want to lean harder into the s’mores flavor? Toast the crushed gluten-free graham crackers in a dry skillet for 2–3 minutes before mixing them in. That dry heat deepens the flavor and makes the bars taste more like they came off a campfire than out of a fridge.
For a chocolate-forward version of these gluten-free rice bars, stir 2 tablespoons of certified gluten-free cocoa powder into the warm binder before mixing. The result is a richer, darker bar that’s closer to a smores dessert bar crossed with a brownie—dense, fudgy at the center, and crispy at the edges.
These bars also lend themselves well to seasonal mix-ins. Swap the mini chocolate chips for white chocolate chips and dried cranberries around the holidays, or fold in toasted shredded coconut for a summery version that pairs well with a scoop of ice cream.
Common Problems & Solutions
Problem: The bars crumble when I try to cut them.
This almost always means they didn’t chill long enough, or weren’t pressed firmly enough before going into the fridge. Return the uncut bars to the refrigerator for another 30 minutes and try again with a warmed knife. Pressing the bars down harder during assembly also significantly reduces crumbling.
Problem: The binder is too thick to coat the cereal evenly.
The granola butter seized up from the heat dropping too fast. Return the saucepan to low heat for 30 seconds, stir until fluid again, then immediately pour over the dry ingredients. Working on a slightly warmed bowl also helps keep the binder pourable longer.
Man, oh man… this next one catches people off guard: the bars taste gummy and dense instead of crispy and chewy. That usually means the marshmallows were mixed in when the binder was still too hot, causing them to melt completely rather than staying as distinct soft pockets. Let the binder cool for the full 2–3 minutes before folding everything together. Distinct marshmallow pieces in the final bar are what give that signature s’mores chew.
Problem: The chocolate chips are fully melted and streaky.
The mixture wasn’t cool enough when the chips were added. Fold them in only after the 2–3 minute cooling window, and work gently with a light folding motion rather than aggressive stirring. Mini chips are better than regular-size here—they distribute more evenly and melt less aggressively at the same temperature.
Problem: The bars stick to the pan and won’t lift out cleanly.
This is a parchment paper problem, not a recipe problem. Make sure you line the pan before adding the mixture, with enough overhang to grip and lift. If you’re already past that point, run a thin offset spatula around the edges and underneath before attempting to lift.
Storage & Meal Prep
| Method | Duration | Notes |
|---|---|---|
| Counter | 2–3 days | Airtight container; keep away from heat or the bars soften |
| Fridge | 5–7 days | Bring to room temp for 5–10 minutes before eating for best texture |
| Freezer | 2–3 months | Wrap individually in parchment, then store in a zip-lock freezer bag |
To serve from frozen, simply thaw at room temperature for 20–30 minutes. There’s no need to reheat—the bars return to their full crispy-chewy texture on their own as they come to room temp.
These bars are excellent for meal prep and lunchboxes. Wrap individual bars in parchment and store in the fridge Sunday night, then pull one per day through the week. Pair with a piece of fruit and they make a complete, satisfying afternoon snack that packs well without crumbling—unlike most gluten-free snack bars.
Any broken or crumbly pieces that don’t cut cleanly can be crumbled over yogurt, layered into a parfait, or used as a topping for the frozen grape yogurt bark for a textured, no-waste dessert option.
Your Questions Answered
Are s’mores gluten-free?
Traditional s’mores are not gluten-free because standard graham crackers contain wheat. The chocolate and marshmallows are usually naturally gluten-free, but the graham cracker is the problem ingredient. Swapping in certified gluten-free graham crackers makes the full s’mores experience safe.
Are all granola bars gluten-free?
No—most commercially made granola bars contain oats that are not certified gluten-free, and many include wheat-based ingredients. Oats are naturally gluten-free but are frequently processed alongside wheat, creating cross-contamination risk. Always look for the certified gluten-free label on both the product and its individual ingredients.
What is a gluten-free alternative to s’mores?
Gluten-free s’mores granola butter rice bars are one of the best alternatives because they replicate the crunch, marshmallow, and chocolate of a classic s’more in a portable, no-bake format. Other options include certified gluten-free graham flour cookies or assembling traditional s’mores with gluten-free graham crackers over a campfire.
Can I make these bars ahead of time?
Yes—these bars are ideal for making 1 to 2 days ahead. They slice more cleanly after a full overnight chill. Store cut bars in an airtight container layered with parchment between rows to prevent sticking, and bring to room temperature for 5 to 10 minutes before serving.
How do I keep gluten-free rice bars from crumbling?
Press the mixture firmly into the pan before chilling, and refrigerate for a full hour before cutting. Under-pressed bars that haven’t set completely are the most common cause of crumbling. A sharp, slightly warmed knife also gives cleaner cuts than a cold or dull blade.
Serving Suggestions

These bars hold their own as a standalone snack, but they shine when served alongside something cold and creamy. Pair them with a glass of cold milk or a scoop of vanilla ice cream for a full dessert moment—the contrast between the chilled, crispy bar and the soft ice cream is like biting into a s’more right off the campfire.
For a gluten-free dessert spread at a family gathering or holiday table, serve these alongside the 2-ingredient Japanese yogurt cheesecake for a light, tangy contrast to the richness of the bars. If you want to round out a full no-bake gluten-free treat platter, the gluten-free Dubai chocolate Korean chewy cookie adds an impressive, truffle-like element that makes the spread look restaurant-worthy.
If you make these bars, I’d love to hear how they turned out—drop a comment below and let me know if you tried any mix-ins or swaps. And if you’re sharing on Pinterest, tag your photo so others searching for gluten-free lunchbox treats can find this recipe too.
Gluten-Free S’mores Granola Butter Rice Bars
Equipment
- 8×8-inch baking pan
- Parchment paper
- Small saucepan
- Large mixing bowl
- Silicone spatula
- Measuring cups and spoons
- Refrigerator
Ingredients
Dry Ingredients
- 4 cups gluten-free crispy rice cereal
- 1 cup gluten-free rolled oats
- 2 gluten-free graham crackers crushed
- 1 cup mini marshmallows certified gluten-free
- ½ cup gluten-free mini chocolate chips
Wet Ingredients
- ½ cup granola butter certified gluten-free
- ¼ cup honey
- 2 tablespoons unsalted butter
- 1 teaspoon vanilla extract
- ¼ teaspoon salt
Instructions
- Line an 8×8-inch baking pan with parchment paper, leaving an overhang for easy removal.
- In a small saucepan over low heat, combine the granola butter, honey, butter, vanilla extract, and salt. Stir until completely smooth and glossy.
- In a large bowl, combine the crispy rice cereal, rolled oats, crushed gluten-free graham crackers, and mini marshmallows.
- Pour the warm granola butter mixture over the dry ingredients and stir until everything is evenly coated.
- Allow the mixture to cool for 2 to 3 minutes, then gently fold in the mini chocolate chips.
- Transfer the mixture to the prepared pan and press firmly into an even layer using a greased spatula or measuring cup.
- Refrigerate for 1 hour until fully firm.
- Lift the bars out using the parchment overhang and cut into 12 bars with a warm sharp knife.