Gluten-Free Apple Butter Blondie Bars
Step-by-step gluten-free apple butter blondie bars with chewy texture, warm spices, and fresh apple chunks. Includes storage tips, substitutions, and troubleshooting.
The first time I brought these gluten-free apple butter blondie bars to a Thanksgiving potluck, my sister-in-law grabbed a second one before she even finished the first. She had no idea they were gluten-free until I told her—and honestly, that’s always the best moment.
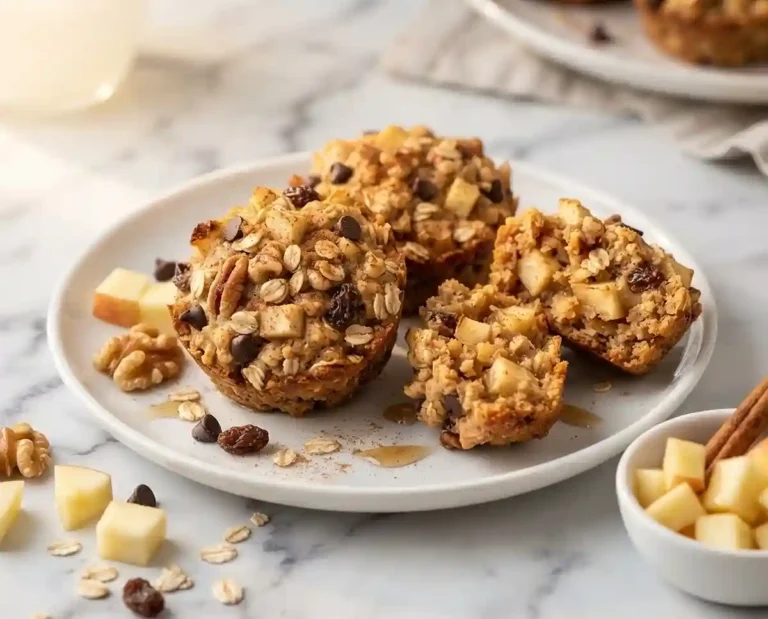
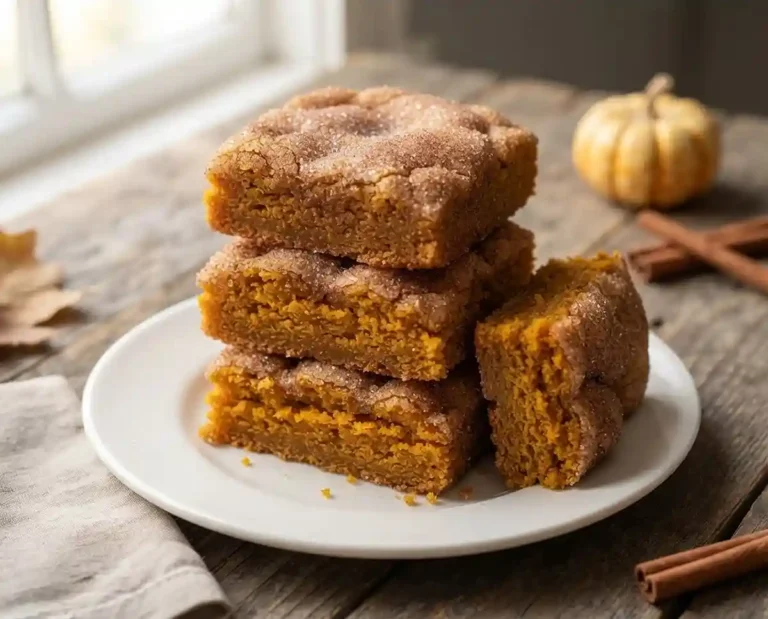
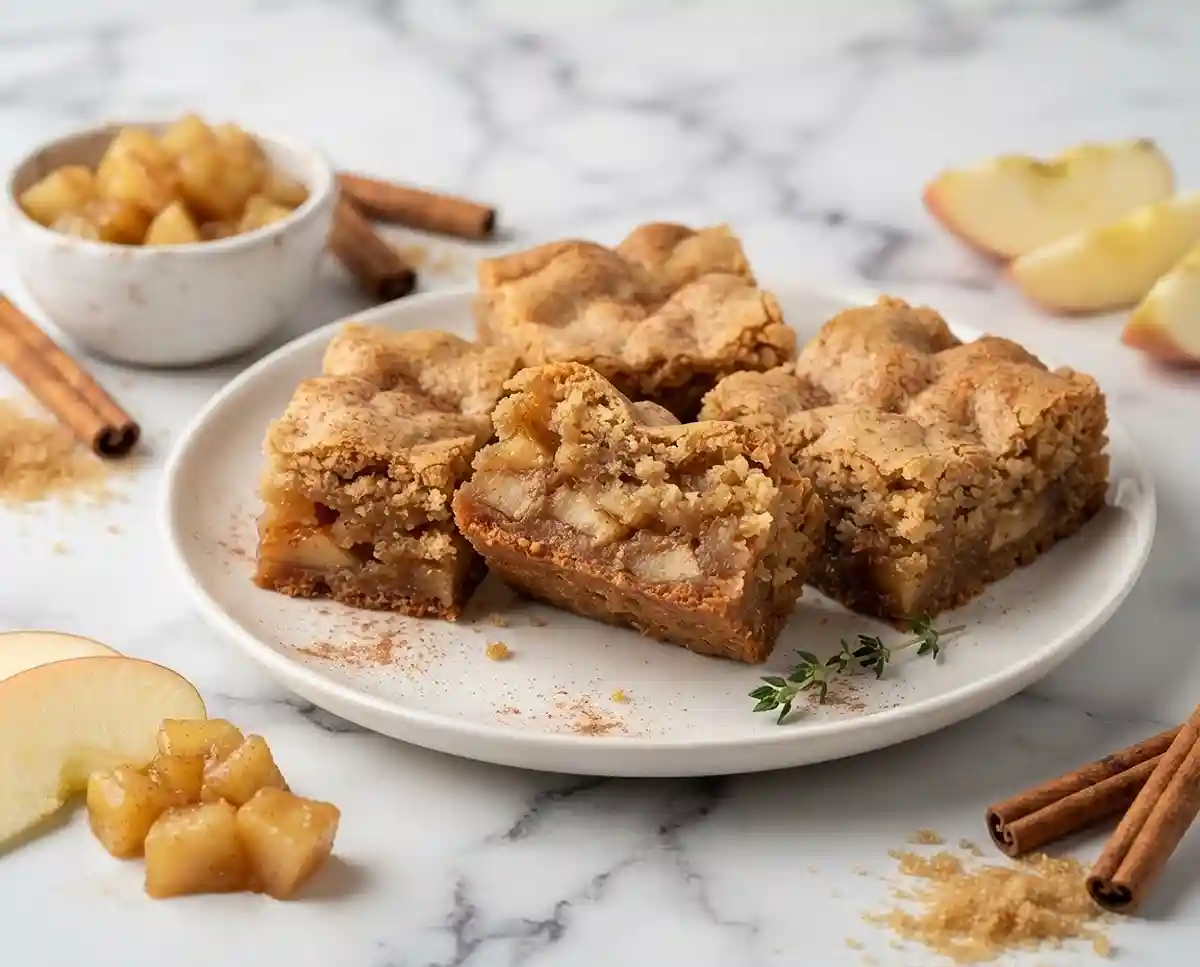
These bars hit every note that makes a blondie worth eating: dense, chewy centers, lightly golden edges, and warm cinnamon-nutmeg sweetness throughout. Fresh apple chunks tucked into the batter add little bursts of juicy fruit in every bite.
What’s not to love about a dessert bar that comes together in one bowl and bakes in under 30 minutes? You don’t need a mixer, special skills, or anything fancy—just a handful of pantry staples and two apples.
Why You’ll Love This Recipe
- Texture that rivals any wheat-based blondie — dense, fudgy centers with lightly crisp edges, like biting into a caramel-scented brownie’s autumn cousin.
- One bowl, no mixer required — everything comes together with a whisk and a spatula, making cleanup quick.
- Naturally adaptable — easy to make dairy-free with one simple swap (more on that below).
- Kid-friendly and crowd-pleasing — the warm spices and apple sweetness appeal to just about everyone at the table.
The Secret to Perfect Gluten-Free Apple Butter Blondie Bars
Gluten-free baking has a reputation for dry, crumbly results, but these bars sidestep all of that with a few smart techniques.
- Coating the apple chunks in flour before folding them in prevents excess moisture from sinking to the bottom and turning the batter gummy.
- A certified gluten-free 1:1 flour blend with built-in xanthan gum mimics the binding structure that gluten normally provides, keeping bars cohesive and sliceable.
- Melted (not softened) butter creates a denser, fudgier crumb rather than a cakey one—exactly what you want in a blondie.
- A full hour of pan cooling lets the structure set properly. Cutting too early leads to crumbling, so patience here pays off. According to trusted celiac research from the Celiac Disease Foundation, certified gluten-free labeling is the safest choice for those with celiac disease or gluten sensitivity.
Table of Contents
Ingredients
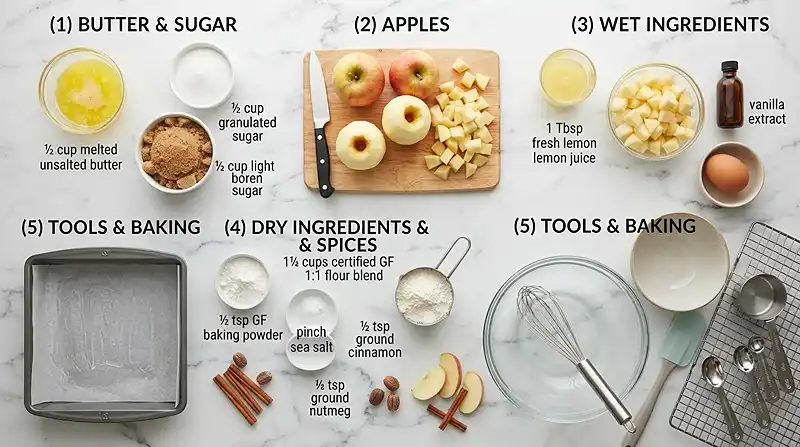
Gather everything before you start—this batter moves quickly once the butter goes in.
Wet Ingredients
| Ingredient | Amount | Notes |
|---|---|---|
| Unsalted butter, melted and slightly cooled | ½ cup (113 g) | Let it cool so it doesn’t scramble the egg |
| Large egg | 1 | Room temperature blends in more smoothly |
| Vanilla extract | ½ teaspoon | Pure vanilla, not imitation, if possible |
| Medium apples, peeled, cored, cut into ¼-inch chunks | 2 | Honeycrisp or Granny Smith work well |
| Fresh lemon juice | 1 tablespoon | Keeps apples from browning and brightens flavor |
Dry Ingredients
| Ingredient | Amount | Notes |
|---|---|---|
| Granulated sugar | ½ cup (100 g) | |
| Packed light brown sugar | ½ cup (100 g) | Packed tightly for accurate measurement |
| Certified gluten-free 1:1 all-purpose flour blend | 1¼ cups (175 g) | Must contain xanthan gum for best results |
| Certified gluten-free baking powder | ½ teaspoon | Cross-contamination risk with conventional brands |
| Ground cinnamon | ½ teaspoon | |
| Ground nutmeg | ¼ teaspoon | Freshly grated gives the best fragrance |
| Salt | Pinch |
Instructions
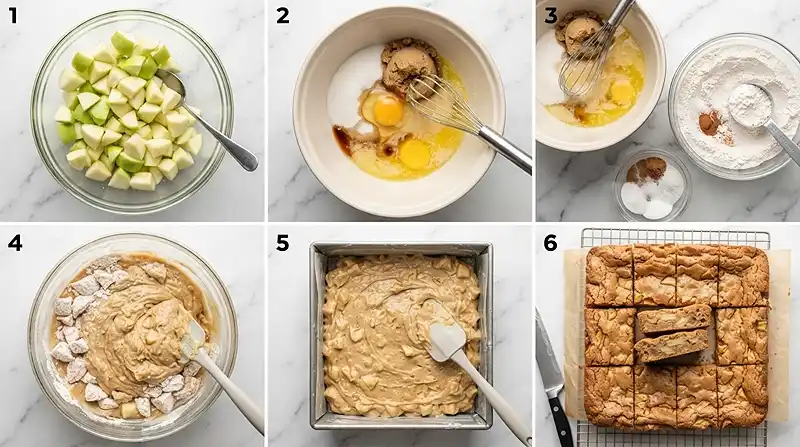
Prep
Step 1. Preheat the oven to 350°F (180°C). Grease and line an 8×8-inch square baking pan with parchment paper, leaving some overhang on the sides for easy lifting.
Step 2. Place the chopped apples in a medium bowl and toss with the lemon juice. Set aside while you prepare the batter.
Build the Batter
Step 3. In a large mixing bowl, whisk together the granulated sugar, brown sugar, egg, and vanilla extract until smooth and well combined. The mixture should look glossy and slightly thickened.
Step 4. Slowly whisk in the melted butter until the mixture becomes smooth and slightly lighter in color. Take your time here—rushing this step can cause the butter to separate.
Step 5. Add the gluten-free baking powder, salt, cinnamon, nutmeg, and gluten-free flour to the wet ingredients. Before stirring, scoop out 2 tablespoons of the flour mixture and add it to the bowl with the apples. Toss the apples until they’re lightly coated.
Pro Tip: Coating the apples in flour helps them distribute evenly through the batter and prevents them from sinking or releasing too much moisture during baking.
Step 6. Stir the remaining flour mixture into the wet ingredients until a thick batter forms with no dry streaks remaining. It will be denser than typical cookie dough—that’s exactly right.
Assemble and Bake
Step 7. Fold the flour-coated apples gently into the batter until evenly distributed. Use a spatula and a light hand—overmixing at this stage can toughen the bars.
Step 8. Spread the batter evenly into the prepared baking pan and smooth the top with a spatula. The batter is thick, so take a moment to press it into the corners.
Step 9. Bake for 24–27 minutes, or until the edges are lightly golden and a toothpick inserted into the center comes out clean. The bars will smell like a spiced apple pie as they bake—warm, buttery, and irresistible.
Pro Tip: Start checking at 24 minutes. Overbaking dries out the bars quickly, especially with gluten-free flour.
Step 10. Let the blondies cool in the pan for 1 hour, then carefully lift them out using the parchment paper and transfer to a wire rack to cool completely.
Step 11. Slice into 9–12 bars and serve. Store in an airtight container at room temperature for up to 4 days.
Make It Your Own
Well… one of the best things about blondies is how easily they bend to what you have on hand. These bars are genuinely forgiving with a few smart swaps.
Dairy-Free Option: Swap the unsalted butter for an equal amount of refined coconut oil or a vegan butter stick like Miyoko’s. Refined coconut oil won’t add any coconut flavor, so the apple and spice notes stay front and center. This makes the recipe completely dairy-free without sacrificing the fudgy texture.
Apple Variety: Honeycrisp apples add sweetness, while Granny Smith brings a tart contrast that balances the brown sugar beautifully. Avoid very soft varieties like McIntosh—they break down during baking and can make the bars mushy rather than giving you those satisfying fruit chunks.
Add-Ins: Fold in ¼ cup of chopped toasted walnuts or pecans at Step 7 for crunch. A handful of raisins or dried cranberries adds chewiness and works especially well as a chewy gluten-free apple butter dessert bar variation for holiday gift boxes or bake sales.
Spice Variation: Replace the cinnamon and nutmeg with 1 teaspoon of pumpkin pie spice for an easy seasonal twist. It layers in ginger and clove notes that lean into fall flavors even further.
Egg-Free: A flax egg (1 tablespoon ground flaxseed mixed with 3 tablespoons water, rested for 5 minutes) works as a binder here. The bars will be slightly denser and may need an extra minute or two in the oven, but they hold together reliably.
Common Problems & Solutions
Man, oh man… gluten-free baking can throw some curveballs. Here’s how to handle the most common ones with this recipe.
Problem: Bars are gummy in the center. This usually means they needed more time in the oven or were cut before fully cooled. Gluten-free flour blends hold more moisture than wheat flour, so the full 1-hour cool in the pan is non-negotiable. If your oven runs cool, bake to an internal temperature of about 200°F rather than relying only on the toothpick test.
Problem: Bars crumbled when sliced. Crumbling happens when the bars are cut too warm or when the flour blend used doesn’t contain xanthan gum. Always confirm your 1:1 blend includes it—this ingredient acts as the structural glue that replaces gluten. If you’re still getting crumbles, chill the bars in the fridge for 30 minutes before slicing.
Problem: Apple chunks sank to the bottom. This is exactly why Step 5 matters—coating the apples in flour before folding them in suspends them through the batter rather than letting them sink. If you skipped that step, make sure to include it next time. You can also try chilling the batter for 10 minutes before folding in the apples.
Problem: Bars taste flat or bland. A pinch of salt goes a long way in baked goods. If your bars tasted one-dimensional, increase the salt slightly (up to ¼ teaspoon) and make sure your spices are fresh. Ground cinnamon and nutmeg lose potency quickly once opened—replace jars that are more than a year old. You can also find excellent guidance on gluten-free baking techniques at King Arthur Baking, including how different flour blends affect flavor and texture.
Storage & Meal Prep
| Method | Duration | Notes |
|---|---|---|
| Counter | 3–4 days | Airtight container at room temperature |
| Fridge | 5–7 days | Bring to room temp before serving for best texture |
| Freezer | 2–3 months | Wrap bars individually in plastic wrap, then freeze in a bag |
To reheat from frozen, unwrap and let bars thaw at room temperature for about an hour. For a warm, freshly-baked feel, microwave a single bar for 15–20 seconds.
These bars are excellent for make-ahead baking. Bake a full batch on Sunday, wrap individually, and pull them out through the week for lunchbox treats or after-dinner bites without any extra effort.
You know… leftover bars that are starting to dry out make an incredible crumbled topping over a bowl of vanilla ice cream. Try our gluten-free butter-dipped ice cream for a dessert combination that’s genuinely hard to beat.
Gluten-Free Apple Butter Blondie Bars FAQs
Can I use applesauce instead of fresh apples?
Yes, but the texture will change significantly. Fresh apple chunks give you pockets of juicy fruit throughout the bars. Applesauce blends into the batter and adds moisture without that texture. If you use it, reduce the applesauce to 1/4 cup and expect a slightly denser, more uniform bar.
How do I know when the blondies are done baking?
The edges should be lightly golden and pull slightly away from the pan sides. A toothpick inserted into the center should come out clean or with just a few moist crumbs—not wet batter. Gluten-free blondies can look underdone even when they’re ready, so trust the toothpick over appearance.
What’s the best gluten-free flour blend for this recipe?
A certified 1:1 gluten-free all-purpose flour blend that includes xanthan gum works best. Bob’s Red Mill 1-to-1, King Arthur Measure for Measure, and Cup4Cup are all reliable options. Avoid single-ingredient flours like almond or rice flour on their own—they don’t have the right protein and starch balance for blondies.
Why did my blondies come out cakey instead of chewy?
Cakey blondies usually mean the butter was too cold when mixed in, or the batter was overmixed after the flour was added. Melted butter creates a denser crumb; if yours solidified before mixing, it can trap air and produce a lighter texture. Also, be gentle when folding in the flour—overmixing develops the starches in gluten-free blends and can make bars springier than intended.
Can I double this recipe for a crowd?
Absolutely. Double all ingredients and bake in a 9×13-inch pan. Increase the baking time to 28-33 minutes and check with a toothpick starting at the 28-minute mark. These are a wonderful option for potlucks, holiday cookie exchanges, or any gathering where you need a big batch of easy gluten-free dessert bars.
Serving Suggestions
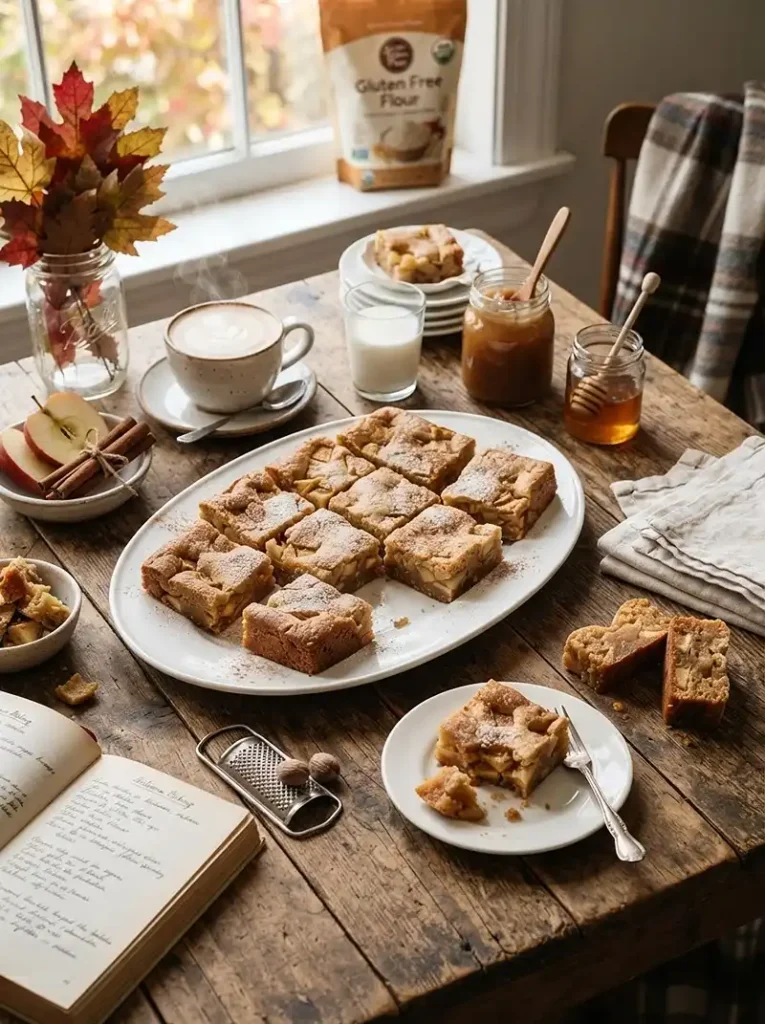
These bars are wonderful on their own, but they shine alongside a scoop of vanilla ice cream or a dollop of lightly sweetened whipped cream. The contrast of warm spice and cold cream is exactly what you’d want at a fall dinner party or a Thanksgiving dessert table.
For a simple plated dessert, warm a bar in the microwave for 15 seconds and drizzle with a little caramel sauce. Paired with our 2-ingredient Japanese yogurt cheesecake, they make an effortless gluten-free dessert spread that looks far more impressive than the effort required.
If you’re building a lighter dessert board, our frozen grape yogurt bark pairs beautifully alongside these bars—the cool, tangy bark balances the warm sweetness of the blondies perfectly.
If you make this recipe, I’d love to hear how it went. Drop a comment below with any modifications you tried, and don’t forget to save it to your Pinterest boards for the next time apple season rolls around—someone you know will be very glad you did.
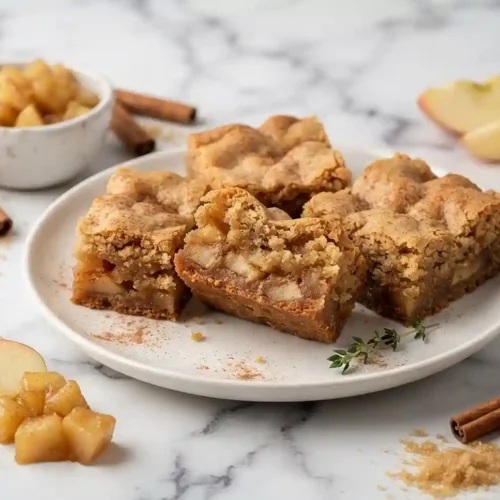
Easy Gluten-Free Apple Butter Blondie Bars
Equipment
- 8×8-inch baking pan
- Parchment paper
- Large mixing bowl
- Medium bowl
- Whisk
- Rubber spatula
- Measuring cups and spoons
- Wire cooling rack
Ingredients
Wet Ingredients
- ½ cup unsalted butter melted and slightly cooled
- 1 large egg room temperature
- ½ teaspoon vanilla extract
- 2 medium apples peeled, cored, and cut into 1/4-inch chunks
- 1 tablespoon fresh lemon juice
Dry Ingredients
- ½ cup granulated sugar
- ½ cup light brown sugar packed
- 1 ¼ cups gluten-free 1:1 all-purpose flour blend contains xanthan gum
- ½ teaspoon gluten-free baking powder
- ½ teaspoon ground cinnamon
- ¼ teaspoon ground nutmeg
- 1 pinch salt
Instructions
- Preheat the oven to 350°F (180°C). Grease and line an 8×8-inch baking pan with parchment paper.
- Toss the chopped apples with the lemon juice in a medium bowl and set aside.
- Whisk together the granulated sugar, brown sugar, egg, and vanilla extract until smooth and glossy.
- Slowly whisk in the melted butter until fully combined.
- Add the baking powder, salt, cinnamon, nutmeg, and gluten-free flour. Remove 2 tablespoons of the flour mixture and toss it with the apples to coat them.
- Stir the remaining flour mixture into the wet ingredients until a thick batter forms.
- Fold the flour-coated apples gently into the batter until evenly distributed.
- Spread the batter evenly into the prepared pan and smooth the top.
- Bake for 24–27 minutes, or until the edges are lightly golden and a toothpick inserted into the center comes out clean.
- Cool the blondies in the pan for 1 hour, then transfer to a wire rack to cool completely.
- Slice into 9 bars and serve. Store leftovers in an airtight container for up to 4 days.