Gluten-Free Kool-Aid Pineapple Spears
Make gluten-free Kool-Aid pineapple spears with just 3 ingredients. Step-by-step guide with flavor variations, storage tips, and serving ideas.
My niece spotted someone making these at a summer block party and begged me to recreate them the very next day. I wasn’t sure a jar of pineapple and two packets of Kool-Aid could turn into anything worth eating — but the moment I pulled those gluten-free Kool-Aid pineapple spears out of the fridge, I was proven completely wrong.
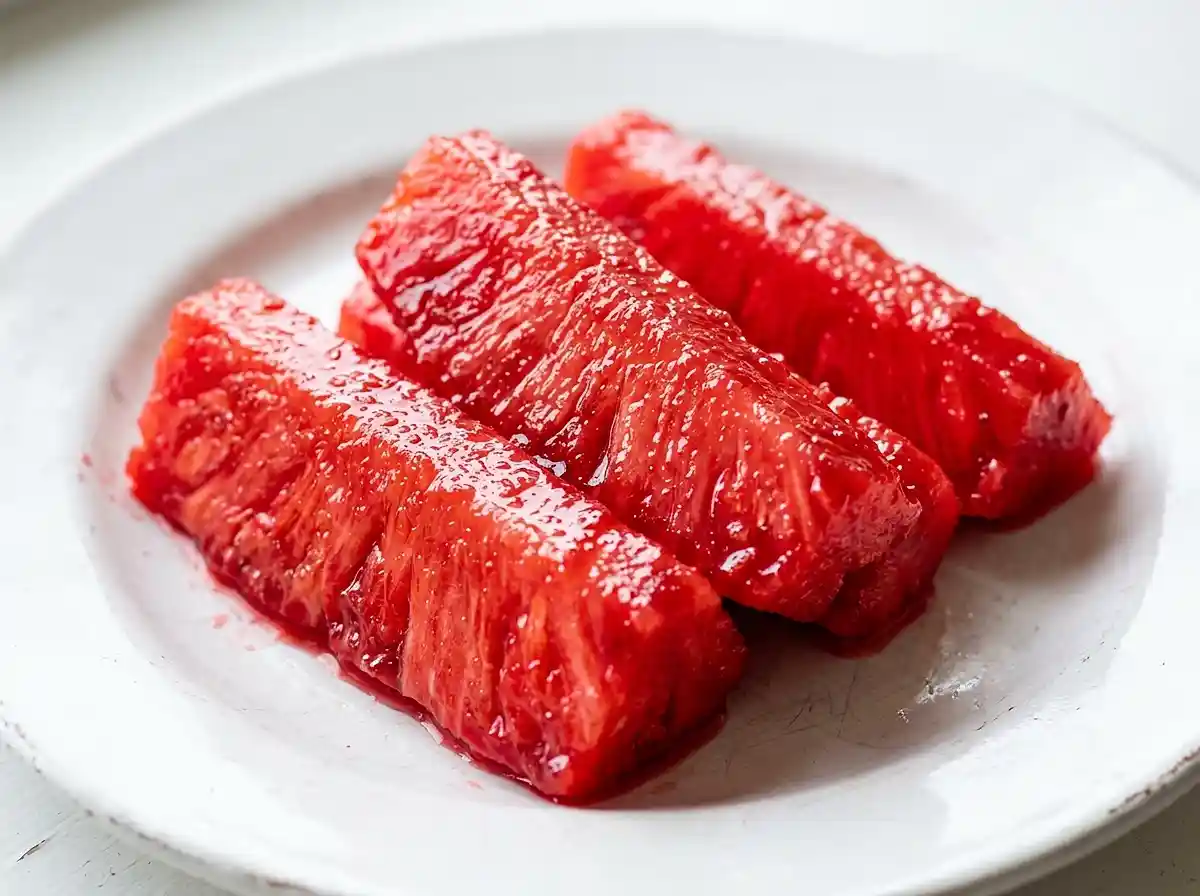
The color alone stops people in their tracks — a deep, jewel-toned red that bleeds into the golden pineapple like a sunset in a jar. And the flavor? Tangy, sweet, and cold in a way that hits like the first bite of a snow cone on a hot afternoon.
Well… if you’ve been scrolling past this trend wondering whether it actually works, I’m here to tell you it absolutely does — and it takes less than five minutes of hands-on time.
Table of Contents
Why You’ll Love This Kool-Aid Pineapple Spears Recipe
- Bold sweet-tart flavor — the Kool-Aid syrup soaks into every fiber of the pineapple, giving you a tangy punch in every bite without being overpowering.
- Three ingredients, zero cooking — no heat, no equipment, no special skills. If you can open a jar and stir, you can make this.
- Naturally gluten-free — both Kool-Aid mix and canned pineapple are free from gluten-containing ingredients, making this a safe, crowd-friendly snack.
- Perfect for parties and summer cookouts — serve them straight from the jar, on a platter, or skewered on toothpicks for a grab-and-go treat that disappears fast.
The Secret to Perfect Gluten-Free Kool-Aid Pineapple Spears
- Use the reserved jar liquid as your soak base — the pineapple’s own syrup or coconut water is already sweetened and flavored to match the fruit. Dissolving the Kool-Aid into it (rather than plain water) gives you a more concentrated, layered flavor that plain syrup can’t replicate.
- Patience is the real ingredient — 30 minutes gives you light color and mild flavor. Overnight gives you deep, almost candy-like intensity. The longer the soak, the more the syrup penetrates the fruit’s cell walls.
- The dry Kool-Aid finish is not optional for texture — sprinkling or dipping the spears in the second packet right before serving adds a slightly crystallized, fizzy-feeling coating that’s entirely different from the soaked interior. That contrast is what makes people ask for the recipe.
- Full submersion matters — any tip of pineapple sticking above the liquid won’t absorb color or flavor evenly. Rotate the jar or use a small plate to press the spears down if needed.
Ingredients

| Ingredient | Amount | Notes |
|---|---|---|
| Main Ingredients | ||
| Pineapple spears in light syrup or coconut water | 1 jar (42 oz) | Drain and reserve all the liquid — do not discard it |
| Granulated sugar | 1 cup | Balances the tartness of the Kool-Aid; adjust to taste |
| Fruit Punch Kool-Aid mix | 2 packets | 1 packet for soaking, 1 packet for dipping/sprinkling before serving |
| Optional Variations | ||
| Tropical Punch Kool-Aid mix | 2 packets | Swap for Fruit Punch for a sunnier, lighter flavor |
| Cherry Kool-Aid mix | 2 packets | Deeper red color, slightly more tart finish |
| Blue Raspberry Kool-Aid mix | 2 packets | Striking color contrast against the yellow pineapple |
| Lime juice | Optional splash | Adds extra zing to the soaking syrup |
| Fresh mint leaves | Optional | For freshness and color on the serving platter |
Instructions
Place a strainer over a pitcher or large measuring cup and drain the pineapple spears, catching every drop of the jar liquid. Set the drained spears aside and keep the liquid — this is the base of your soak.
Add 1 cup of granulated sugar and 1 packet of Fruit Punch Kool-Aid mix directly into the reserved pineapple liquid. The liquid will immediately start turning a vivid red.
Whisk everything together until the sugar dissolves completely and no granules remain at the bottom. You’re looking for a bright, glossy syrup — not cloudy or gritty. This takes about 60–90 seconds of steady stirring.Pro Tip: If your pineapple liquid is cold from the fridge, the sugar may take a little longer to dissolve. Let it sit for a minute and stir again.
Carefully return the pineapple spears to the jar, then pour the Kool-Aid syrup over them. Every spear should be fully submerged in the red liquid.
If any tips are peeking above the syrup line, gently rotate or shake the jar to help the liquid settle evenly around each piece. You can also lay the jar on its side and flip it halfway through the chill time.
Cover the jar tightly and refrigerate for at least 30 minutes. For stronger color and bolder flavor — the kind that tastes like a candy-sweet summer memory — chill for several hours or overnight.
Right before serving, open the second packet of Kool-Aid mix. Either dip the wet pineapple spears directly into the dry powder or sprinkle it generously over the top. This step adds a slightly crystallized, sweet-tart crust that’s the best part of the whole experience.
Serve cold, straight from the jar, laid out on a platter with fresh mint, or threaded onto toothpicks for easy party grabbing. They’re at their best ice-cold.

Make It Your Own
You know… the flavor swap options here are genuinely fun to experiment with. Cherry Kool-Aid gives you a deeper, darker red and a slightly more tart finish that pairs really well with the natural sweetness of the pineapple. Blue Raspberry is the showstopper — the color contrast against the yellow fruit is striking on a party table.
Tropical Punch is the mildest of the bunch and works especially well if you’re serving kids or anyone who finds Fruit Punch too intense. The flavor is softer and the color leans more orange-pink, which looks beautiful on a platter with fresh mint tucked around the edges.
For adults, try adding a splash of lime juice to the soaking syrup. It cuts through the sweetness and adds a slightly citrusy edge that makes the whole thing taste more complex — almost like a agua fresca you can eat. It pairs naturally with the pineapple’s acidity.
If you want to cut fresh pineapple spears yourself instead of using jarred, that works too — just create a simple soak of 1 cup water plus ½ cup sugar to replace the reserved jar liquid. The texture will be slightly firmer, and the soak time may need to be extended to a full overnight for the color to fully penetrate.
Common Problems & Solutions
Problem: The color barely soaked in after 30 minutes. Extend the chill time — 30 minutes is the minimum, not the ideal. The Kool-Aid pigment needs time to work into the pineapple’s cell structure. For deep, vivid color all the way through, aim for at least 4 hours or overnight. The flavor deepens significantly too.
Problem: The syrup tastes way too sweet. Reduce the sugar to ¾ cup instead of the full 1 cup in your next batch, and add a squeeze of lime juice to balance. Man, oh man… this is the most common note from people who prefer a more tart than sweet result. The Kool-Aid alone is already quite sweet, so the sugar is adjustable.
Problem: The pineapple spears are floating and not soaking evenly. The spears are buoyant in liquid — this is normal. Place a small zip-lock bag filled with water on top of the spears inside the jar to weigh them down, or flip the jar on its side halfway through the chill time. Even contact with the syrup is the key to even color.
Problem: The dry Kool-Aid won’t stick before serving. The pineapple needs to be wet — freshly pulled from the syrup, not patted dry. If the surface looks dry, dip the spear briefly back into the syrup, shake off the excess, then immediately roll it in the dry Kool-Aid powder. It’ll cling like a charm.
Storage & Meal Prep
| Method | Duration | Notes |
|---|---|---|
| Counter | 2 hours max | Keep cold at parties — set jar in a bowl of ice |
| Fridge | 5–7 days | Store in the jar with the syrup; flavor deepens over time |
| Freezer | Up to 2 months | Freeze spears individually on a tray, then bag; texture softens on thawing |
These are best served straight from the fridge — no reheating needed. If you freeze them, thaw in the fridge overnight and expect a slightly softer, almost sorbet-like texture that’s still enjoyable.
Make-ahead tip: the full soak can be done up to 5 days in advance. Hold the dry Kool-Aid dip until right before serving for the best coating texture and visual impact.
Your Questions Answered
How do you make pineapple spears with Kool-Aid?
Drain a jar of pineapple spears and reserve the liquid. Dissolve 1 cup sugar and one packet of Kool-Aid into the reserved liquid, pour it back over the spears, and refrigerate for at least 30 minutes. Before serving, dip or sprinkle with a second packet of dry Kool-Aid for a sweet-tart crust.
Does Kool-Aid have gluten?
Standard Kool-Aid drink mix packets do not contain gluten ingredients. The unsweetened powder mix contains citric acid, artificial flavor, and color — no wheat, barley, or rye derivatives. Always check the label on the specific variety you purchase, as formulations can occasionally change.
Is pineapple gluten-free?
Yes — fresh and canned pineapple are naturally gluten-free. When buying jarred or canned pineapple, look for varieties packed in light syrup, juice, or coconut water with no added thickeners or starch-based ingredients.
What is the Kool-Aid pineapple trend?
It is a viral snack where jarred pineapple spears are soaked in a Kool-Aid and sugar syrup, then finished with a dry Kool-Aid dusting before serving. The result is a sweet, tangy, brightly colored fruit treat that has become popular at summer parties and cookouts.
How do I make pineapple spears at home without a jar?
Cut a whole pineapple into long spears by halving it, quartering it, removing the core, and slicing each quarter into 3 to 4 strips. Replace the jar liquid with a simple soak of 1 cup water and half a cup of sugar. Fresh pineapple may need an overnight soak for the color to fully penetrate.
Serving Suggestions
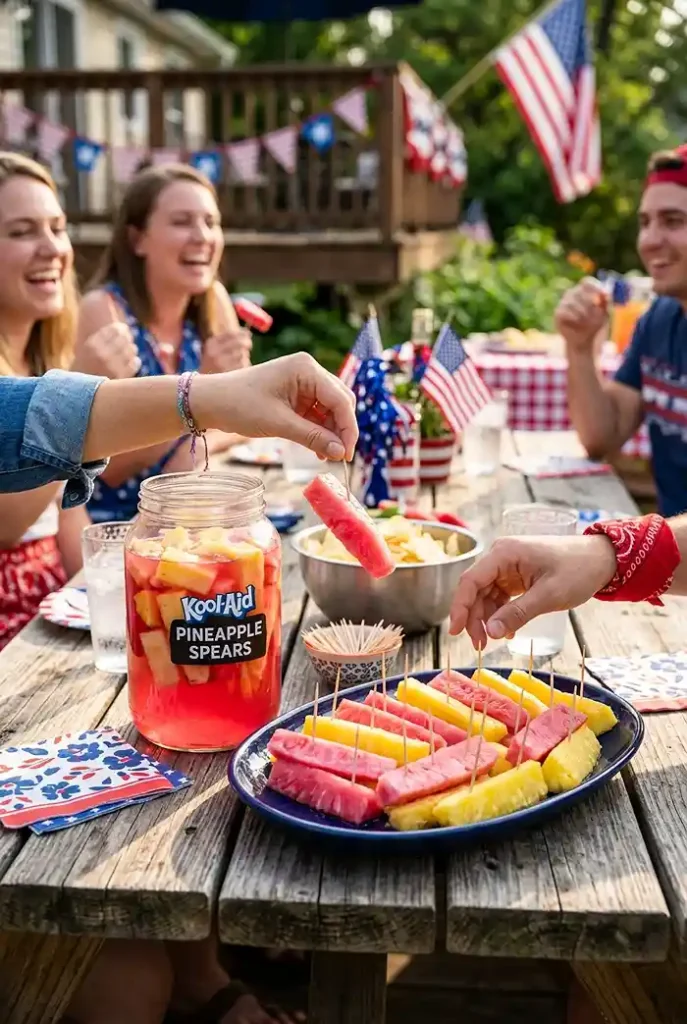
These pineapple spears in Kool-Aid are the kind of snack that disappears within minutes at a Fourth of July cookout or a Labor Day backyard party. Set the jar on a table surrounded by ice, stick toothpicks in the top, and watch them go.
They pair naturally alongside other no-cook summer snacks — try them next to a chopped cheeseburger salad with dill pickle for a full cookout spread that keeps things easy and gluten-free.
If you’re building out a gluten-free dinner menu to go alongside these, my gluten-free tomato smash pasta is a 30-minute crowd-pleaser that rounds out any casual gathering beautifully.
Give these a try and drop a comment below letting me know which Kool-Aid flavor you used — I’m always curious which color ends up being the crowd favorite. Share your jar on Pinterest and tag your creation so other gluten-free families can find it too.
Gluten-Free Kool-Aid Pineapple Spears
Equipment
- Strainer
- Large measuring cup or pitcher
- Whisk
- Large jar with lid
Ingredients
Main Ingredients
- 1 jar (42 oz) Pineapple spears in light syrup or coconut water Drain and reserve all the liquid
- 1 cup Granulated sugar Adjust to taste
- 2 packets Fruit Punch Kool-Aid mix 1 packet for soaking and 1 packet for dipping or sprinkling
Optional Variations
- 2 packets Tropical Punch Kool-Aid mix Substitute for Fruit Punch
- 2 packets Cherry Kool-Aid mix Produces a deeper red color
- 2 packets Blue Raspberry Kool-Aid mix Creates a striking color contrast
- 1 splash Lime juice Optional
- Fresh mint leaves Optional garnish
Instructions
- Drain the pineapple spears, reserving all of the liquid, and set the pineapple aside.
- Whisk the granulated sugar and one packet of Fruit Punch Kool-Aid into the reserved pineapple liquid until fully dissolved.
- Return the pineapple spears to the jar and pour the prepared Kool-Aid syrup over them, making sure they are fully submerged.
- Rotate or gently shake the jar if necessary so all of the pineapple remains covered by the syrup.
- Seal the jar and refrigerate for at least 30 minutes, or several hours to overnight for a stronger flavor and deeper color.
- Before serving, dip the wet pineapple spears into the second packet of dry Kool-Aid mix or sprinkle it over the top.
- Serve chilled directly from the jar, on a serving platter, or on toothpicks with fresh mint if desired.