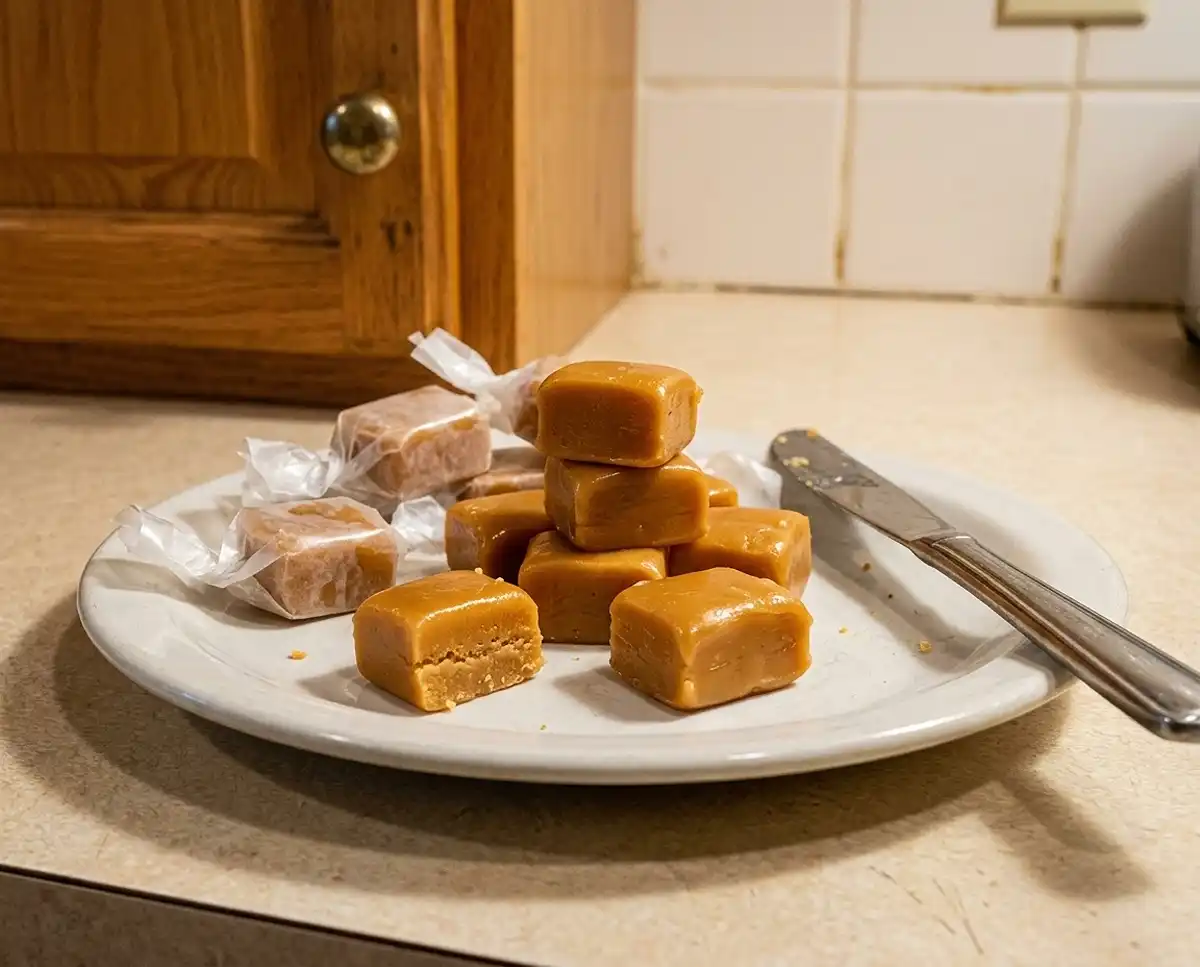
Milton Hershey Historical Caramel
Make gluten-free Milton Hershey historical caramel at home with nine pantry ingredients, clear steps, a candy thermometer guide, and storage tips.
I once walked away from a pot of caramel to break up a sibling argument. I came back to smoke, a screaming alarm, and a black puddle. My kids named it “campfire rocks,” and now I treat gluten-free Milton Hershey historical caramel like a toddler near a staircase: eyes on it, always.
Milton Hershey learned to make caramel with fresh milk in Denver, then built his Lancaster Caramel Company on it. The Hershey Community Archives history of his fresh-milk experiments tells the story. My version is a modern stovetop take using condensed milk and cream.
Honestly… I assumed a candy this old-school needed a professional’s touch. Why does homemade caramel have such a scary reputation, anyway? You need one thermometer, a little patience, and about two minutes to check labels for gluten.
What Makes This Gluten-Free Historical Caramel Recipe Worth Making
This recipe makes 24 chewy, buttery caramels with one saucepan and one baking pan.
- Texture and flavor: Firm enough to cut and wrap, soft enough to bend, with brown sugar depth and a salty finish.
- Difficulty level: Beginner-friendly if you own a candy thermometer and stay at the stove.
- Unique advantages: Nine ingredients, no special equipment, and kid-friendly to eat once the hot sugar has cooled.
- Best for: Gift tins, holiday cookie swaps, and candy bowls for kids who can’t trade for regular candy.
The Science Behind Great Gluten-Free Milton Hershey Historical Caramel
Great caramel comes down to controlling sugar, milk proteins, and temperature.
- Corn syrup blocks crystals: Its glucose gets in the way of sugar crystals linking up, so the caramel stays smooth instead of grainy.
- 245-248°F (118-120°C) is firm-ball stage: Enough water has cooked off that the caramel sets chewy and sliceable, not runny or tooth-breaking.
- Milk and cream add browning: Their proteins and milk sugars brown through the Maillard reaction, which builds that toasty, buttery flavor.
- Constant stirring protects milk solids: Dairy scorches fast on the bottom of a pot, and scraping keeps the flavor buttery instead of bitter.
Gluten-free caramel has one extra risk: hidden gluten in packaged ingredients. The Celiac Disease Foundation food labeling guide explains how to read labels, and I still check every can and bottle.
Table of Contents
Ingredients
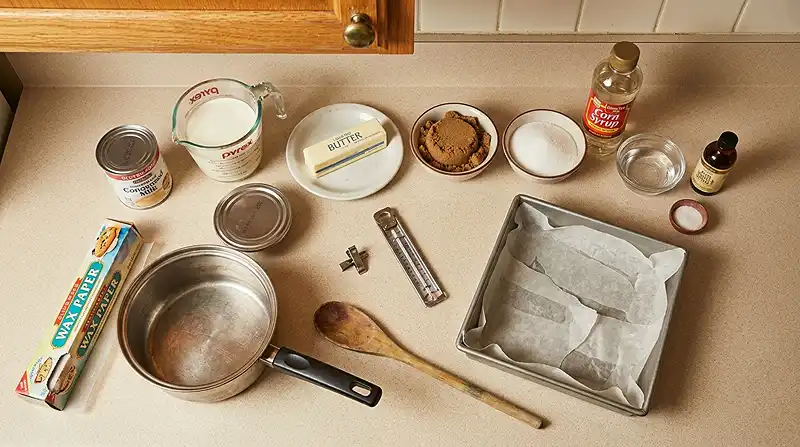
Makes 24 caramels.
Sugars and Syrup
- 1 cup packed brown sugar
- ½ cup granulated sugar
- ½ cup light corn syrup, verified gluten-free
- 2 tablespoons water
Dairy and Fat
- 1 (14-ounce) can sweetened condensed milk, labeled gluten-free
- 1 cup heavy cream
- 6 tablespoons unsalted butter
Flavor
- 1 teaspoon pure vanilla extract, verified gluten-free
- ½ teaspoon fine salt
Sweetened condensed milk is not evaporated milk, so double-check the can. Use light corn syrup, not dark, which would push the flavor toward molasses.
Instructions
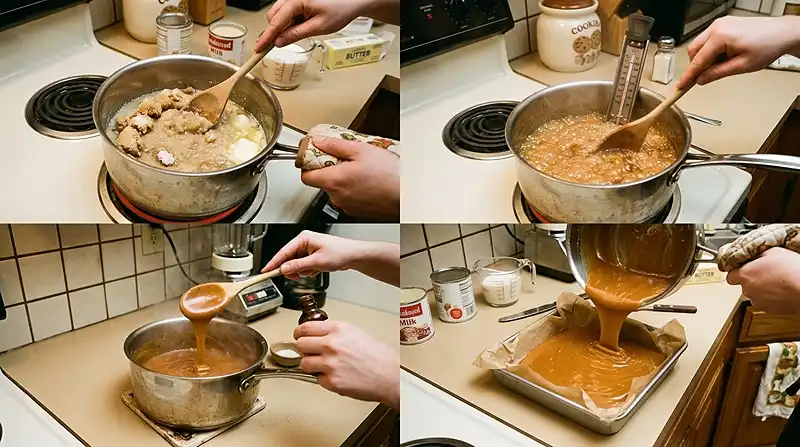
- Prepare the pan: Line an 8-inch square baking pan with parchment paper, leaving some overhang for easy removal. Lightly grease the parchment. Pro Tip: Press the paper into the corners so the caramel sets with sharp edges.
- Combine the ingredients: In a heavy-bottomed saucepan, combine the brown sugar, granulated sugar, light corn syrup, and water. Add the sweetened condensed milk, heavy cream, and butter. Pro Tip: Choose a bigger pot than seems necessary, because the mixture bubbles up as it cooks.
- Cook the caramel: Set the saucepan over medium heat. Stir continuously with a heatproof spatula or wooden spoon, scraping the bottom and sides to prevent scorching. The mixture burbles like oatmeal on a low simmer, and I learned the hard way that cranking the heat to hurry it scorches the bottom first.
- Check the temperature: Continue cooking until the mixture thickens and reaches 245-248°F (118-120°C) on a candy thermometer. It should turn deep golden and coat the spoon. Take care, as hot caramel can cause severe burns. Pro Tip: Keep the thermometer bulb off the bottom of the pan for an accurate reading.
- Add the flavorings: Remove the saucepan from the heat. Carefully stir in the vanilla extract and salt until evenly incorporated. It may sputter, so keep your face back.
- Pour and cool: Immediately pour the caramel into the prepared pan and spread it evenly. Let it cool completely at room temperature until firm, with the edges pulling away from the pan. Pro Tip: Skip the fridge to rush it, since slow cooling gives a smoother chew in my kitchen.
- Cut into pieces: Lift the caramel from the pan using the parchment overhang. Cut into 24 bite-sized pieces with a lightly greased, sharp knife. Pro Tip: Wipe and re-grease the blade every few cuts so the pieces stay clean.
- Serve or wrap: Enjoy the caramels once fully cooled, or wrap the individual pieces for storage. Twisted squares of parchment or wax paper work well and keep the pieces from fusing together.
Ways to Customize This Recipe
Flaky sea salt on top is the easiest upgrade. Sprinkle it over the caramel right after you spread it in the pan, so it sticks as the caramel sets. It turns a simple old-fashioned gluten-free caramel candy recipe into something that tastes like a bakery counter treat.
Toasted pecans work well stirred in with the vanilla and salt. Make sure they are plain nuts, not processed with wheat products. The crunch is great, but nuts make cutting harder, so keep that knife sharp and greased.
Look… I once swapped the light corn syrup for honey, and the batch turned grainy and tasted too floral. Corn syrup’s glucose does real work in stopping crystals. If you want vintage homemade caramel candy from scratch that sets smoothly, keep the corn syrup.
I haven’t tested a dairy-free version, so I can’t promise results. Coconut cream and plant-based butter behave differently with sugar, and the set could change. If you try it, tell me what happened in the comments.
Dipping fully cooled caramels in melted chocolate makes a gift-box candy. Verify the chocolate is gluten-free, since some brands pick up cross-contact. Make sure the caramels are firm before dipping so they hold their shape.
If Something Went Wrong, Start Here
Problem: The caramel is rock hard. Next time, pull the pot off the heat as soon as the thermometer hits 245°F. Every extra few degrees cooks out more water, and less water means a harder set.
Problem: The caramel is too soft or won’t set. Let it cool completely first. If it is still soft, scrape it back into the pot and cook it a few degrees higher. Test your thermometer in boiling water, which should read about 212°F at sea level.
Problem: Butter is pooling on top. Oh wow… that scares everyone the first time. Take the pot off the heat and whisk steadily until it comes back together. The butterfat separates when the heat runs too high or the stirring pauses.
Problem: The caramel is grainy. Keep scraping the sides of the pot as you stir, and don’t shake the thermometer into the mix. A few stray sugar crystals can seed a whole batch. The corn syrup helps, but it can’t fix rough handling.
Problem: It tastes burnt. Unfortunately, you need to start over. Scorched milk solids turn bitter and spread through the whole pot, so don’t scrape the bottom into the pan. Lower the heat and stir the next batch more steadily.
Storage & Meal Prep
Wrapped caramels keep for days at room temperature and for months in the freezer.
| Method | Duration | Notes |
|---|---|---|
| Counter | 2-3 days | Airtight container |
| Fridge | 5-7 days | Bring to room temp |
| Freezer | 2-3 months | Wrap individually |
To soften a chilled caramel, let it sit at room temperature, or microwave it for a few seconds. For no-waste ideas, chop any ragged end pieces into oatmeal made with certified gluten-free oats, or melt them with a splash of cream for an ice cream sauce.
Milton Hershey Historical Caramel FAQs
Can I make this caramel without a candy thermometer?
Yes, but a thermometer is the most reliable method. You can try the cold-water test by dropping a little caramel into a glass of cold water, where it should form a firm but pliable ball. Expect a practice batch or two before you trust your eye.
How do I know my corn syrup and vanilla are gluten-free?
Check for a gluten-free label, or contact the manufacturer. Corn syrup and pure vanilla extract are usually gluten-free, but brands vary and labeling mistakes happen. When in doubt, call the company before you cook.
What’s the best way to cut caramels cleanly?
Use a sharp knife, lightly greased, and wipe it between cuts. Lift the cooled slab out with the parchment overhang first so you can cut on a flat board. A cold blade drags, so let the caramel sit at room temperature.
Why did my caramel turn grainy?
Stray sugar crystals most likely seeded the batch. Keep scraping the sides of the pot while you stir, and avoid shaking the spatula or thermometer back into the mixture. Light corn syrup is in the recipe to help prevent this.
Can I freeze these caramels?
Yes, wrap each piece individually and freeze for 2-3 months. Wrapping keeps the pieces from sticking together and protects them from freezer odors. Thaw them in the fridge or at room temperature before eating.
Serving Suggestions
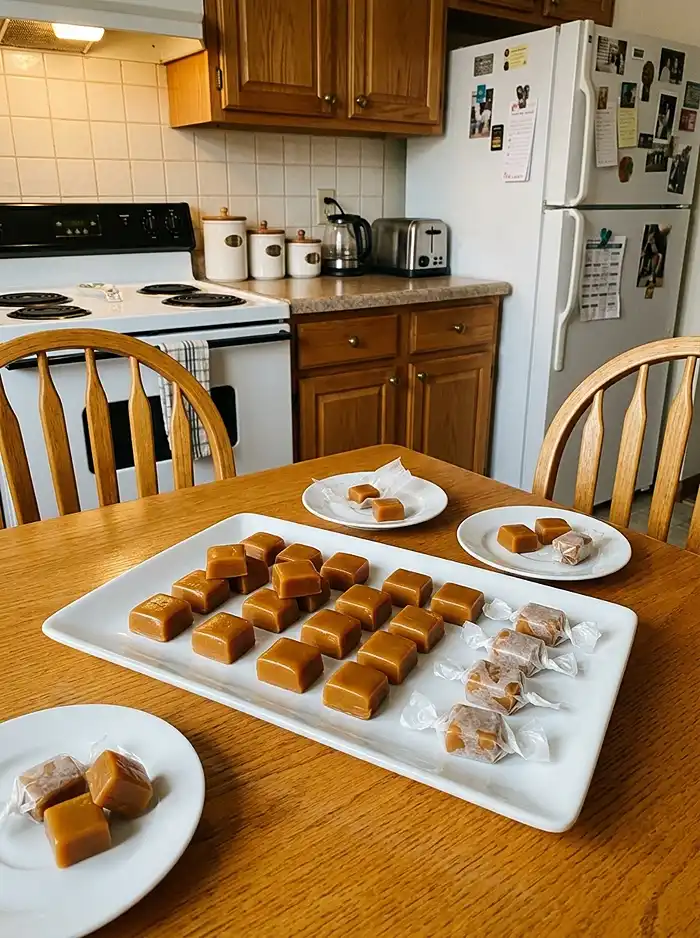
Every Halloween, I fill a small jar with these so my celiac-safe trick-or-treat swap pile never runs dry. They also pair well with salty, savory dinners for a sweet finish.
- Serve them after a maple mustard pork tenderloin sheet pan dinner.
- Set them out beside maple Dijon sausage pinwheels on a party table.
- Pair them with a gluten-free Ina Garten jambalaya recipe night for dessert.
Final Thoughts
Give this gluten-free Milton Hershey historical caramel a try, then pin it to your Pinterest board for your next holiday cookie swap. Tell me in the comments how it turned out and what you changed. A star rating helps other gluten-free families find it too.
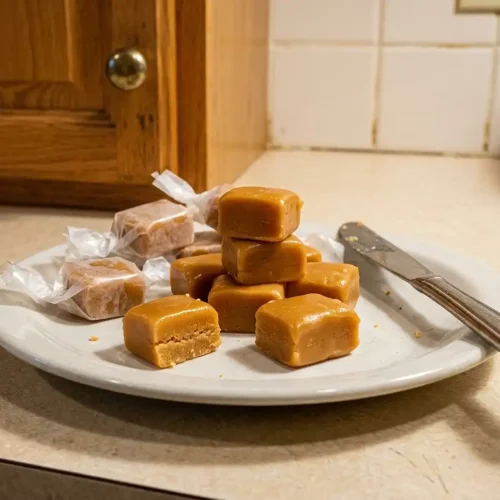
Gluten-Free Milton Hershey Historical Caramel
Equipment
- Heavy-bottomed saucepan
- Candy thermometer
- Heatproof spatula or wooden spoon
- 8-inch square baking pan
- Parchment paper
- Sharp knife
- Measuring cups and spoons
Ingredients
Sugars and Syrup
- 1 cup packed brown sugar
- ½ cup granulated sugar
- ½ cup light corn syrup Verify that the product is gluten-free; use light rather than dark corn syrup.
- 2 tablespoons water
Dairy and Fat
- 1 14-ounce can sweetened condensed milk Choose a product labeled gluten-free and do not substitute evaporated milk.
- 1 cup heavy cream
- 6 tablespoons unsalted butter
Flavor
- 1 teaspoon pure vanilla extract Verify that the product is gluten-free.
- ½ teaspoon fine salt
Instructions
- Line an 8-inch square baking pan with parchment paper, leaving an overhang for easy removal. Lightly grease the parchment and press it into the corners.
- In a heavy-bottomed saucepan, combine the brown sugar, granulated sugar, light corn syrup, and water. Add the sweetened condensed milk, heavy cream, and butter. Use a saucepan large enough to allow the mixture to bubble up safely.
- Set the saucepan over medium heat. Stir continuously with a heatproof spatula or wooden spoon, scraping the bottom and sides to prevent scorching.
- Continue cooking until the mixture thickens and reaches 245–248°F (118–120°C) on a candy thermometer. The caramel should turn deep golden and coat the spoon. Keep the thermometer bulb off the bottom of the pan, and handle the hot mixture carefully to avoid burns.
- Remove the saucepan from the heat. Carefully stir in the vanilla extract and salt until evenly incorporated. Keep your face back because the mixture may sputter.
- Immediately pour the caramel into the prepared pan and spread it evenly. Let it cool completely at room temperature until firm and the edges begin to pull away from the pan. Allow enough time for the caramel to set before cutting.
- Lift the caramel slab from the pan using the parchment overhang. Cut it into 24 bite-sized pieces with a sharp, lightly greased knife. Wipe and re-grease the blade every few cuts for cleaner edges.
- Enjoy the caramels once fully cooled, or wrap each piece individually in parchment or wax paper to prevent sticking.