Flourless Oatmeal Cookie Bars
Make gluten-free flourless oatmeal cookie bars with oats, bananas, peanut butter and maple syrup. Step-by-step, soft and chewy, with storage tips.
I once pulled a pan of banana oat bars out of the oven, sliced them while still hot, and watched them slump into what my youngest called banana soup. Oh wow… the cleanup took longer than the baking. That mess taught me how to make gluten-free flourless oatmeal cookie bars that actually hold their shape.
Need a wholesome treat that’s easy to pack for busy days? Discover these gluten free snacks on the go for more portable, satisfying bites perfect for work, school, and road trips. You might find a few new grab-and-go favorites that make snack prep easier than ever!
What Makes These Gluten-Free Flourless Oatmeal Cookie Bars Worth Making
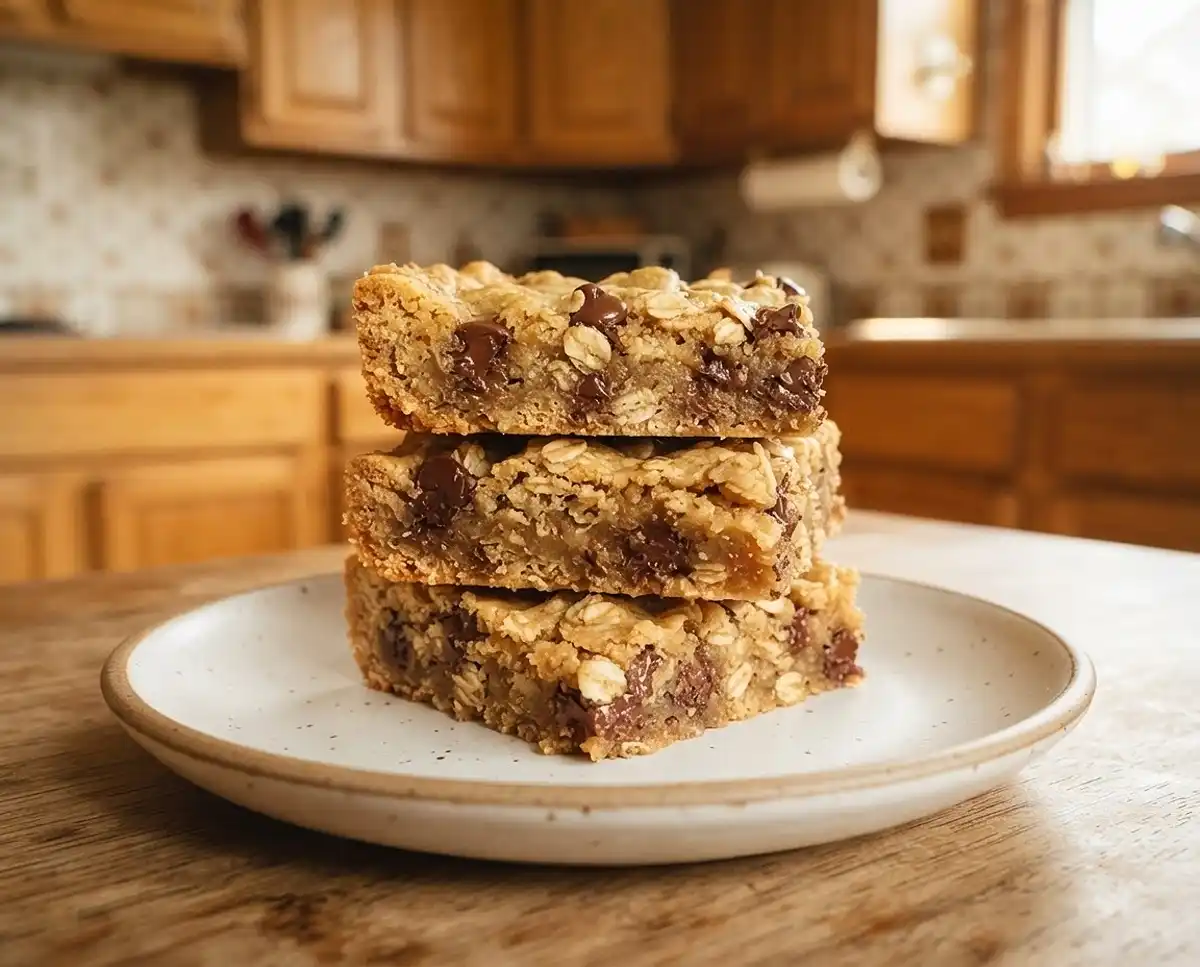
These bars are a soft, chewy snack that comes together in one bowl with no flour at all.
- Texture and flavor: Tender and chewy, like an oatmeal cookie in bar form. The bananas and maple syrup add gentle sweetness.
- Difficulty level: Beginner-friendly. You mash, stir, press, and bake.
- Unique advantages: Naturally dairy-free with dairy-free chips, kid-friendly, and easy to make with almond butter instead of peanut butter.
- When they work best: Breakfast on the run, after-school snacks, and make-ahead lunchbox treats. Slice them smaller and they work as homemade energy bars.
The Science Behind Great Gluten-Free Flourless Oatmeal Cookie Bars
These bars hold together because the oats, bananas, and peanut butter do the jobs that flour and eggs usually do.
- Oats provide the structure. They soak up moisture from the bananas and soften as they bake. That gives you a chewy crumb with no flour blend and no gums.
- Bananas act as glue and sweetener. Ripe bananas are high in sugar and moisture, which bind the oats and sweeten the bars without adding more syrup.
- Peanut butter adds fat and protein. The fat keeps the crumb tender, and the protein helps the bars set as they cool.
- Cooling finishes the job. The fats and starches firm up as the pan cools, which is why slicing too early leads to a soft, messy slab.
Oats deserve extra care for anyone avoiding gluten, since they often pick up stray gluten during growing and milling. Certified gluten-free oats are the safe choice.
For background, see Health Canada’s position on oats and celiac disease.
A small number of people with celiac disease react even to pure oats. If that’s you, check with your doctor first.
Table of Contents
Ingredients
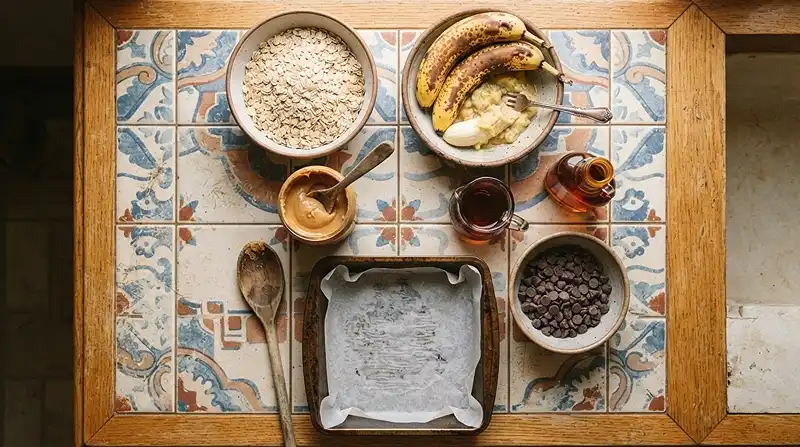
This recipe makes 9 bars. Check every label, and the Celiac Disease Foundation’s label reading guide is a handy refresher.
Dry Ingredients
- 2 cups rolled oats, certified gluten-free
Wet Ingredients
- 1½ cups mashed ripe bananas (about 3–4 medium bananas)
- 1 cup creamy peanut butter, labeled gluten-free (or almond butter)
- ¼ cup pure maple syrup or honey
Mix-In
- ½ cup semi-sweet chocolate chips, labeled gluten-free (optional)
Choose bananas with plenty of brown spots, since they’re sweeter and mash more smoothly. Use creamy peanut butter that’s well stirred.
Instructions
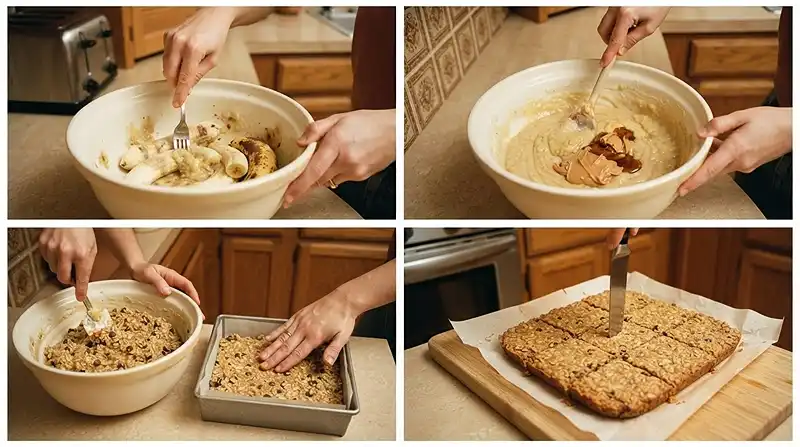
- Prepare the pan. Preheat the oven to 350°F (175°C). Line an 8-inch square baking pan with parchment paper, leaving some overhang for easy removal.
- Mash the bananas. In a large mixing bowl, mash the ripe bananas until mostly smooth. Pro Tip: A few tiny lumps are fine and add nice pockets of banana.
- Mix the wet ingredients. Add the peanut butter and maple syrup or honey. Stir until creamy and thoroughly combined. Pro Tip: Room-temperature peanut butter blends in much more easily.
- Add the oats. Fold in the certified gluten-free rolled oats until evenly coated, then stir in the chocolate chips, if using. The mixture will be thick and slightly sticky.
- Press into the pan. Transfer the mixture to the prepared pan. Spread it evenly and press firmly into the corners. Pro Tip: Wet your fingertips or spatula to keep it from sticking.
- Bake. Bake for 18–22 minutes, until the edges are lightly golden and the center feels set. You’ll smell roasted peanut butter when they’re close.
- Cool completely. Remove the pan from the oven and let the bars cool completely in the pan. This helps them firm up and makes slicing easier. Pro Tip: Don’t skip this, or you’ll get banana soup like I did.
- Slice and serve. Lift the cooled slab out using the parchment paper and cut into 9 bars. Pro Tip: Wipe your knife clean between cuts for neat edges.
Ways to Customize This Recipe
Honestly… the almond butter swap is the one I get asked about most. Use it 1:1 for the peanut butter, and stir it well first. Runny almond butter can make the bars a little softer, so bake toward the longer end of the time range.
Peanut butter gives the richest, most classic flavor, so keep it if you can. Creamy styles blend smoothest and give the most even slice. Natural jars that separate need a thorough stir before measuring.
Maple syrup and honey are interchangeable here. Maple gives a mellow, caramel note, while honey tastes a bit floral and browns slightly faster. Neither swap changes the structure, since the bananas do most of the binding.
Chocolate chips are optional. Leave them out for a plainer oatmeal bar, or choose dairy-free chips to keep the whole pan dairy-free. Semi-sweet chips melt into soft pockets rather than staying hard.
For homemade energy bars, cut the slab into 18 smaller pieces instead of 9. They’re easier to pack and fit a smaller appetite. Wrap them individually if you plan to freeze them.
If Something Went Wrong, Start Here
Problem: The center is gummy or mushy. Solution: Bake a few minutes longer and let the bars cool completely before cutting. Look… oats and bananas hold a lot of moisture, and the structure only finishes setting as the pan cools.
Problem: The bars crumble when I cut them. Solution: Press the mixture firmly into the corners and cool fully before slicing. Packing the oats tightly gives the bananas and peanut butter more contact to bind with.
Problem: The bars are dry. Solution: Use bananas with plenty of brown spots, and pull the pan at 18 minutes. Underripe bananas hold less moisture, and extra baking time drives off what little they have.
Problem: The bars stick to the pan. Solution: Line the pan with parchment, leaving an overhang on two sides. The natural sugars in bananas and syrup caramelize on bare metal and glue the bars down.
Storage & Meal Prep
Because the bananas add moisture, these bars keep best chilled after the first couple of days.
| Method | Duration | Notes |
|---|---|---|
| Counter | 2-3 days | Airtight container |
| Fridge | 5-7 days | Bring to room temp |
| Freezer | 2-3 months | Wrap individually |
To reheat, microwave a bar for 10 to 15 seconds until warm and soft. A frozen bar thaws in the fridge overnight or on the counter for about an hour.
Crumbs and broken pieces make a good topping for yogurt or oatmeal. Overripe bananas can be mashed and frozen in 1½ cup portions, ready for the next batch.
Frequently Asked Questions
Can I use quick oats instead of rolled oats?
Rolled oats work best. They keep a chewy texture, while quick oats are cut finer and can turn pasty. Whichever you use, make sure they are certified gluten-free.
How do I know my bananas are ripe enough?
Choose peels with plenty of brown spots and fruit that mashes easily. Ripe bananas are sweeter and moister, which helps the bars bind. Greener bananas make a drier, less sweet bar.
What’s the best nut butter for these bars?
Creamy peanut butter gives the most reliable texture. Almond butter works as a 1:1 swap and gives a milder flavor. Choose a well-stirred jar labeled gluten-free.
Why did my bars turn out gummy?
Gummy bars are usually underbaked or cut before they cooled. Bake until the edges are golden and the center feels set, then let the pan cool completely. Very large bananas can also add extra moisture.
Can I make these vegan?
Yes, use maple syrup instead of honey and choose dairy-free chocolate chips. Check that the peanut butter and chips are labeled gluten-free. The rest of the recipe is already plant-based.
Serving Suggestions
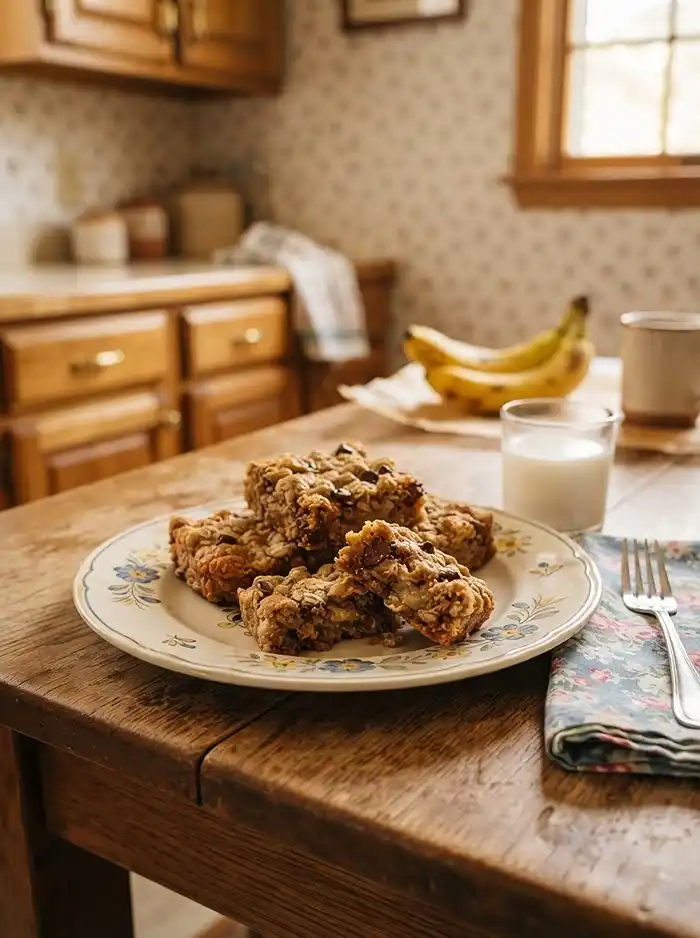
Pack a bar in a back-to-school lunchbox with apple slices, or pair one with a glass of milk for an after-school snack. They’re also sturdy enough for a morning commute with coffee.
Want more easy snacks? Try these easy no-bake almond butter cookies.
You might also like this 3-ingredient no-bake coconut crack.
Or make a batch of gluten-free copycat Heavenly Hunks for the freezer.
If you try these bars, leave a star rating and tell me in the comments how they turned out. I’d love to hear about any swaps you made.
And pin the recipe to your Pinterest snack board so you can find it the next time the bananas start to spot.
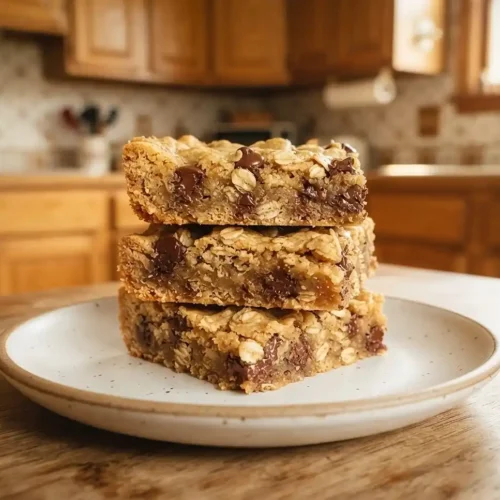
Gluten-Free Flourless Oatmeal Cookie Bars
Equipment
- 8-inch square baking pan
- Parchment paper
- Large mixing bowl
- Fork or potato masher
- Mixing spoon or spatula
- Measuring cups
- Sharp knife
Ingredients
Dry Ingredients
- 2 cups Rolled oats Certified gluten-free
Wet Ingredients
- 1½ cups Mashed ripe bananas About 3–4 medium bananas
- 1 cup Creamy peanut butter Labeled gluten-free; or use almond butter
- ¼ cup Pure maple syrup or honey Use maple syrup for a vegan version
Mix-In
- ½ cup Semi-sweet chocolate chips Optional; labeled gluten-free. Use dairy-free chips if needed
Instructions
- Prepare the pan. Preheat the oven to 350°F (175°C). Line an 8-inch square baking pan with parchment paper, leaving some overhang for easy removal.
- Mash the bananas. In a large mixing bowl, mash the ripe bananas until mostly smooth. A few tiny lumps are fine and add nice pockets of banana.
- Mix the wet ingredients. Add the peanut butter and maple syrup or honey. Stir until creamy and thoroughly combined. Room-temperature peanut butter blends in much more easily.
- Add the oats. Fold in the certified gluten-free rolled oats until evenly coated, then stir in the chocolate chips, if using. The mixture will be thick and slightly sticky.
- Press into the pan. Transfer the mixture to the prepared pan. Spread it evenly and press firmly into the corners. Wet your fingertips or spatula to keep the mixture from sticking.
- Bake. Bake for 18–22 minutes, until the edges are lightly golden and the center feels set. You’ll smell roasted peanut butter when they’re close.
- Cool completely. Remove the pan from the oven and let the bars cool completely in the pan. This helps them firm up and makes slicing easier. Don’t skip this step, or the bars may fall apart.
- Slice and serve. Lift the cooled slab out using the parchment paper and cut into 9 bars. Wipe your knife clean between cuts for neat edges.