Fried Panko Crust Egg Balls
Learn how to make gluten-free fried panko crust egg balls with a step-by-step recipe. Crispy outside, creamy inside, with an easy air fryer option.
The first time I made a batch of gluten-free fried panko crust egg balls for a Super Bowl party, I set them out thinking they’d last the whole evening. They were gone in under ten minutes, and three people asked me for the recipe before halftime.
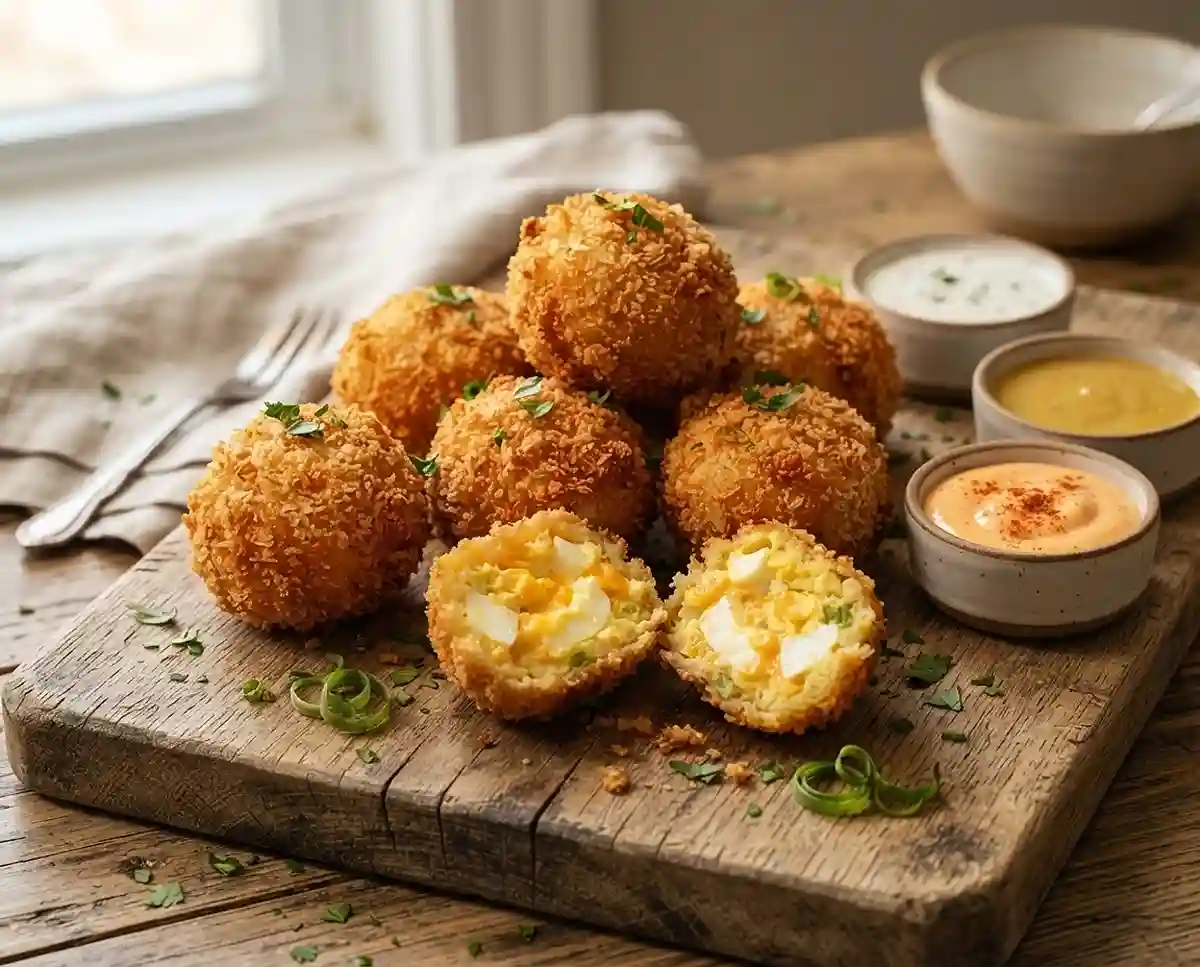
What makes these so addictive is the contrast — a deeply golden, shatteringly crisp panko crust giving way to a creamy, cheesy egg filling that’s rich without being heavy. It’s the kind of appetizer that disappears quietly and quickly.
Well… if you’ve been avoiding fried foods since going gluten-free because the coating always turns out soggy or falls off mid-fry, I want to reassure you: the three-step dredge here solves that completely.
Why You’ll Love This Gluten-Free Panko Egg Ball Recipe
- Audibly crispy crust: seasoned gluten-free panko delivers a crunch that rivals any wheat-based coating — no gummy, pale disappointment.
- Crowd-friendly serving size: makes 8 egg balls that work as appetizers, party snacks, or a protein-forward lunch.
- Two cooking options: pan-fry for maximum crunch or air fry for a lighter result — both produce a golden, even crust.
- Make-ahead friendly: the egg balls can be formed and coated hours in advance, then fried just before serving.
The Secret to Perfect Gluten-Free Fried Panko Crust Egg Balls
- Pat the eggs completely dry: moisture on the surface of hard-boiled eggs causes the flour layer to slide off, which collapses the entire dredge. A quick pat with paper towels is non-negotiable.
- The three-step dredge order matters: flour first creates a dry surface for the egg wash to grip; egg wash acts as glue; panko adheres in a thick, even layer. Skip or reverse any step and the crust won’t hold.
- Press the panko on firmly: don’t just roll — press the crumbs into the surface with your palm. This embeds them into the egg wash and dramatically reduces falloff during frying.
- Oil temperature is the difference-maker: too cool and the crust absorbs grease and goes limp; too hot and it scorches before the inside warms through. A consistent 350°F (175°C) gives you that deep-golden crust without burning.
Table of Contents
Ingredients
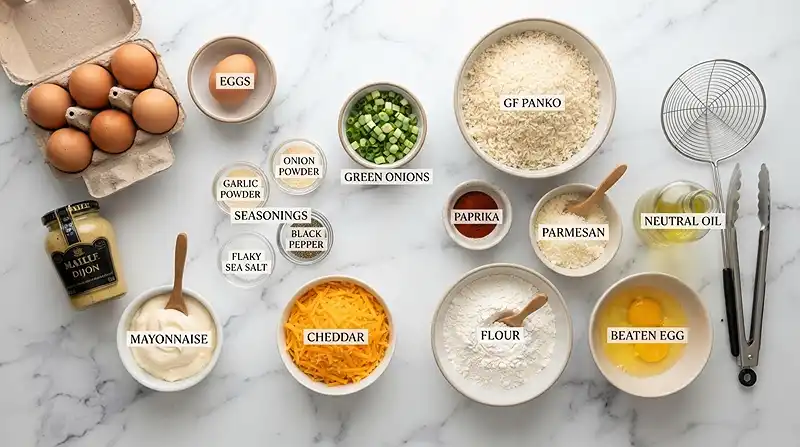
This recipe makes 8 egg balls. Keep quantities exactly as listed — the ratio of mayo to mustard to cheese is calibrated for a filling that’s rich but holds its shape.
Egg Balls
| Ingredient | Amount | Notes |
|---|---|---|
| Large eggs | 6 | Hard-boiled; 4 chopped into filling, 2 used as centers |
| Mayonnaise | ¼ cup | Full-fat for best binding and richness |
| Dijon mustard | 1 tablespoon | Adds tang and depth to the filling |
| Finely chopped green onions | 2 tablespoons | Use both white and green parts |
| Garlic powder | ¼ teaspoon | |
| Onion powder | ¼ teaspoon | |
| Salt | ¼ teaspoon | |
| Black pepper | ¼ teaspoon | |
| Shredded cheddar cheese | ½ cup | Freshly shredded melts more evenly than pre-shredded |
Crispy Gluten-Free Panko Crust
| Ingredient | Amount | Notes |
|---|---|---|
| Gluten-free panko breadcrumbs | 1 cup | Must be labeled certified gluten-free |
| Paprika | ½ teaspoon | Adds color and mild sweetness |
| Garlic powder | ½ teaspoon | |
| Salt | ¼ teaspoon | |
| Grated Parmesan cheese | 2 tablespoons | Adds umami and helps the crust brown deeply |
| Large egg, beaten | 1 | Used as the egg wash for dredging |
| Gluten-free all-purpose flour | ¼ cup | First dredge layer; creates surface for egg wash to grip |
For Frying
- Neutral oil such as avocado or canola oil — enough to fill about 1 inch in the skillet
Instructions
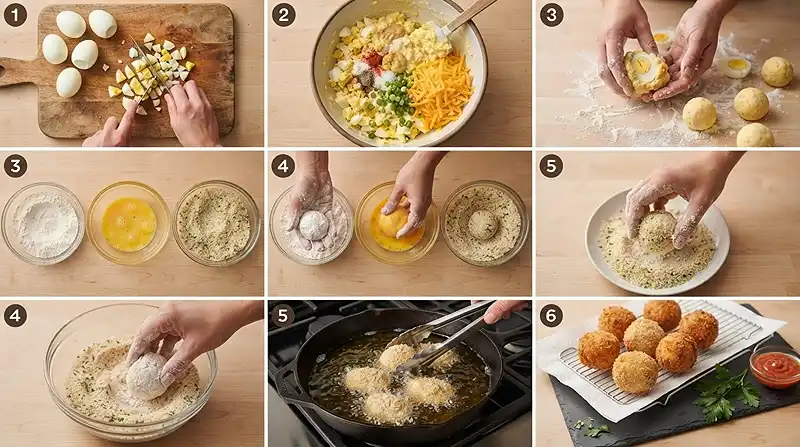
Step 1: Hard-Boil the Eggs
Place 6 eggs in a saucepan and cover with cold water. Bring to a boil, then reduce to a gentle boil and cook for 10–11 minutes. A gentle boil — not a rolling one — keeps the whites tender rather than rubbery.
Step 2: Cool and Peel
Transfer the eggs immediately to an ice bath and let them cool completely. Peel and pat them dry with paper towels. That drying step is critical — any surface moisture will prevent the flour from adhering cleanly.
Step 3: Make the Filling
In a bowl, combine the mayonnaise, Dijon mustard, green onions, garlic powder, onion powder, salt, pepper, and shredded cheddar. Stir until everything is evenly incorporated and the mixture smells deeply savory.
Carefully chop 4 of the hard-boiled eggs into small pieces and fold them into the mixture. Go gently here — you want distinct pieces of egg in the filling, not mush.
Step 4: Form the Egg Balls
Take the remaining 2 hard-boiled eggs and cut each in half. Gently shape some of the filling mixture around each half, pressing it into a smooth ball around the egg center to create 4 larger egg balls.
Alternatively, divide the full filling mixture into 8 equal portions and roll each into a ball without a hard-boiled center — great for a snack-size option. Either way, refrigerate the formed balls for 15 minutes to firm them up before dredging.
Step 5: Set Up the Dredging Station
Set up three shallow bowls in order: one with the gluten-free all-purpose flour, one with the beaten raw egg, and one with the gluten-free panko mixed with paprika, garlic powder, salt, and Parmesan. Working with one bowl at a time prevents cross-contamination between layers and keeps the coating clean.
Step 6: Coat the Egg Balls
Roll each egg ball lightly in the gluten-free flour to coat the entire surface. Dip it into the beaten egg, letting the excess drip off. Then roll it generously in the seasoned panko, pressing the crumbs firmly onto the surface with your palm so they embed and won’t shed during frying.
Pro Tip: For an even thicker crust, repeat the egg-wash and panko steps a second time. Double-coating gives you that restaurant-style crunch.
Step 7: Fry Until Golden
Heat about 1 inch of neutral oil in a skillet over medium heat to approximately 350°F (175°C). Use a thermometer if you have one — guessing oil temperature is the most common reason for a greasy crust.
Carefully place the coated egg balls into the hot oil. Fry in batches for about 2–3 minutes per side, turning gently, until the panko crust is deeply golden and crisp. Don’t crowd the pan — overcrowding drops the oil temperature and results in steaming rather than frying.
Step 8: Drain and Rest
Transfer to a paper towel-lined plate or wire rack to drain. Let cool for a few minutes before serving — the filling holds its shape better once it’s had a moment to settle.
Air Fryer Option
For a lighter version, spray the coated egg balls generously with cooking spray and air fry at 375°F (190°C) for 8–12 minutes, turning halfway through, until crisp and golden. The crust won’t be quite as shatteringly crunchy as the pan-fried version, but it’s genuinely satisfying. Check out this gluten-free air fryer Japanese cheesecake for more proof that the air fryer handles delicate textures beautifully.
Make It Your Own
You know… one of the things I love about this recipe is how flexible the filling is. Swap the cheddar for pepper jack if you want a little heat — the spice plays really well against the richness of the mayo-based filling.
For a dairy-free version, use a plant-based mayo (Hellmann’s vegan works well) and skip the Parmesan and cheddar entirely. Add an extra tablespoon of Dijon and a handful of finely diced jalapeños to compensate for the depth the cheese would have contributed.
Want a smoky variation? Replace the paprika with smoked paprika and add ½ teaspoon of chipotle powder to the panko mixture. The result is a crispy gluten-free egg ball with a crust that smells like it came off a backyard grill.
If you’re making these for a crowd and want to skip the frying entirely, the air fryer option outlined in the instructions works well as an easy gluten-free baked egg ball version. Spray generously and don’t skip the flip at the halfway point — even browning on all sides is what creates that satisfying crunch without oil.
Common Problems & Solutions
Problem: The Panko Coating Falls Off During Frying
The fix is almost always in the dredge. If you skip the flour layer or don’t press the panko on firmly, the coating separates from the surface the moment it hits hot oil. Go back to Step 6 and press — really press — those crumbs in with your palm before frying.
Chilling the coated egg balls in the fridge for 15–20 minutes before frying also helps the layers bond and reduces falloff significantly.
Problem: The Crust is Pale and Greasy, Not Golden
Solution: the oil wasn’t hot enough. Man, oh man… this is the most common frying mistake, and it’s easy to fix with a thermometer. Oil that’s below 325°F absorbs into the coating instead of crisping it.
According to food science research on frying temperatures from Serious Eats, maintaining consistent oil temperature between batches is what separates a crispy crust from a greasy one. Let the oil come back to temperature between each batch.
Problem: The Egg Balls Fall Apart When Forming
Solution: the filling is too warm or too wet. Refrigerate the formed balls for at least 15 minutes before dredging — cold filling holds together far better than room-temperature filling when you press the coating on.
If the mixture still feels loose, add a tablespoon of gluten-free all-purpose flour directly into the filling. According to the Celiac Disease Foundation’s guide to gluten-free binders, certified GF starches and flours provide the same structural binding in savory applications as wheat flour does.
Problem: The Inside is Cold After the Crust is Already Golden
Solution: the egg balls were too large, or the oil was too hot. If you’re going with the larger 4-ball version with a hard-boiled egg center, reduce the heat slightly to 325°F and extend the frying time by an additional minute per side.
The filling doesn’t need to “cook” — it just needs to warm through — so patience at a slightly lower temperature is always the right call here.
Storage & Meal Prep
| Method | Duration | Notes |
|---|---|---|
| Counter | Up to 2 hours | Safe for serving at room temp; beyond that, refrigerate |
| Fridge | 3–4 days | Airtight container; crust softens but flavor holds |
| Freezer | Up to 1 month | Freeze before frying for best results; fry from frozen |
To reheat, use an air fryer at 350°F for 4–5 minutes — it revives the crust far better than a microwave, which makes panko soggy. The oven at 375°F on a wire rack also works well.
For meal prep, form and coat the egg balls, freeze them on a parchment-lined sheet, then transfer to a zip-lock bag. Fry directly from frozen, adding 2–3 extra minutes per side. This is one of those no-waste strategies that pays off every time.
Fried Panko Crust Egg Balls FAQs
Can I bake these instead of frying them?
Yes, you can bake the coated egg balls on a wire rack set over a baking sheet at 425°F (220°C) for 18–22 minutes, flipping once halfway through. Spray generously with cooking spray before baking. The crust won’t be as deeply golden as the pan-fried version, but it’s a solid lighter option.
How do I keep the panko crust from getting soggy after frying?
Drain fried egg balls on a wire rack instead of paper towels. A rack allows air to circulate underneath and keeps steam from softening the bottom crust. Paper towels trap steam directly under the food, which is the main cause of a soggy base.
What’s the best gluten-free panko brand for frying?
Ian’s, 4C, and Kikkoman all make certified gluten-free panko that holds up well in hot oil. Look for panko that is labeled certified gluten-free on the package, not just wheat-free, to ensure safe processing for anyone with celiac disease or serious gluten sensitivity.
Why did my egg balls crack when I was forming them?
The filling was likely too cold or too compact. If the mixture has been refrigerated for more than an hour, let it sit at room temperature for 5 minutes before shaping. Work with slightly damp hands to prevent sticking, and shape gently rather than pressing hard.
Can I make these ahead of time for a party?
Yes, and it is actually recommended. Form and coat the egg balls up to 8 hours ahead and refrigerate uncovered on a parchment-lined tray. Fry just before serving for the crispiest crust. You can also fry them 30 minutes ahead and reheat in an air fryer at 350°F for 3–4 minutes right before guests arrive.
Serving Suggestions
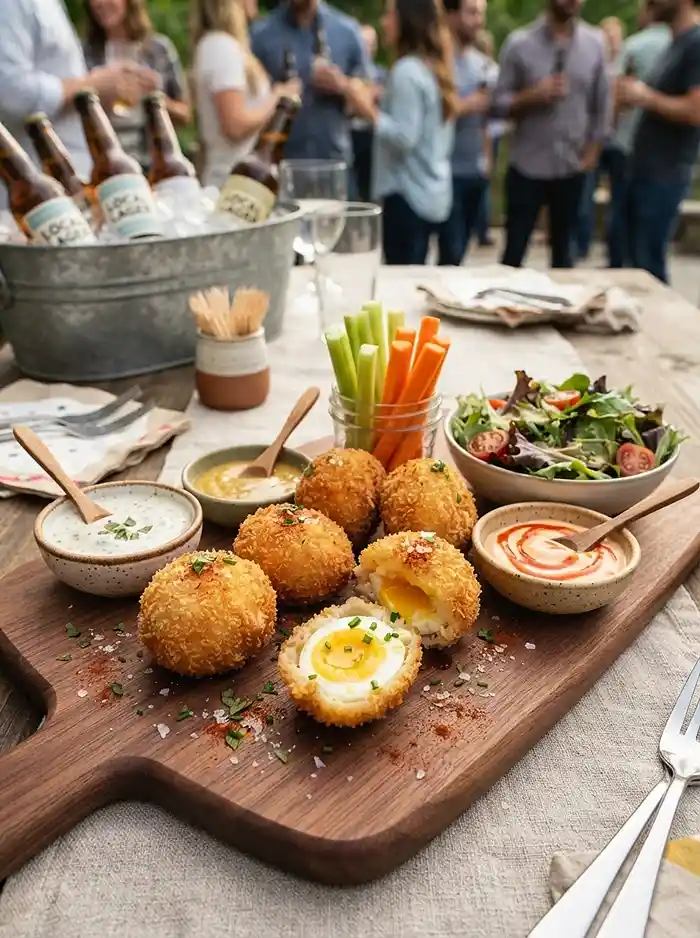
These egg balls are built for dipping — serve them alongside a bowl of sriracha mayo, classic ranch, or a honey-mustard sauce made from whatever Dijon is left in the jar. The creamy, tangy dips cut through the richness of the crust beautifully.
They also shine as part of a larger Easter brunch spread, where their portable size and finger-food format make them easier to serve than a traditional deviled egg platter. Set them out alongside a brown butter cream cheese frosted dessert and a gluten-free whipped mascarpone treat for a full gluten-free spread that impresses without stress.
Conclusion
Try these gluten-free panko crust egg balls and let me know in the comments what dipping sauce you went with — I’m always collecting new ideas from readers who make this their own.
If they disappear at your party the way they do at mine, save this to Pinterest so other gluten-free cooks can find it when they need a crowd-pleasing appetizer that actually delivers on crunch.
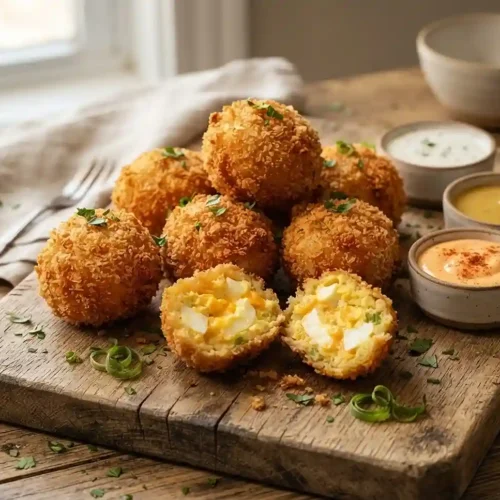
Gluten-Free Fried Panko Crust Egg Balls
Equipment
- Saucepan
- Large bowl
- Shallow Bowls
- Skillet
- Cooking thermometer
- Paper towels
- Wire rack
- Air fryer
Ingredients
Egg Balls
- 6 Large eggs Hard-boiled; 4 chopped into filling, 2 used as centers
- ¼ cup Mayonnaise Full-fat for best binding and richness
- 1 tablespoon Dijon mustard Adds tang and depth to the filling
- 2 tablespoons Finely chopped green onions Use both white and green parts
- ¼ teaspoon Garlic powder
- ¼ teaspoon Onion powder
- ¼ teaspoon Salt
- ¼ teaspoon Black pepper
- ½ cup Shredded cheddar cheese Freshly shredded melts more evenly than pre-shredded
Crispy Gluten-Free Panko Crust
- 1 cup Gluten-free panko breadcrumbs Must be labeled certified gluten-free
- ½ teaspoon Paprika Adds color and mild sweetness
- ½ teaspoon Garlic powder
- ¼ teaspoon Salt
- 2 tablespoons Grated Parmesan cheese Adds umami and helps the crust brown deeply
- 1 large Egg Beaten and used as the egg wash for dredging
- ¼ cup Gluten-free all-purpose flour First dredge layer; creates a surface for the egg wash to grip
For Frying
- as needed Neutral oil Avocado or canola oil; enough to fill about 1 inch in the skillet
Instructions
- Place 6 eggs in a saucepan and cover with cold water. Bring to a boil, then reduce to a gentle boil and cook for 10–11 minutes.
- Transfer the eggs immediately to an ice bath and let them cool completely. Peel and pat them completely dry with paper towels.
- In a bowl, combine the mayonnaise, Dijon mustard, green onions, garlic powder, onion powder, salt, black pepper, and shredded cheddar. Stir until evenly incorporated.
- Chop 4 of the hard-boiled eggs into small pieces and gently fold them into the mayonnaise mixture, keeping distinct pieces of egg rather than mashing them.
- Cut the remaining 2 hard-boiled eggs in half. Shape some of the filling mixture around each half, pressing it into a smooth ball around the egg center to create 4 larger egg balls. Alternatively, divide the filling into 8 portions and roll each into a ball without a hard-boiled center.
- Refrigerate the formed egg balls for 15 minutes to firm them before dredging.
- Set up three shallow bowls: one with gluten-free all-purpose flour, one with the beaten egg, and one with gluten-free panko mixed with paprika, garlic powder, salt, and Parmesan.
- Roll each egg ball lightly in the gluten-free flour, dip it into the beaten egg, then roll generously in the seasoned panko. Press the crumbs firmly onto the surface so they adhere well.
- For an extra-thick crust, repeat the egg-wash and panko steps a second time.
- Heat about 1 inch of neutral oil in a skillet over medium heat to approximately 350°F (175°C).
- Carefully place the coated egg balls into the hot oil and fry in batches for about 2–3 minutes per side, turning gently, until deeply golden and crisp. Avoid overcrowding the pan.
- Transfer the fried egg balls to a wire rack or paper towel-lined plate to drain. Let them cool for a few minutes before serving.
- For the air fryer option, spray the coated egg balls generously with cooking spray and air fry at 375°F (190°C) for 8–12 minutes, turning halfway through, until crisp and golden.