Gluten-Free Oatmeal Creme Pie Cake
Make this gluten-free oatmeal creme pie cake with layers of marshmallow filling and buttercream. Full ingredients, steps, and storage tips inside.
My daughter asked for “the cookie cake with the fluffy middle” for her birthday two years ago, and I panicked a little. She meant an oatmeal creme pie, blown up to cake size, and at the time I had zero idea if gluten-free cake flour could even hold up to three stacked layers.
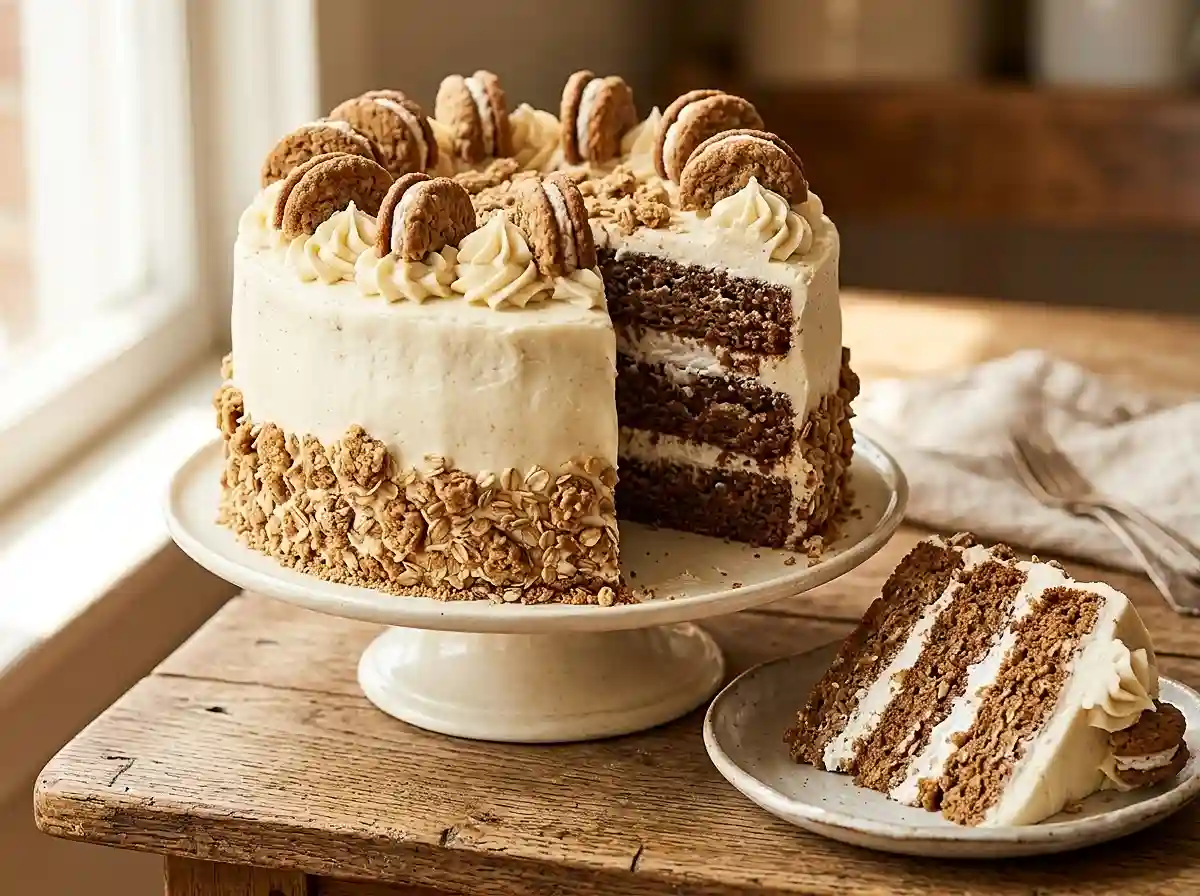
Well, it turns out this gluten-free oatmeal creme pie cake is one of the most forgiving layer cakes I’ve built. The ground oats add a soft, cinnamon-warm crumb, and the marshmallow filling tucked between buttery vanilla layers tastes exactly like the lunchbox treat you remember.
Table of Contents
Why You’ll Love This Gluten-Free Oatmeal Creme Pie Cake
- The ground oats and cinnamon give every bite a soft, tender crumb with real oatmeal cookie flavor.
- Beginner-friendly: the layers come together with a stand mixer and basic pans, no special equipment required.
- The marshmallow creme filling can be made nut-free and is easy to adjust for dairy-sensitive eaters with simple swaps.
- It’s the perfect centerpiece for birthdays, potlucks, or a Fourth of July dessert table when you want something more special than sheet cake.
The Secret to Perfect Gluten-Free Oatmeal Creme Pie Cake
Grinding the oats into small pieces rather than leaving them whole is what keeps this cake tender instead of chewy. Whole rolled oats pull moisture away from the batter and can leave gritty pockets, but finely ground oats blend right into the crumb.
- Using a gluten-free 1:1 flour blend with xanthan gum already built in gives the batter the structure gluten normally provides, so the layers hold together when stacked.
- Room-temperature butter, eggs, sour cream, and milk emulsify smoothly into the batter, which prevents the greasy or dense texture that cold ingredients can cause.
- Beating the butter and sugars for a full two minutes builds air pockets that keep the crumb light, since gluten-free flour doesn’t trap air the way wheat flour does.
- A buttercream dam around each layer keeps the soft marshmallow filling from oozing out the sides while the cake chills.
Ingredients
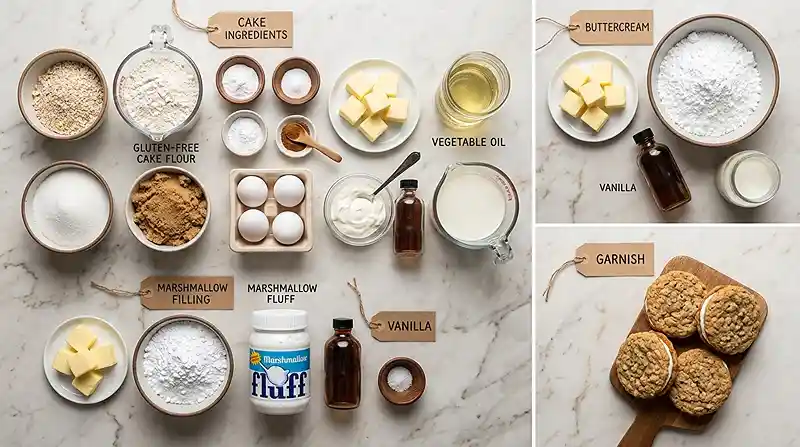
Brown Sugar Oatmeal Cake
- ¾ cup certified gluten-free old-fashioned rolled oats (71 g), ground into small pieces
- 1 ¾ cups gluten-free 1:1 cake flour blend (186 g), preferably one containing xanthan gum
- 1 ½ teaspoons baking powder
- ¼ teaspoon baking soda
- 1 teaspoon ground cinnamon
- ½ teaspoon salt
- ½ cup unsalted butter (113 g), room temperature
- 2 tablespoons vegetable oil (30 ml)
- ½ cup granulated sugar (100 g)
- ½ cup packed brown sugar (100 g)
- 2 large eggs, room temperature
- ¼ cup sour cream (60 g), room temperature
- 2 teaspoons pure vanilla extract
- 1 cup whole milk (240 ml), room temperature
Marshmallow Creme Filling
- ½ cup unsalted butter (113 g), room temperature
- 1 cup powdered sugar (105 g)
- 7 ounces gluten-free marshmallow creme/fluff (198 g)
- 1 teaspoon pure vanilla extract
- 1 pinch salt
Vanilla Buttercream
- 1 cup unsalted butter (226 g), room temperature
- 3 ½ cups powdered sugar (420 g)
- 2 teaspoons pure vanilla extract
- 2 tablespoons whole milk
- 1 pinch salt
Gluten-Free Garnish
- Gluten-free oatmeal creme pies, quartered, for decorating
- Gluten-free oatmeal creme pies, crumbled, for the bottom of the cake
Instructions
Bake the Cake Layers
- Preheat the oven to 350°F (175°C). Prepare three 6-inch cake pans or two 8-inch pans with baking spray and parchment circles.
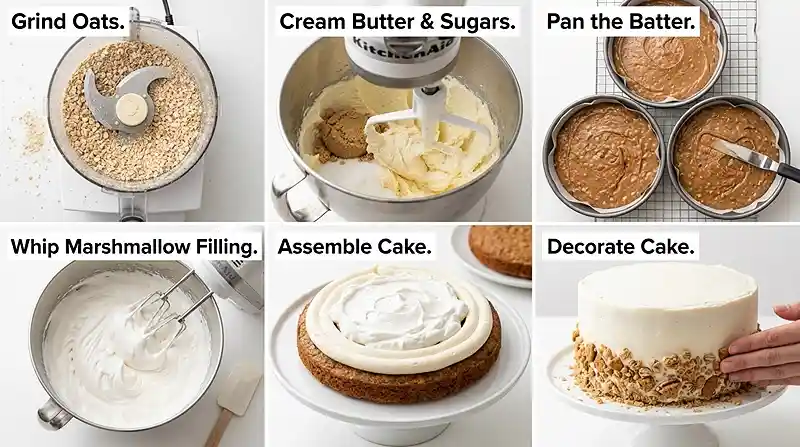
- Pulse the certified gluten-free oats in a food processor until finely broken down, almost like a coarse flour.
- Whisk together the ground oats, gluten-free cake flour, baking powder, baking soda, cinnamon, and salt in a medium bowl.
- Beat the room-temperature butter on high for about 2 minutes until fluffy and pale. Add the vegetable oil, granulated sugar, and brown sugar, then beat for another 2 minutes until the mixture looks light and ribbony.
- Add the eggs one at a time, mixing well after each addition. Add the sour cream and vanilla and beat for about 1 minute until fully emulsified. Pro tip: if the batter looks slightly curdled here, keep mixing; it will smooth out once the dry ingredients go in.
- With the mixer on low, add the dry ingredients in two additions. Slowly stream in the milk and mix just until combined. Do not overmix, or the crumb will turn dense instead of tender.
- Divide the batter evenly between the prepared pans. Bake for 30 to 35 minutes, or until a toothpick inserted in the center comes out clean and the edges turn a light golden brown.
- Cool the layers in the pans for 5 minutes, then transfer to a wire rack and cool completely before filling. A warm layer will melt the marshmallow filling right out.
Make the Fillings
- For the marshmallow filling, whip the butter for about 5 minutes until pale and creamy. Add the powdered sugar and mix until fully combined.
- Add the gluten-free marshmallow creme, vanilla, and salt. Beat until smooth and fluffy, scraping the bowl once or twice.
- For the buttercream, beat the butter for about 7 minutes until very pale and fluffy, almost white in color. Gradually add the powdered sugar, followed by the vanilla, milk, and salt.
- Beat the buttercream until silky and pipeable, with a nutty aroma of vanilla coming through. Pro tip: if it looks grainy, keep beating; gluten-free buttercream sometimes needs an extra minute to fully smooth out.
Assemble the Cake
- Once the cake layers are completely cool, level them with a serrated knife if necessary.
- Pipe a buttercream dam around the edge of the first layer and fill the center with half of the marshmallow filling. Repeat with the second layer and the remaining filling.
- Place the final cake layer on top. Crumb coat the entire cake with a thin layer of buttercream and refrigerate for at least 20 minutes to set.
- Apply the final buttercream finish, smoothing the sides and top. Press the crumbled gluten-free oatmeal creme pie pieces onto the bottom third of the cake.
- Pipe buttercream swirls around the top edge and decorate with the quartered gluten-free oatmeal creme pies.
Make It Your Own
Swap the whole milk in the cake batter for full-fat oat milk if you need this dairy-free at the batter stage, since oat milk carries enough fat to keep the crumb moist. The butter in the filling and buttercream still needs a plant-based stick butter substitute to hold its structure.
Man, oh man, if you want a deeper flavor, try browning the butter for the buttercream before it cools back to room temperature. It adds a toasty, almost caramel note that pairs beautifully with the cinnamon in the cake layers.
For a homemade oatmeal cake with less sugar overall, cut the granulated sugar in the cake batter to ⅓ cup instead of ½ cup. The cake will taste slightly less sweet, but the marshmallow filling and buttercream still bring plenty of sweetness on their own.
If you can’t find gluten-free marshmallow creme locally, you can make a stabilized version by whipping gluten-free mini marshmallows with a splash of milk over low heat until smooth, then cooling before use.
Common Problems & Solutions
Problem: My cake layers turned out gummy in the middle. Solution: bake a few extra minutes and check with both a toothpick and a gentle poke of the center. Gluten-free batters can look golden on top while the interior is still underbaked, since the starches need longer to fully set than wheat flour does.
Problem: The layers crumbled apart when I tried to stack them. Solution: make sure your gluten-free flour blend contains xanthan gum, and let the layers cool completely before handling. Warm gluten-free cake is far more fragile than warm wheat cake, so patience here really does pay off.
Problem: My buttercream looks greasy or separated. Solution: your butter or milk was likely too warm. Chill the bowl for 10 minutes, then beat again on high speed until the mixture comes back together and looks smooth.
Problem: The cake tastes dry the next day. Solution: brush each layer with a tablespoon of milk before filling, and store the finished cake tightly covered. Gluten-free cakes lose moisture faster than wheat cakes because the flour blends absorb liquid differently, so that light brushing step makes a real difference.
Storage & Meal Prep
| Method | Duration | Notes |
|---|---|---|
| Counter | 2-3 days | Airtight container |
| Fridge | 5-7 days | Bring to room temp |
| Freezer | 2-3 months | Wrap individually |
Let refrigerated or frozen slices sit at room temperature for about 30 minutes before serving, since cold buttercream can taste dull and waxy. Leftover crumbs from trimming the layers freeze well and make a great topping for gluten-free ice cream, so nothing has to go to waste.
Your Questions Answered
Can I make this cake ahead of time?
Yes, bake the layers up to 2 days ahead and store them wrapped at room temperature, or freeze them for up to a month before filling and frosting.
How do I know when the cake layers are fully baked?
Check for a clean toothpick and lightly golden edges. Press the center gently; it should spring back rather than leave a dent.
What’s the best gluten-free flour blend for this recipe?
A 1:1 cake flour blend that already contains xanthan gum works best since it mimics the structure wheat flour normally provides.
Why did my marshmallow filling turn runny?
The butter was likely too soft when the marshmallow creme was added. Rewhip on high for another minute or chill the filling for 10 minutes before piping.
Can I use regular rolled oats instead of certified gluten-free ones?
No, standard oats are frequently cross-contaminated with wheat. Use certified gluten-free oats if celiac disease or gluten sensitivity is a concern.
Serving Suggestions
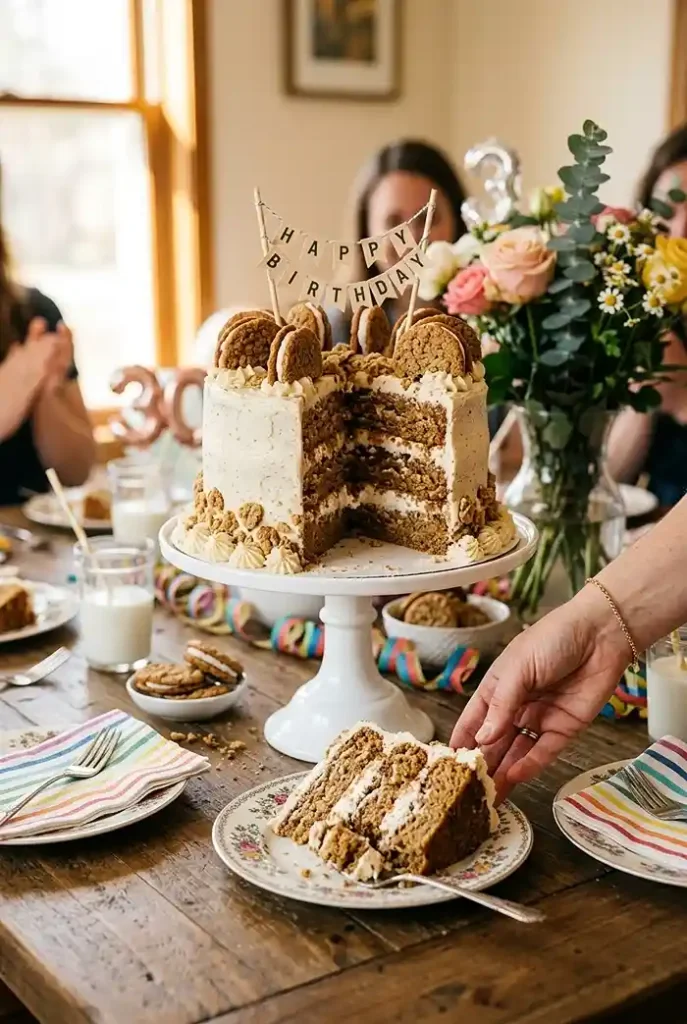
This cake is rich enough to stand on its own, but a scoop of vanilla ice cream alongside a slice makes it feel extra festive for a birthday table.
It also holds up well next to a batch of my gluten-free whipped mascarpone frosting if you want to swap toppings for a different celebration.
I’ve served this at more than one Fourth of July cookout, and it disappears just as fast as the wheat-based desserts on the table.
If you’re building out a full gluten-free dessert spread, my air fryer Japanese cheesecake is another crowd-pleaser worth adding to the table.
Give this gluten-free oatmeal creme pie cake a try this weekend, and come back to let me know how your layers turned out. I’d love to see your version on Pinterest, and if you tweak anything about the filling or flour blend, drop a comment so other readers can learn from it too.
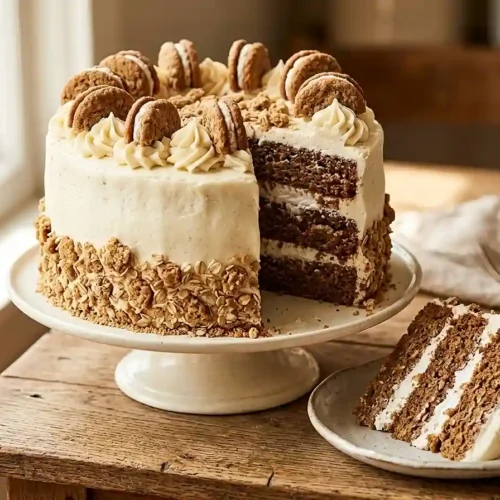
Gluten-Free Oatmeal Creme Pie Cake
Equipment
- Stand mixer
- Food processor
- Three 6-inch cake pans or two 8-inch cake pans
- Parchment paper
- Wire rack
- Serrated knife
- Piping bag
Ingredients
Brown Sugar Oatmeal Cake
- ¾ cup certified gluten-free old-fashioned rolled oats 71 g, ground into small pieces
- 1 ¾ cups gluten-free 1:1 cake flour blend 186 g, preferably one containing xanthan gum
- 1 ½ teaspoons baking powder
- ¼ teaspoon baking soda
- 1 teaspoon ground cinnamon
- ½ teaspoon salt
- ½ cup unsalted butter 113 g, room temperature
- 2 tablespoons vegetable oil 30 ml
- ½ cup granulated sugar 100 g
- ½ cup packed brown sugar 100 g
- 2 large eggs Room temperature
- ¼ cup sour cream 60 g, room temperature
- 2 teaspoons pure vanilla extract
- 1 cup whole milk 240 ml, room temperature
Marshmallow Creme Filling
- ½ cup unsalted butter 113 g, room temperature
- 1 cup powdered sugar 105 g
- 7 ounces gluten-free marshmallow creme or fluff 198 g
- 1 teaspoon pure vanilla extract
- 1 pinch salt
Vanilla Buttercream
- 1 cup unsalted butter 226 g, room temperature
- 3 ½ cups powdered sugar 420 g
- 2 teaspoons pure vanilla extract
- 2 tablespoons whole milk
- 1 pinch salt
Gluten-Free Garnish
- gluten-free oatmeal creme pies Quartered, for decorating
- gluten-free oatmeal creme pies Crumbled, for the bottom of the cake
Instructions
- Preheat the oven to 350°F (175°C). Prepare three 6-inch cake pans or two 8-inch pans with baking spray and parchment circles.
- Pulse the certified gluten-free oats in a food processor until finely broken down, almost like a coarse flour.
- Whisk together the ground oats, gluten-free cake flour, baking powder, baking soda, cinnamon, and salt in a medium bowl.
- Beat the room-temperature butter on high for about 2 minutes until fluffy and pale. Add the vegetable oil, granulated sugar, and brown sugar, then beat for another 2 minutes until light and ribbony.
- Add the eggs one at a time, mixing well after each addition. Add the sour cream and vanilla and beat for about 1 minute until fully emulsified.
- With the mixer on low, add the dry ingredients in two additions. Slowly stream in the milk and mix just until combined. Do not overmix.
- Divide the batter evenly between the prepared pans. Bake for 30 to 35 minutes, or until a toothpick inserted in the center comes out clean and the edges are lightly golden.
- Cool the layers in the pans for 5 minutes, then transfer them to a wire rack and cool completely before filling.
- For the marshmallow filling, whip the butter for about 5 minutes until pale and creamy. Add the powdered sugar and mix until fully combined.
- Add the gluten-free marshmallow creme, vanilla, and salt. Beat until smooth and fluffy, scraping the bowl once or twice.
- For the buttercream, beat the butter for about 7 minutes until very pale and fluffy. Gradually add the powdered sugar, followed by the vanilla, milk, and salt.
- Beat the buttercream until silky and pipeable. If it looks grainy, continue beating for an extra minute until smooth.
- Once the cake layers are completely cool, level them with a serrated knife if necessary.
- Pipe a buttercream dam around the edge of the first layer and fill the center with half of the marshmallow filling. Repeat with the second layer and remaining filling.
- Place the final cake layer on top. Crumb coat the entire cake with a thin layer of buttercream and refrigerate for at least 20 minutes to set.
- Apply the final buttercream finish, smoothing the sides and top. Press crumbled gluten-free oatmeal creme pie pieces onto the bottom third of the cake.
- Pipe buttercream swirls around the top edge and decorate with quartered gluten-free oatmeal creme pies.