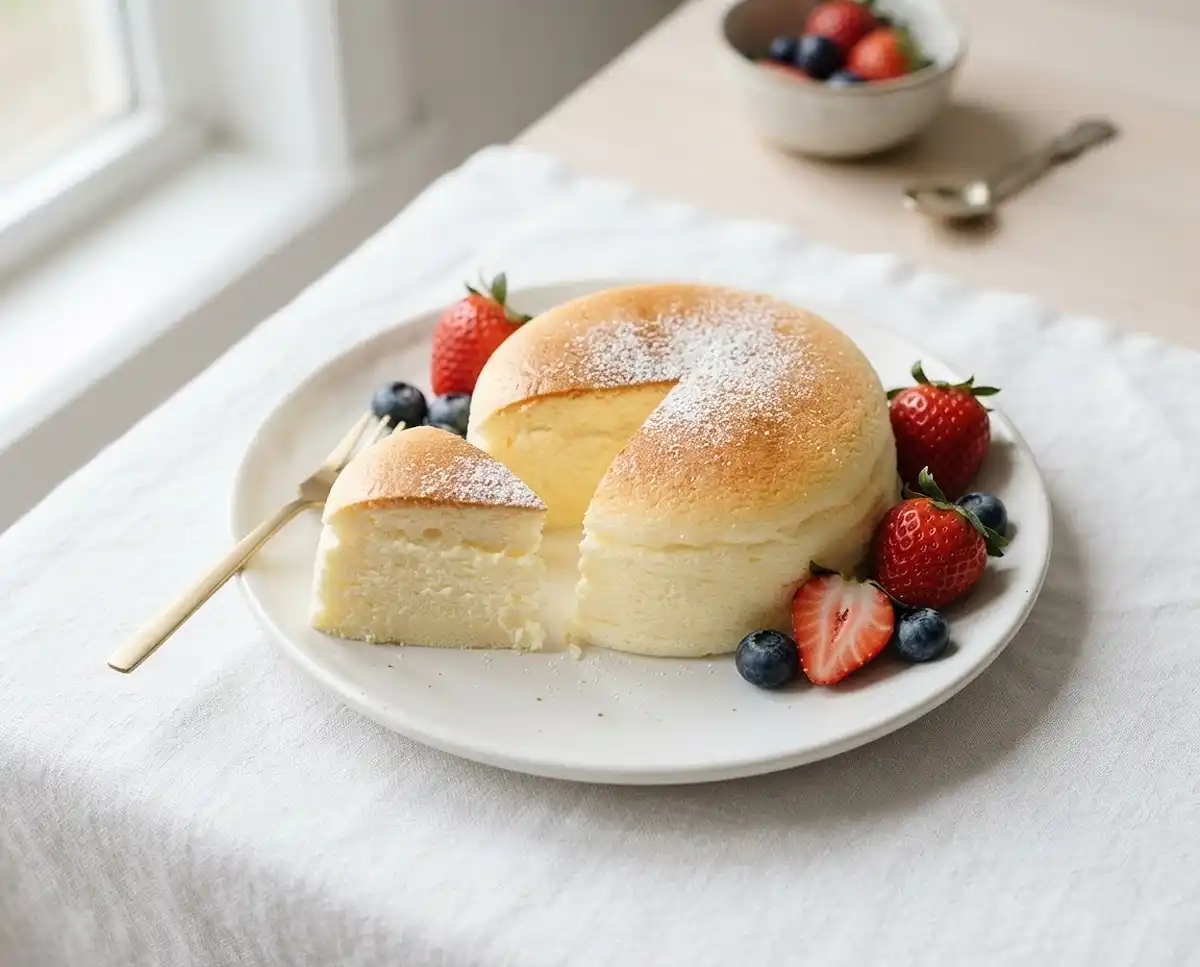
Air Fryer Japanese Cheesecake
Make Air Fryer Japanese Cheesecake with 7 simple gluten-free ingredients for a soft, jiggly soufflé-style dessert. Follow the step-by-step guide for an easy, naturally flourless cheesecake.
The first time I attempted a Japanese soufflé cheesecake, I pulled a sad, sunken puck from the oven and nearly gave up on the whole idea. That was five years ago, and now I make gluten-free air fryer Japanese cheesecake so often my kids ask for it instead of birthday cake.
What finally changed everything? Ditching the water bath and trusting my air fryer. The gentle, even heat does something a conventional oven struggles to replicate — it cradles those whipped egg whites without shocking them.
So if you’ve been nervous about tackling this iconic dessert without gluten, I want you to know: this version is genuinely approachable. Is it a little more technique-forward than dropping cookies onto a sheet pan? Sure. But the payoff — that signature jiggle, that cloud-like bite — is absolutely worth it.
Why You’ll Love This Gluten-Free Japanese Cheesecake
- Naturally flourless: certified gluten-free cornstarch replaces flour entirely, so there’s no specialty blend needed.
- Beginner-friendly technique: the two-temperature air fryer method is more forgiving than a traditional oven bake.
- Light as a cloud: the texture lands somewhere between a classic cheesecake and a chiffon cake — billowy, delicate, and barely sweet.
- Make-ahead friendly: it slices cleanest the next day after an overnight chill, making it ideal for dinner parties or holiday prep.
The Secret to Perfect Gluten-Free Air Fryer Japanese Cheesecake
- Room temperature everything: cold cream cheese causes lumps that no amount of mixing can fully fix. Give all your dairy at least 30 minutes on the counter.
- Soft-to-medium peaks only: overwhipped egg whites turn stiff and grainy, which tears the batter during folding and kills the rise. Stop when peaks curl gently.
- Fold in thirds: lightening the cream cheese base with the first third of egg whites before adding the rest prevents deflation and keeps the batter airy.
- Gradual cooling is non-negotiable: leaving the cheesecake inside the off air fryer for 10–15 minutes prevents the sudden temperature drop that causes cracking and collapse.
Table of Contents
Ingredients
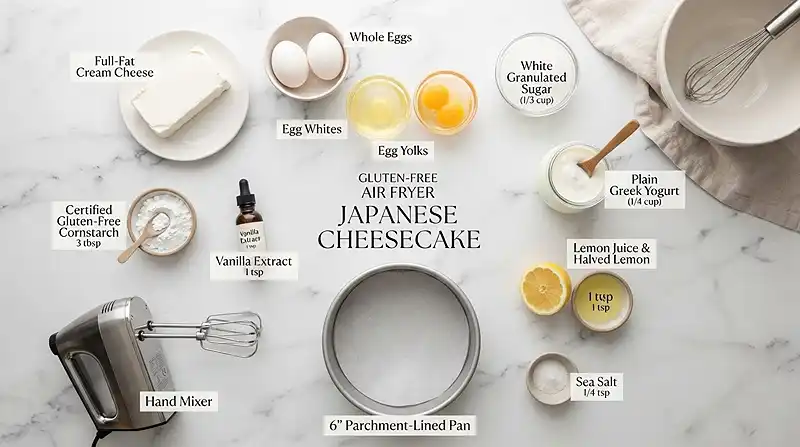
This recipe makes 6–8 servings using one 6-inch round pan. Keep every quantity exactly as listed — the balance between egg whites and cornstarch is precise.
| Ingredient | Amount | Notes |
|---|---|---|
| Full-fat cream cheese, softened | 8 oz (226 g) | Must be room temperature |
| Large eggs, separated | 2 | Room temperature; yolks and whites used separately |
| Granulated sugar | ¼ cup (50 g) | Added to egg whites for meringue |
| Plain Greek yogurt or sour cream | ½ cup (120 g) | Room temperature; full-fat preferred |
| Certified gluten-free cornstarch | 2 tablespoons | Check label — must say certified GF |
| Vanilla extract | 1 teaspoon | Pure vanilla, not imitation |
| Fresh lemon juice | 1 tablespoon | Brightens flavor and stabilizes egg whites |
| Salt | Pinch | Enhances overall flavor balance |
Instructions
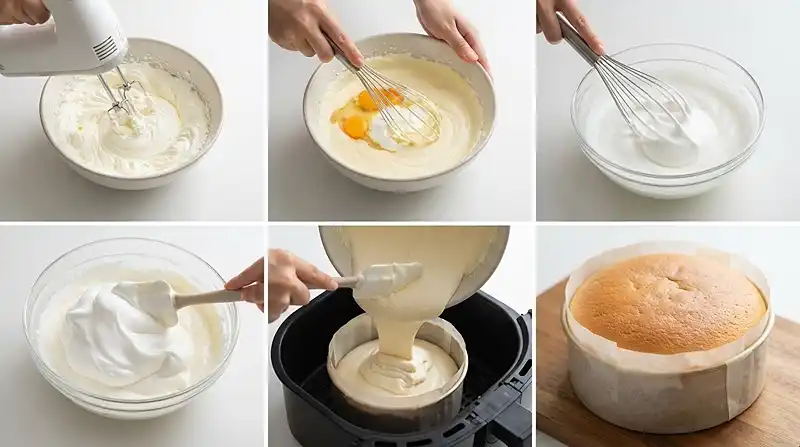
Step 1: Bring Ingredients to Room Temperature
Let the cream cheese, eggs, and Greek yogurt sit at room temperature for at least 30 minutes. This is the single most important prep step — cold cream cheese will stay lumpy no matter how long you mix it.
Step 2: Make the Cream Cheese Base
In a medium bowl, beat the softened cream cheese until it’s completely smooth and free of lumps. Take your time here; you want it as silky as possible before adding anything else.
Add the egg yolks, Greek yogurt, vanilla extract, lemon juice, and salt. Mix until the batter is smooth and creamy, with no streaks of yolk visible.
Step 3: Add the Cornstarch
Sift in the certified gluten-free cornstarch directly over the cream cheese mixture. Mix gently until no dry streaks remain. Sifting prevents clumps that could create dense pockets in the finished cheesecake.
Step 4: Whip the Egg Whites
In a separate clean bowl — any trace of fat will prevent the whites from whipping — beat the egg whites until foamy. Gradually add the granulated sugar and continue beating until you have soft to medium peaks.
The peaks should curl gently when you lift the beater. Don’t overwhip; stiff, dry whites are the number one reason this cheesecake fails. Well… I learned that the hard way after a very sad, rubbery first batch.
Step 5: Fold the Batter Together
Gently fold about one-third of the whipped egg whites into the cream cheese mixture using a rubber spatula and slow sweeping motions. This lightens the base and makes folding in the rest much easier.
Add the remaining egg whites in two more additions, folding just until combined after each. You want to preserve as much air as possible — a few streaks are fine. Overmixing is the enemy here.
Step 6: Prepare the Pan
Line a 6-inch round cake pan that fits comfortably inside your air fryer basket with parchment paper. Lightly grease the sides. A proper fit matters — if the pan is too large, it will block airflow and bake unevenly.
Step 7: Fill the Pan
Pour the batter into the prepared pan. Gently tap the pan once or twice on the counter to release any large air bubbles trapped near the bottom.
Step 8: First Bake at 300°F
Preheat the air fryer to 300°F (150°C) for about 3 minutes. Place the cake pan in the basket and cook at 300°F for 15 minutes. The top will start to set and turn pale gold around the edges.
Step 9: Finish at Lower Heat
Reduce the temperature to 265°F (130°C) and cook for another 20–25 minutes. The cheesecake is done when the top is lightly golden and the center has a gentle jiggle — like Jell-O, not liquid. A fully set center means it’s overbaked.
Step 10: Cool Gradually Inside the Air Fryer
Turn off the air fryer and leave the cheesecake inside with the basket closed for 10–15 minutes. This gradual cooling is the key to preventing dramatic collapse or cracking on top.
Step 11: Chill Before Serving
Remove the pan and let the cheesecake cool completely at room temperature. Then refrigerate for at least 2–3 hours — or overnight for the cleanest slices and the most developed flavor.
Make It Your Own
You know… one of the best things about this recipe is how well it takes to small swaps. If you’re dairy-free, try swapping the cream cheese for a high-quality dairy-free cream cheese (Violife or Kite Hill both work well) and use coconut yogurt in place of Greek yogurt.
The dairy-free version will have a slightly lighter set and a more neutral flavor, but the jiggle is still there. Pair it with fresh berry compote to add depth.
Want a citrus version? Swap the vanilla extract for ½ teaspoon orange extract and add a teaspoon of orange zest to the batter. It makes a stunning variation for Easter brunch or a spring dinner party.
You can also add 1–2 tablespoons of matcha powder to the cream cheese base for a soft, earthy Japanese-inspired version. Sift the matcha with the cornstarch to avoid green clumps. Check out this gluten-free whipped mascarpone frosting if you want a light topping that pairs beautifully with the matcha variation.
For a richer base, replace the Greek yogurt with full-fat sour cream. The flavor gets a little tangier and the texture becomes slightly denser — closer to a classic New York cheesecake, but still with that light soufflé character.
Common Problems & Solutions
Problem: The Cheesecake Collapsed After Baking
Man, oh man… this is the most heartbreaking thing to watch happen. The fix is almost always in the cooling: if you remove the cheesecake from a hot air fryer into cool room air immediately, the sudden temperature shift causes it to shrink fast and dramatically.
Always rest it inside the turned-off air fryer for 10–15 minutes before removing. Some modest shrinkage is completely normal — it’s not a sign of failure.
Problem: The Top Cracked
Solution: cracking usually means the temperature was too high or the cheesecake was overbaked. Make sure your air fryer is preheated, not blasting hot, and use the two-step temperature method as written.
According to trusted celiac disease research from the Celiac Disease Foundation, even minor cross-contact from shared utensils or uncertified starches can trigger a reaction. Always verify that your cornstarch is certified gluten-free — some brands share lines with wheat products.
Problem: The Batter Deflated During Folding
Solution: this happens when egg whites are either overwhipped or folded too aggressively. Use a wide rubber spatula and a gentle scooping motion — think of folding a letter, not stirring soup.
Work quickly but calmly. The batter should still look light and mousse-like when it goes into the pan.
Problem: The Center is Gummy or Dense
Solution: gumminess in gluten-free baking often means underbaking combined with too much moisture. Make sure your Greek yogurt is full-fat and not watery (drain off any liquid on top before measuring).
The authoritative nutrition guide on gluten-free cornstarch explains that cornstarch gelatinizes at around 203°F — so the internal temperature needs to reach that point for the structure to set properly.
Storage & Meal Prep
| Method | Duration | Notes |
|---|---|---|
| Counter | 2–3 hours max | Only before first chill; don’t store at room temp after slicing |
| Fridge | 4–5 days | Airtight container or wrapped tightly in plastic wrap |
| Freezer | Up to 2 months | Wrap individual slices in plastic wrap, then foil |
To serve from frozen, thaw slices overnight in the refrigerator — never at room temperature, which creates condensation on top. The texture holds up remarkably well after freezing.
If you want to make this for a Thanksgiving or Christmas dessert spread, bake it two days ahead and refrigerate whole. Slice just before serving for the cleanest presentation. Pair it with sliced strawberries or a simple powdered sugar dusting for an elegant finish.
Air Fryer Japanese Cheesecake FAQs
Can I make gluten-free Japanese cheesecake without an air fryer?
Yes, you can bake it in a conventional oven at 300°F (150°C) using a water bath. Place the pan inside a larger roasting pan filled with 1 inch of hot water and bake for 55–65 minutes. The air fryer version is more convenient, but the oven method produces equally beautiful results.
How do I know when my Japanese cheesecake is done?
The top should be lightly golden and the center should have a gentle, uniform jiggle when you carefully shake the pan — similar to set gelatin, not liquid. If the edges are set but the center sloshes, it needs more time at the lower temperature.
Why did my egg whites deflate when I folded them in?
Overwhipped egg whites (stiff, dry peaks) deflate quickly when folded into a denser batter. Aim for soft-to-medium peaks — the tips should curl gently, not stand completely straight. Fold using slow, sweeping motions and stop as soon as the mixture is just combined.
What’s the best pan size for an air fryer Japanese cheesecake?
A 6-inch round cake pan works best for most standard air fryers. It should fit with at least half an inch of clearance on all sides so the hot air can circulate properly. A pan that’s too large will block airflow and cause uneven baking.
Can I use a sugar substitute in this recipe?
Granulated sugar plays a structural role in stabilizing the egg white meringue, so substitutes behave differently. Fine-grain allulose is the closest swap and works reasonably well, though the peaks may be slightly less stable. Avoid powdered erythritol, which can make the whites grainy and difficult to fold.
Serving Suggestions
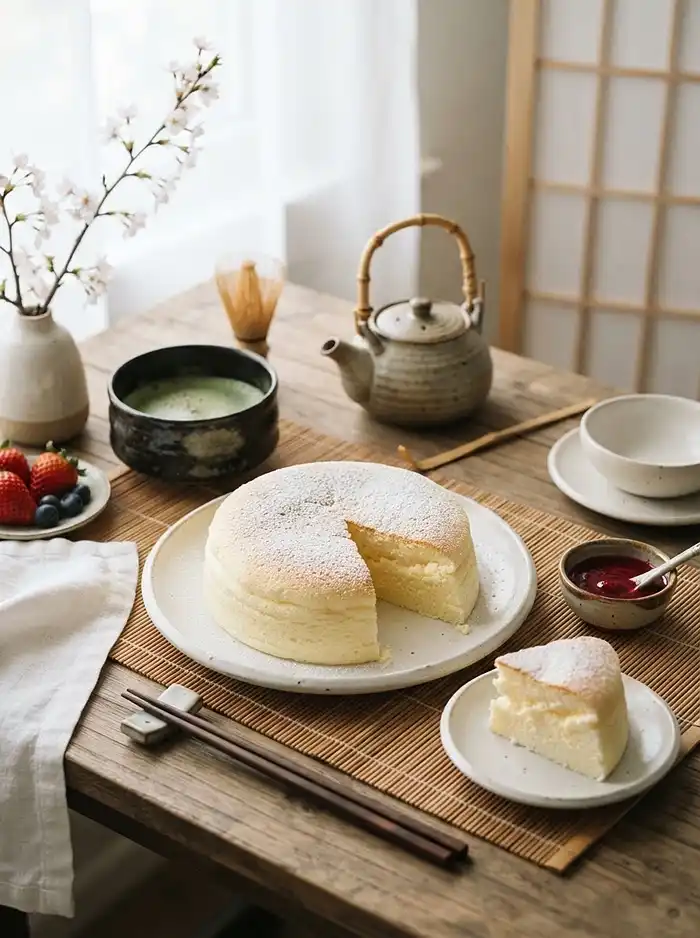
This cheesecake is wonderful plain — the flavor is subtle enough that toppings feel like a bonus rather than a necessity. A light dusting of powdered sugar is the most traditional finish and keeps the presentation clean and elegant.
For something more celebratory, serve it alongside a small bowl of fresh strawberries macerated with a little sugar and lemon — the brightness cuts right through the richness of the cream cheese. This combination also makes a stunning dessert for a Mother’s Day brunch spread.
If you’re building a full dessert table, pair it with this gluten-free carrot cake with brown butter cream cheese frosting for contrast in texture and flavor. Or keep things light and airy by serving alongside these brown butter cream cheese frosted treats for a full gluten-free dessert experience.
Conclusion
Give this homemade gluten-free Japanese soufflé cheesecake a try and let me know how it goes in the comments below. I genuinely want to hear what worked, what you tweaked, and whether your family gave it the jiggle test of approval.
If you make it, save it to Pinterest so other gluten-free bakers can find it too — the more we share what actually works, the better this community gets for everyone.
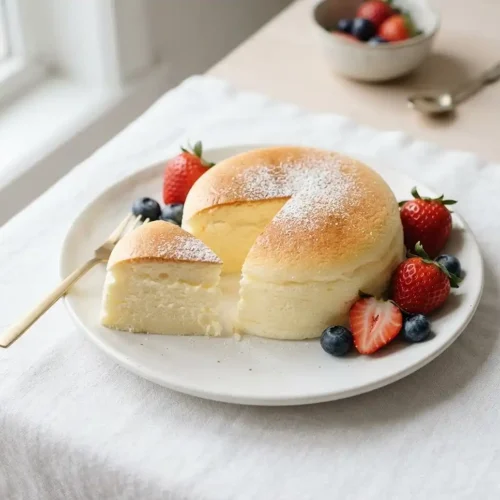
Gluten-Free Air Fryer Japanese Cheesecake
Equipment
- Air fryer
- 6-inch round cake pan
- Parchment paper
- Medium mixing bowl
- Electric mixer
- Rubber spatula
- Sifter
Ingredients
Cheesecake
- 8 oz Full-fat cream cheese, softened 226 g; must be room temperature
- 2 Large eggs, separated Room temperature; yolks and whites used separately
- ¼ cup Granulated sugar 50 g; added to egg whites for meringue
- ½ cup Plain Greek yogurt or sour cream 120 g; room temperature and full-fat preferred
- 2 tablespoons Certified gluten-free cornstarch Check label; must say certified gluten-free
- 1 teaspoon Vanilla extract Pure vanilla, not imitation
- 1 tablespoon Fresh lemon juice Brightens flavor and stabilizes egg whites
- 1 pinch Salt Enhances overall flavor balance
Instructions
- Let the cream cheese, eggs, and Greek yogurt sit at room temperature for at least 30 minutes. Cold cream cheese can remain lumpy even after mixing.
- In a medium bowl, beat the softened cream cheese until completely smooth and free of lumps. Add the egg yolks, Greek yogurt, vanilla extract, lemon juice, and salt. Mix until smooth and creamy with no visible yolk streaks.
- Sift the certified gluten-free cornstarch directly over the cream cheese mixture and mix gently until no dry streaks remain.
- In a separate clean bowl, beat the egg whites until foamy. Gradually add the granulated sugar and continue beating until soft to medium peaks form. The peaks should curl gently when the beater is lifted.
- Gently fold about one-third of the whipped egg whites into the cream cheese mixture using a rubber spatula and slow sweeping motions. Add the remaining egg whites in two more additions, folding just until combined after each addition.
- Line a 6-inch round cake pan that fits comfortably inside the air fryer basket with parchment paper. Lightly grease the sides.
- Pour the batter into the prepared pan. Gently tap the pan once or twice on the counter to release large air bubbles trapped near the bottom.
- Preheat the air fryer to 300°F (150°C) for about 3 minutes. Place the cake pan in the basket and cook at 300°F for 15 minutes.
- Reduce the temperature to 265°F (130°C) and cook for another 20–25 minutes. The cheesecake is done when the top is lightly golden and the center has a gentle jiggle similar to set gelatin, not liquid.
- Turn off the air fryer and leave the cheesecake inside with the basket closed for 10–15 minutes to cool gradually and help prevent cracking or dramatic collapse.
- Remove the pan and let the cheesecake cool completely at room temperature. Refrigerate for at least 2–3 hours, or overnight for the cleanest slices and most developed flavor.