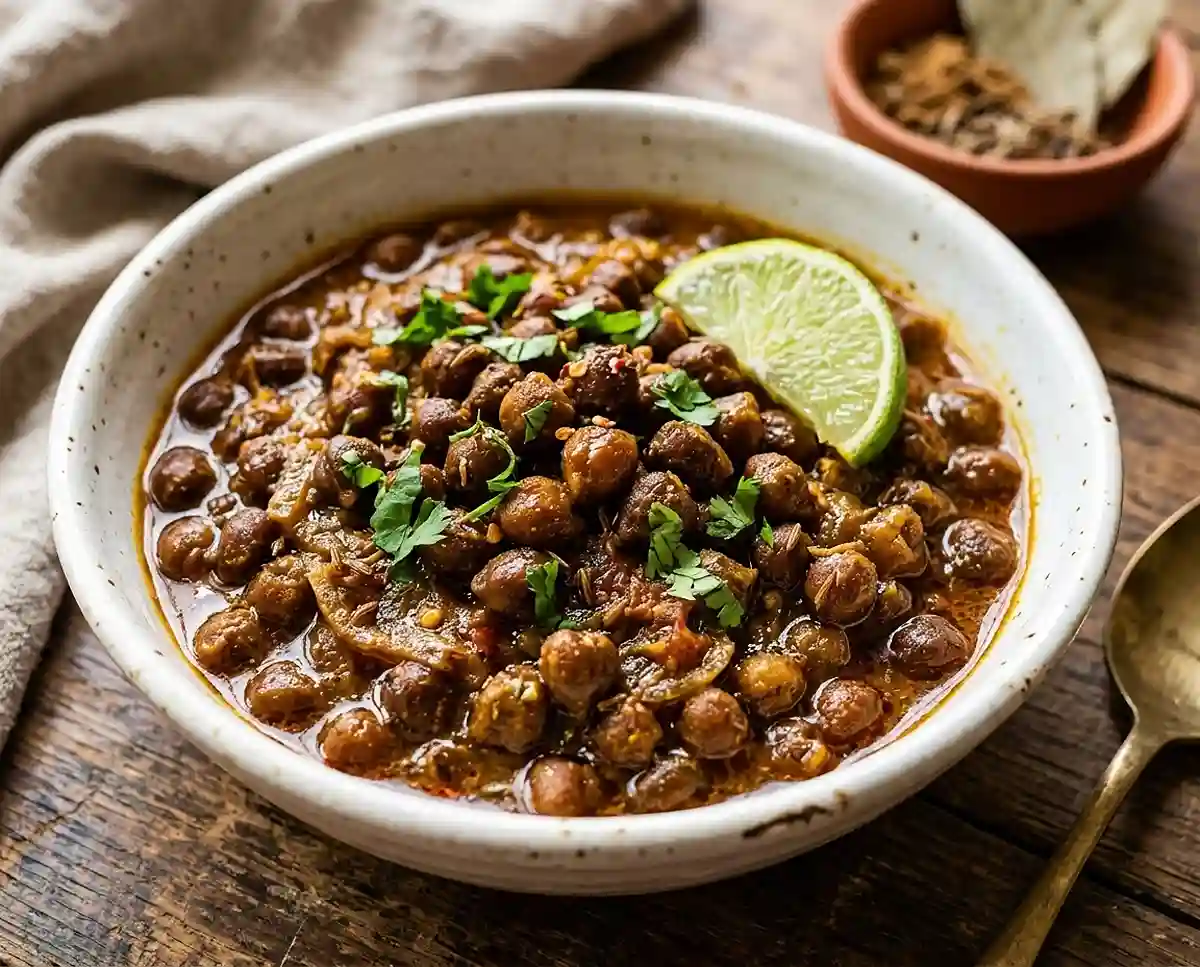
Gluten-Free Kala Chana Recipe Punjabi Style
Step-by-step gluten-free kala chana recipe Punjabi style — soaked black chickpeas, aromatic masala, and a rich tomato gravy ready in under an hour.
The first time I made kala chana at home, I burned the cumin seeds before the onions even hit the pan. The whole kitchen smelled like a campfire, and I had to start over from scratch. That small failure taught me the most important rule of Punjabi cooking: low and slow builds the flavor — never rush the base.
This gluten-free kala chana recipe Punjabi style is exactly what I wish someone had handed me that day. It uses a pressure cooker to get tender black chickpeas in about ten minutes, and the masala base does all the heavy lifting. Have you ever bitten into a chickpea that practically melts, coated in a deep rust-colored gravy that clings like a warm hug?
Table of Contents
Why You’ll Love This Kala Chana Curry
- Naturally gluten-free — no flour, no fillers, no worry. Every ingredient is whole and clean.
- Beginner-friendly pressure cooker method — one pot, minimal cleanup, and the chickpeas come out tender every time.
- Rich, layered flavor — the tomato-onion masala tastes like it simmered all day, even though it’s done in under an hour.
- Flexible and family-friendly — serve it as a Punjabi Black Chickpeas Curry with roti on a regular Tuesday, or dress it up as kala chana chaat for a crowd.
The Secret to Perfect Gluten-Free Kala Chana Recipe Punjabi Style
- Overnight soaking is non-negotiable. Black chickpeas have a dense, starchy skin. Soaking for 8 to 9 hours softens that outer layer so the interior cooks evenly and the pressure cooker can do its job in minutes rather than hours.
- Let the oil separate before adding spices. Cooking the tomatoes until the oil visibly pools at the edges of the masala tells you the water has cooked off and the fat-soluble spice compounds will bloom properly in the next step.
- Bloom the spices on low heat. Adding Kashmiri chilli powder, turmeric, and coriander to a hot pan on low heat for sixty seconds activates their flavor and color without scorching them.
- Add garam masala at the end. Garam masala loses its aromatic top notes under prolonged heat. Stirring it in after pressure cooking keeps the finish bright and fragrant rather than flat.
Ingredients

Here’s everything you need, grouped for easier prep. All quantities are for 3 servings.
For Soaking
- 1 cup Black chickpeas (kala chana) — 172 grams
- 2 ½ cups Water
For the Masala Base
- 2 tablespoons Oil or ghee
- 1 teaspoon Cumin seeds
- ½ cup Onion, finely chopped — 63 grams, about 1 medium
- 1 teaspoon Garlic, finely chopped — 4 to 5 small cloves
- 1 teaspoon Green chillies, finely chopped — 1 to 2, or swap with serrano pepper
- 1 teaspoon Ginger, finely chopped — about 1 inch
- 1 ¼ cups Tomato, finely chopped — 185 grams, about 2 medium
Spices & Seasoning
- 1 teaspoon Kashmiri chilli powder — or ½ teaspoon cayenne pepper
- ¼ teaspoon Turmeric powder
- 1 teaspoon Coriander powder
- 1 pinch Asafoetida (hing) — optional, adds a subtle savory depth
- Salt — as required
- ½ teaspoon Garam masala or Punjabi garam masala
For Cooking & Garnish
- 1 ½ cups Water — or as required
- 1–2 tablespoons Coriander leaves, chopped — optional garnish
Ingredient note: Kashmiri chilli powder gives the curry its signature deep red color without aggressive heat. It’s different from regular chilli powder, so look for it at Indian grocery stores or an authoritative Indian pantry guide to understand what to look for on labels.
Instructions
Step 1: Soak the Chickpeas
Rinse the black chickpeas a couple of times under running water until it runs mostly clear. Add 2 ½ cups water and soak overnight, or for about 8 to 9 hours.
Drain and rinse again in a colander before cooking. The chickpeas will have roughly doubled in size — that’s a good sign.
Step 2: Build the Cumin Base
Heat the oil or ghee in a 3-litre stovetop pressure cooker over low heat. Add the cumin seeds and let them crackle — they’ll pop and turn a shade darker within 20 to 30 seconds.
Pro Tip: Don’t walk away here. Burnt cumin turns bitter and will flavor the entire dish. The moment you hear the crackling, move to the next step.
Step 3: Cook the Onions
Add the chopped onions and saute on medium-low to medium heat until light golden, then bring the heat back down to low. This usually takes 7 to 10 minutes and is worth every second.
Step 4: Add Aromatics
Add the garlic, green chilli, and ginger, and saute for 10 to 12 seconds, just until the raw smell mellows. You’ll notice the sharpness fade and the kitchen start to smell earthy and warm.
Step 5: Cook the Tomatoes
Stir in the chopped tomatoes and cook on medium-low heat until they soften, turn pulpy, and the oil begins to separate from the masala. Do not rush this step — it usually takes 8 to 12 minutes.
You can swap fresh tomatoes for crushed canned tomatoes or about ½ cup plus 2 tablespoons of tomato puree if needed. The oil separating at the edges is your visual signal that the base is ready.
Step 6: Bloom the Spices
Add the turmeric, asafoetida, coriander powder, and Kashmiri chilli powder. Saute for a minute on low heat to bloom the spices. The masala will shift to a vivid red-orange color — as rich and warm as a setting sun.
Step 7: Add Chickpeas and Water
Add the soaked, rinsed chickpeas along with 1 ½ cups water. Season with salt and stir well so the masala coats every chickpea before sealing the cooker.
Step 8: Pressure Cook
Seal the cooker and pressure cook on medium heat for 10 to 11 minutes, or about 10 to 12 whistles, until the chickpeas are tender. If they’re still firm in the center after releasing pressure, cook another 5 minutes.
Pro Tip: Altitude affects pressure cooker timing. If you’re above 3,000 feet, add an extra 2 to 3 minutes to be safe. According to food safety guidance on pressure cooking temperatures, maintaining consistent pressure is key to cooking legumes through completely.
Step 9: Finish and Serve
Sprinkle in the garam masala and chopped coriander leaves. Give it a gentle mix and serve hot. The curry should be thick enough to coat the back of a spoon but still pourable.

Make It Your Own
You know, one of the best things about this kala chana recipe is how many directions you can take it. If you want a kala chana chaat version, let the curry cool, then toss the chickpeas with chopped onion, tomato, green chilli, chaat masala, tamarind chutney, and a squeeze of lemon. It transforms into a tangy, punchy street-food snack in minutes.
For a dairy-free version, simply use oil instead of ghee. The dish loses a little richness but none of the depth, especially if you let the onions go a few shades deeper before adding the aromatics.
If you’d like a thicker, drier finish — more like a Punjabi Black Chickpeas Curry you’d eat with paratha — cook uncovered after pressure cooking for 5 minutes to reduce the gravy. Stir often to prevent sticking on the bottom.
Man, oh man, the hing makes a difference here if you’ve never used asafoetida before. A single pinch added with the dry spices adds a savory, almost onion-garlic undertone that deepens the whole masala. It’s worth seeking out at an Indian grocer for just a few dollars a jar.
To make this a kale chaat with a twist, add a handful of massaged and blanched kale to the finished chickpeas and serve at room temperature. The bitterness of the kale balances the richness of the spiced masala beautifully.
Common Problems and Solutions
Man, oh man — wait, I used that one already. You know, pressure cooking can throw a few curveballs even for experienced cooks, especially with legumes. Here’s what to watch for.
Problem: Chickpeas are still firm after pressure cooking.
Reseal the cooker and cook for another 5 minutes on medium heat. Older dried chickpeas (stored for more than a year) can be stubborn. Next time, extend the soak to 10 to 12 hours and add a pinch of baking soda to the soaking water, which softens the skin more efficiently.
Problem: Masala is sticking or burning before the tomatoes are done.
Add a tablespoon of water and scrape the bottom of the pan. Lower the heat and be patient. Rushing the tomato phase is the most common reason the base tastes bitter instead of sweet and complex.
Problem: Curry tastes flat or one-dimensional.
Check your salt first — under-seasoning mutes every spice in the dish. Then add a small squeeze of lemon juice just before serving, which brightens the entire flavor profile. A slightly larger pinch of garam masala at the finish also helps.
Problem: Gravy is too thin.
Remove the lid and simmer on medium heat for 5 to 8 minutes, stirring occasionally. Alternatively, mash a small spoonful of cooked chickpeas against the side of the pot and stir it back in — this thickens the gravy naturally without any starch needed.
Storage and Meal Prep
| Method | Duration | Notes |
|---|---|---|
| Counter | 2–3 days | Airtight container only; reheat before serving |
| Fridge | 5–7 days | Bring to room temperature before reheating |
| Freezer | 2–3 months | Freeze in individual portions for easy weeknight meals |
To reheat from the fridge, warm in a small saucepan over medium-low heat with a splash of water to loosen the gravy. Kala chana actually tastes better the next day — the chickpeas absorb the masala overnight and every bite is more flavorful than the first serving.
Batch-cooking this on a Sunday makes for effortless meal prep. Double the recipe and freeze half in individual portions — you’ve got a fast, protein-rich dinner ready for any night of the week with nothing to do but reheat and warm some roti.
Your Questions Answered
Can I make kala chana without a pressure cooker?
Yes. Simmer soaked chickpeas in a covered pot for 60 to 90 minutes, checking every 20 minutes. An Instant Pot on high pressure for 25 to 30 minutes with natural release also works well.
How do I store leftover kala chana curry?
Store in an airtight container in the fridge for up to 5 to 7 days. For longer storage, freeze individual portions for up to 3 months. Reheat with a splash of water to loosen the gravy.
Can I use canned black chickpeas instead of dried?
Yes. Drain and rinse one 15-ounce can and skip the soaking and pressure cooking steps. Add the canned chickpeas directly to the finished masala with a quarter cup of water and simmer for 10 to 12 minutes before finishing with garam masala.
Is this kala chana recipe gluten-free?
Yes, every ingredient in this recipe is naturally gluten-free. There is no flour, no thickener, and no soy sauce. Always check packaged spice blends like garam masala for any gluten-containing additives if cross-contamination is a concern.
How do I make kala chana chaat from this curry?
Cool the cooked chickpeas completely, then toss with chopped onion, tomato, green chilli, coriander leaves, chaat masala, tamarind chutney, and a squeeze of lemon. Serve immediately for the best texture and flavor.
Serving Suggestions
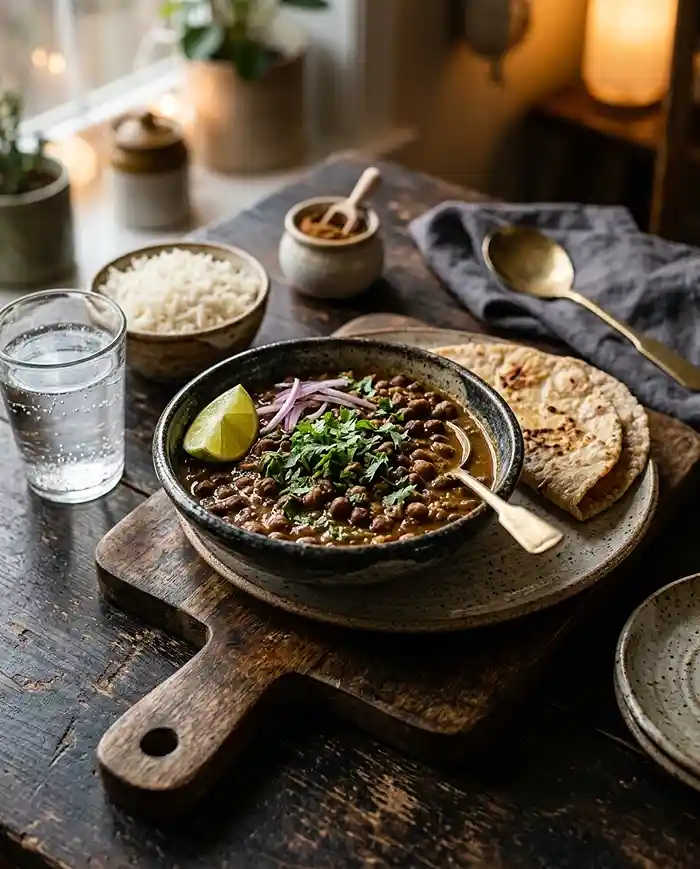
This curry is made for sopping up with freshly made roti or a flaky paratha. For a heartier meal, serve it over basmati rice with a wedge of lemon and sliced onion on the side — it’s the kind of dinner that fills the table with warmth, whether it’s a regular Tuesday or a Diwali spread where you want something traditional and crowd-pleasing.
If you’re building a fuller Indian spread, pair this with a cooling raita and a protein-packed rice bake for variety. Or keep it light and browse these gluten-free salted caramel banana oat bars for a sweet finish.
Leftovers make a brilliant high-protein lunch the next day — spoon cold kala chana over greens, drizzle with olive oil and lemon, and you’ve got a kala chana chaat salad that takes zero effort and tastes intentional. Try pairing it alongside these cherry almond breakfast cookie squares for a wholesome midday plate.
If you make this recipe, I’d genuinely love to hear how it turned out. Drop a comment below with any tweaks you made — whether you went the chaat route, tried it with canned tomatoes, or cooked it in the Instant Pot. And if you loved it, sharing it on Pinterest helps other gluten-free home cooks find it too.
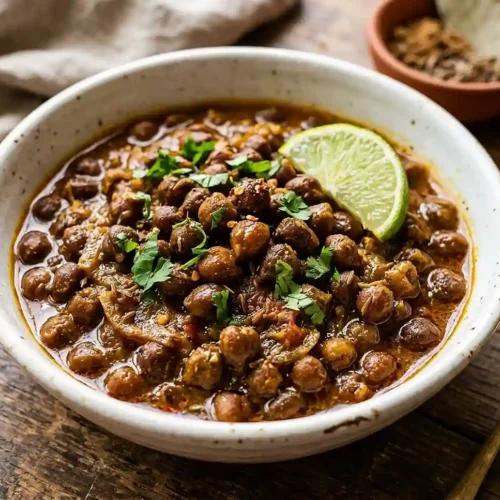
Gluten-Free Kala Chana Recipe Punjabi Style
Equipment
- 3-litre stovetop pressure cooker
- Large pot or saucepan
- Colander
- Wooden spoon
- Measuring spoons
- Measuring cups
Ingredients
For Soaking
- 1 cup black chickpeas (kala chana) 172 grams
- 2 ½ cups water
For the Masala Base
- 2 tablespoons oil or ghee Use oil for a dairy-free version
- 1 teaspoon cumin seeds
- ½ cup onion, finely chopped 63 grams, about 1 medium onion
- 1 teaspoon garlic, finely chopped 4 to 5 small cloves
- 1 teaspoon green chillies, finely chopped 1 to 2; serrano pepper can be used
- 1 teaspoon ginger, finely chopped About 1 inch
- 1 ¼ cups tomato, finely chopped 185 grams, about 2 medium tomatoes
Spices & Seasoning
- 1 teaspoon Kashmiri chilli powder Or use ½ teaspoon cayenne pepper
- ¼ teaspoon turmeric powder
- 1 teaspoon coriander powder
- 1 pinch asafoetida (hing) Optional
- salt As required
- ½ teaspoon garam masala or Punjabi garam masala
For Cooking & Garnish
- 1 ½ cups water Or as required
- 1–2 tablespoons coriander leaves, chopped Optional garnish
Instructions
- Rinse the black chickpeas thoroughly under running water. Add 2 ½ cups water and soak overnight, or for 8 to 9 hours.
- Drain and rinse the soaked chickpeas in a colander before cooking.
- Heat the oil or ghee in a 3-litre stovetop pressure cooker over low heat. Add the cumin seeds and let them crackle and darken slightly for about 20 to 30 seconds.
- Add the chopped onion and sauté over medium-low to medium heat until light golden, about 7 to 10 minutes. Reduce the heat back to low.
- Add the chopped garlic, green chilli, and ginger. Sauté for 10 to 12 seconds, just until the raw smell mellows.
- Add the chopped tomatoes and cook over medium-low heat until softened and pulpy and the oil begins to separate from the masala, about 8 to 12 minutes.
- Add the turmeric, asafoetida, coriander powder, and Kashmiri chilli powder. Sauté for 1 minute over low heat to bloom the spices.
- Add the soaked and rinsed chickpeas along with 1 ½ cups water. Season with salt and stir well so the masala coats the chickpeas.
- Seal the pressure cooker and cook over medium heat for 10 to 11 minutes, or about 10 to 12 whistles, until the chickpeas are tender. If they remain firm, pressure cook for another 5 minutes.
- Release the pressure safely, then stir in the garam masala and chopped coriander leaves.
- Serve hot. The finished curry should be thick enough to coat the back of a spoon while remaining pourable.