Gluten-Free Maple Vanilla Waffles
Make Gluten-Free Maple Vanilla Waffles with 30g of protein per serving, step-by-step instructions, tips for a crispy texture, and easy meal prep ideas for a satisfying breakfast.
I’ve made a lot of gluten-free waffles over the years, and most of them left me disappointed — gummy in the middle, falling apart at the edges, and barely keeping me full past 9 a.m. Then I landed on this formula for 30g protein gluten-free maple vanilla protein waffles, and I genuinely haven’t looked back.
The secret turned out to be Greek yogurt. It thickens the batter just enough to get that satisfying chew on the inside while the outside crisps up golden in the waffle iron. You know… once I figured that out, everything else fell into place.
These come together in about 15 minutes and hit 30 grams of protein per serving without any chalky aftertaste. What more could a busy morning actually ask for?
Why You’ll Love This Maple Vanilla Protein Waffles Recipe
- Crispy outside, tender inside: Greek yogurt and the right batter rest time give you waffles that hold together beautifully — no soggy middles, no crumbling edges.
- Genuinely beginner-friendly: Two bowls, a whisk, and a waffle maker. That’s the whole setup. No special equipment or technique required.
- 30 grams of protein per serving: Between the protein powder, eggs, and Greek yogurt, this high-protein breakfast keeps hunger away for hours without relying on sugary fillers.
- Meal prep friendly: Make a double batch, freeze them individually, and reheat on a weekday morning in minutes. These are just as good reheated as fresh.
The Secret to Perfect 30g Protein Gluten-Free Maple Vanilla Protein Waffles
- Let the batter rest: Gluten-free oat flour absorbs liquid more slowly than wheat flour. A 3–5 minute rest lets the flour fully hydrate, which gives the waffles structure and prevents that gummy, undercooked texture so common in gluten-free baking.
- Don’t overmix: Stir the wet and dry ingredients until just combined — a few streaks of flour are fine. Overmixing develops the starch in oat flour and makes waffles dense and tough rather than light.
- Greek yogurt does double duty: It adds protein and acts as a natural emulsifier, binding the batter so it spreads evenly in the waffle iron without spreading too thin or sticking. According to Harvard’s Nutrition Source guidance on yogurt, Greek yogurt is also a meaningful source of calcium and probiotics — a genuine nutritional upgrade over plain milk in baking.
- Use certified gluten-free oat flour and protein powder: Oats are naturally gluten-free but frequently cross-contaminated during processing. The Celiac Disease Foundation’s trusted guidance on gluten-free foods is clear that certification matters — especially for oat-based products. Don’t assume; check the label.
Table of Contents
Ingredients
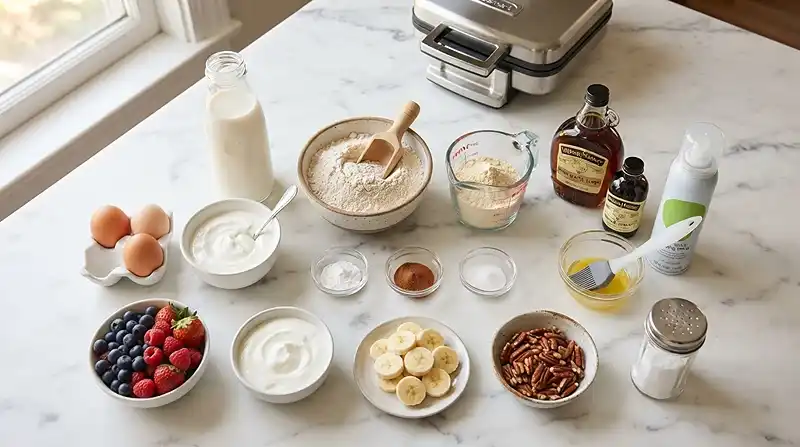
Dry Ingredients
- 1 cup certified gluten-free oat flour
- ½ cup vanilla protein powder, certified gluten-free
- 1 teaspoon baking powder
- ½ teaspoon ground cinnamon
- ¼ teaspoon salt
Wet Ingredients
- 2 large eggs
- ½ cup plain Greek yogurt
- ½ cup unsweetened almond milk
- 1 tablespoon pure maple syrup
- 1 teaspoon vanilla extract
- 1 tablespoon melted butter or coconut oil
- Nonstick cooking spray
Optional Toppings
- Pure maple syrup
- Fresh berries
- Greek yogurt
- Banana slices
- Chopped pecans or walnuts
- Dusting of powdered sugar
Note on protein powder: A vanilla whey or plant-based vanilla blend both work here. Make sure it’s certified gluten-free and that the flavor isn’t overly sweet — some protein powders add a lot of sweetener that can make the waffles cloying.
Instructions
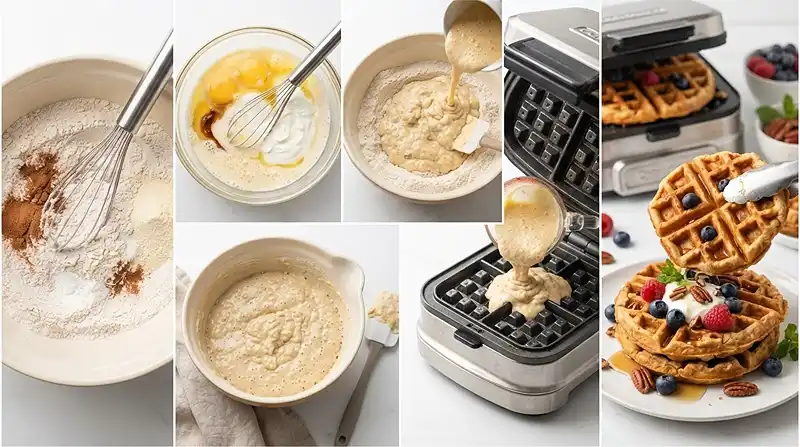
- Preheat and grease the waffle maker. Preheat your waffle maker according to the manufacturer’s instructions and lightly grease it with nonstick cooking spray. A properly preheated iron is the single biggest factor in getting a crisp exterior — don’t skip this step.
- Whisk the dry ingredients. In a large bowl, whisk together the gluten-free oat flour, protein powder, baking powder, cinnamon, and salt until evenly combined. Whisking first prevents clumps and ensures the baking powder distributes evenly for a consistent rise.
- Mix the wet ingredients. In a separate bowl, whisk the eggs, Greek yogurt, almond milk, maple syrup, vanilla, and melted butter until smooth. The batter should look creamy and uniform — no streaks of yogurt remaining.
- Combine wet and dry. Pour the wet ingredients into the dry ingredients and gently stir until just combined. Don’t overmix — stop as soon as you no longer see dry flour. A few lumps are completely fine.
- Rest the batter. Let the batter rest for 3–5 minutes. If it becomes too thick to pour, stir in another tablespoon or two of almond milk until it reaches a pourable consistency — like thick pancake batter.
- Cook the waffles. Pour the appropriate amount of batter into the preheated waffle maker (check your model’s fill guide). Close and cook for 3–5 minutes, until golden and crisp. You’ll know they’re done when steam stops escaping from the sides.
- Remove carefully and repeat. Carefully remove the waffle with a fork or silicone tongs and set it on a wire rack — not a plate — so the bottom stays crisp. Repeat with the remaining batter.
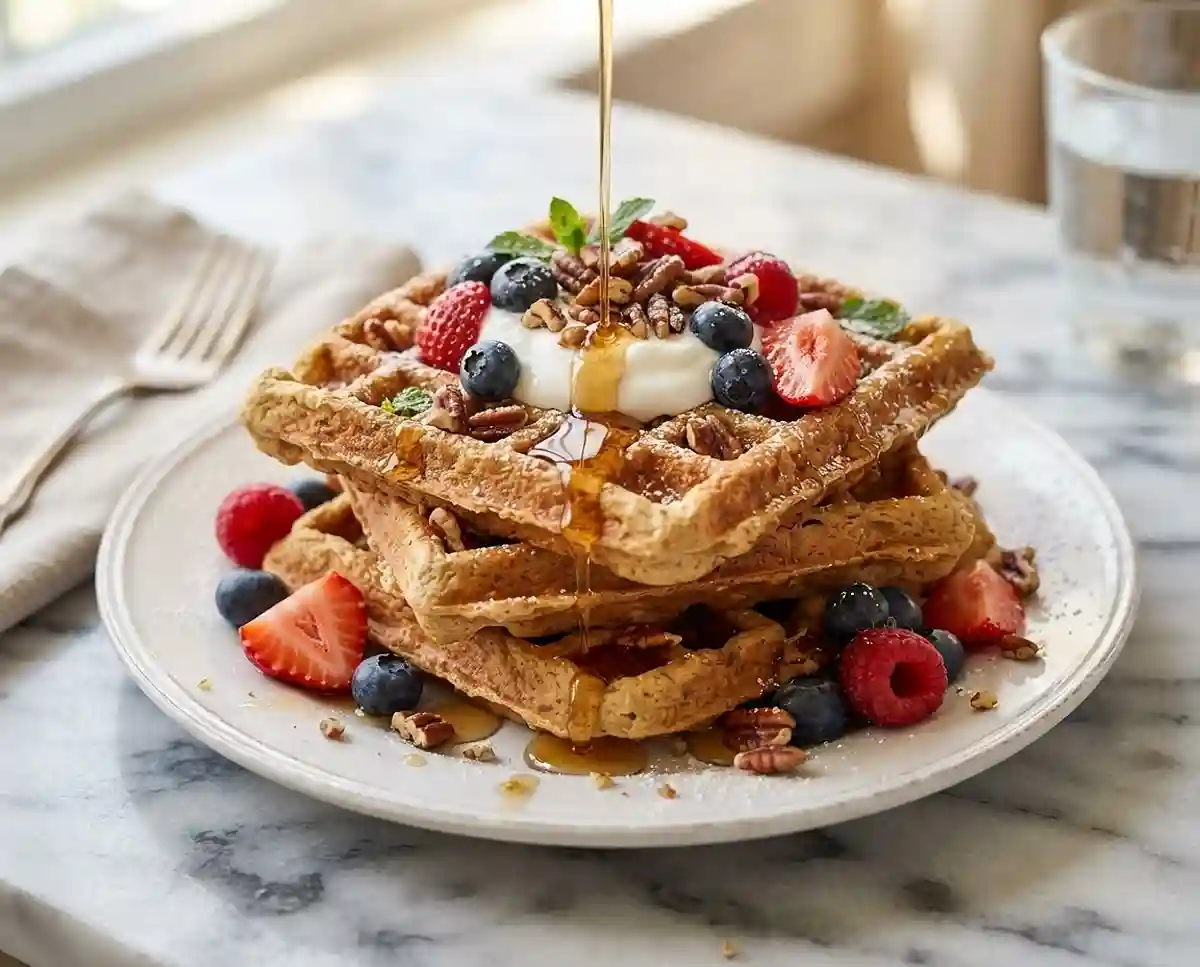
- Serve warm. Serve with Greek yogurt, berries, pecans, and a drizzle of pure maple syrup. The contrast of cool yogurt against the warm waffle hits like the best version of a weekend breakfast.
Pro Tip: If you want to keep the first batch warm while you cook the rest, place the waffles directly on the oven rack at 200°F. Don’t stack them — stacking traps steam and makes them soft.
Make It Your Own
Well… the beauty of a batter this forgiving is how far you can stretch it. Swap the almond milk for oat milk, regular milk, or even light coconut milk — the texture stays consistent across all three. Just keep it unsweetened so the maple syrup flavor stays front and center.
For a dairy-free gluten-free protein waffle, replace the Greek yogurt with a thick, plain coconut yogurt and use coconut oil instead of butter. The waffles will be slightly less protein-dense but still a solid gluten-free breakfast — and the subtle coconut note plays beautifully with maple vanilla.
If your protein powder is unflavored or chocolate, adjust the vanilla extract to 1½ teaspoons for more pronounced vanilla flavor. Chocolate protein powder with a pinch more cinnamon and a drizzle of almond butter on top is a completely different (and very worthwhile) direction for this maple vanilla breakfast base.
Want more carbs for a post-workout meal? Mash half a ripe banana into the wet ingredients before mixing. It adds natural sweetness, a little extra body, and pairs with the maple vanilla flavor without overwhelming it. Pair these waffles with our high-protein blackberry tahini oatmeal for a full high-protein breakfast spread.
Common Problems & Solutions
Problem: Waffles are sticking to the iron. Grease the waffle maker generously before every single waffle, not just the first one. Protein powder contains ingredients that make batter more prone to sticking than standard waffle recipes. A light spray between each waffle makes a real difference.
Problem: Waffles are gummy in the middle. This almost always comes down to one of two things: the batter wasn’t rested long enough, or the waffle maker wasn’t fully preheated. Give the batter its full 3–5 minute rest and make sure the iron is hot before the batter goes in — you should hear a sizzle when it hits.
Problem: Waffles fall apart when you open the iron. Man, oh man… this one is frustrating. The most common cause is opening the waffle maker too early. Wait until steam stops venting from the sides before lifting the lid. Opening too soon tears the waffle before the structure has set.
Problem: The batter is too thick to pour. Protein powder absorbs liquid differently depending on the brand and type. If the batter thickens up too much during the rest period, stir in almond milk one tablespoon at a time until it pours like thick pancake batter. Don’t add too much — thin batter spreads unevenly and won’t crisp properly.
Problem: The waffles taste chalky or bitter. This is a protein powder issue. Some brands, especially plant-based options with stevia or monk fruit, leave a noticeable aftertaste when baked. Try switching to a whey-based vanilla powder, or look for a plant-based option with minimal sweetener. A good vanilla extract also helps mask any off-notes.
Storage & Meal Prep
| Method | Duration | Notes |
|---|---|---|
| Counter | Same day only | Waffles soften quickly; best eaten fresh |
| Fridge | 4–5 days | Airtight container; reheat in toaster for best texture |
| Freezer | 2–3 months | Freeze in a single layer first, then transfer to a zip bag |
To reheat from frozen, pop the waffle directly into the toaster on a medium setting — it comes out crisp in about 2 minutes. The microwave works in a pinch but makes them soft rather than crispy.
Leftover waffles make a great base for a quick weekday breakfast sandwich — add a fried egg and a slice of cheese for something savory. You can also crumble a leftover waffle over Greek yogurt with berries for a fast high-protein breakfast parfait.
These pair beautifully with our gluten-free cinnamon roll apple breakfast casserole when you’re feeding a crowd and need both a sweet and satisfying option on the table.
Gluten-Free Maple Vanilla Waffles FAQs
Can I make these waffles without protein powder?
Yes, but the protein count will drop significantly. Replace the protein powder with an equal amount of additional gluten-free oat flour and add an extra tablespoon of maple syrup to compensate for the lost sweetness. The texture will be slightly lighter and the waffles won’t be as filling.
Can I use a different flour instead of oat flour?
Certified gluten-free oat flour gives the best texture here, but a 1-to-1 gluten-free all-purpose blend can work as a substitute. Avoid almond flour — it’s too moist and dense for waffles and will prevent them from crisping. If using a blend, you may need slightly less almond milk as blends absorb differently than oat flour.
How do I know when the waffles are done cooking?
The most reliable signal is steam. When the waffle is nearly done, steam stops venting visibly from the sides of the iron. Most waffle makers also have an indicator light — wait for both signals before opening. Lifting the lid too early is the number one cause of torn, undercooked waffles.
What’s the best protein powder to use in this recipe?
A vanilla whey protein isolate gives the cleanest flavor and best texture. For dairy-free, look for a plant-based vanilla blend with minimal added sweetener — pea protein or brown rice protein blends work well. Always choose certified gluten-free, especially if you have celiac disease or serious gluten sensitivity.
Why did my waffles come out dense instead of fluffy?
Overmixing is the most likely cause. Once you combine the wet and dry ingredients, stir only until the flour disappears — stop immediately. Overmixing develops the starch in oat flour and deflates the batter. Also check that your baking powder is fresh; expired baking powder won’t give the lift needed for a light waffle.
Serving Suggestions
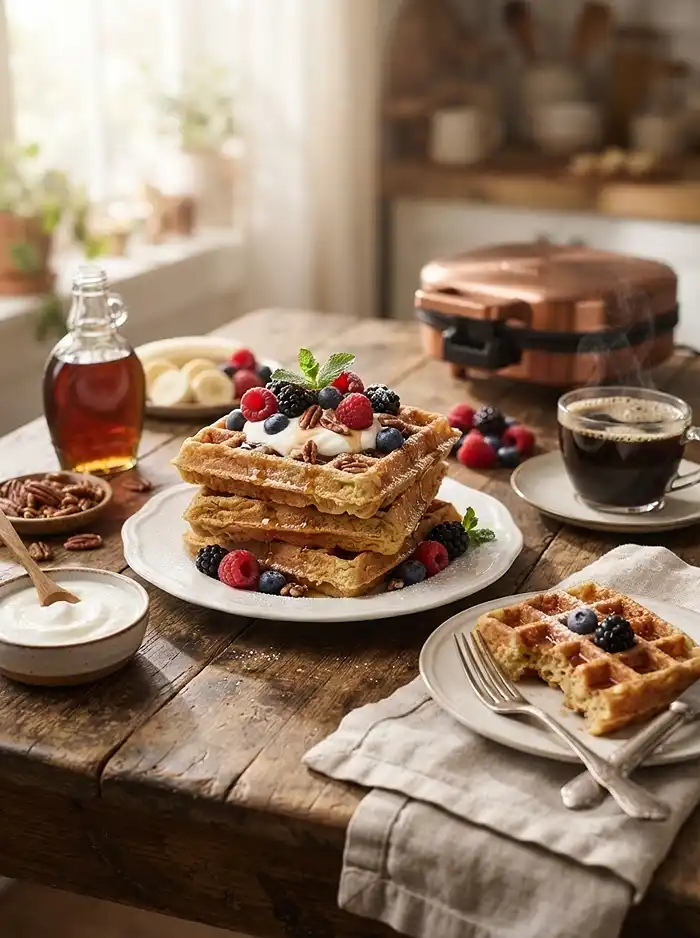
These waffles shine on their own, but they really come alive with a generous spoonful of Greek yogurt, a handful of fresh berries, and a slow drizzle of maple syrup. The yogurt melts slightly against the warm waffle in a way that’s genuinely indulgent — like a lighter, protein-packed take on whipped cream.
For a full Mother’s Day or Easter brunch spread, serve these alongside our gluten-free caramelized pear cottage cheese toast — the warm spiced pears and maple vanilla waffles share the same flavor DNA and look stunning together on a table.
For a heartier plate, add banana slices and chopped pecans on top. The crunch of the nuts against the soft banana and crisp waffle edge is a contrast that makes every bite more interesting.
If you try this recipe, I’d genuinely love to hear how it went — leave a comment below with your protein powder brand of choice, any swaps you made, or a photo on Pinterest. Your feedback helps me keep making these recipes better for everyone.
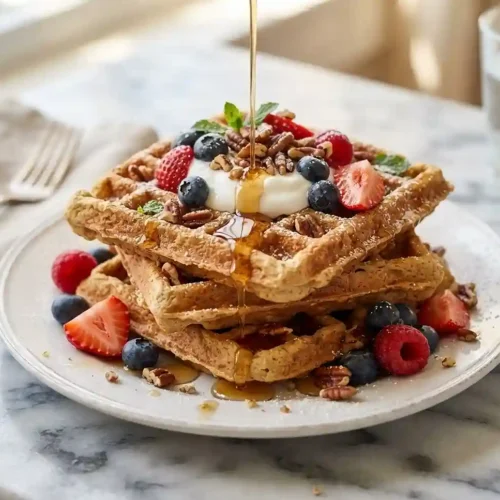
30g Protein Gluten-Free Maple Vanilla Waffles
Equipment
- Waffle Maker
- Large mixing bowl
- Small mixing bowl
- Whisk
- Wire rack
Ingredients
Dry Ingredients
- 1 cup Certified gluten-free oat flour
- ½ cup Vanilla protein powder Certified gluten-free
- 1 teaspoon Baking powder
- ½ teaspoon Ground cinnamon
- ¼ teaspoon Salt
Wet Ingredients
- 2 large Eggs
- ½ cup Plain Greek yogurt
- ½ cup Unsweetened almond milk
- 1 tablespoon Pure maple syrup
- 1 teaspoon Vanilla extract
- 1 tablespoon Melted butter or coconut oil
- Nonstick cooking spray For greasing the waffle maker
Optional Toppings
- Pure maple syrup Optional
- Fresh berries Optional
- Greek yogurt Optional
- Banana slices Optional
- Chopped pecans or walnuts Optional
- Powdered sugar Optional
Instructions
- Preheat the waffle maker according to the manufacturer’s instructions and lightly grease it with nonstick cooking spray. A fully preheated waffle maker helps create a crisp exterior.
- In a large bowl, whisk together the certified gluten-free oat flour, vanilla protein powder, baking powder, cinnamon, and salt until evenly combined.
- In a separate bowl, whisk the eggs, Greek yogurt, almond milk, maple syrup, vanilla extract, and melted butter or coconut oil until smooth and uniform.
- Pour the wet ingredients into the dry ingredients and gently stir until just combined. Stop mixing as soon as the dry flour disappears; a few small lumps are fine.
- Let the batter rest for 3–5 minutes. If it becomes too thick to pour, stir in another 1–2 tablespoons of almond milk until it reaches the consistency of thick pancake batter.
- Pour the appropriate amount of batter into the preheated waffle maker according to its fill guide. Close and cook for 3–5 minutes, until golden and crisp and steam has stopped escaping from the sides.
- Carefully remove each waffle with a fork or silicone tongs and place it on a wire rack rather than a plate to help preserve its crispness. Repeat with the remaining batter.
- Serve the warm waffles with Greek yogurt, fresh berries, pecans, and a drizzle of pure maple syrup, or add other optional toppings as desired.