Blackberry White Chocolate Oat Bars
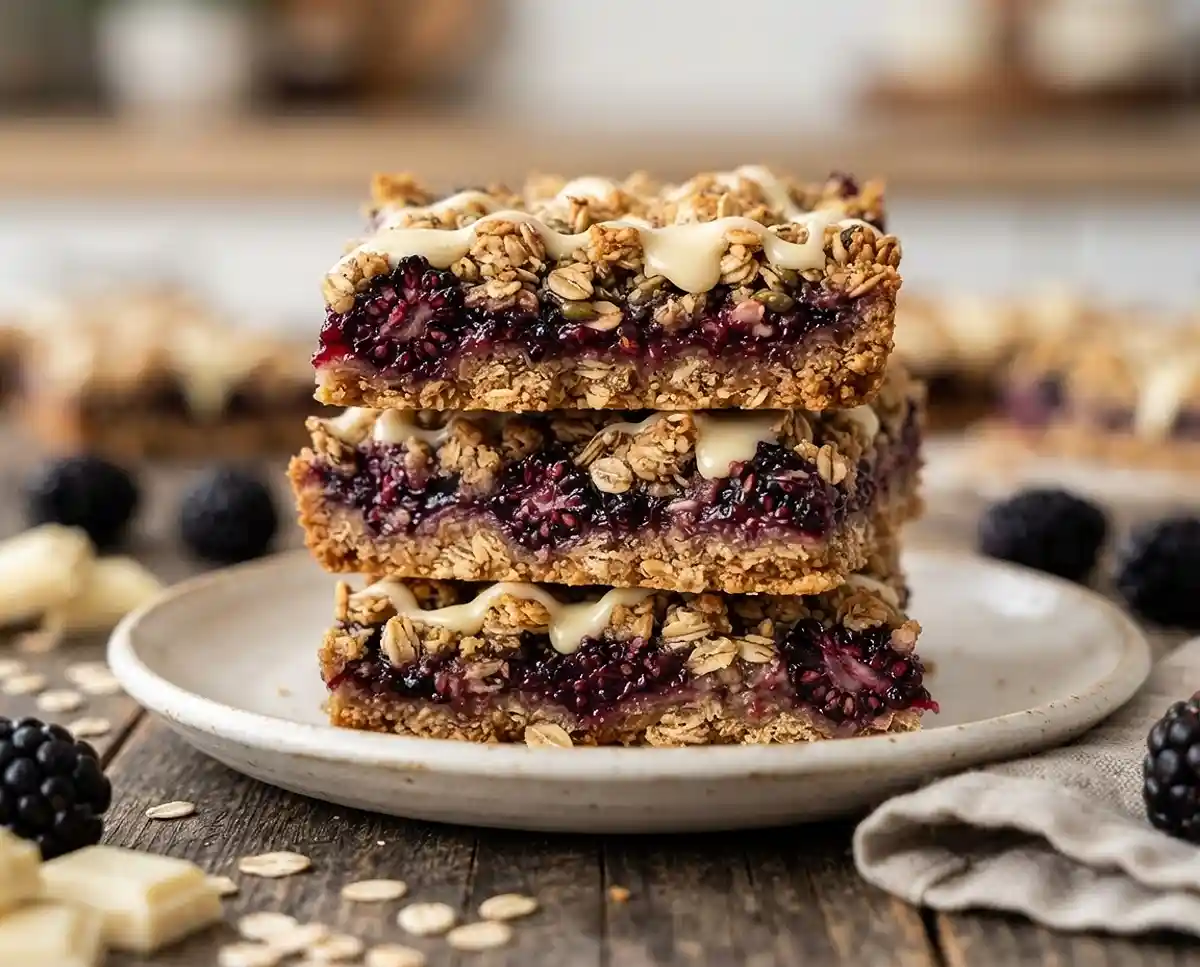
Make these gluten-free blackberry white chocolate oat bars with a jammy fruit filling, crumbly oat crust, and a simple dairy-free drizzle. Step-by-step recipe included.
The first time I made a fruit bar for a summer cookout, the filling ran everywhere the second I sliced into it. I had skipped the cooling step entirely because I was impatient—classic mistake. That was the day I learned that letting your bars cool completely isn’t optional; it’s the whole secret to clean slices and a filling that actually holds its shape.
These gluten-free blackberry white chocolate oat bars have become one of my most-requested recipes. The jammy blackberry filling sits between two layers of a buttery oat crust, and that dairy-free white chocolate drizzle takes them from casual snack to something genuinely worth sharing. Have you ever had a bar cookie that tasted like it came from a real bakery but took less than an hour start to finish?
Table of Contents
Why You’ll Love This Gluten-Free Blackberry White Chocolate Oat Bar Recipe
- Texture that satisfies: The crust bakes up golden and slightly crisp, while the inside stays tender—like a soft granola bar meeting a fruit crumble.
- Beginner-friendly: No mixer required. One bowl for the oat base, one small saucepan for the filling, and you’re done.
- Naturally dairy-free: Coconut oil replaces butter throughout, and dairy-free white chocolate chips handle the drizzle—no substitutions needed.
- Works for any occasion: These bars travel well, hold their shape once cooled, and look impressive enough for a holiday cookie platter or a weekday lunchbox.
The Secret to Perfect Gluten-Free Blackberry White Chocolate Oat Bars
- Press the base firmly: Gluten-free doughs don’t bind the same way wheat doughs do. Pressing that bottom layer hard into the pan is what prevents crumbling when you slice.
- Cook the filling until it thickens: Cornstarch activates fully only when heated. If you pull the filling off the stove too early, it’ll be watery and soak the crust. You want a texture as thick as warm jam before it goes into the pan.
- Use certified gluten-free oats: Regular oats are frequently cross-contaminated during processing. According to trusted celiac disease research from Beyond Celiac, certified gluten-free oats are the only safe option for people with celiac disease.
- Cool completely before slicing: This lets the fruit layer set into a gel-like consistency. Slicing warm bars leads to a runny filling and bars that fall apart—patience is the real technique here.
Ingredients
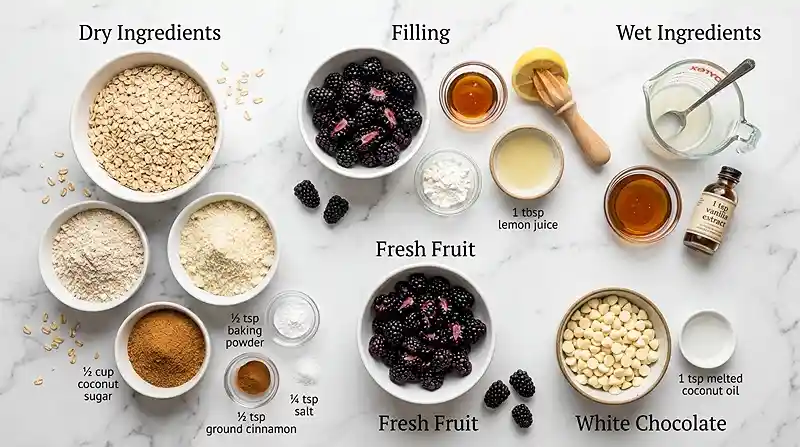
For the Blackberry Oat Bars
| Ingredient | Amount | Notes |
|---|---|---|
| Certified gluten-free old-fashioned rolled oats | 2 cups | Use certified GF—not regular oats |
| Certified gluten-free oat flour | 1 cup | Can blend certified GF oats until fine |
| Almond flour | ½ cup | Adds fat and helps bind the crust |
| Coconut sugar | ½ cup | Less sweet than white sugar; adds slight caramel depth |
| Baking powder | ½ teaspoon | |
| Ground cinnamon | ½ teaspoon | |
| Salt | ¼ teaspoon | |
| Melted coconut oil | ½ cup | Refined coconut oil has a neutral flavor |
| Pure maple syrup | ¼ cup | |
| Vanilla extract | 1 teaspoon | |
| Fresh blackberries, roughly chopped | 1 cup | Added to the topping layer |
For the Blackberry Filling
| Ingredient | Amount | Notes |
|---|---|---|
| Fresh or frozen blackberries | 1 ½ cups | Frozen works great; no need to thaw |
| Pure maple syrup | 2 tablespoons | |
| Cornstarch | 1 tablespoon | Thickens the filling—don’t skip |
| Lemon juice | 1 tablespoon | Brightens and balances the berry sweetness |
For the Dairy-Free White Chocolate Drizzle
| Ingredient | Amount | Notes |
|---|---|---|
| Dairy-free white chocolate chips or chunks | ½ cup | Check label—some white chips contain milk |
| Coconut oil | 1 teaspoon | Helps the chocolate melt smooth and drizzle easily |
Instructions
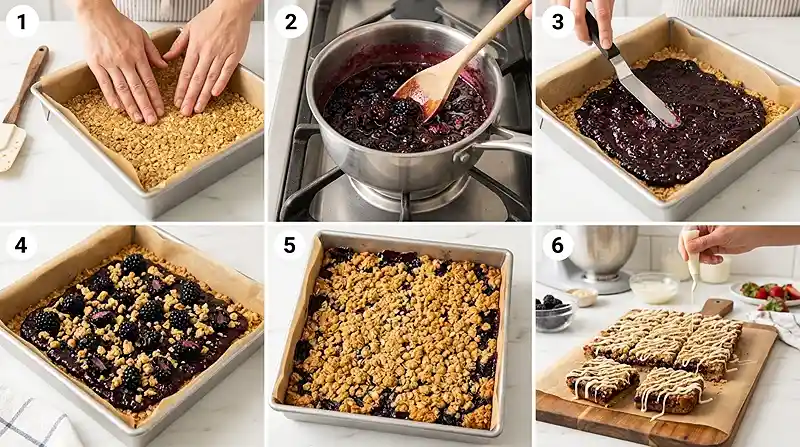
- Preheat and prep the pan. Preheat the oven to 350°F (175°C). Line an 8×8-inch baking pan with parchment paper, letting the edges hang over the sides so you can lift the bars out cleanly after baking.
- Mix the oat base. In a large bowl, combine the oats, oat flour, almond flour, coconut sugar, baking powder, cinnamon, and salt. Stir until everything is evenly distributed.
- Add the wet ingredients. Pour in the melted coconut oil, maple syrup, and vanilla extract. Stir until a crumbly, slightly clumped mixture forms. It should hold together when you squeeze a bit in your hand—if it’s too dry, add a teaspoon of maple syrup at a time.
- Press the base layer. Transfer about ⅔ of the oat mixture into the prepared pan. Press it down firmly and evenly using the bottom of a measuring cup. A packed, flat base is what keeps everything from crumbling once sliced. Set the remaining mixture aside.
- Cook the blackberry filling. In a small saucepan, combine 1 ½ cups blackberries, 2 tablespoons maple syrup, 1 tablespoon cornstarch, and 1 tablespoon lemon juice. Cook over medium heat for 5–7 minutes, stirring occasionally. The berries will break down and the liquid will thicken—it should coat the back of a spoon and have a glossy, jam-like consistency.
- Layer the filling. Spread the warm blackberry filling evenly over the pressed oat base. Work quickly while it’s still warm and spreadable. Use a spatula to get it all the way to the edges.
- Add fresh blackberries and the crumble topping. Scatter the 1 cup of roughly chopped fresh blackberries over the filling. Then crumble the reserved oat mixture evenly over the top—don’t press it down. You want a loose, rustic crumble so air circulates and it bakes up golden.
- Bake until golden. Bake for 30–35 minutes, until the top is lightly golden and you can see the blackberry filling bubbling around the edges. The bubbling is your cue that the cornstarch has fully activated and the filling will set properly as it cools.
- Cool completely. Let the bars cool completely in the pan before slicing—at least 1 to 2 hours at room temperature. Cooling helps the fruit layer set properly. If you slice them warm, the filling will run and the bars will fall apart. This is the step most people skip, and it’s the most important one.
- Melt and drizzle the white chocolate. Combine the dairy-free white chocolate chips and 1 teaspoon coconut oil in a microwave-safe bowl. Melt in 20-second intervals, stirring between each, until the mixture is completely smooth. Drizzle over the cooled bars using a spoon or a piping bag. Let the chocolate set for 10–15 minutes before cutting into squares.
Make It Your Own
Swap fresh blackberries for raspberries or blueberries if that’s what you have on hand. Both fruits contain enough natural pectin to thicken with cornstarch the same way blackberries do, so the filling technique stays identical.
You know… the almond flour in this recipe does more than add flavor—it provides fat and a slightly soft crumb that oat flour alone can’t deliver. If you need a nut-free version, replace the almond flour with an equal amount of certified gluten-free oat flour and add an extra tablespoon of coconut oil to compensate for the lost fat content.
For a lower-sugar version, reduce the coconut sugar in the oat base to ⅓ cup and use only 1 tablespoon of maple syrup in the filling. The bars will be less sweet overall, but the blackberry flavor comes through even more prominently—which honestly isn’t a bad trade-off.
If you want to skip the white chocolate drizzle entirely, these easy cookie bars are still worth making. A dusting of powdered sugar or a drizzle of raw honey over the cooled bars gives you that finished-bakery look without the extra step. You can find more inspiration in my gluten-free lotus milk cake for ideas on dairy-free toppings that work beautifully over baked goods.
Common Problems and Solutions
Problem: The bars are crumbling when I slice them. Make sure the base layer was pressed firmly enough before baking, and that the bars cooled completely. Slicing while even slightly warm is the number-one reason gluten-free oat bars fall apart. Let them rest the full 1–2 hours—refrigerating for 30 minutes before slicing can help if you’re in a rush.
Problem: The blackberry filling is too runny. This usually means the filling wasn’t cooked long enough for the cornstarch to fully activate. Next time, cook for the full 7 minutes and look for the filling to coat the back of a spoon before pulling it off the heat. If your current batch is already baked and runny, refrigerating the bars overnight will firm the filling significantly.
Man, oh man… Problem: The top crumble isn’t browning. Gluten-free oat mixtures can take a few extra minutes to get that golden color. If your top looks pale at 35 minutes, add 3–5 more minutes and check every minute. Every oven runs slightly different, so treat the time range as a guide rather than a rule.
Problem: The white chocolate seized up or turned grainy. This happens when the chocolate overheats or comes into contact with even a drop of water. Melt in short 20-second intervals only, stir between each, and make sure your bowl and spoon are completely dry. Adding the teaspoon of coconut oil before melting helps stabilize the mixture and keeps it smooth.
For more guidance on working with gluten-free baked goods, the authoritative gluten-free resource at Celiac.com is a reliable reference for ingredient safety and cross-contact questions.
Storage and Meal Prep
| Method | Duration | Notes |
|---|---|---|
| Counter | 2–3 days | Airtight container; keep away from direct sunlight |
| Fridge | 5–7 days | Bring to room temperature before serving for best texture |
| Freezer | 2–3 months | Wrap bars individually in plastic wrap before placing in a bag |
To reheat from frozen, let a bar thaw at room temperature for about 30 minutes or warm it in a 300°F oven for 8–10 minutes. The crust crisps back up nicely, though the white chocolate drizzle will melt—that’s completely fine and still tastes great.
These bars are excellent for meal prep. Slice the full batch, wrap each bar individually, and freeze them in a zip bag. Pull one out the night before for a quick breakfast or lunchbox treat throughout the week.
Your Questions Answered
Can I use frozen blackberries instead of fresh for the filling?
Yes, frozen blackberries work perfectly in the cooked filling. No need to thaw them first. They may release more liquid than fresh berries, so cook the filling an extra minute or two until thick and jam-like before spreading.
How do I store gluten-free blackberry oat bars?
Store bars in an airtight container at room temperature for 2-3 days, in the fridge for up to 7 days, or individually wrapped in the freezer for up to 3 months. Bring refrigerated bars to room temperature before serving for the best texture.
Why are my gluten-free oat bars crumbling when I slice them?
Crumbling usually means the bars were sliced before cooling completely, or the base layer was not pressed firmly enough. Let bars cool for at least 1-2 hours at room temperature, or refrigerate for 30 minutes before cutting.
Can I make these bars without the white chocolate drizzle?
Absolutely. The bars are complete without the drizzle. You can finish them with a dusting of powdered sugar or a drizzle of honey instead, or enjoy them plain straight from the pan.
What can I substitute for almond flour in this recipe?
Replace almond flour with an equal amount of certified gluten-free oat flour and add an extra tablespoon of melted coconut oil to the base mixture. This keeps the crust moist and helps it bind without nuts.
Serving Suggestions
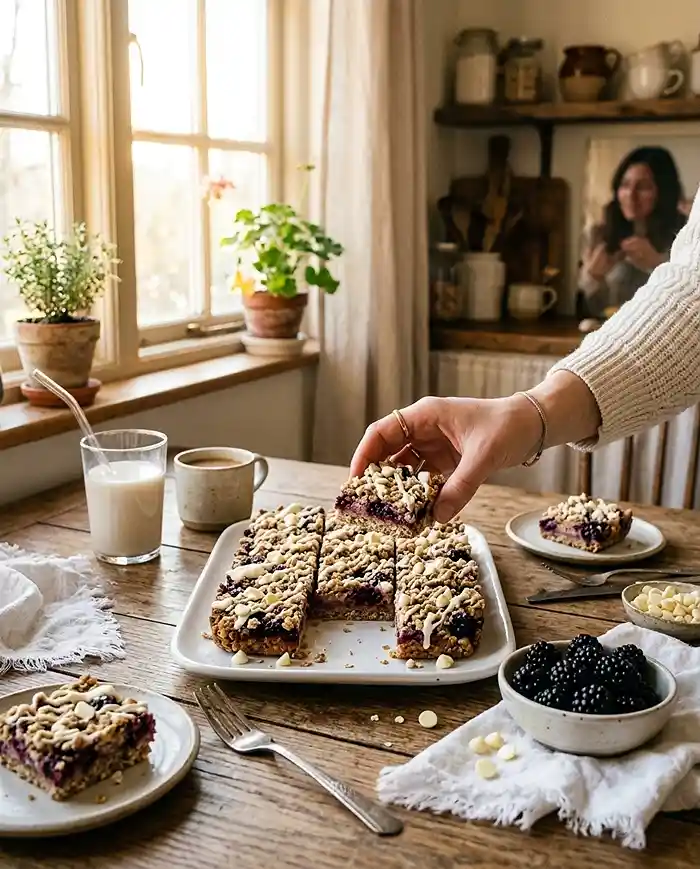
These gluten-free oat bars pair beautifully with a hot cup of coffee or a simple vanilla oat milk latte. The mild bitterness of coffee balances the sweetness of the blackberry filling in a way that makes each bite feel more complex and satisfying.
For a Thanksgiving dessert table or a Christmas cookie exchange, these bars slice into neat squares and look stunning on a platter with a light dusting of powdered sugar added just before serving. They fit right in alongside richer, heavier desserts while giving guests a naturally lighter option.
If you’re building out a full gluten-free dessert spread, check out my gluten-free lotus milk cake and these gluten-free egg white bread rolls for crowd-pleasing options that pair well with fruit-forward flavors like this one.
If you want a savory balance after all that sweetness, my gluten-free chicken rosemary lasagna makes a hearty dinner that rounds out any occasion beautifully.
Give these a try and let me know how they turned out in the comments below. Did you swap a filling, try a different berry, or skip the white chocolate? I genuinely want to hear about your version—and if you loved them, sharing on Pinterest helps other gluten-free home bakers find this recipe too.