Gluten-Free Whole Wheat Breadsticks Recipe
Make gluten-free whole wheat breadsticks at home with a whole-grain flour blend, psyllium husk, and Italian seasoning. Step-by-step instructions, tips, and storage guide.
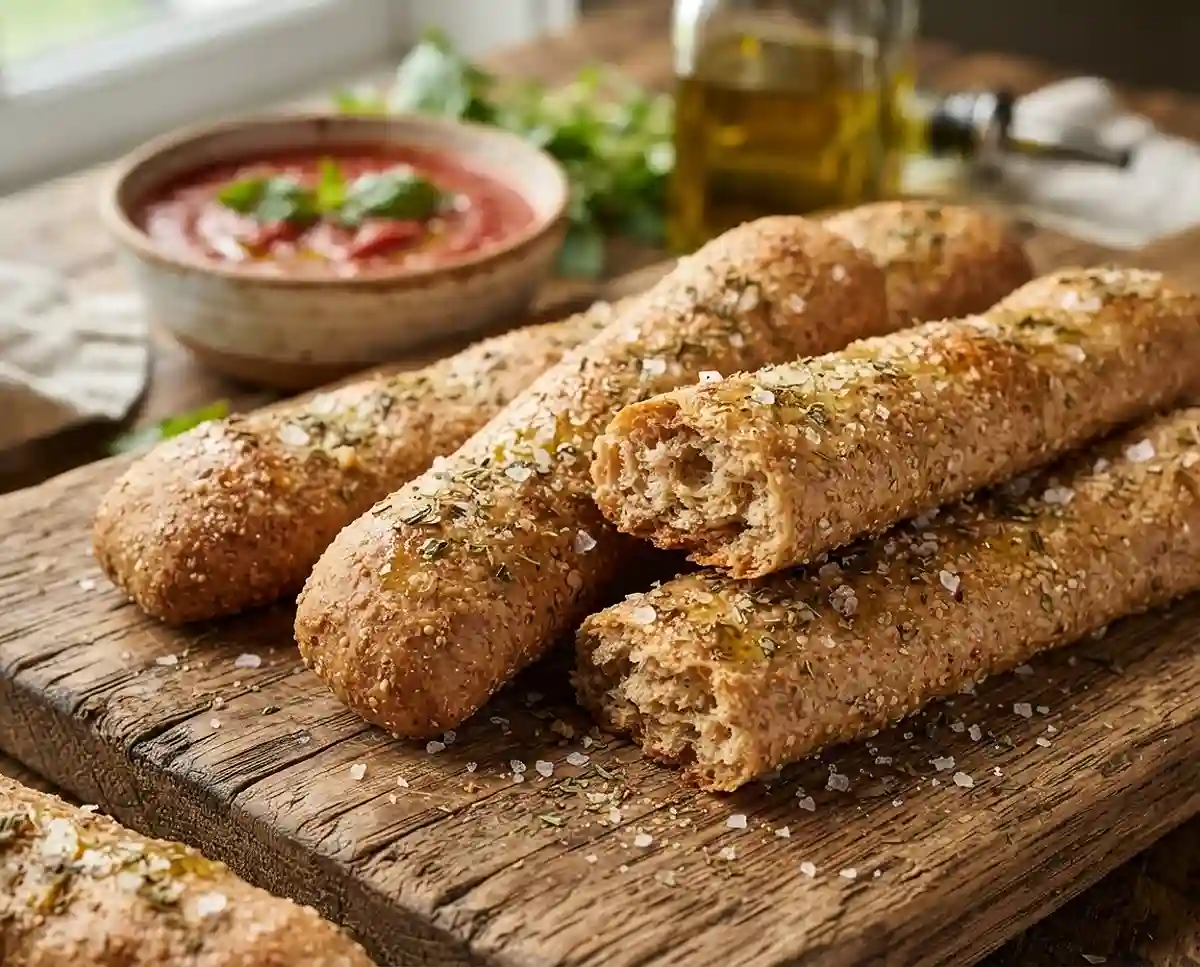
Gluten-free whole wheat breadsticks were the recipe that finally made me believe you could have a real breadstick — chewy inside, golden outside, with that satisfying snap — without a single gram of gluten.
I’d burned through three batches before I figured out the psyllium husk timing and the flour ratio that actually holds together. Now it’s the recipe I pull out every time someone at the table says they miss bread.
Could a gluten-free breadstick really hold its own next to a classic? After years of testing, I can tell you: yes, if you build the dough right from the start.
Table of Contents
Why You’ll Love This Gluten-Free Whole Wheat Breadstick Recipe
- Whole-grain flavor: Brown rice flour and sorghum flour together give these breadsticks a nutty, slightly earthy depth that white-flour versions just don’t have.
- Beginner-friendly: No shaping skills required — roll each piece by hand in under a minute with lightly oiled palms.
- Naturally dairy-free: Not a drop of butter or milk in the dough, making these a safe bring-along for mixed-diet gatherings.
- Make-ahead and freezer-ready: Bake a full batch, freeze half, and pull them out whenever the dinner table needs something warm and shareable.
The Secret to Perfect Gluten-Free Whole Wheat Breadsticks
- Psyllium husk is non-negotiable: It acts as the gluten substitute, binding the flour blend and giving the dough enough elasticity to roll without cracking. Skipping it produces a crumbly mess.
- Let the dough rest before shaping: Five minutes of resting after mixing gives the psyllium time to fully hydrate and tighten the dough’s structure — this is what prevents breadsticks from spreading flat in the oven.
- Apple cider vinegar improves texture: A teaspoon of acid interacts with the psyllium and starches to create a more cohesive crumb. According to gluten-free baking guidance from the Celiac Disease Foundation, acid also helps activate leavening more effectively in gluten-free doughs.
- Oil your hands, not the surface: Lightly oiled hands give you control over the dough without adding excess flour, which dries out the breadsticks and makes them crumble after baking.
Ingredients
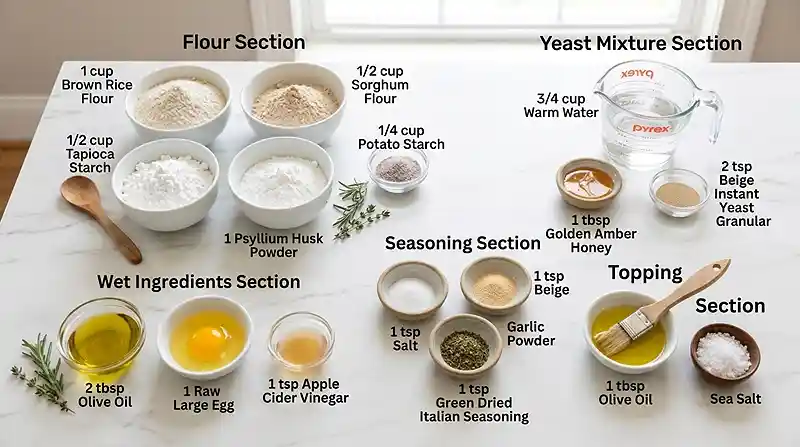
Dry Ingredients
- 1 cup brown rice flour
- ½ cup sorghum flour
- ½ cup tapioca flour
- ¼ cup potato starch
- 1 tablespoon psyllium husk powder (not whole psyllium husks — powder hydrates faster and more evenly)
- 2 teaspoons instant yeast
- 1 tablespoon honey or sugar
- 1 teaspoon salt
- 1 teaspoon garlic powder
- 1 teaspoon dried Italian seasoning
Wet Ingredients
- ¾ cup warm water
- 2 tablespoons olive oil
- 1 large egg
- 1 teaspoon apple cider vinegar
For Finishing
- 1 tablespoon olive oil, for brushing
- ½ teaspoon flaky sea salt, for topping
Instructions
-
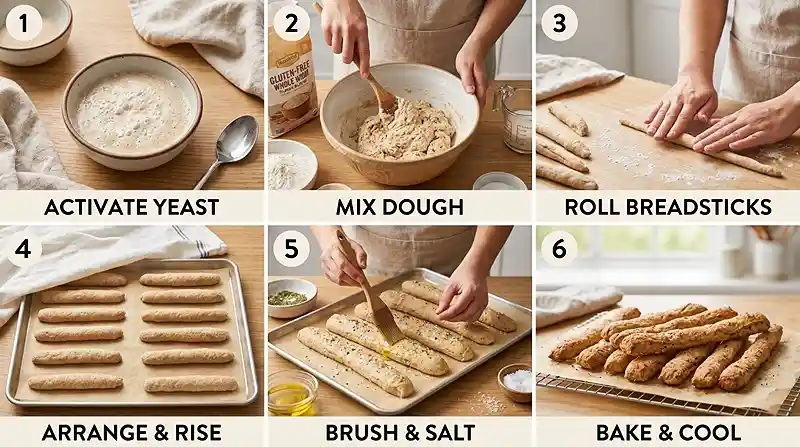
In a small bowl, whisk together the warm water, honey or sugar, and yeast. Let stand for 5–10 minutes until slightly foamy. If nothing happens after 10 minutes, your water was too hot or your yeast is past its prime — start fresh.
In a large bowl, whisk together the brown rice flour, sorghum flour, tapioca flour, potato starch, psyllium husk powder, salt, garlic powder, and Italian seasoning. Whisking the dry ingredients first ensures the psyllium distributes evenly — clumps of psyllium create gummy pockets in the finished breadstick.
Add the yeast mixture, olive oil, egg, and apple cider vinegar to the dry ingredients. Stir vigorously until a soft, slightly sticky dough forms — it will look wetter than traditional bread dough, and that’s exactly right.
-
Let the dough rest for 5 minutes so the psyllium can absorb the liquid and improve the dough’s structure. You’ll notice it firm up slightly and become easier to handle during this rest.
Divide the dough into 12 equal pieces. With lightly oiled hands, roll each piece into a thin breadstick about 6–7 inches long, working gently and evenly so each one bakes at the same rate.
Place the breadsticks on a parchment-lined baking sheet, leaving space between them. Cover loosely with plastic wrap or a clean kitchen towel and let rise in a warm place for 25–30 minutes.
-
Preheat the oven to 400°F (200°C) while the breadsticks are in their final rise. Brush each one lightly with olive oil and sprinkle with flaky sea salt just before they go in.
Bake for 18–22 minutes, or until lightly golden and firm around the edges. The outsides should feel set and dry to the touch — if they still feel soft, give them 2 more minutes. Let cool for a few minutes before serving.
Make It Your Own
Well… one of the best parts of this whole wheat breadstick recipe is how naturally it adapts to different flavor profiles and dietary needs without breaking the dough’s structure.
Swap honey for maple syrup. Maple syrup works as a one-to-one replacement for honey in this dough. The flavor difference is minimal once baked, but it makes the recipe vegan-friendly when paired with a flax egg in place of the large egg.
Add rosemary and parmesan to the topping. After brushing with olive oil, press a pinch of fresh rosemary and finely grated parmesan into the surface before baking. The cheese crisps beautifully and adds a savory, nutty crust that pairs well with holiday spreads like a Christmas Eve pasta dinner.
Make them thicker for a softer bite. This crispy whole wheat breadsticks recipe produces a firm, snappable result. If you prefer a softer, chewier interior, shape each piece slightly thicker — about ¾ inch — and reduce the bake time by 3–4 minutes. The breadsticks won’t crisp all the way through, but they’ll have more of a dinner roll texture.
Try sesame or everything bagel seasoning on top. Replace the flaky sea salt with sesame seeds or an everything bagel blend for a completely different flavor direction. Press the topping in gently after brushing with oil so it adheres through the full bake.
Common Problems and Solutions
Man, oh man… gluten-free breadsticks have a short list of things that can go sideways, but each one has a straightforward fix once you know what to look for.
Problem: The breadsticks spread flat and lose their shape. Solution: The dough needed more rest time, or the psyllium husk wasn’t fully hydrated. Add an extra 2–3 minutes to the rest period before shaping. Also verify you’re using psyllium husk powder, not whole husks — the powder hydrates faster and binds more evenly.
Problem: The breadsticks cracked while rolling. Solution: The dough is too dry. Add warm water one teaspoon at a time and work it in before attempting to roll again. Lightly oiling your hands rather than the surface gives you more control and prevents the outside of the dough from drying out mid-roll.
Problem: The inside is gummy even after the full bake time. Solution: This is almost always a dough that was too wet or an oven that runs cool. Use an oven thermometer to verify your oven is hitting 400°F accurately. If the exterior looks golden but the inside still feels soft, lower the heat to 375°F and bake for an additional 5 minutes.
Problem: The breadsticks taste flat and bland. Solution: The seasoning is right in the dough, so if it’s tasting thin, the salt likely wasn’t measured precisely. Taste the dough before shaping — it should taste lightly seasoned. Don’t skip the flaky sea salt on top; that finishing layer makes a meaningful difference in the perceived flavor of the whole breadstick.
Storage and Meal Prep
| Method | Duration | Notes |
|---|---|---|
| Counter | 2–3 days | Airtight container; place a paper towel underneath to absorb moisture |
| Fridge | 5–7 days | Bring to room temperature or toast before serving |
| Freezer | 2–3 months | Wrap individually in plastic wrap, then store in a freezer bag |
You know… these breadsticks actually reheat better than most gluten-free baked goods. A quick 5-minute pass in a 350°F oven restores that crispy outside without drying out the inside.
For freezer-to-table nights, pull out however many you need and bake straight from frozen at 375°F for 8–10 minutes. No thawing needed, and they come out tasting fresh-baked.
Your Questions Answered
Can I make gluten-free whole wheat breadsticks ahead of time?
Yes. Shape the breadsticks, place them on the baking sheet, cover, and refrigerate overnight before the rise. The next day, bring them to room temperature for 30 to 45 minutes, then brush with oil and bake as directed.
Why did my gluten-free breadsticks spread flat?
The dough likely needed more rest time, or the psyllium husk powder was not fully hydrated. Add 2 to 3 extra minutes to the rest period before shaping. Also make sure you are using psyllium husk powder and not whole husks.
Can I freeze gluten-free breadsticks?
Yes. Wrap each breadstick individually in plastic wrap, place in a freezer bag, and freeze for up to 3 months. Bake straight from frozen at 375°F for 8 to 10 minutes — no thawing needed.
What can I substitute for sorghum flour?
Replace sorghum flour with an equal amount of certified gluten-free oat flour or additional brown rice flour. Brown rice flour produces a lighter, more neutral flavor while oat flour keeps some of the whole-grain depth.
How do I make these breadsticks crispier?
Brush generously with olive oil before baking and use the top rack position in your oven. After baking, leave the breadsticks in the turned-off oven with the door cracked for 5 minutes to dry out the exterior without burning.
Serving Suggestions
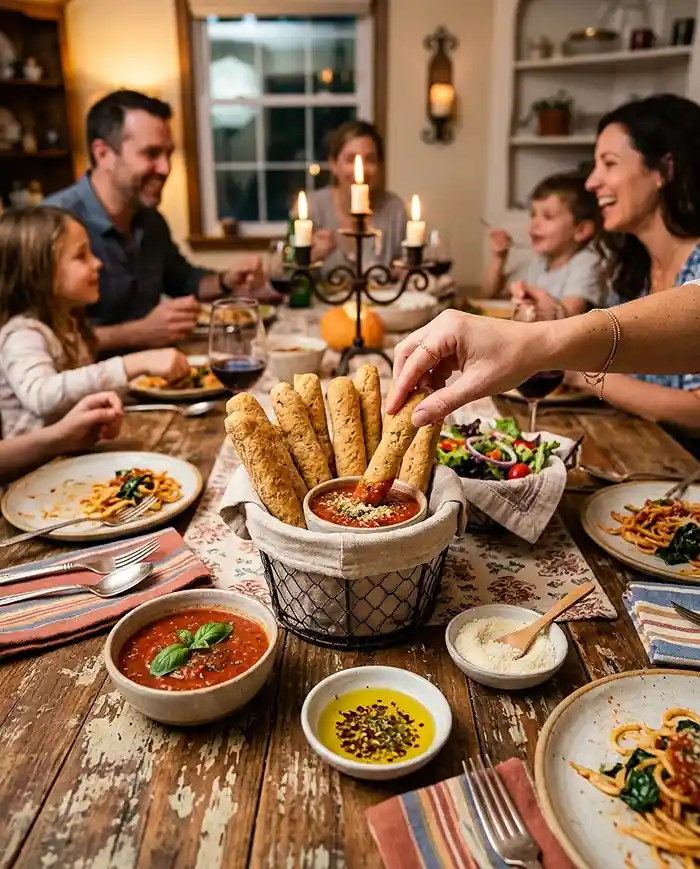
These breadsticks are built for the table — pull them out warm alongside a bowl of marinara for dipping, or serve them next to the pesto salmon and corn rice bowls for a complete gluten-free dinner that feels genuinely satisfying.
For a shareable appetizer plate, pair them with the gluten-free tomato mozzarella polenta bites — they’re a natural match in flavor and both come together quickly.
Finish the spread with the no-bake banana split granola cups for a dessert that requires zero oven time after the breadsticks come out.
If you’re new to gluten-free baking and want to understand why psyllium husk and flour blends behave the way they do, the gluten-free bread baking tips from Beyond Celiac are a genuinely useful read before your first batch.
Give this recipe a try and let me know how your batch turned out — drop a comment below with any swaps you made or questions that came up. If you loved them, sharing on Pinterest helps other gluten-free families find a breadstick that actually works.
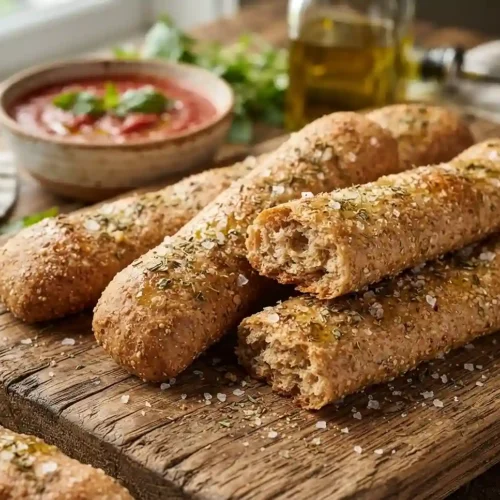
Simple Gluten-Free Whole Wheat Breadsticks Recipe
Equipment
- Small bowl
- Large mixing bowl
- Whisk
- Wooden spoon or spatula
- Parchment-lined baking sheet
- Kitchen towel or plastic wrap
Ingredients
Dry Ingredients
- 1 cup Brown rice flour
- ½ cup Sorghum flour
- ½ cup Tapioca flour
- ¼ cup Potato starch
- 1 tablespoon Psyllium husk powder Use powder, not whole psyllium husks, for faster and more even hydration
- 2 teaspoons Instant yeast
- 1 tablespoon Honey or sugar
- 1 teaspoon Salt
- 1 teaspoon Garlic powder
- 1 teaspoon Dried Italian seasoning
Wet Ingredients
- ¾ cup Warm water
- 2 tablespoons Olive oil
- 1 large Egg
- 1 teaspoon Apple cider vinegar
For Finishing
- 1 tablespoon Olive oil For brushing
- ½ teaspoon Flaky sea salt For topping
Instructions
- Whisk together the warm water, honey or sugar, and yeast in a small bowl. Let stand for 5–10 minutes until slightly foamy.
- In a large bowl, whisk together the brown rice flour, sorghum flour, tapioca flour, potato starch, psyllium husk powder, salt, garlic powder, and Italian seasoning until evenly combined.
- Add the yeast mixture, olive oil, egg, and apple cider vinegar to the dry ingredients. Stir vigorously until a soft, slightly sticky dough forms.
- Let the dough rest for 5 minutes so the psyllium husk can fully hydrate and the dough can firm up slightly.
- Divide the dough into 12 equal pieces. With lightly oiled hands, gently roll each piece into a thin breadstick about 6–7 inches long.
- Place the breadsticks on a parchment-lined baking sheet with space between them. Cover loosely with plastic wrap or a clean kitchen towel and let rise in a warm place for 25–30 minutes.
- Preheat the oven to 400°F (200°C). Brush each breadstick lightly with olive oil and sprinkle with flaky sea salt.
- Bake for 18–22 minutes, until lightly golden and firm around the edges. Let cool for a few minutes before serving.