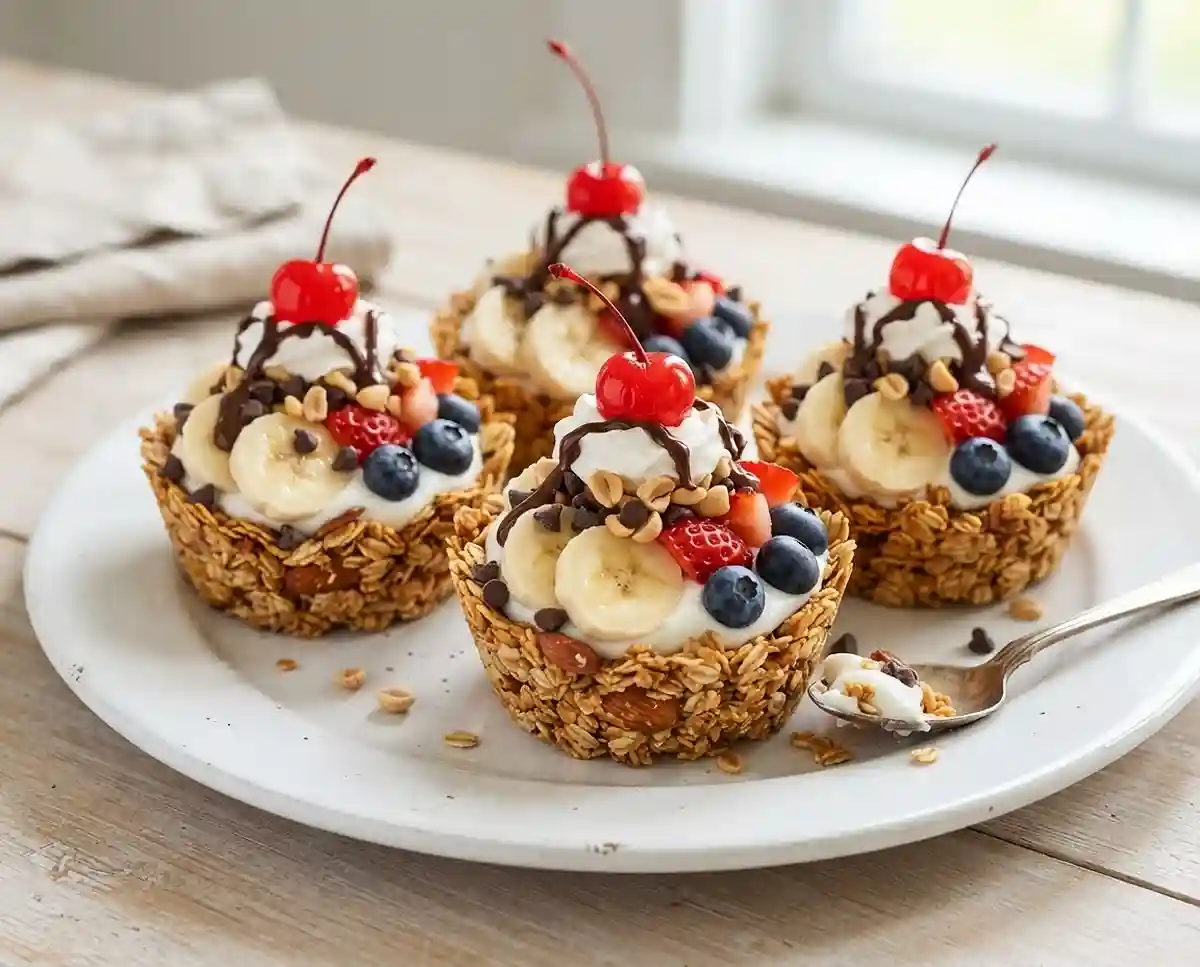
No-Bake Banana Split Granola Cups
Step-by-step gluten-free no-bake banana split granola cups with creamy yogurt, fresh fruit, and chocolate chips. Ready in under 90 minutes, no oven needed.
The first time I made these, it was a sweltering Fourth of July afternoon and I absolutely refused to turn on the oven. My kids were already sticky from the heat, and they wanted something that felt like a real dessert — not just frozen grapes.
So I grabbed my granola, some peanut butter, and whatever fruit was on the counter, and these gluten-free no-bake banana split granola cups were born. They’ve been a staple at our summer gatherings ever since, and I haven’t looked back once.
Can you believe a dessert this fun takes fewer than ten ingredients and zero baking? The granola cups press together in minutes, chill while you prep the fruit, and come together like little edible bowls of joy. They taste like a classic banana split — but lighter, fresher, and completely gluten-free.
Why You’ll Love This Gluten-Free No-Bake Banana Split Granola Cups Recipe
- No oven required: The entire recipe is fridge-and-freezer only — perfect for hot days or busy weeknights.
- Genuinely easy: Even beginner cooks get picture-perfect cups on the first try, thanks to silicone muffin liners.
- Naturally customizable: Swap the fruit, change the nut butter, or skip the chocolate — these cups bend to what you have on hand.
- Kid-friendly and crowd-pleasing: Little hands love pressing the granola into the cups, and every guest gets their own personal dessert.
The Secret to Perfect Gluten-Free No-Bake Banana Split Granola Cups
- Warm the binder before mixing: Microwaving the peanut butter, honey, and coconut oil together makes them flow smoothly through the granola, coating every cluster evenly. Cold binder leads to clumpy, uneven cups that fall apart.
- Press firmly and chill long enough: The cups need a full hour in the fridge — no shortcuts. For extra sturdiness, a 20-minute freeze after chilling makes them hold their shape even at a backyard party.
- Use certified gluten-free granola: Cross-contamination is a real risk with oats. Look for the certified GF label, which matters for anyone with celiac disease. The Celiac Disease Foundation’s guide to gluten sources explains exactly why certification matters.
- Add the filling just before serving: Greek yogurt and fresh fruit release moisture quickly. Assemble at the last minute so the cups stay crisp and hold their shape beautifully.
Table of Contents
Ingredients
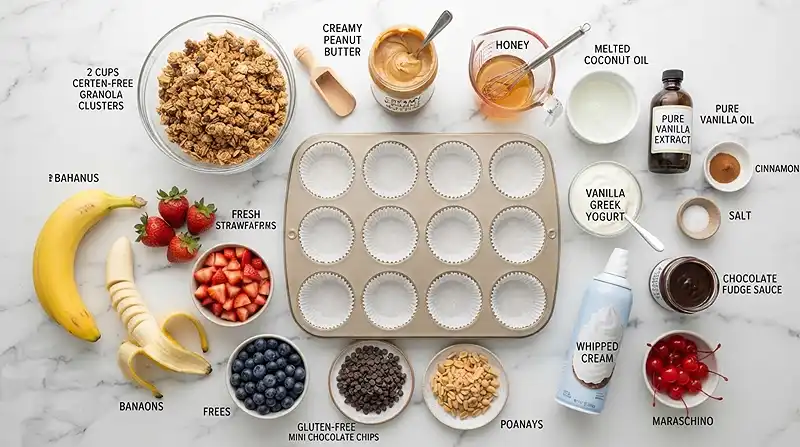
For the Granola Cups
| Ingredient | Amount | Notes |
|---|---|---|
| Certified gluten-free granola | 2 cups | Look for the GF certification label |
| Creamy peanut butter or almond butter | ½ cup | Natural or conventional both work |
| Honey or pure maple syrup | ¼ cup | Maple syrup keeps it fully vegan |
| Coconut oil, melted | 2 tbsp | Helps cups firm up when chilled |
| Vanilla extract | ½ tsp | |
| Ground cinnamon | ¼ tsp | |
| Salt | Pinch | Balances sweetness |
For the Banana Split Filling
| Ingredient | Amount | Notes |
|---|---|---|
| Bananas, sliced | 2 medium | Ripe but firm holds up best |
| Strawberries, diced | 1 cup | |
| Blueberries | ½ cup | |
| Vanilla Greek yogurt | ½ cup | Full-fat gives the richest texture |
| Gluten-free mini chocolate chips | 2 tbsp | Check label for GF certification |
| Chopped peanuts or walnuts | 2 tbsp | |
| Whipped cream or whipped topping | 2 tbsp | Optional |
| Chocolate or fudge sauce | 2 tbsp | Optional — use a GF-labeled brand |
| Maraschino cherry per cup | 1 per cup | Optional, for a classic finish |
Instructions
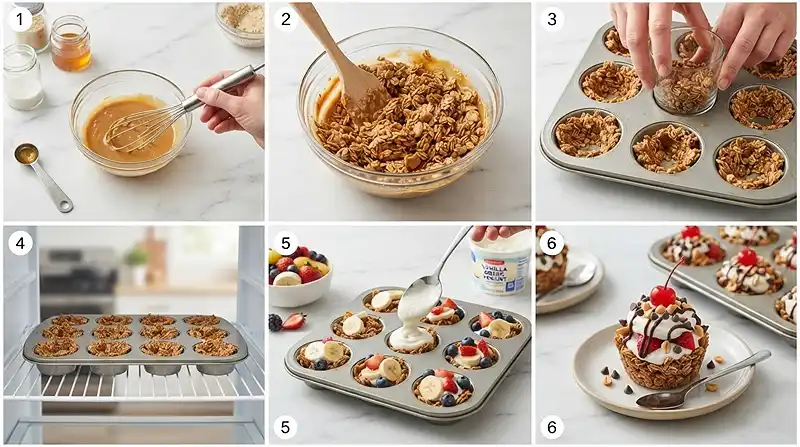
Step 1: Make the Granola Mixture
In a microwave-safe bowl, combine the peanut butter, honey, and coconut oil. Microwave for about 20–30 seconds, then stir until smooth and fully combined.
Mix in the vanilla extract, cinnamon, and salt. Add the certified gluten-free granola and stir until every piece is lightly coated — you’re looking for a glossy, even coating throughout, not clumps.
Step 2: Form the Cups
Lightly grease a 12-cup muffin pan or use silicone muffin liners (silicone is my strong preference — the cups pop out without a fight). Divide the granola mixture evenly among the cups, using about 2½ to 3 tablespoons per cup.
Press the mixture firmly into the bottom and up the sides to form little bowls. A small glass or the back of a measuring spoon works beautifully for pressing the center down and shaping the walls.
Step 3: Chill
Refrigerate the cups for at least 1 hour, or until completely firm to the touch. For an extra-sturdy texture that holds up at room temperature longer, transfer the pan to the freezer for 20–30 minutes after the initial chilling.
Pro Tip: Don’t rush this step. A cup that hasn’t fully set will crack the moment you add the filling — the chill time is what transforms loose granola into a crisp, scoopable shell as satisfying as a waffle cone.
Step 4: Fill the Banana Split Cups
Just before serving, spoon a little vanilla Greek yogurt into each granola cup — about a teaspoon per cup. Top with sliced banana, diced strawberries, and blueberries. Sprinkle with gluten-free mini chocolate chips and chopped nuts.
Step 5: Add the Finishing Touches
For the full banana-split experience, add a small dollop of whipped cream to each cup, drizzle with chocolate sauce, and crown each one with a maraschino cherry. Serve immediately — these are at their peak the moment they’re assembled.
Make It Your Own
Well… one of the best things about these gluten-free no-bake cups is how forgiving the base recipe is. If you’re dairy-free, swap the vanilla Greek yogurt for a coconut milk yogurt alternative. It layers in just as smoothly and adds a subtle tropical note that pairs wonderfully with the banana.
You can also switch out the peanut butter for almond butter or sunflower seed butter. Sunflower seed butter is a great nut-free option for school events or potlucks where allergies are a concern. Just know it tends to make the cups slightly softer, so lean on the freezer step to compensate.
The fruit filling is completely open to interpretation. Raspberries, sliced peaches, or kiwi all work beautifully as part of this banana split dessert experience. Stone fruits in summer and mandarin segments in winter keep this recipe in rotation all year long.
For a chocolate lover’s version, stir 1 tablespoon of unsweetened cocoa powder directly into the granola mixture. The cups come out with a deeper, almost brownie-like flavor that kids absolutely go wild for at birthday parties and holiday gatherings.
If you enjoy no-bake layered desserts, check out this dairy-free peach pie chia pudding — it uses the same build-ahead logic and is just as crowd-friendly.
Common Problems & Solutions
Problem: The cups crumble when I try to remove them from the pan. Solution: They didn’t chill long enough, or the binder ratio was off. Make sure to microwave the peanut butter mixture until it’s fully fluid before adding the granola. Then chill a full hour — not 40 minutes, a full hour. Silicone liners also make removal nearly effortless compared to metal pans.
Problem: The cups feel soggy after filling. Solution: The yogurt or fruit sat too long in the cups before serving. Moisture migrates fast. Always fill these gluten free no bake cups immediately before serving — never more than 15 minutes ahead — and use thick, full-fat Greek yogurt rather than thin or low-fat varieties.
Man, oh man… this next one trips up so many first-timers. Problem: The granola mixture won’t press into shape — it keeps springing back. Solution: Your binder cooled too fast. Reheat the peanut butter mixture for another 10 seconds and work quickly while it’s warm and pliable. Cold binder loses its adhesive quality before the granola can be properly shaped.
Problem: The cups are too sweet. Solution: Reduce the honey or maple syrup to 3 tablespoons and skip the fudge sauce drizzle. Using plain Greek yogurt instead of vanilla also dials back the sweetness considerably while adding a nice tang that balances the fruit.
Storage & Meal Prep
| Method | Duration | Notes |
|---|---|---|
| Counter | 2–3 hours (unfilled only) | Filled cups must be refrigerated |
| Fridge (unfilled cups) | 5–7 days | Store in an airtight container |
| Freezer (unfilled cups) | 2–3 months | Wrap individually, thaw 10 min before filling |
The granola cups themselves are a fantastic make-ahead component — press and chill a full batch on Sunday and you’ve got individual dessert vessels ready all week. Store them in a single layer in an airtight container in the fridge.
You know… the beauty of this granola cup treat is that it separates naturally into a “shell” component and a “filling” component. Keep them apart until the moment of serving, and you’ll never deal with a soggy cup. Leftover fruit can go into smoothies or overnight oats the next morning — no waste, no guilt.
No-Bake Banana Split Granola Cups FAQs
Can I make these granola cups ahead of time?
Yes — the unfilled granola cups can be made up to 7 days ahead and stored in an airtight container in the fridge, or up to 3 months in the freezer. Fill them with yogurt and fruit only right before serving to keep the cups crisp.
How do I keep the granola cups from falling apart?
Press the granola mixture firmly and chill for a full hour minimum. For extra stability, freeze the formed cups for 20–30 minutes after refrigerating. Using silicone muffin liners also helps them release cleanly without cracking.
What’s the best certified gluten-free granola to use?
Look for granola with a certified gluten-free label, not just ‘oat-free’ or ‘made without gluten.’ Brands that use dedicated gluten-free facilities are safest for people with celiac disease. The Celiac Disease Foundation recommends checking for third-party certification on the package.
Why did my cups turn out soggy?
Soggy cups are almost always caused by filling them too early. The yogurt and fresh fruit release moisture quickly. Assemble these no-bake cups no more than 15 minutes before serving, and use thick full-fat Greek yogurt for the best results.
Can I make these dairy-free?
Absolutely. Swap the vanilla Greek yogurt for coconut milk yogurt and skip the whipped cream, or use a dairy-free whipped topping. The granola cup base itself contains no dairy, so the swap is seamless.
Serving Suggestions
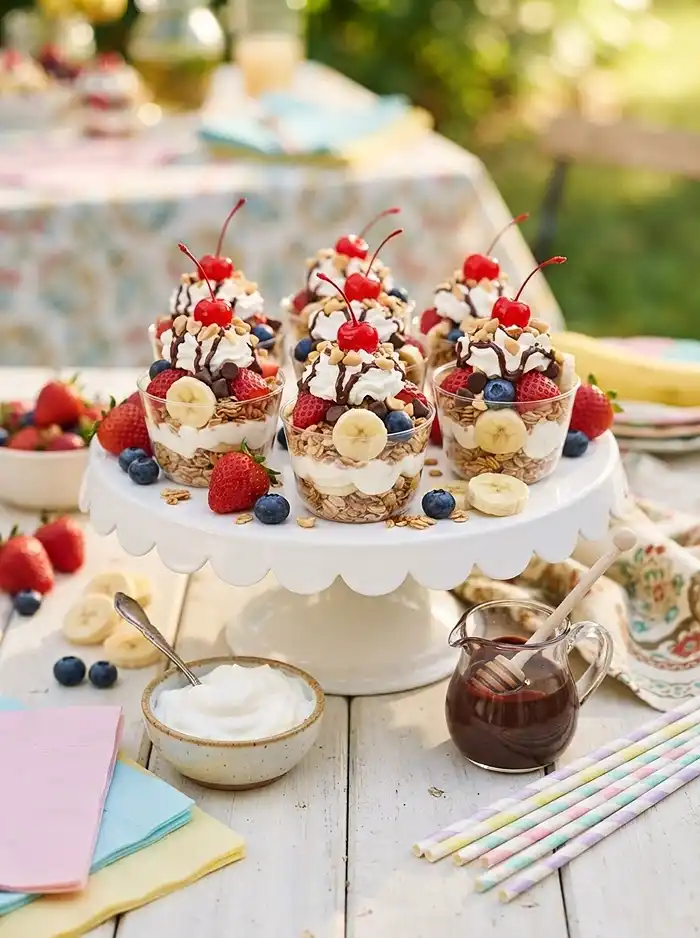
These granola cup treats are genuinely stunning on a summer dessert table — set them out on a platter with tiny toppings in small bowls so guests can customize their own. They’re perfect for a Fourth of July cookout, a Memorial Day weekend brunch, or any backyard gathering where you want something festive without heating up the kitchen.
Pair them with something cold and bubbly on the side — sparkling lemonade, iced hibiscus tea, or a light fruit punch. If you’re planning a brunch spread, these sit beautifully next to this dairy-free peach pie chia pudding for a full no-bake dessert station.
Looking for more easy gluten-free recipes to round out your table? The gluten-free bread and butter pickles make a surprisingly fun savory contrast on a summer spread. And if you’re curious about functional drinks to sip while you prep, the guide on how to make gluten-free mushroom tea is worth a read.
Conclusion
These gluten-free no-bake banana split granola cups prove that going gluten-free never means settling for less fun at the dessert table. They’re quick to make, genuinely crowd-pleasing, and hold up beautifully for every kind of gathering.
Give them a try this week — I’d love to hear which fruit combination you landed on. Drop your version in the comments below, leave a star rating if you loved them, and share a photo on Pinterest so others can find this recipe too.
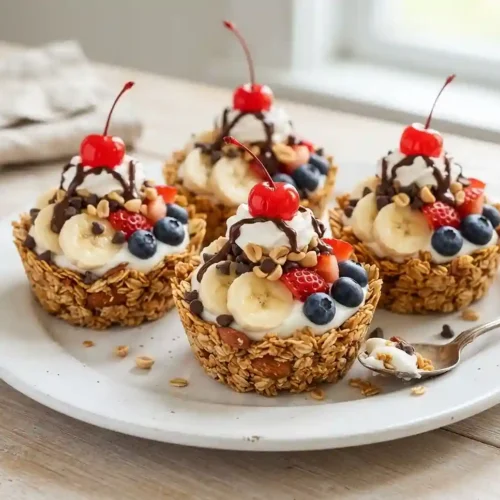
Gluten-Free No-Bake Banana Split Granola Cups
Equipment
- Microwave-safe bowl
- Microwave
- 12-cup muffin pan
- Silicone muffin liners
- Small glass or measuring spoon
- Refrigerator
- Freezer
Ingredients
For the Granola Cups
- 2 cups Certified gluten-free granola Look for the GF certification label
- ½ cup Creamy peanut butter or almond butter Natural or conventional both work
- ¼ cup Honey or pure maple syrup Maple syrup keeps it fully vegan
- 2 tbsp Coconut oil, melted Helps cups firm up when chilled
- ½ tsp Vanilla extract
- ¼ tsp Ground cinnamon
- Pinch Salt Balances sweetness
For the Banana Split Filling
- 2 medium Bananas, sliced Ripe but firm holds up best
- 1 cup Strawberries, diced
- ½ cup Blueberries
- ½ cup Vanilla Greek yogurt Full-fat gives the richest texture
- 2 tbsp Gluten-free mini chocolate chips Check label for GF certification
- 2 tbsp Chopped peanuts or walnuts
- 2 tbsp Whipped cream or whipped topping Optional
- 2 tbsp Chocolate or fudge sauce Optional — use a GF-labeled brand
- 1 per cup Maraschino cherry Optional, for a classic finish
Instructions
- In a microwave-safe bowl, combine the peanut butter, honey, and coconut oil. Microwave for about 20–30 seconds, then stir until smooth and fully combined.
- Mix in the vanilla extract, cinnamon, and salt. Add the certified gluten-free granola and stir until every piece is lightly coated with a glossy, even coating.
- Lightly grease a 12-cup muffin pan or use silicone muffin liners. Divide the granola mixture evenly among the cups, using about 2½ to 3 tablespoons per cup.
- Press the mixture firmly into the bottom and up the sides to form little bowls. A small glass or the back of a measuring spoon can be used to press the center down and shape the walls.
- Refrigerate the cups for at least 1 hour, or until completely firm to the touch. For an extra-sturdy texture, transfer the pan to the freezer for 20–30 minutes after the initial chilling.
- Just before serving, spoon about a teaspoon of vanilla Greek yogurt into each granola cup. Top with sliced banana, diced strawberries, and blueberries. Sprinkle with gluten-free mini chocolate chips and chopped nuts.
- For the full banana-split experience, add a small dollop of whipped cream to each cup, drizzle with chocolate sauce, and crown each one with a maraschino cherry. Serve immediately.