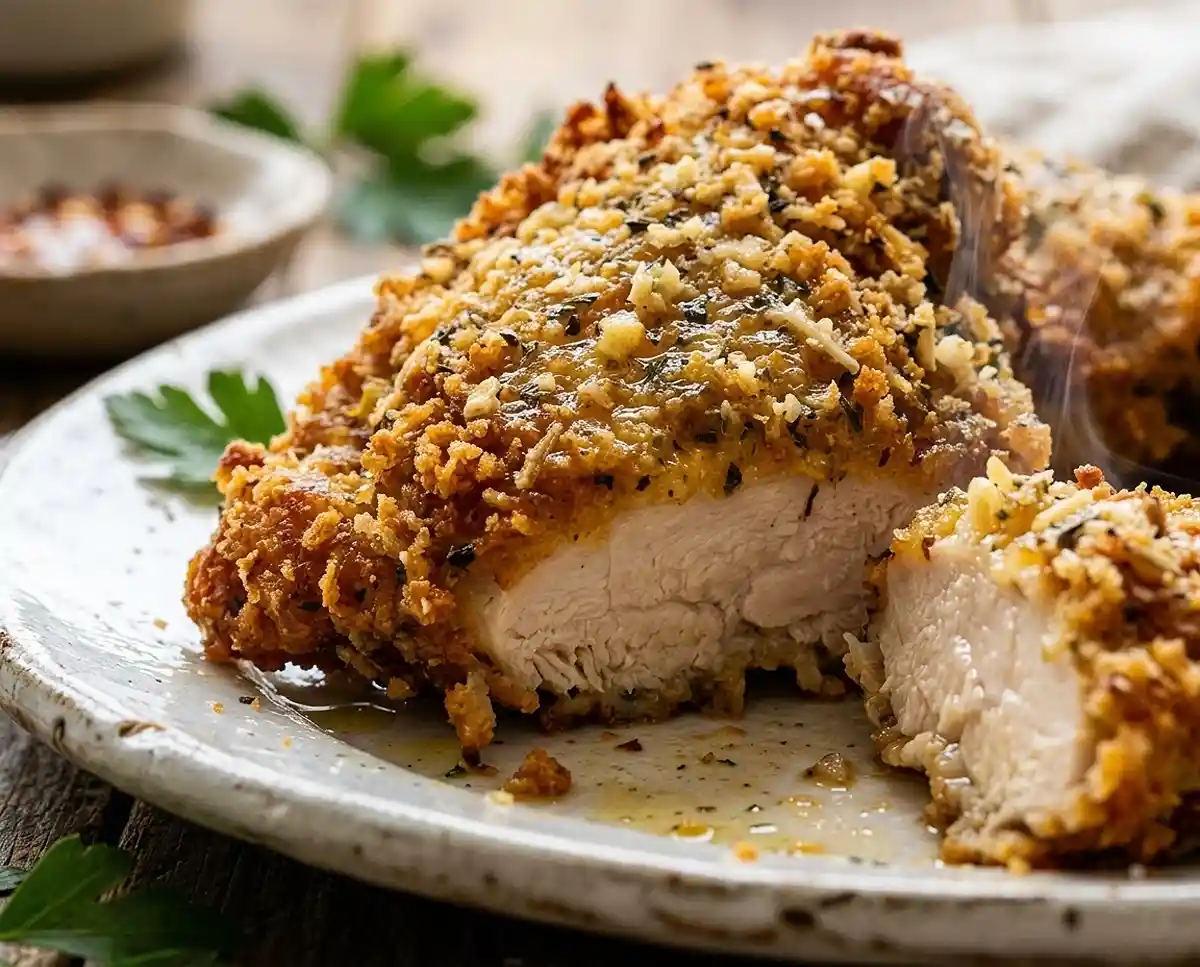
Gluten-Free Ya Ya Chicken Recipe
Make this gluten-free ya ya chicken recipe with a tangy vinegar marinade and a crispy Parmesan crust. Step-by-step instructions, tips, and storage guide included.
The first time I made a gluten-free ya ya chicken recipe, I used the wrong breadcrumbs — a store-bought blend that turned to paste the moment it hit the marinade.
The coating slid right off in the oven. I stood there staring at a pan of naked chicken thinking, there has to be a better way.
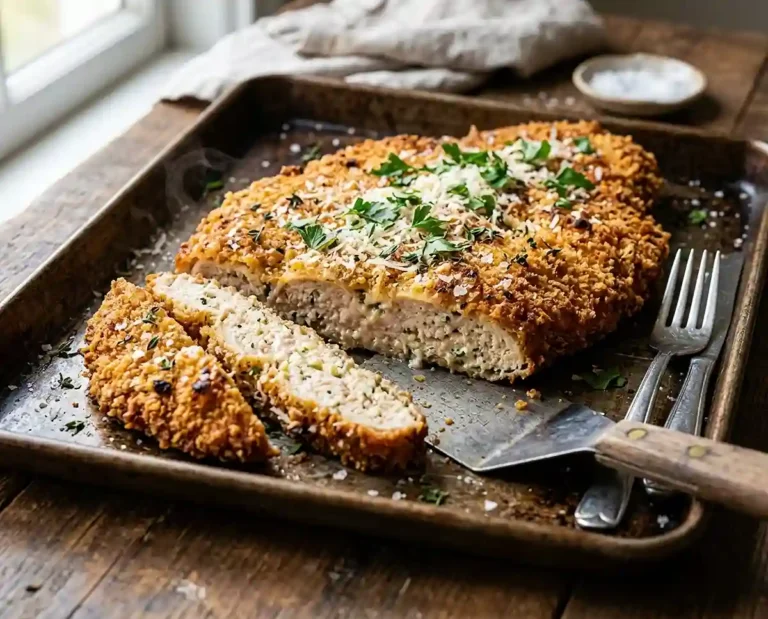
Turns out the fix was two things: certified gluten-free fresh breadcrumbs and a proper press-and-coat technique. Get those right, and you end up with a crust that shatters like a thin cracker and clings all the way to the bone.
Table of Contents
Why You’ll Love This Ya Ya Chicken Recipe
- Crispy coating that actually sticks — the marinade acts as a binder so every breadcrumb holds in the oven
- Hands-off baking — 45 to 50 minutes at 400°F does the work while you do something else
- Naturally gluten-free — no flour, no breading shortcuts, just certified GF breadcrumbs and real cheese
- Scales easily — feeds 6 to 8 people, and leftovers reheat beautifully the next day
The Secret to Perfect Gluten-Free Ya Ya Chicken
- Red-wine vinegar in the marinade — the acidity tenderizes the meat and creates a tacky surface that helps the coating grip
- Certified gluten-free fresh breadcrumbs — dried crumbs turn dusty and fall off; fresh ones compress and fuse to the chicken during baking
- Two cheeses, not one — Parmesan adds sharp saltiness while Pecorino Romano brings a nuttier, more pungent depth that dried herbs alone can’t replicate
- Space on the baking sheet — crowding traps steam and makes the coating soft. Give each piece room to crisp all around.
Ingredients

For the Marinade
| Ingredient | Amount | Notes |
|---|---|---|
| Extra-virgin olive oil | 1/4 cup, plus more for the baking sheet | Use a good-quality oil — it’s a flavor carrier here |
| Red-wine vinegar | 1/4 cup plus 1 tablespoon | Do not substitute white vinegar — the flavor is different |
| Kosher salt | 1/2 teaspoon | |
| Crushed red-pepper flakes | 1/4 teaspoon | Adjust up or down to taste |
| Dried oregano | 1/2 teaspoon | |
| Garlic, minced and divided | 3 cloves | 2 cloves go into the marinade, 1 clove into the coating |
For the Chicken
| Ingredient | Amount | Notes |
|---|---|---|
| Whole chicken, cut into 8 pieces | 3 to 4 pounds | Ask your butcher to cut it, or buy pre-cut pieces |
For the Gluten-Free Crispy Coating
| Ingredient | Amount | Notes |
|---|---|---|
| Certified gluten-free fresh breadcrumbs | 1 cup | Make your own by pulsing GF bread in a food processor |
| Parmesan cheese, freshly grated | 1/4 cup | Pre-grated versions are too dry — freshly grated melts better |
| Pecorino Romano cheese, freshly grated | 1/4 cup | Stronger and saltier than Parmesan; don’t skip it |
| Fresh flat-leaf parsley, finely chopped | 2 tablespoons | Flat-leaf has more flavor than curly parsley |
| Freshly ground black pepper | 1/4 teaspoon |
Instructions
Step 1: Make the Marinade
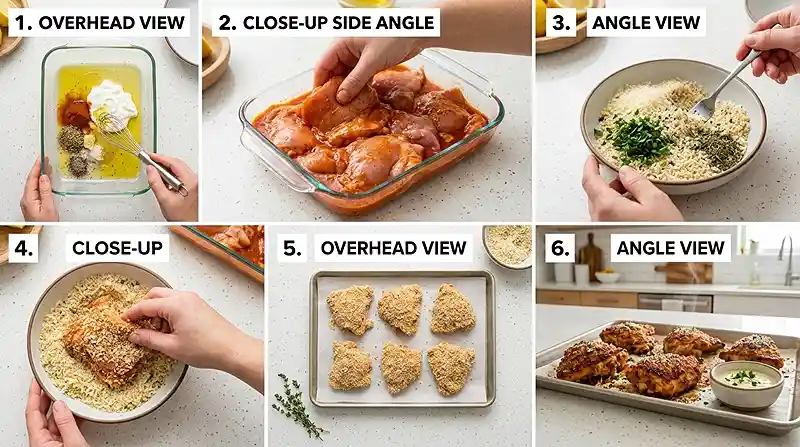
In a 9×13-inch baking dish, whisk together the olive oil, red-wine vinegar, kosher salt, crushed red-pepper flakes, dried oregano, and 2 minced garlic cloves.
Add the chicken pieces and turn each one to coat thoroughly on all sides. You want every surface covered — the marinade is doing double duty as flavor and binder.
Cover the dish tightly and refrigerate for at least 1 hour, or up to 8 hours. The longer it marinates, the more the vinegar tenderizes the meat and the deeper the flavor goes.
Step 2: Prep the Oven and Coating
Preheat the oven to 400°F (200°C). Line a rimmed baking sheet with parchment paper or foil and lightly coat with olive oil — this prevents sticking and helps the underside of the coating crisp.
In a medium bowl, combine the certified gluten-free breadcrumbs, Parmesan, Pecorino Romano, finely chopped parsley, black pepper, and the remaining minced garlic clove. Toss until evenly mixed — you should smell that garlic immediately.
Step 3: Coat the Chicken
Remove each chicken piece from the marinade and press it firmly into the breadcrumb mixture, coating all sides well. Don’t shake off the excess marinade first — that sticky surface is what helps the coating bond.
Pro Tip: Use one hand for the wet chicken and one hand for pressing the crumbs. This keeps the coating from clumping into a soggy mess in the bowl.
Arrange the coated chicken pieces on the prepared baking sheet, leaving space between each piece. Crowding is the enemy of crisp — steam needs somewhere to escape.
Step 4: Bake
Bake for 45 to 50 minutes, or until the coating is deep golden and the chicken reaches an internal temperature of 165°F (74°C) at the thickest part.
Use an instant-read thermometer rather than guessing by color — the coating can brown quickly while the interior still needs more time. According to USDA food safety guidelines for poultry, 165°F is the minimum safe internal temperature for all chicken cuts.
Carefully loosen the chicken from the baking sheet — a thin spatula works better than tongs here, which can knock off the crust. Let it rest for a few minutes before serving so the juices redistribute.
Make It Your Own
Want a dairy-free version of this gluten-free ya ya recipe? Swap both cheeses for a plant-based Parmesan alternative and add an extra tablespoon of nutritional yeast to replicate the savory depth. The coating will still crisp beautifully as long as you use fresh gluten-free breadcrumbs.
Well… if you prefer bone-in chicken thighs or drumsticks instead of a whole cut-up bird, this recipe adapts easily. Use the same marinade and coating ratios — just reduce the bake time to 35 to 40 minutes since those cuts are smaller and cook faster.
For a spicier coating, double the crushed red-pepper flakes or add a pinch of smoked paprika to the breadcrumb mixture. Smoked paprika won’t make the coating taste smoky — it just adds a gentle warmth that layers nicely with the oregano and garlic.
No fresh parsley on hand? Substitute with 2 teaspoons of dried flat-leaf parsley. Dried herbs have more concentrated flavor, so you need less — but fresh parsley gives the coating a brighter, more vibrant look right out of the oven.
Common Problems & Solutions
Problem: The coating fell off during baking. The chicken wasn’t tacky enough when you pressed on the crumbs. Don’t pat the chicken dry before coating — you need that marinade surface. Press the crumbs firmly rather than lightly dusting, and make sure your baking sheet is lightly oiled so the underside has something to grip.
Problem: The coating is soft and pale instead of crispy. The pieces were too close together on the pan, trapping steam. Space them at least an inch apart and make sure your oven was fully preheated before they went in. A cold oven means the crust steams instead of crisps in those critical first minutes.
Man, oh man… Problem: The coating burned before the chicken was cooked through. This usually happens with larger pieces like bone-in breasts. Tent the pan loosely with foil after the first 30 minutes and continue baking until the thermometer reads 165°F. The foil protects the crust while the interior finishes cooking.
Problem: The chicken is dry inside. It was overcooked or the marinade time was too short. Aim for a full hour of marinating at minimum — the red-wine vinegar is doing important work breaking down the proteins. Pull the chicken the moment it hits 165°F and let it rest covered with foil for 5 minutes to lock in the juices.
Storage & Meal Prep
| Method | Duration | Notes |
|---|---|---|
| Counter | 2 hours max | Cooked poultry should not sit at room temp longer than 2 hours |
| Fridge | 3 to 4 days | Airtight container; bring to room temp before reheating |
| Freezer | 2 to 3 months | Wrap pieces individually before placing in a freezer bag |
To reheat and keep the coating crispy, use the oven at 375°F for 12 to 15 minutes rather than the microwave. The microwave turns the crust rubbery — the oven brings it back close to its original crunch.
Leftover chicken is brilliant pulled off the bone and tossed into a salad, stuffed into a gluten-free wrap, or layered over rice with a drizzle of olive oil.
You can also marinate the raw chicken up to 8 hours ahead and keep it covered in the fridge — that makes this a fantastic make-ahead option for busy weeknights or weekend entertaining.
Gluten-Free Ya Ya Chicken Recipe FAQs
Can I use boneless chicken thighs instead of a whole cut-up chicken?
Yes. Boneless thighs work well with the same marinade and coating. Reduce the bake time to 25 to 30 minutes and check for 165°F internal temperature. The coating may be slightly thinner since boneless pieces are flatter, but it will still crisp nicely.
How do I make gluten-free fresh breadcrumbs?
Pulse 2 to 3 slices of day-old gluten-free sandwich bread in a food processor until you get coarse crumbs. Day-old bread crumbles more evenly than fresh. One cup of crumbs takes about 2 to 3 slices depending on the bread density.
Can I prepare this recipe ahead of time?
Yes. You can marinate the chicken for up to 8 hours in the refrigerator. Beyond 8 hours, the vinegar can over-tenderize the meat. Coat the chicken with the breadcrumb mixture right before baking for the crispiest results.
How do I reheat leftovers without losing the crispy coating?
Reheat in the oven at 375°F for 12 to 15 minutes rather than using the microwave. The microwave turns the coating soft and rubbery. The oven restores much of the original crunch without drying out the chicken.
Is this recipe dairy-free as written?
No, the coating includes Parmesan and Pecorino Romano. To make it dairy-free, substitute both cheeses with a plant-based Parmesan alternative and add a tablespoon of nutritional yeast for depth. The coating will still crisp well with fresh gluten-free breadcrumbs.
Serving Suggestions

You know… this chicken is at its best straight from the oven, when the coating crackles like thin-crust pizza and the inside is still steaming. Serve it alongside roasted potatoes or a simple green salad with lemon vinaigrette to let the herby coating shine.
It’s also a natural fit for a Sunday family dinner or a Fourth of July spread where you need something crowd-friendly that holds its own at room temperature for a while.
For a rich dipping sauce alongside, try this gluten-free crack sauce recipe — the creamy, garlicky base is a natural match for the herbed crust. Or round out the table with these gluten-free enoki beef rolls as a savory starter before the chicken comes out of the oven.
And if you need a fun dessert to finish the meal, these gluten-free Fruity Pebbles cookies are a guaranteed crowd-pleaser that kids and adults reach for equally.
Give this recipe a try and leave a comment below — I’d love to hear whether you went with two bags or three, and how your crust turned out.
If it’s a keeper, pin it to your gluten-free dinner board on Pinterest so you always know where to find it.
Gluten-Free Ya Ya Chicken Recipe With Crispy Coating
Equipment
- 9×13 inch baking dish
- Whisk
- Rimmed baking sheet
- Parchment paper or foil
- Medium mixing bowl
- Instant-read thermometer
- Thin spatula
Ingredients
For the Marinade
- ¼ cup Extra-virgin olive oil Plus more for the baking sheet; use a good-quality oil
- ¼ cup Red-wine vinegar Plus 1 tablespoon; do not substitute white vinegar
- ½ teaspoon Kosher salt
- ¼ teaspoon Crushed red-pepper flakes Adjust to taste
- ½ teaspoon Dried oregano
- 3 cloves Garlic Minced and divided; 2 cloves for the marinade and 1 clove for the coating
For the Chicken
- 3 to 4 pounds Whole chicken Cut into 8 pieces; pre-cut pieces can also be used
For the Gluten-Free Crispy Coating
- 1 cup Certified gluten-free fresh breadcrumbs Make your own by pulsing GF bread in a food processor
- ¼ cup Parmesan cheese Freshly grated; pre-grated versions are too dry
- ¼ cup Pecorino Romano cheese Freshly grated
- 2 tablespoons Fresh flat-leaf parsley Finely chopped
- ¼ teaspoon Freshly ground black pepper
Instructions
- In a 9×13-inch baking dish, whisk together the olive oil, red-wine vinegar, kosher salt, crushed red-pepper flakes, dried oregano, and 2 minced garlic cloves. Add the chicken pieces and turn to coat thoroughly. Cover and refrigerate for at least 1 hour or up to 8 hours.
- Preheat the oven to 400°F (200°C). Line a rimmed baking sheet with parchment paper or foil and lightly coat it with olive oil. In a medium bowl, combine the gluten-free breadcrumbs, Parmesan, Pecorino Romano, chopped parsley, black pepper, and remaining minced garlic.
- Remove each chicken piece from the marinade and press it firmly into the breadcrumb mixture, coating all sides well. Do not shake off the excess marinade first. Use one hand for the wet chicken and one hand for pressing on the crumbs to prevent clumping.
- Arrange the coated chicken pieces on the prepared baking sheet, leaving at least an inch of space between pieces so steam can escape and the coating can crisp.
- Bake for 45 to 50 minutes, or until the coating is deep golden and the thickest part of the chicken reaches 165°F (74°C). Use an instant-read thermometer to check the temperature.
- Carefully loosen the chicken from the baking sheet with a thin spatula. Let it rest for a few minutes before serving.