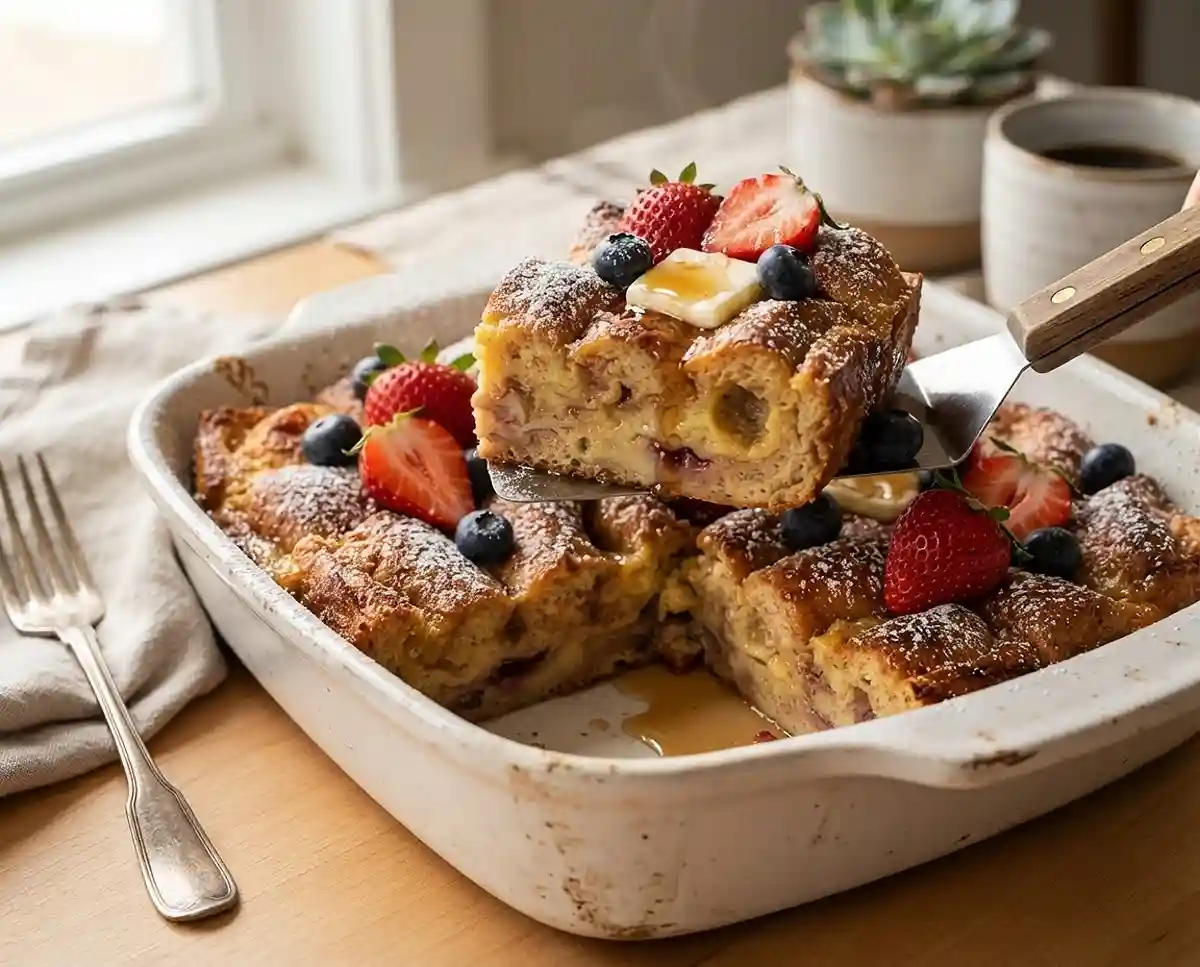
Hawaiian Bread French Toast Bake
Learn how to make a gluten-free Hawaiian bread French toast bake with a simple custard, golden top, storage tips, and make-ahead ideas for brunch.
The first time I made a gluten-free Hawaiian bread French toast bake, I almost gave up on the whole idea. My gluten-free rolls turned to mush in the custard, and the center never fully set. Well, that flop taught me the one rule that makes this recipe actually work: dry your bread first, no shortcuts.
These days this dish shows up at nearly every holiday brunch in my house. Have you ever needed a make-ahead breakfast that feeds a crowd without you standing over a griddle at 7am? That’s exactly the gap this recipe fills, and it uses ingredients most gluten-free kitchens already have on hand.
What makes this version different is the sweet, soft texture of Hawaiian-style rolls. Even in gluten-free form, they soak up custard beautifully once they’ve dried out a bit, giving you a bake that’s tender in the middle with edges that turn a deep golden brown.
Why You’ll Love This Hawaiian Bread French Toast Bake
- Soft, custardy texture: The dried rolls soak up just enough egg mixture to stay tender without turning gummy.
- Beginner-friendly: There’s no flipping, no standing at the stove, and only one bowl for the custard.
- Flexible for dietary needs: Swap in unsweetened dairy-free milk and this becomes a dairy-free gluten-free breakfast too.
- Best for feeding a group: One 8×8 dish serves 6-8 people, which makes it perfect for weekend guests or a holiday morning.
The Secret to Perfect Gluten-Free Hawaiian Bread French Toast Bake
Gluten-free bread behaves differently than regular bread, so this recipe leans on a few specific techniques to keep it from turning to mush.
- Dry the bread completely first. Gluten-free rolls have less structural gluten protein to hold their shape, so they need to lose moisture before they meet the custard or they’ll disintegrate.
- Don’t oversoak. A 10 to 15 minute rest is enough. Gluten-free crumb absorbs liquid faster than wheat bread, so extra soaking time works against you here.
- Cover, then uncover. Baking covered first lets the custard set gently in the center; removing the foil for the last stretch is what gives you that golden, slightly crisp top.
- Whisk the custard until it’s ribbony, meaning it falls in a slow, smooth stream off the whisk. That extra bit of aeration helps the eggs coat the bread evenly instead of pooling at the bottom.
If you want to understand more about how gluten-free flours and doughs behave differently from wheat, the Celiac Disease Foundation’s gluten-free food guide is a solid, trusted celiac research resource worth bookmarking.
Table of Contents
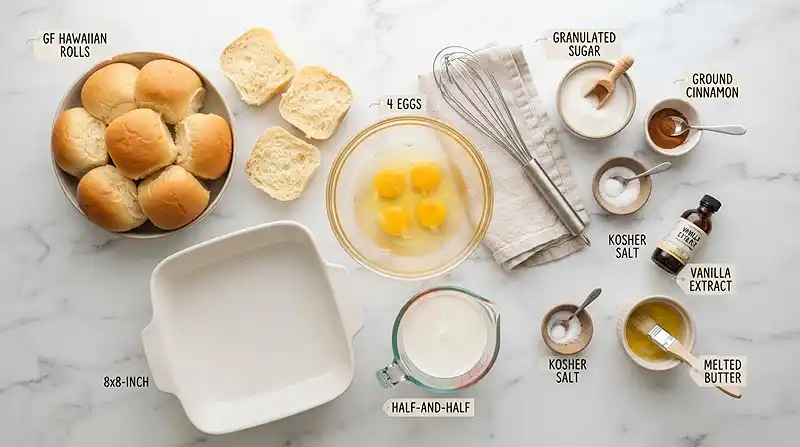
Ingredients
French Toast Bake
- 1 package (12 rolls) gluten-free Hawaiian-style rolls
- 4 large eggs
- ½ cup half-and-half, heavy cream, or unsweetened dairy-free milk
- 2 tablespoons granulated sugar
- 1 teaspoon ground cinnamon
- 1 teaspoon vanilla extract
- Pinch of kosher salt
- 2 tablespoons melted butter or neutral oil, for greasing
Optional Toppings
- Powdered sugar
- Warm maple syrup
- Fresh strawberries, blueberries, or bananas
- Butter
- Chopped pecans or walnuts
Servings: 6-8
Instructions
Step 1: Dry the Bread
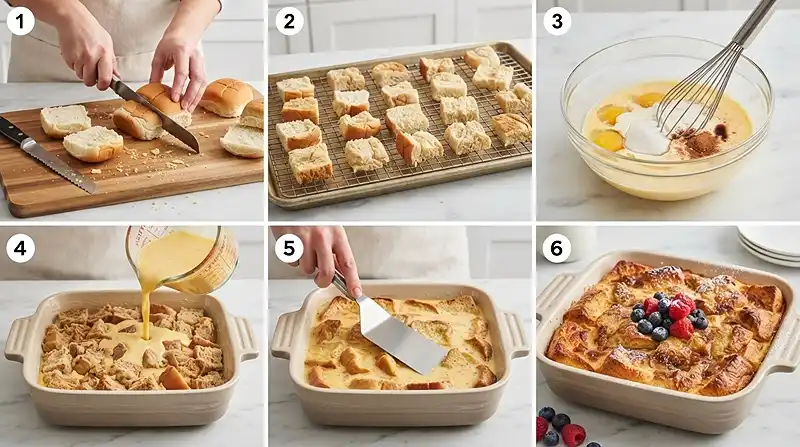
Cut the gluten-free Hawaiian rolls into halves or large chunks. Spread them on a wire rack and let them sit uncovered overnight. For a quicker option, place them in a 350°F oven for about 10 minutes to dry them slightly.
Step 2: Prepare the Baking Dish
Preheat the oven to 350°F (175°C). Lightly grease an 8×8-inch or similar-sized baking dish with melted butter or oil.
Step 3: Make the Custard
In a medium bowl, whisk together the eggs, half-and-half, sugar, cinnamon, vanilla, and salt until smooth and slightly ribbony. This is where the flavor base comes together, so take your time here.
Step 4: Combine
Arrange the dried Hawaiian rolls evenly in the prepared baking dish. Slowly pour the egg mixture over the bread, making sure the pieces are evenly coated.
Step 5: Rest
Gently press the bread down with a spatula so it absorbs some of the custard. Let it sit for 10-15 minutes before baking. Don’t oversoak the bread, as gluten-free rolls can become soft quickly.
Step 6: Bake
Cover the dish loosely with foil and bake for 20 minutes. Remove the foil and continue baking for another 15-20 minutes, until the top is golden brown and the center is set.
Step 7: Cool Slightly
Let the French toast bake rest for 5-10 minutes before serving. This allows the custard to finish setting while keeping the center as soft as a cloud.
Step 8: Serve
Dust with powdered sugar and serve warm with maple syrup and fresh fruit. Add butter or chopped nuts if desired.
Make It Your Own
You know, one of the best parts of this baked french toast with Hawaiian bread is how easily it adapts to what you already have in the kitchen.
Dairy-free swap: Use unsweetened dairy-free milk in place of the half-and-half. The custard will be slightly less rich, but it still sets up beautifully and coats the bread well.
Add-ins: Fold in a handful of chopped pecans, chocolate chips, or a swirl of cream cheese between the bread layers before baking for a more indulgent hawaiian bread french toast bake recipe.
Fruit variation: Layer thin apple or banana slices between the bread pieces before pouring the custard over. The fruit softens as it bakes and adds natural sweetness.
Spice swap: Nutmeg or a touch of orange zest can stand in for or complement the cinnamon if you want a different flavor direction.
Common Problems & Solutions
Problem: The center is gummy instead of custardy. Solution: your bread wasn’t dried out enough before soaking. Gluten-free rolls hold onto extra moisture, so they need a full overnight rest on a rack or a quick 10-minute stint in the oven before they ever touch the custard.
Problem: The bake falls apart when you cut it. Solution: you likely skipped the rest time after baking. Man, oh man, I learned this one the hard way at my very first attempt. Give the dish 5-10 minutes to cool so the custard finishes setting and holds its shape.
Problem: The top browns too fast but the middle stays wet. Solution: your oven may be running hot, or the foil came off too early. Keep the dish covered for the full 20 minutes and check for doneness with a gentle jiggle test before removing the foil.
Problem: The bread turned mushy before it even baked. Solution: this almost always means the rolls soaked too long during the rest step. Ten to 15 minutes is the sweet spot for gluten-free bread, since it absorbs liquid faster than wheat-based rolls.
For more background on why gluten-free grains and starches behave this way in baking, Mayo Clinic’s authoritative gluten-free nutrition guide is a helpful reference.
Storage & Meal Prep
| Method | Duration | Notes |
|---|---|---|
| Counter | 2-3 days | Airtight container |
| Fridge | 5-7 days | Bring to room temp |
| Freezer | 2-3 months | Wrap individually |
Reheat individual portions in the microwave for 30-45 seconds, or warm a larger portion in a 300°F oven until heated through. Leftover pieces make a great base for a quick bread pudding if you crumble them and add a splash of milk before rewarming, so nothing goes to waste.
Hawaiian Bread French Toast Bake FAQs
Can I make this gluten-free Hawaiian bread French toast bake ahead of time?
Yes. Assemble the dish up to the point of baking, cover, and refrigerate overnight. Bake it straight from the fridge the next morning, adding a few extra minutes to the covered baking time.
How do I keep the bread from turning gummy?
Dry the gluten-free rolls completely before soaking them, either overnight on a rack or 10 minutes in a 350°F oven. This step removes excess moisture so the bread can absorb custard without falling apart.
What’s the best gluten-free bread to use if I can’t find Hawaiian-style rolls?
Any soft, slightly sweet gluten-free sandwich bread or brioche-style loaf will work in a pinch. The texture won’t be quite as tender, but the method stays the same.
Why did my French toast bake turn out watery in the middle?
This usually means it needed more time in the oven, or the foil came off too soon. Bake covered for the full 20 minutes, then check with a gentle jiggle test before uncovering for the final stretch.
Can I freeze leftovers?
Yes, wrap individual pieces tightly and freeze for up to 2-3 months. Thaw overnight in the fridge, then reheat in the oven or microwave until warmed through.
Serving Suggestions
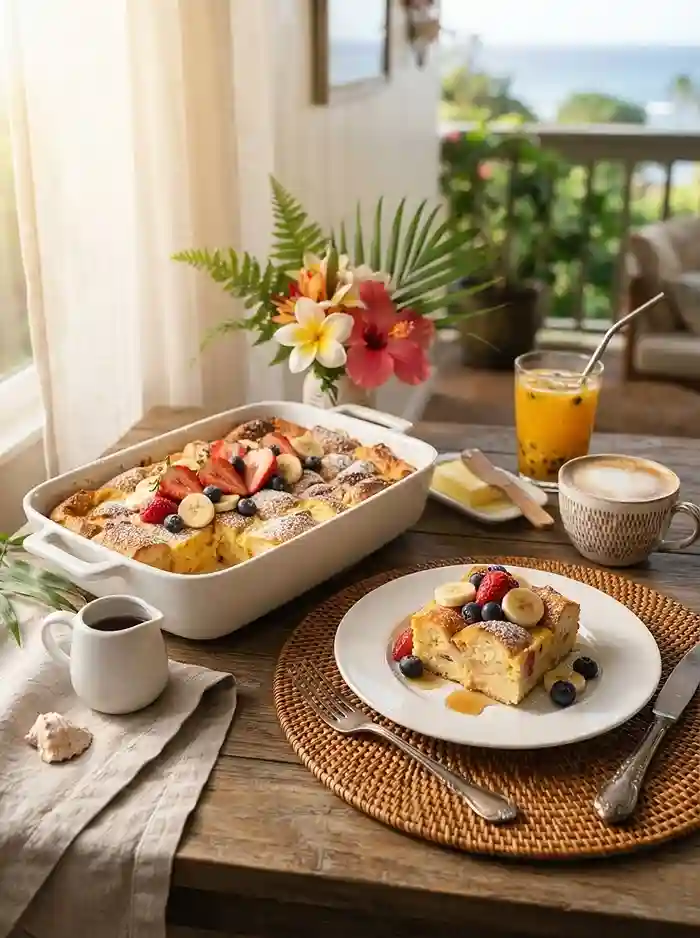
This bake has become our go-to for Christmas morning, when everyone wakes up hungry and nobody wants to stand at the stove. Serve it with warm maple syrup, fresh berries, and a side of crispy bacon or sausage to round out the plate.
For more brunch and baking ideas, check out this beginner-friendly gluten-free bread recipe or browse this easy dairy-free dessert for something sweet later in the day.
Give It a Try
I’d love to hear how this gluten-free Hawaiian bread French toast bake turns out in your kitchen, especially if you try one of the variations above. Snap a photo, save it to Pinterest, and drop a rating or comment below so other readers can see what worked for you.
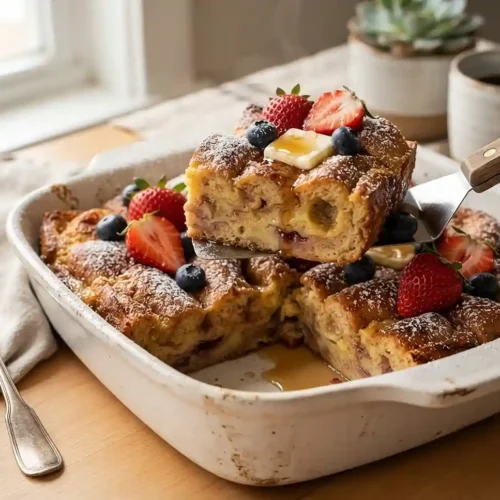
Gluten-Free Hawaiian Bread French Toast Bake
Equipment
- Wire rack
- 8×8-inch baking dish
- Medium mixing bowl
- Whisk
- Spatula
- Aluminum foil
Ingredients
French Toast Bake
- 1 package gluten-free Hawaiian-style rolls 12 rolls
- 4 large eggs
- ½ cup half-and-half or heavy cream or unsweetened dairy-free milk
- 2 tablespoons granulated sugar
- 1 teaspoon ground cinnamon
- 1 teaspoon vanilla extract
- 1 pinch kosher salt
- 2 tablespoons melted butter or neutral oil for greasing
Optional Toppings
- powdered sugar
- warm maple syrup
- fresh strawberries, blueberries, or bananas
- butter
- chopped pecans or walnuts
Instructions
- Cut the gluten-free Hawaiian rolls into halves or large chunks. Spread them on a wire rack and let them sit uncovered overnight. For a quicker option, place them in a 350°F oven for about 10 minutes to dry them slightly.
- Preheat the oven to 350°F (175°C). Lightly grease an 8×8-inch or similar-sized baking dish with melted butter or oil.
- In a medium bowl, whisk together the eggs, half-and-half, sugar, cinnamon, vanilla, and salt until smooth and slightly ribbony.
- Arrange the dried Hawaiian rolls evenly in the prepared baking dish. Slowly pour the egg mixture over the bread, making sure the pieces are evenly coated.
- Gently press the bread down with a spatula so it absorbs some of the custard. Let it sit for 10-15 minutes before baking. Do not oversoak the bread.
- Cover the dish loosely with foil and bake for 20 minutes. Remove the foil and continue baking for another 15-20 minutes, until the top is golden brown and the center is set.
- Let the French toast bake rest for 5-10 minutes before serving so the custard can finish setting.
- Dust with powdered sugar and serve warm with maple syrup and fresh fruit. Add butter or chopped nuts if desired.