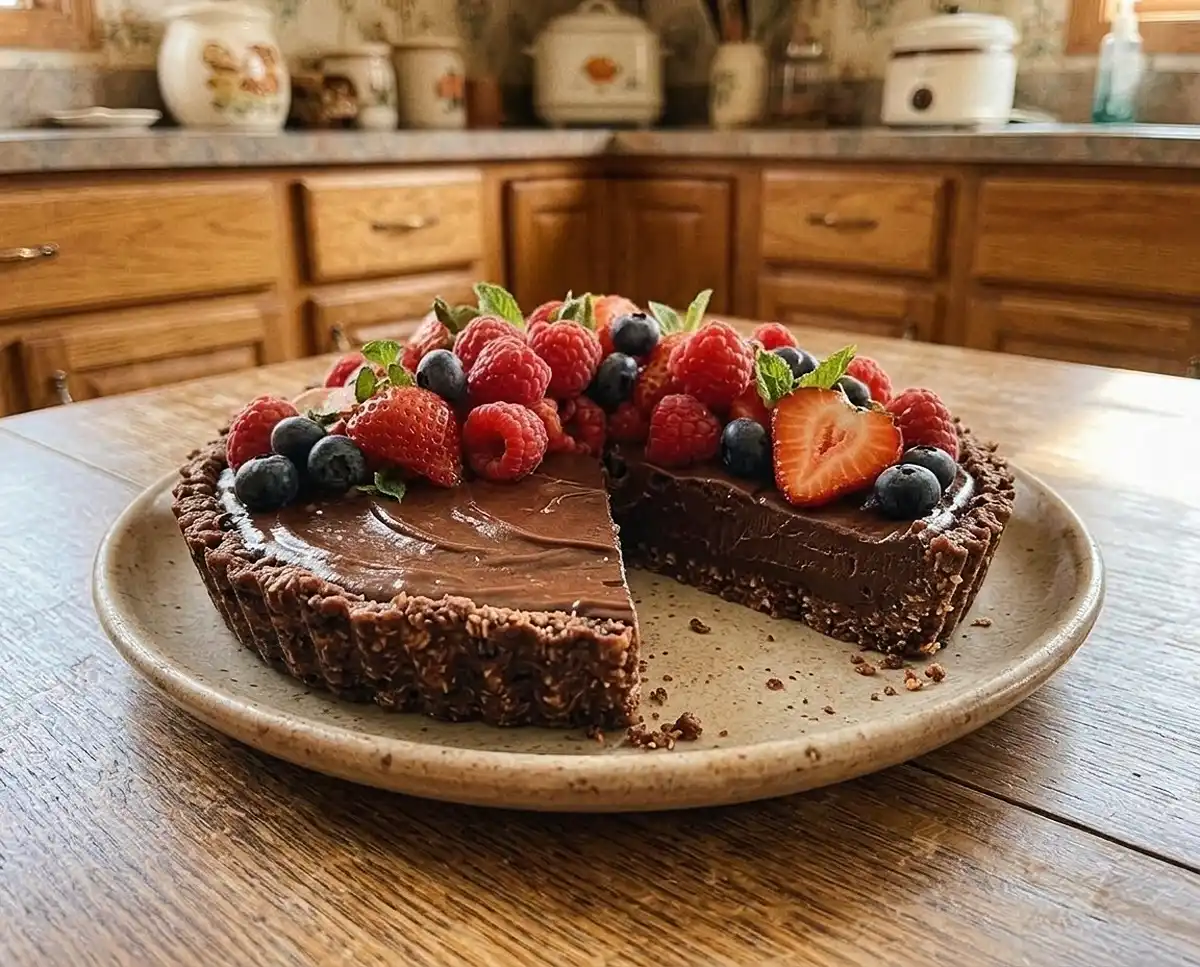
No Bake Chocolate Berry Tart
I learned the hard way that a no-bake tart lives or dies by a firm, cold crust. My first gluten-free no bake chocolate berry tart slumped off the pan in one soft sheet, and my youngest called it chocolate soup with berries.
Craving a rich, chocolatey dessert with a burst of fresh berry flavor? Discover these no bake gluten free snacks for more effortless treats that satisfy sweet cravings without turning on the oven. You might find your next show-stopping no-bake favorite among these delicious ideas!
Who wants to turn on the oven when the kitchen is already warm? Everything comes together in a food processor, and the rich cocoa filling sets right in the refrigerator.
What Makes This Gluten-Free No Bake Chocolate Berry Tart Worth Making
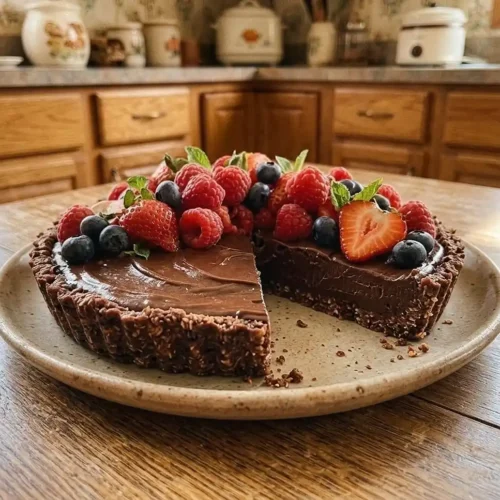
- Texture and flavor: A sturdy oat and cocoa crust holds a smooth, fudgy chocolate filling, topped with juicy fresh berries.
- Difficulty: Beginner-friendly. If you can pulse a food processor and spread filling with a spatula, you can make this.
- Unique advantages: It’s naturally dairy-free and egg-free, and it uses maple syrup as the only sweetener.
- Best for: Hot-weather gatherings, make-ahead desserts, and anyone who wants a chocolate treat without turning on the oven.
The Science Behind Great Gluten-Free No Bake Chocolate Berry Tart
A no-bake tart sets through temperature and fat, not heat. Four details make the difference between a clean slice and a puddle.
- Pulsed oats: Breaking up the oats first lets them blend with the syrup and coconut oil into a pliable dough that holds together without any gluten or flour.
- Coconut oil as the setting agent: Coconut oil is solid when cold and soft at room temperature, so chilling firms both the crust and the filling.
- Maple syrup as the binder: Its sticky sweetness glues the crust crumbs together and keeps the filling smooth.
- Berries added at the right time: Fresh berries release juice as they sit, so topping them later protects the filling’s surface and keeps the tart looking sharp.
Table of Contents
Ingredients
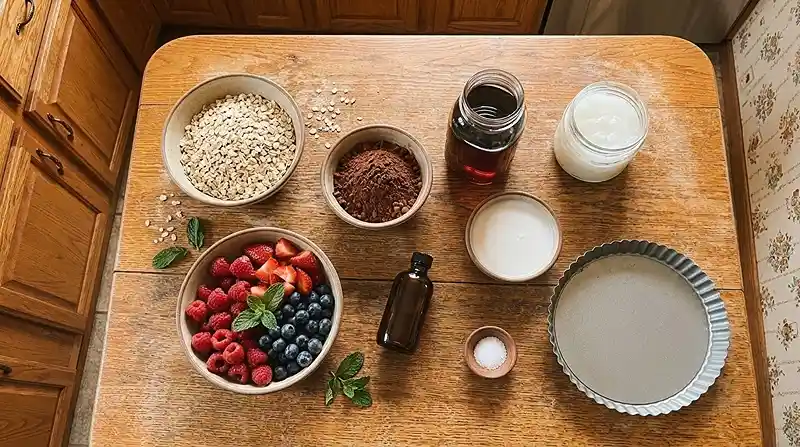
This recipe makes 1 (9 inch) tart, or 12 mini tarts.
For the Crust
- 1 3/4 cup (190 grams) rolled oats (certified gluten free, if needed)
- 2/3 cup (65 grams) unsweetened cocoa powder
- 1/3 cup pure maple syrup
- 2 Tablespoons coconut oil
- pinch kosher salt
For the Chocolate Filling
- 1/3 cup pure maple syrup
- 1/3 cup coconut oil
- 1/3 cup coconut milk
- 2/3 cup (65 grams) unsweetened cocoa powder
- 1 1/2 teaspoons vanilla extract
- 1/4 teaspoon kosher salt
For the Topping
- 1 1/2 – 2 cups fresh berries (I like a mix of fresh raspberries, strawberries, and blueberries)
- Fresh mint leaves (optional), for garnish
Ingredient notes: Oats are naturally gluten-free but often picked up wheat in processing, so this trusted guide to choosing gluten-free oats is worth a read. Stir or shake the coconut milk well before measuring, and use pure maple syrup rather than pancake syrup.
Instructions
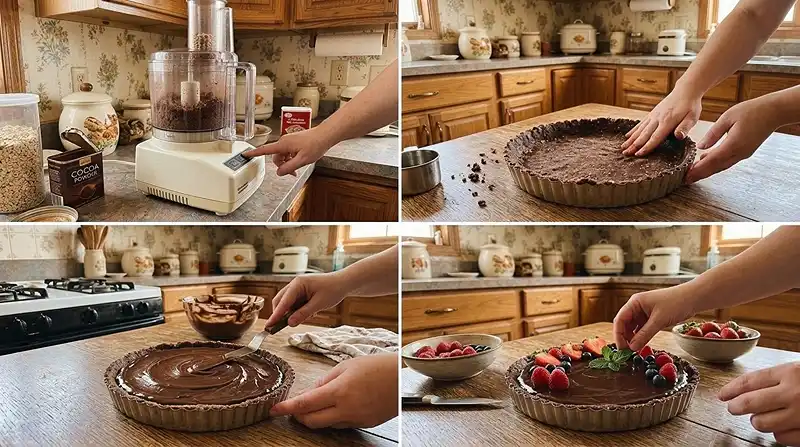
First, Make the Crust
- Pulse the oats: Put the oats in a food processor and pulse to break up a bit.
- Make the crust mixture: Add cocoa powder, syrup, coconut oil, and salt. Process until the mixture starts to come together and sticks together when you pinch it between your fingers. If it’s too dry, add more coconut oil 1/2 teaspoon at a time until it comes together.
Pro Tip: Do the pinch test every time. If the crumbs fall apart in your fingers, the crust won’t hold after chilling.
- Press and chill: Transfer the dough to a tart pan (preferably one with a removable bottom) and pat it out with your fingers or the bottom of a cup until the crust is spread evenly. Refrigerate the crust while you make the filling.
Then, Make the Chocolate Filling
- Blend the filling: Place syrup, coconut oil, coconut milk, cocoa powder, vanilla, and salt in a food processor (or blender) and puree or pulse until well combined. Give the filling a stir to make sure there are no lumps remaining.
- Fill the tart: Spread the filling over the crust and smooth it out with a spatula or knife. If desired, use an offset spatula or the back of a spoon to make gentle swoops in the filling.
For the Topping
- Serving within a few hours: If serving within 4-5 hours, place the berries on top of the chocolate filling in any design you like. Chill for at least 30-40 minutes in the refrigerator to allow the filling and crust to set, and store the tart in the refrigerator until ready to serve.
- Making it ahead: If you’re making this more than 4-5 hours before eating, cover the tart (crust and filling) with plastic wrap or food wrap and refrigerate. When ready to serve, top with berries, and store the tart in the refrigerator.
- Freezing: If you’re making this far in advance, make and freeze the tart without the berry topping in an airtight bag for up to 2-3 weeks. Wrap with plastic wrap or food wrap and cover with a large freezer bag. Thaw the tart in the refrigerator before adding berries and serving.
Ways to Customize This Recipe
For mini chocolate tarts, divide the crust evenly among 12 tart molds instead of one 9 inch pan. Press each crust firmly up the sides and chill before filling. Minis are easy to serve at parties because nobody has to slice.
Look… if you love a hazelnut tart, sprinkle toasted, chopped hazelnuts over the filling before the berries go on. Hazelnut and chocolate are a classic pairing, and the nuts add crunch against the smooth filling. Skip them if you need a nut-free dessert.
Mix and match the berries to whatever looks best at the market. The recipe calls for 1 1/2 to 2 cups, and raspberries, strawberries, and blueberries give the best contrast of color and tartness against the rich chocolate.
If someone in your home has celiac disease, use certified gluten-free oats and read this overview of what people with celiac disease need to know about oats. Some people react even to certified oats, so it’s worth knowing how your body responds.
If Something Went Wrong, Start Here
Problem: the crust is crumbly. Add more coconut oil, 1/2 teaspoon at a time, and process again until the mixture sticks when pinched. The coconut oil acts as the glue once it chills, so a dry mixture won’t hold a slice.
Problem: the filling is soft or runny. Chill the tart for at least 30-40 minutes before slicing. Oh wow… I once cut into one after ten minutes and got chocolate lava, because coconut oil needs real time in the cold to firm up.
Problem: the filling looks lumpy. Stir the filling after processing to check for lumps, then process again if needed. Cold coconut oil or coconut milk can leave small clumps behind that show up as streaks on the surface.
Problem: the berries bleed or look watery. If you’re making the tart more than 4-5 hours ahead, hold off on the topping. Fresh berries release juice as they sit, so adding them right before serving keeps the chocolate surface clean.
Problem: the tart is hard to release from the pan. Use a tart pan with a removable bottom and press the crust firmly and evenly. A well-chilled crust holds its shape when you lift the ring away.
Storage & Meal Prep
| Method | Duration | Notes |
|---|---|---|
| Counter | Serving time only | Coconut oil softens at room temperature |
| Fridge | 5-7 days | Add berries just before serving for best texture |
| Freezer | 2-3 weeks | Freeze without berries, wrapped and in an airtight bag |
There’s no reheating here, since this tart is best served cold. Thaw a frozen tart in the refrigerator, then add the berries. Crumble any leftover crust or filling over yogurt or ice cream so nothing goes to waste.
Frequently Asked Questions
Can I make this tart ahead of time?
Yes, you can make it ahead. If you’re making it more than 4-5 hours before serving, cover and refrigerate the crust and filling, then add the berries when you’re ready to serve. For longer storage, freeze it without the berries.
How do I keep the crust from crumbling?
Press it firmly and evenly, and make sure it passes the pinch test. If the mixture is dry, add more coconut oil 1/2 teaspoon at a time. Chilling the crust while you make the filling helps it firm up.
What’s the best pan for a no-bake tart?
A tart pan with a removable bottom is the best choice. It lets you lift the ring away without cracking the crust. For mini chocolate tarts, use 12 individual tart molds.
Why did my filling not set?
It most likely needs more time in the refrigerator. Chill the tart for at least 30-40 minutes so the coconut oil can firm up. Keep it refrigerated until serving, since the filling softens at room temperature.
Can I freeze this tart?
Yes, freeze it without the berry topping for up to 2-3 weeks. Wrap it with plastic wrap or food wrap, then cover with a large freezer bag. Thaw it in the refrigerator before adding berries and serving.
Serving Suggestions
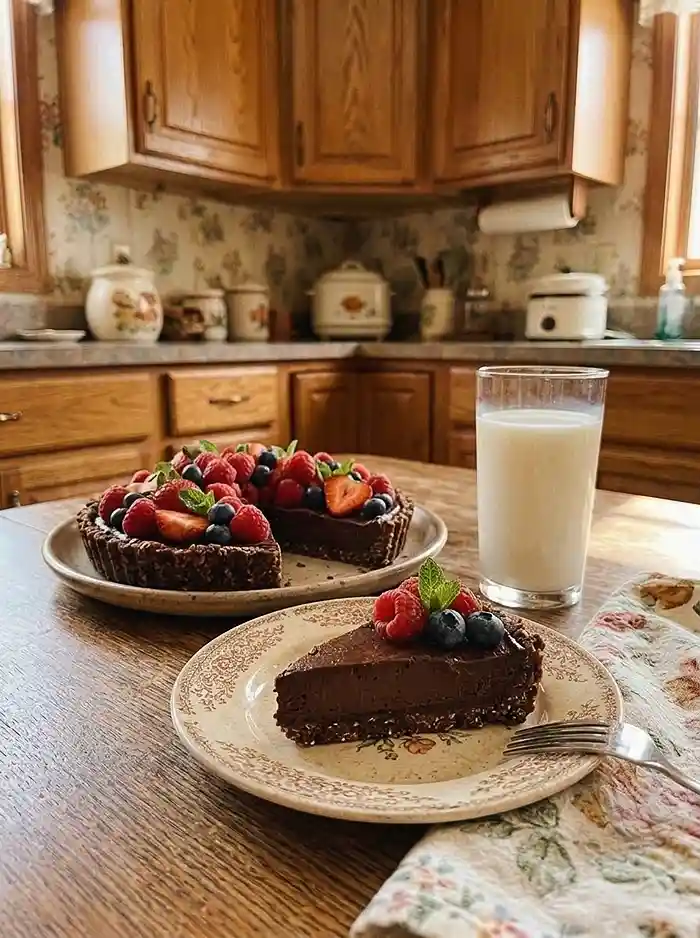
This tart is a natural fit for a Fourth of July cookout, where red raspberries, strawberries, and blueberries make it look right at home on the dessert table. Slice it cold and serve with coffee, or set it beside a slice of white chocolate cake for a dark-and-light dessert board.
For a full no-bake spread, add a tray of no-bake turtle brownies or a batch of no-bake peanut butter oat cups.
Final Thoughts
Give this tart a try, then leave a rating and tell me in the comments how it turned out and what you changed. I read every one. Pin it to Pinterest so you can find it the next time a no-oven dessert calls your name.
If you’re craving something cozy once the weather cools, try these gluten-free pumpkin spice maple cookies.
Gluten-Free No Bake Chocolate Berry Tart
Equipment
- Food processor
- Blender (optional)
- 9-inch tart pan with removable bottom
- Measuring cups and spoons
- Spatula
- Offset Spatula or Spoon
- Mixing bowl
- Knife
- Plastic wrap or food wrap
Ingredients
For the Crust
- 1 ¾ cups Rolled oats 190 g, certified gluten-free if needed
- ⅔ cup Unsweetened cocoa powder 65 g
- ⅓ cup Pure maple syrup
- 2 tablespoons Coconut oil
- 1 pinch Kosher salt
For the Chocolate Filling
- ⅓ cup Pure maple syrup
- ⅓ cup Coconut oil
- ⅓ cup Coconut milk Stir or shake well before measuring
- ⅔ cup Unsweetened cocoa powder 65 g
- 1 ½ teaspoons Vanilla extract Check gluten-free labeling
- ¼ teaspoon Kosher salt
For the Topping
- 1 1/2–2 cups Fresh mixed berries Raspberries, strawberries, and blueberries
- As needed Fresh mint leaves Optional, for garnish
Instructions
- Put the rolled oats in a food processor and pulse a few times to break them up slightly.
- Add the cocoa powder, maple syrup, coconut oil, and salt. Process until the mixture starts coming together and sticks when pinched between your fingers. If it feels too dry, add more coconut oil 1/2 teaspoon at a time until the crust holds together.
- Transfer the crust mixture to a 9-inch tart pan, preferably one with a removable bottom. Press it firmly and evenly across the bottom and up the sides using your fingers or the bottom of a cup. Refrigerate while preparing the filling.
- Add the maple syrup, coconut oil, coconut milk, cocoa powder, vanilla extract, and salt to a food processor or blender. Process until smooth and well combined. Stir to check for any remaining lumps, blending again if necessary.
- Spread the chocolate filling evenly over the chilled crust. Smooth the surface with a spatula or knife, or create decorative swoops using the back of a spoon or an offset spatula.
- If serving within 4 to 5 hours, arrange the fresh berries over the chocolate filling in your preferred design. Refrigerate for at least 30 to 40 minutes to allow the crust and filling to set. Keep refrigerated until serving.
- If making the tart more than 4 to 5 hours ahead, cover the crust and filling with plastic wrap or food wrap and refrigerate. Add the fresh berries when ready to serve, then keep the tart chilled.
- To freeze, prepare the tart without the berry topping. Wrap it with plastic wrap or food wrap and place it in an airtight freezer bag. Freeze for up to 2 to 3 weeks. Thaw in the refrigerator before adding fresh berries and serving.