No Bake Turtle Brownies
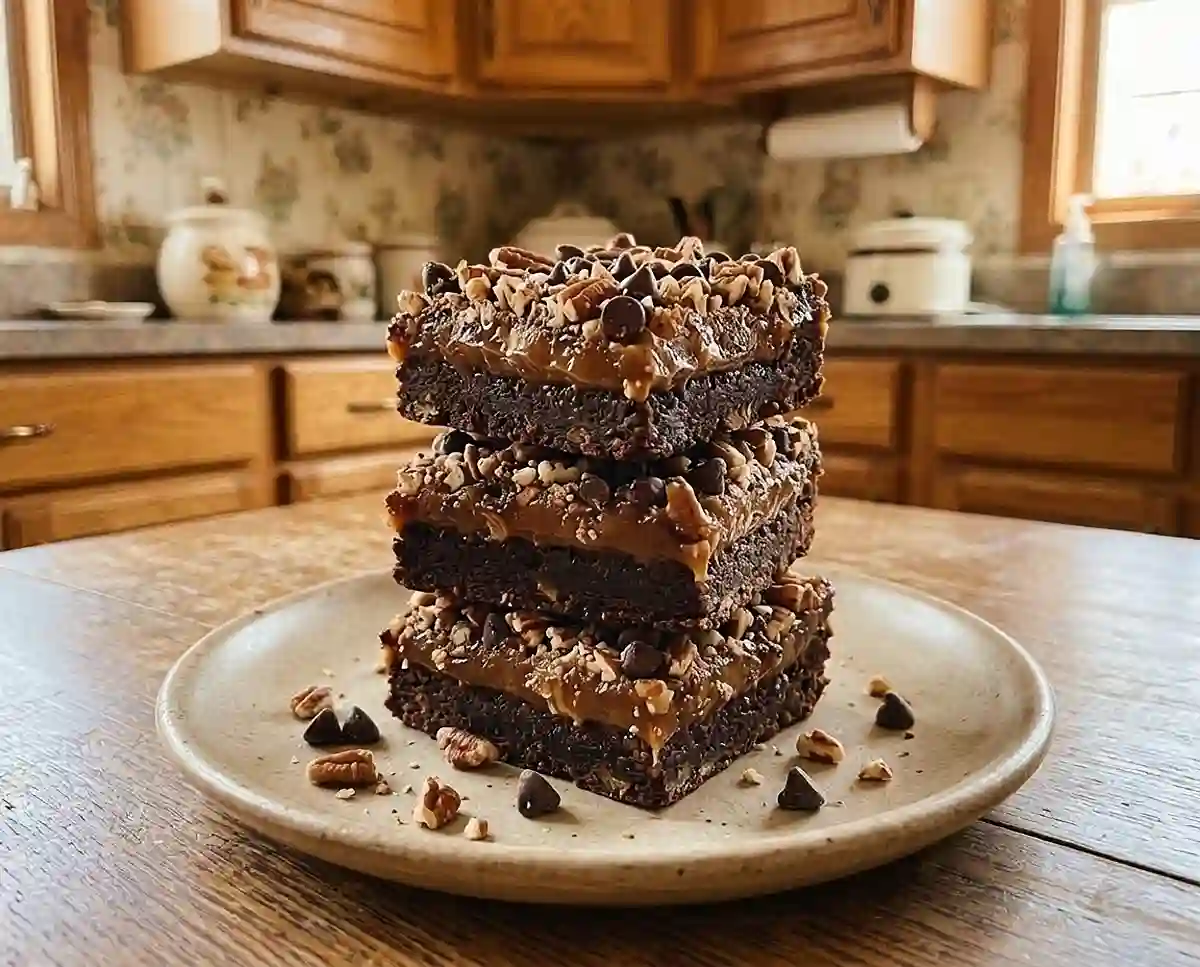
Make gluten-free no bake turtle brownies with a walnut-almond base, date caramel, and pecans. Step-by-step with troubleshooting and storage tips.
I learned the hard way that a no-bake dessert still needs a timer. My first batch of gluten-free no bake turtle brownies sat in the freezer overnight because I forgot about them. The next morning I needed a bread knife and a lot of patience, and my husband tapped one on the counter just to hear it clink.
Craving rich chocolate, gooey caramel, and crunchy pecans without turning on the oven? Discover these no bake gluten free snacks packed with irresistible treats for every sweet tooth. You might discover your next favorite no-bake dessert among these delicious ideas!
Everything is gluten-free and dairy-free when you use labeled cocoa, vanilla, and chocolate chips, and dates provide most of the sweetness. This brownies recipe makes 16 squares and needs a freezer instead of an oven. It’s a solid pick for beginners and hot summer kitchens.
What Makes These Gluten-Free No Bake Turtle Brownies Worth Making
- Texture and flavor: A fudgy, chewy cocoa base is topped with thick caramel, crunchy pecans, and mini chocolate chips, much like a turtle candy.
- Difficulty level: Beginner-friendly. You need a food processor, a baking dish, and a freezer, with no oven or stovetop.
- Unique advantages: Dairy-free and vegan with labeled chips, and sweetened mostly with dates. They do contain tree nuts: walnuts, almonds, and pecans.
- Best for: Make-ahead desserts, potlucks, and days when the oven is busy or too hot to use.
The Science Behind Great Gluten-Free No Bake Turtle Brownies
Great no-bake brownies come from balancing fat, sugar, and moisture so nothing needs flour or eggs to hold together. Here is what each technique does for you.
- Nuts plus dates: Nuts supply fat and protein while dates supply sticky sugars and fiber. Processed together, they form a paste that holds when pressed, replacing the gluten structure.
- Pulsing the nuts first: Chopping the nuts before adding dates keeps the processing time short. Too much processing releases the nuts’ oil and makes a greasy base.
- Warm water in the caramel: Warm water softens the date fibers so the paste blends smooth. Adding it gradually prevents a runny caramel that would soak into the base.
- Freezing to set: Cold firms the natural oils in the nuts, which sets the layers and lets you cut clean squares.
Table of Contents
Ingredients
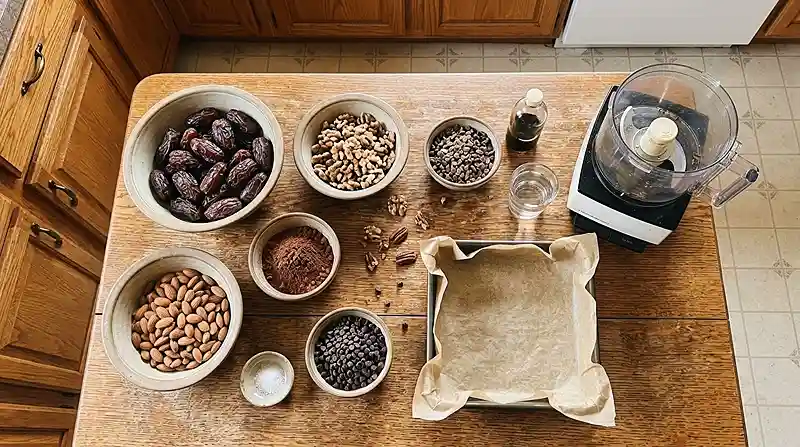
This recipe makes 16 brownies.
For the brownie layer
- 1½ cups raw walnuts
- 1½ cups raw almonds
- 2½ cups packed pitted Medjool dates
- ½ cup unsweetened cocoa powder, labeled gluten-free
- ½ teaspoon pure vanilla extract, labeled gluten-free
- ¼ teaspoon fine sea salt
For the caramel layer
- 2 cups packed pitted Medjool dates
- 2–4 tablespoons warm water, as needed
- 1 teaspoon pure vanilla extract, labeled gluten-free
- ⅛ teaspoon fine sea salt
For the toppings
- ½ cup crushed pecans
- ½ cup mini chocolate chips, labeled gluten-free and dairy-free
Naturally gluten-free ingredients can pick up gluten in processing, so check the labels on your cocoa, vanilla, and nuts. This trusted celiac labeling guide explains what to watch for.
Use soft Medjool dates and measure them packed. If yours are firm, soak them in warm water for 10 minutes, then drain and pat dry. For chocolate chips, this gluten-free chocolate guide helps you choose.
Instructions
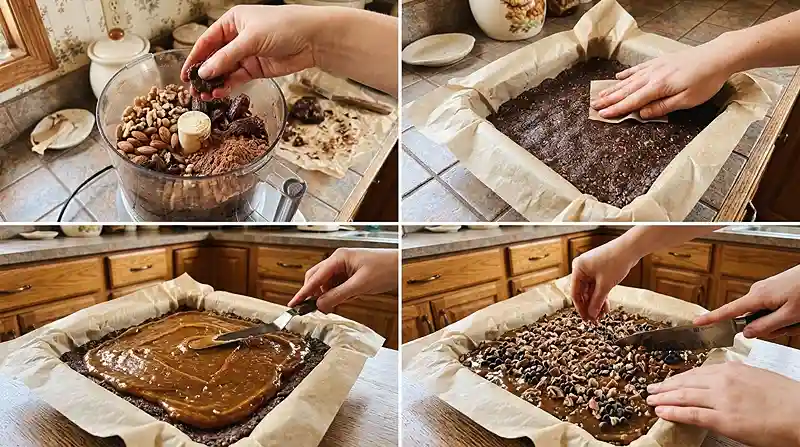
Make the brownie base
- Prepare the pan: Line an 8 × 8-inch square baking dish with parchment paper, leaving some overhang for easy removal. The overhang works as handles later.
- Make the brownie layer: Add the walnuts and almonds to a food processor and pulse until finely chopped. They’ll rattle like gravel in a coffee can until they break down. Add the pitted Medjool dates, cocoa powder, vanilla extract, and salt, then process until the mixture becomes sticky and holds together when pressed. Pro Tip: Stop as soon as it clumps, since overprocessing turns nuts oily.
- Press the brownie base: Transfer the mixture to the prepared baking dish. Press it firmly and evenly across the bottom using clean hands or the back of a spoon. Pro Tip: Firm pressure removes gaps so the base stays intact when sliced.
Make the caramel and layer it
- Make the date caramel: Add the pitted Medjool dates, vanilla extract, and salt to a clean food processor and process until finely broken down. Gradually add warm water, 1 tablespoon at a time, blending until a thick, smooth, spreadable caramel forms. Pro Tip: Stop adding water once it’s thick enough to coat a spoon.
- Add the caramel layer: Spread the date caramel evenly over the brownie base. A damp spatula keeps the sticky caramel from tugging at the base.
- Add the toppings: Sprinkle the crushed pecans over the caramel and gently press them into the surface. Add the mini chocolate chips and lightly press them down so they stick.
Freeze, slice, and store
- Freeze: Place the dish in the freezer for about 1 hour, until the layers are firm enough to slice. Set a timer, because mine once stayed there overnight.
- Slice and serve: Lift the brownies out using the parchment paper. Cut into 16 squares with a sharp knife. Let them soften for a few minutes before serving, if desired.
- Store: Keep the brownies in an airtight container in the refrigerator for up to 1 week or freeze for longer storage.
Ways to Customize This Recipe
Nut swap: Use all almonds for a milder flavor, or swap raw pecans for the walnuts, keeping the same total amount. Walnuts give a slightly earthy, bittersweet note, so pecans make the base a little sweeter. The date and nut ratio is what holds everything together.
Salted caramel finish: For a salted caramel feel, sprinkle a pinch of flaky sea salt over the caramel before the pecans. The salt contrasts with the date sweetness. Go light, since the caramel already contains salt.
Brownie bites: Cut the chilled slab into 32 smaller squares for brownie bites. They’re easier to grab at parties and help portions go further. Chill the pan fully first so the smaller pieces cut cleanly.
Nut-free version: Look… I’d love to tell you a seed swap works, but I haven’t tested it. Nuts provide the fat and structure in the base, so a nut-free version needs a different approach. If you try sunflower seeds, tell me how it goes.
If Something Went Wrong, Start Here
Problem: The base is crumbly. Process it for 20 to 30 more seconds and test a pinch. The nuts need to break down enough to release oil and bind with the dates. If your dates were dry, soak them in warm water for 10 minutes, drain, and try again.
Problem: The base is greasy. Chill the mixture for 10 minutes before pressing it into the dish. Overprocessing releases extra nut oil, and cold firms it back up. Next time, stop the processor as soon as the mixture clumps.
Problem: The caramel is runny. Chill it for 10 minutes, or blend in a few more dates if you have them. Too much water loosens the date fibers beyond spreadable. Add water one tablespoon at a time and stop when it coats a spoon.
Problem: The squares are frozen solid. Oh wow… that happened to me, and it’s easy to fix. Let the slab sit at room temperature for 10 to 15 minutes. The nut oils soften quickly, and a sharp knife will then slide through.
Storage & Meal Prep
| Method | Duration | Notes |
|---|---|---|
| Counter | 2-3 days | Airtight container, cool room only |
| Fridge | 5-7 days | Bring to room temp |
| Freezer | 2-3 months | Wrap individually |
No reheating is needed. Let a chilled square sit for a few minutes for a softer, chewier bite.
For no-waste ideas, crumble stray pieces over yogurt or oatmeal. Any extra date caramel stirs nicely into a bowl of oats.
Frequently Asked Questions
Can I freeze gluten-free no bake turtle brownies?
Yes, you can freeze them for 2-3 months. Wrap each square individually and store them in an airtight container. Thaw in the refrigerator, then let them sit at room temperature for a few minutes before serving.
How do I get clean slices?
Freeze the pan for about 1 hour, lift the slab out using the parchment paper, and cut with a sharp knife. Wipe the blade between cuts to keep the caramel from dragging. If the slab is too hard, let it soften for a few minutes first.
What’s the best type of date to use?
Soft Medjool dates work best. If yours are firm, soak them in warm water for 10 minutes, then drain and pat dry before measuring. Soft dates blend into a smooth paste and bind the base and caramel.
Why did my caramel turn out runny?
Runny caramel usually means too much water was added too quickly. Add warm water one tablespoon at a time and stop once the caramel is thick enough to coat a spoon. Chilling it for about 10 minutes also helps it firm up.
Serving Suggestions
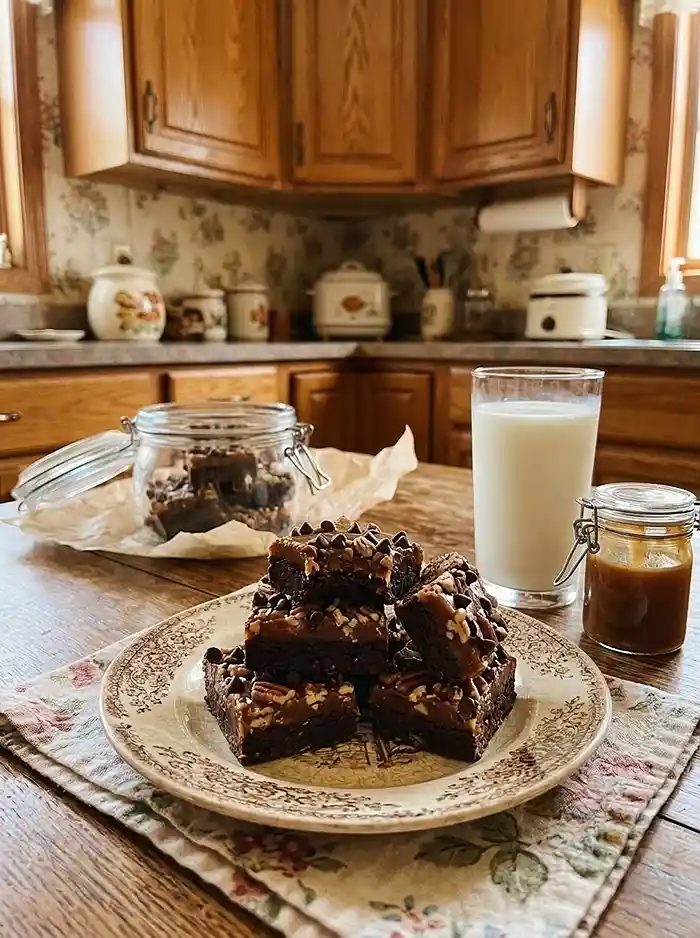
Serve these chilled with coffee or a glass of cold milk or dairy-free milk. They’re also a lifesaver on a Thanksgiving dessert table, when pie pressure is high and oven space is gone.
For a fuller dessert spread, add gluten-free no-bake coconut cups or vegan no-bake pecan pie bars.
Chocolate fans can also pair them with no-bake peanut butter brownie cups.
If you try these gluten-free no bake turtle brownies, I’d love to hear how they turned out. Leave a rating and a comment below, and share any changes you made. Pin the recipe on Pinterest so it’s easy to find the next time you need a dessert without the oven.
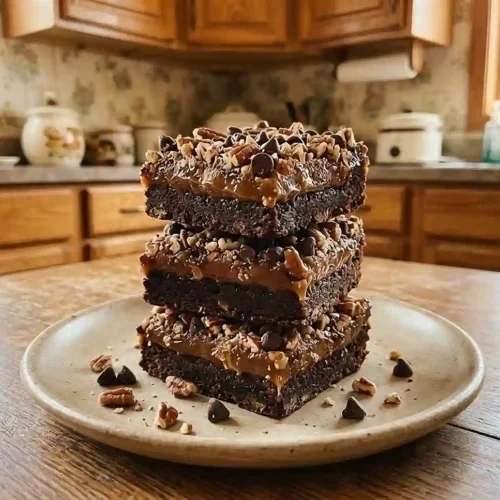
Gluten-Free No Bake Turtle Brownies
Equipment
- Food processor
- 8 × 8-inch Square Baking Dish
- Parchment paper
- Measuring cups
- Measuring spoons
- Spatula
- Sharp knife
Ingredients
For the Brownie Layer
- 1½ cups Raw walnuts
- 1½ cups Raw almonds
- 2½ cups Pitted Medjool dates Packed
- ½ cup Unsweetened cocoa powder Labeled gluten-free
- ½ teaspoon Pure vanilla extract Labeled gluten-free
- ¼ teaspoon Fine sea salt
For the Caramel Layer
- 2 cups Pitted Medjool dates Packed
- 2–4 tablespoons Warm water Add gradually as needed
- 1 teaspoon Pure vanilla extract Labeled gluten-free
- ⅛ teaspoon Fine sea salt
For the Toppings
- ½ cup Crushed pecans
- ½ cup Mini chocolate chips Labeled gluten-free and dairy-free
Instructions
- Line an 8 × 8-inch square baking dish with parchment paper, leaving some overhang on the sides for easy removal later.
- Add the walnuts and almonds to a food processor and pulse until finely chopped. Add the pitted Medjool dates, cocoa powder, vanilla extract, and salt. Process until the mixture becomes sticky and holds together when pressed. Stop as soon as it clumps to avoid releasing too much oil from the nuts.
- Transfer the brownie mixture to the prepared baking dish. Press it firmly and evenly across the bottom using clean hands or the back of a spoon, removing any gaps so the base stays intact when sliced.
- Add the pitted Medjool dates, vanilla extract, and salt to a clean food processor. Process until finely broken down. Gradually add warm water, 1 tablespoon at a time, blending until a thick, smooth, spreadable caramel forms. Stop adding water once the caramel is thick enough to coat a spoon.
- Spread the date caramel evenly over the brownie base. Use a damp spatula to prevent the sticky caramel from pulling at the base.
- Sprinkle the crushed pecans over the caramel and gently press them into the surface. Add the mini chocolate chips and lightly press them down so they stick.
- Place the dish in the freezer for about 1 hour, until the layers are firm enough to slice.
- Lift the brownies out using the parchment paper. Cut into 16 squares with a sharp knife. Let them soften for a few minutes before serving, if desired.
- Store the brownies in an airtight container in the refrigerator for up to 1 week or freeze for longer storage.